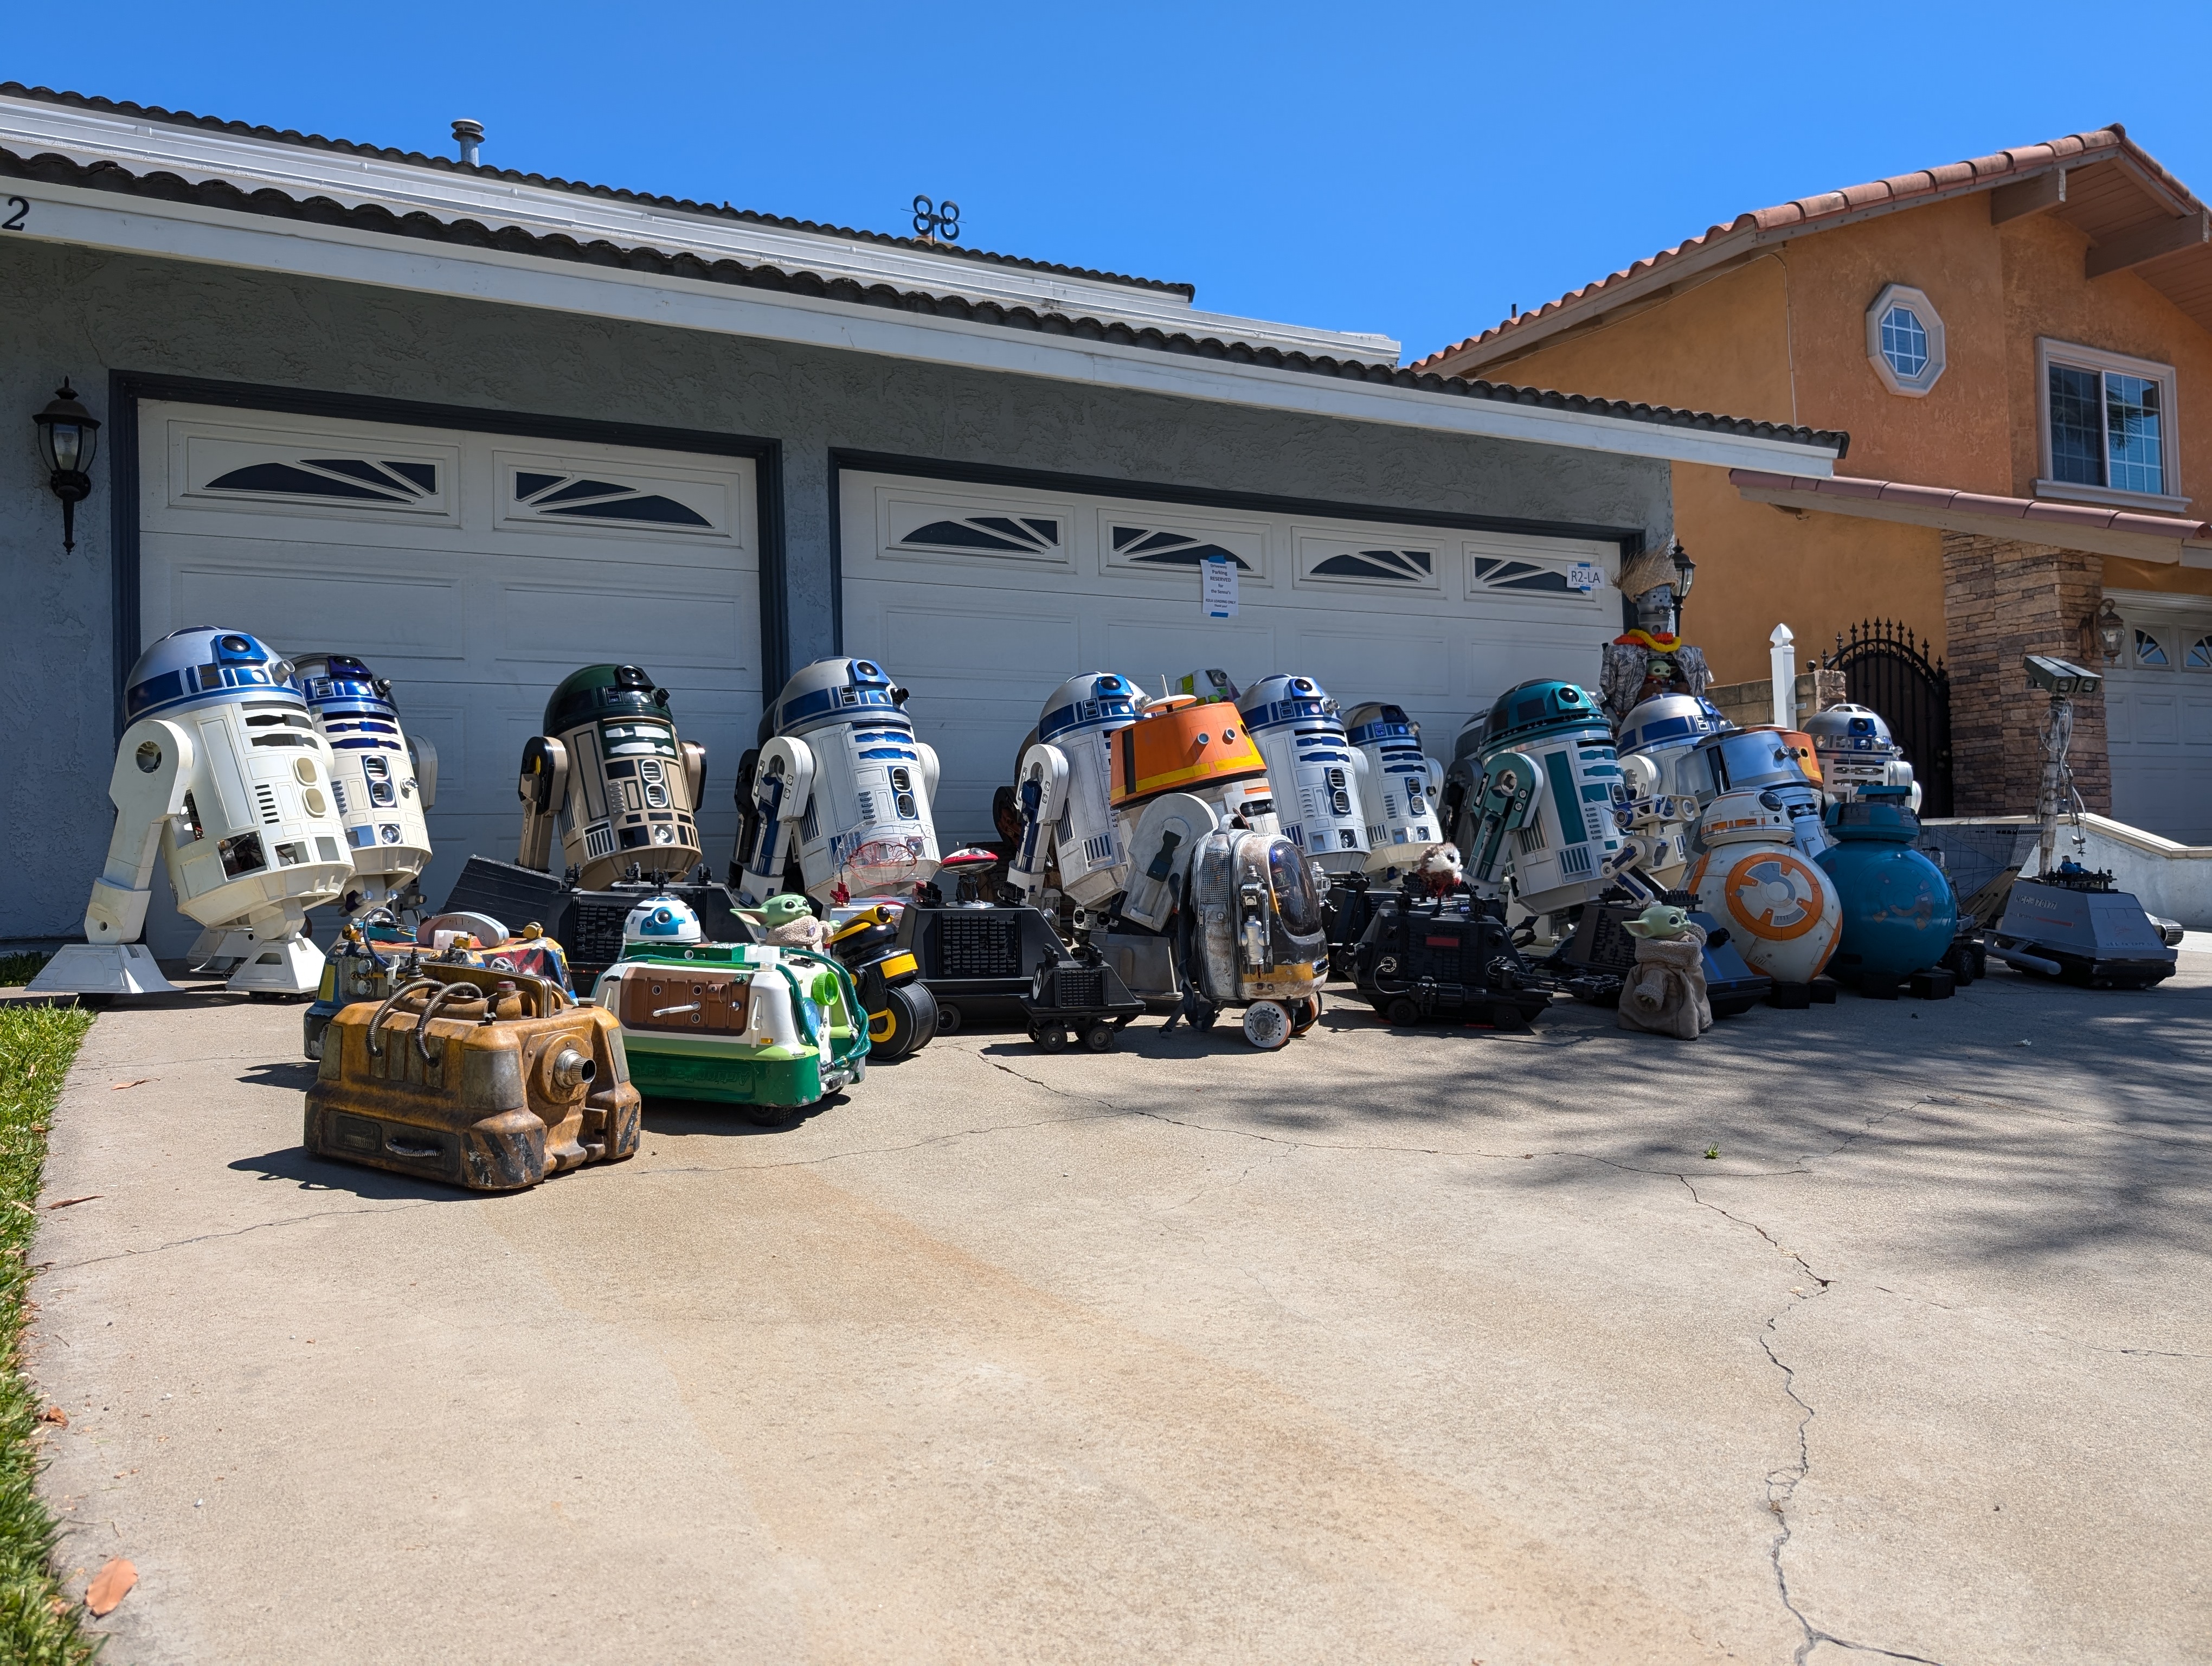
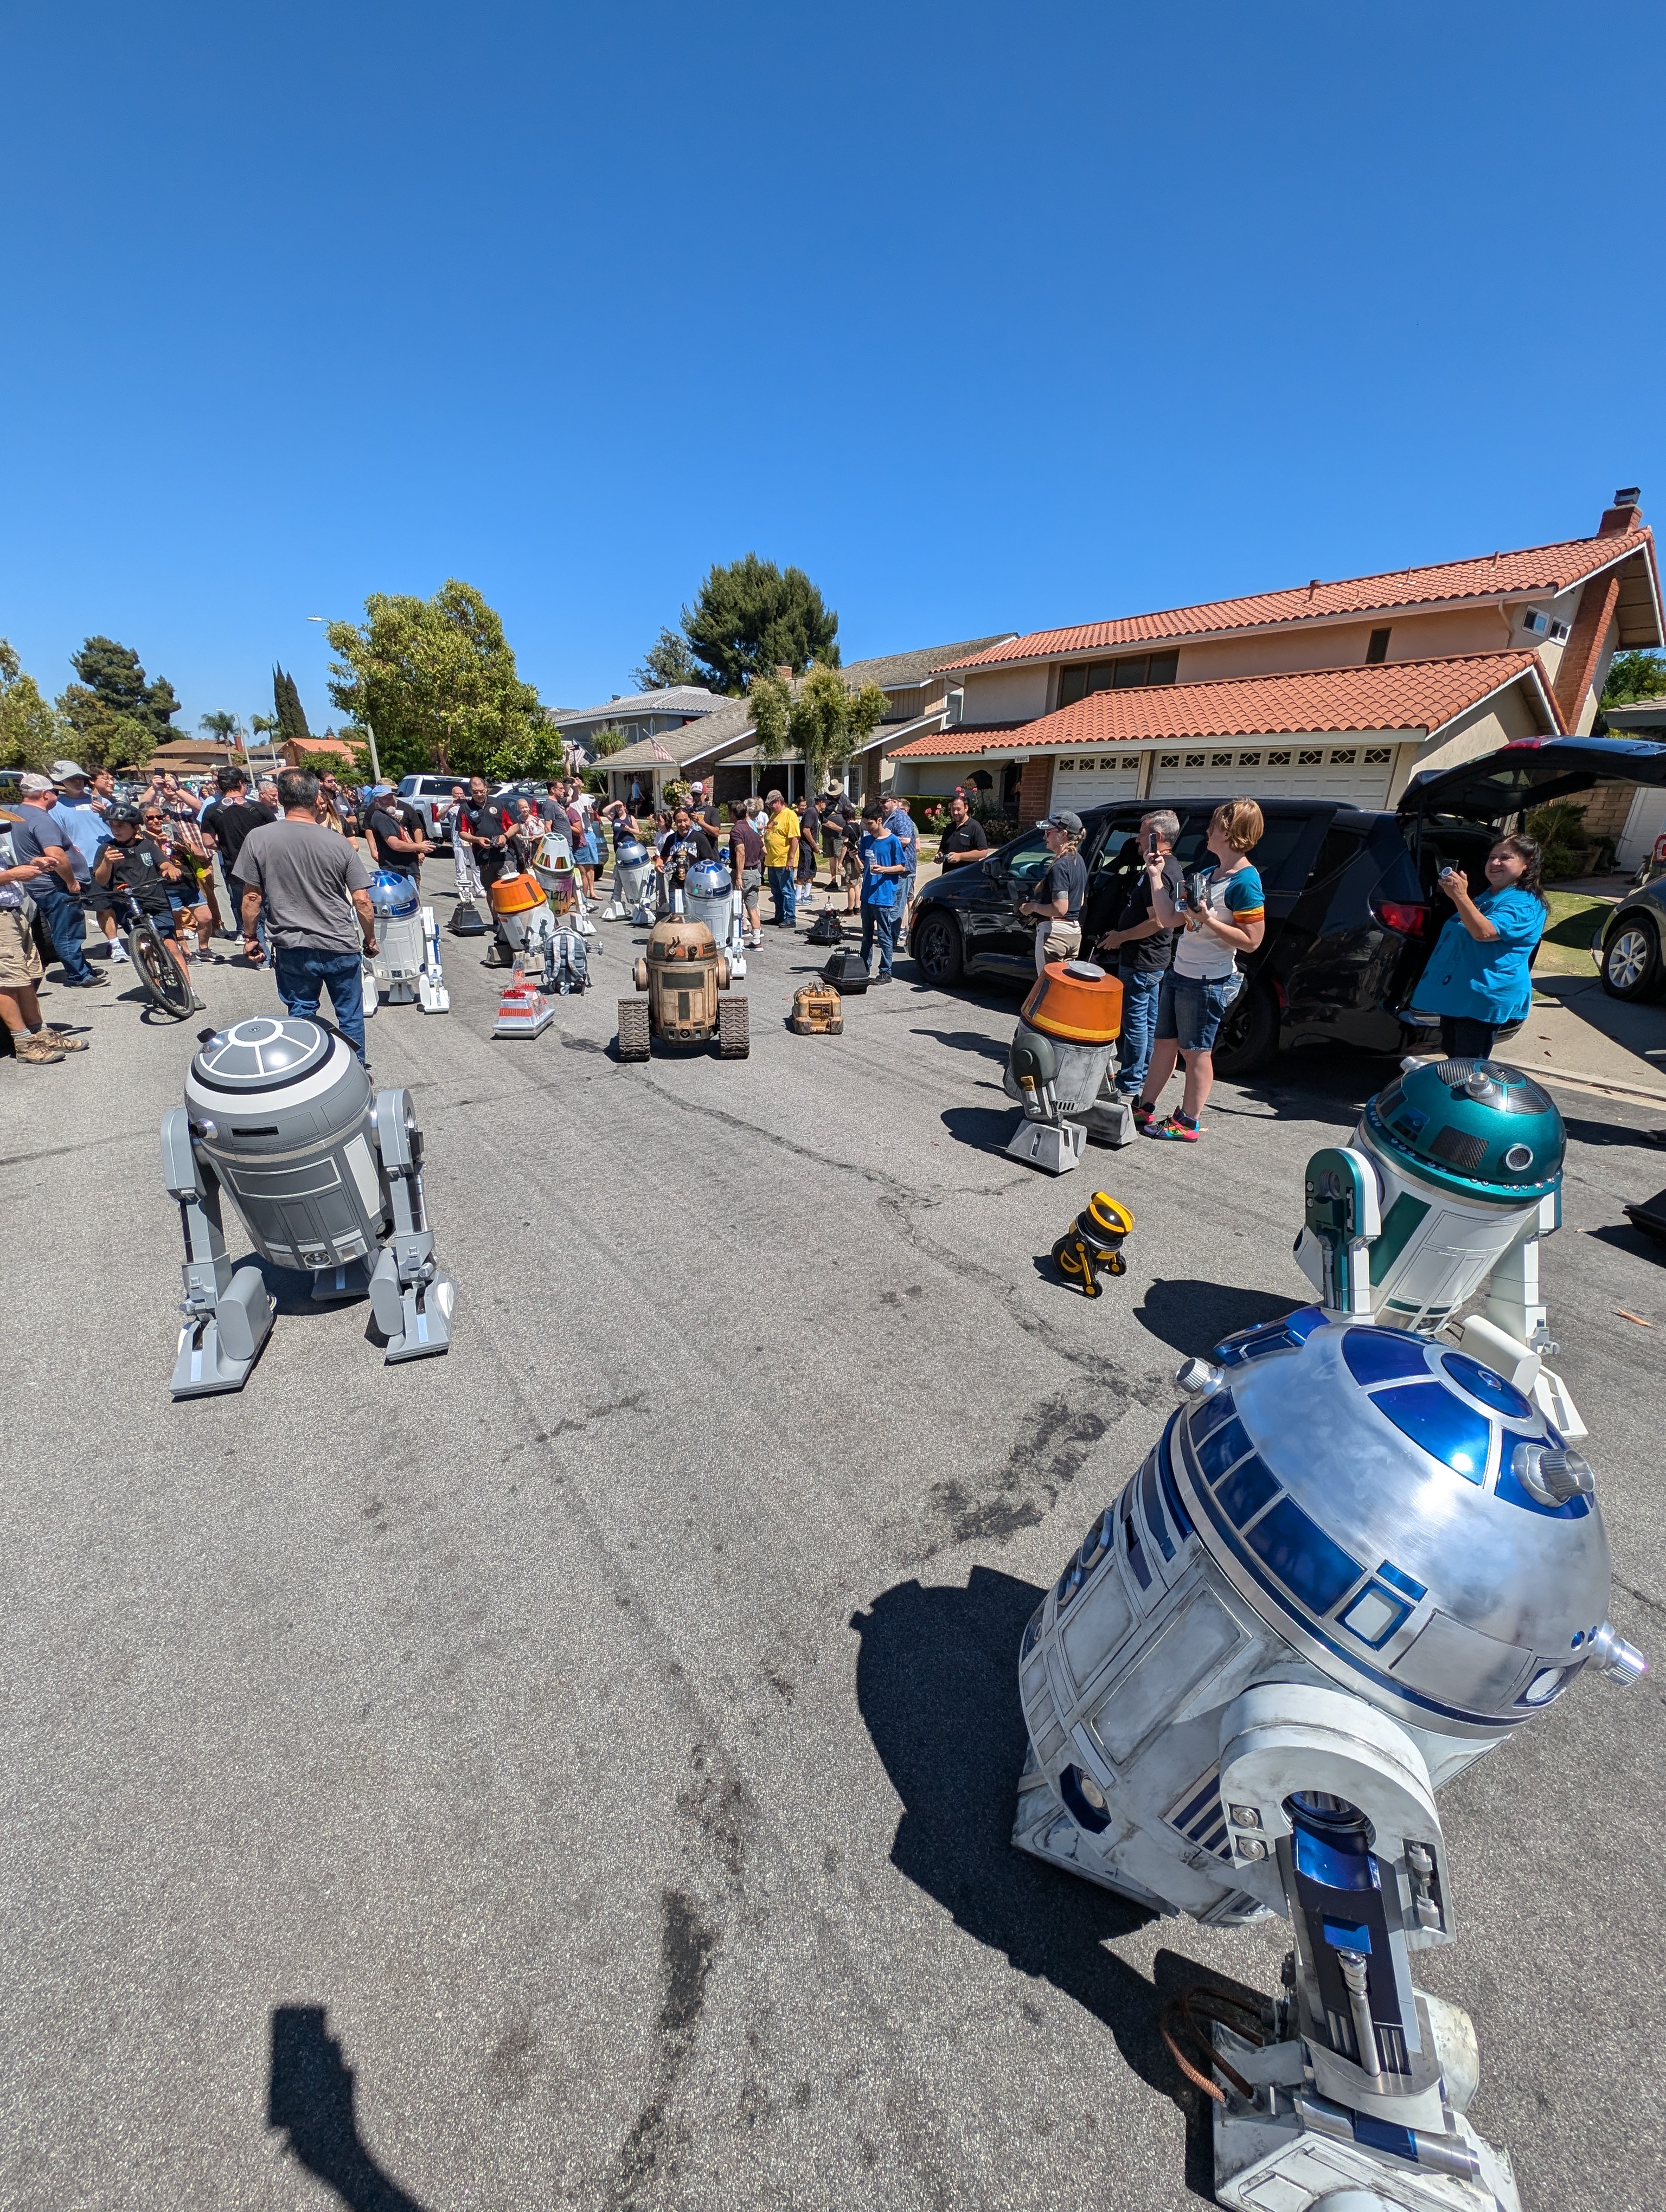
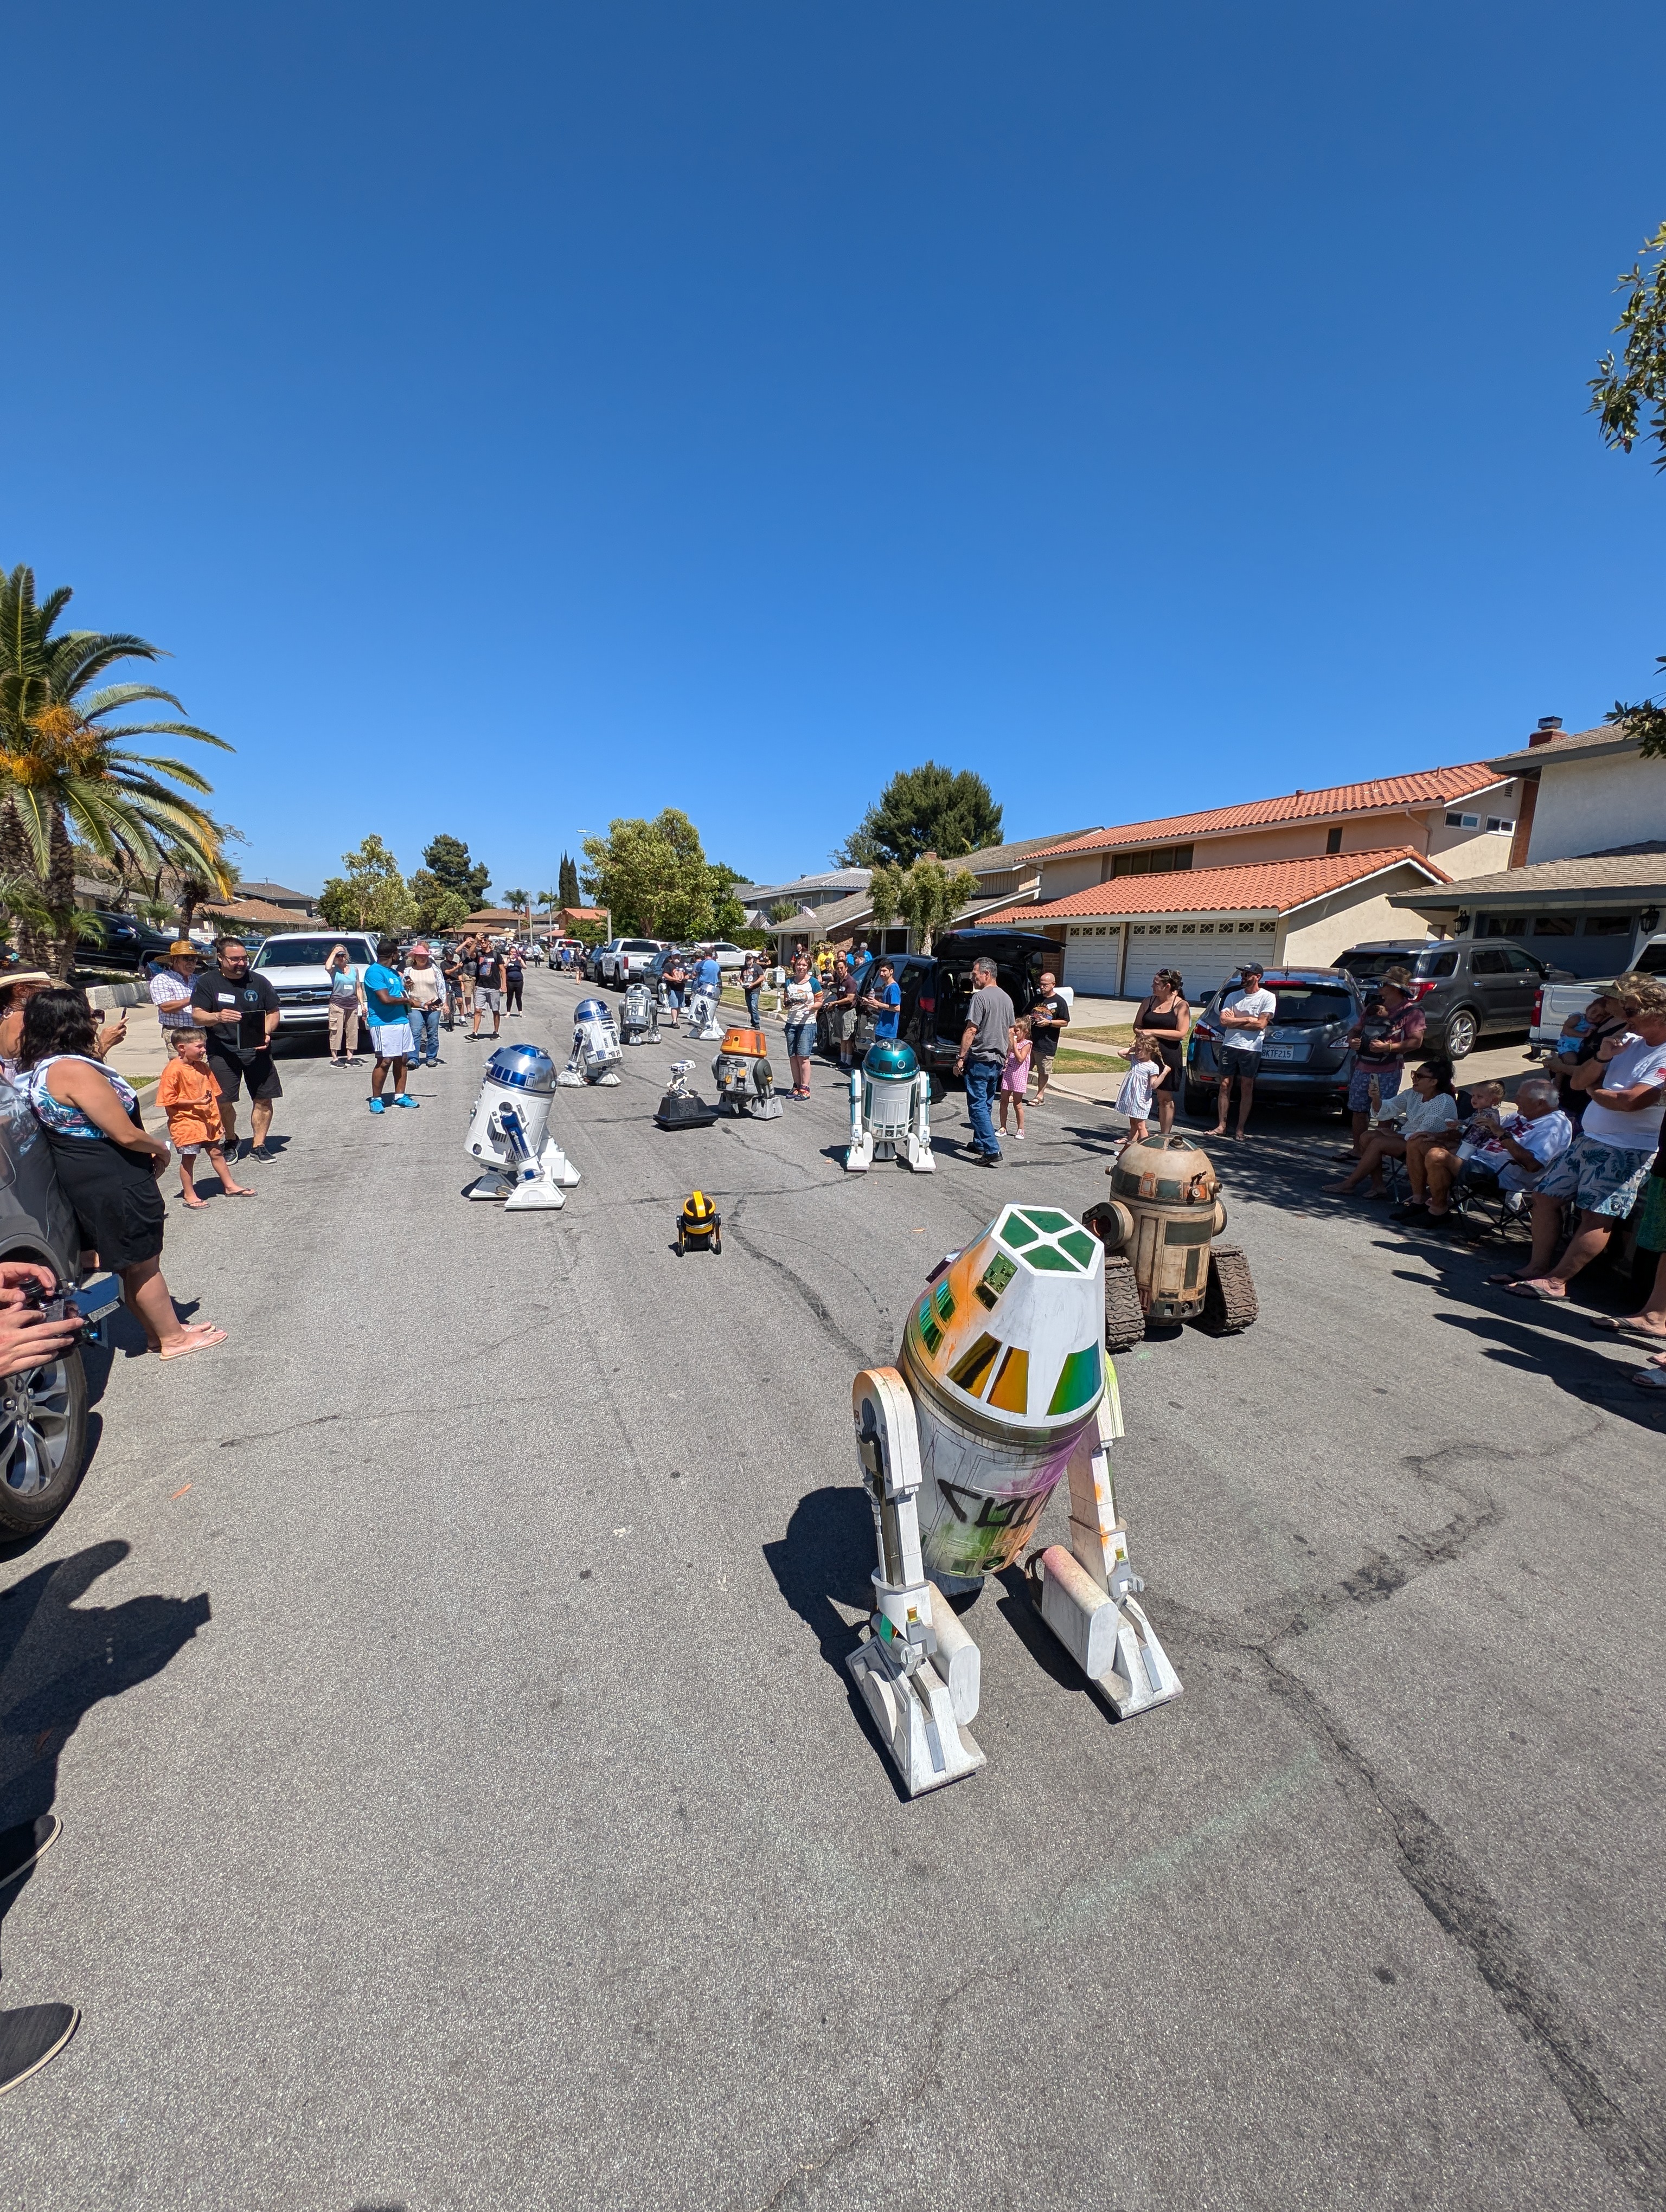
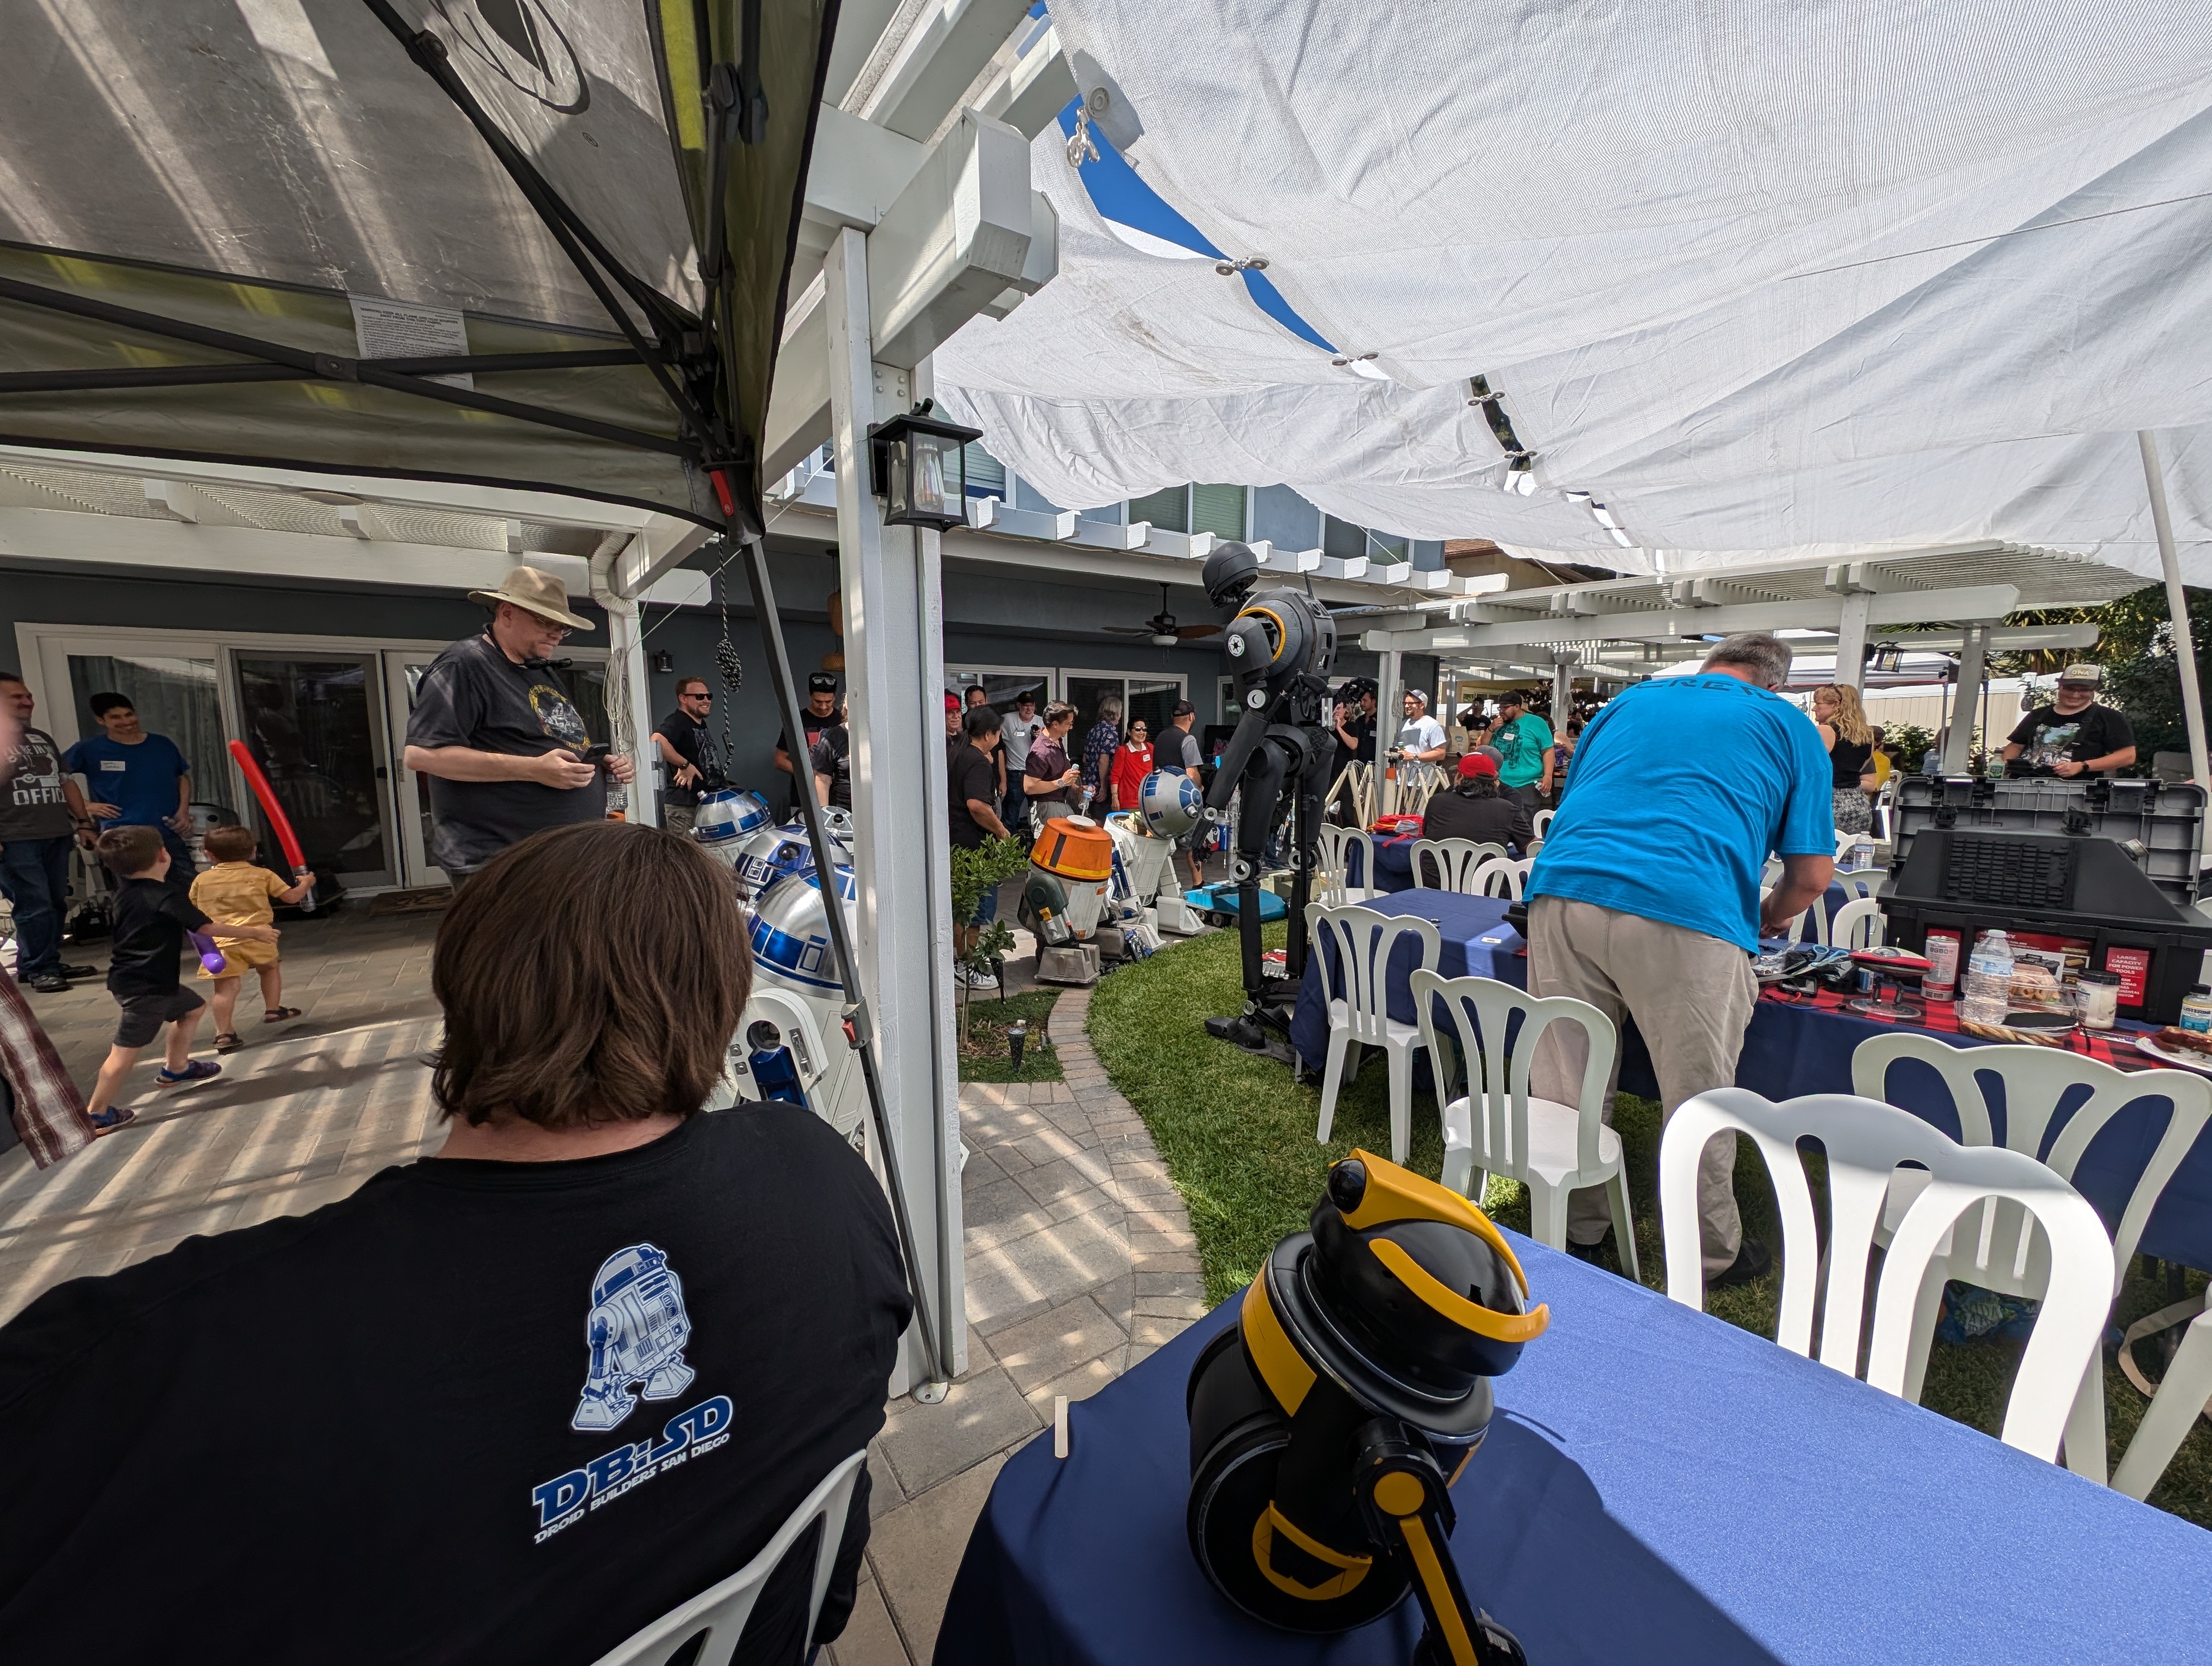
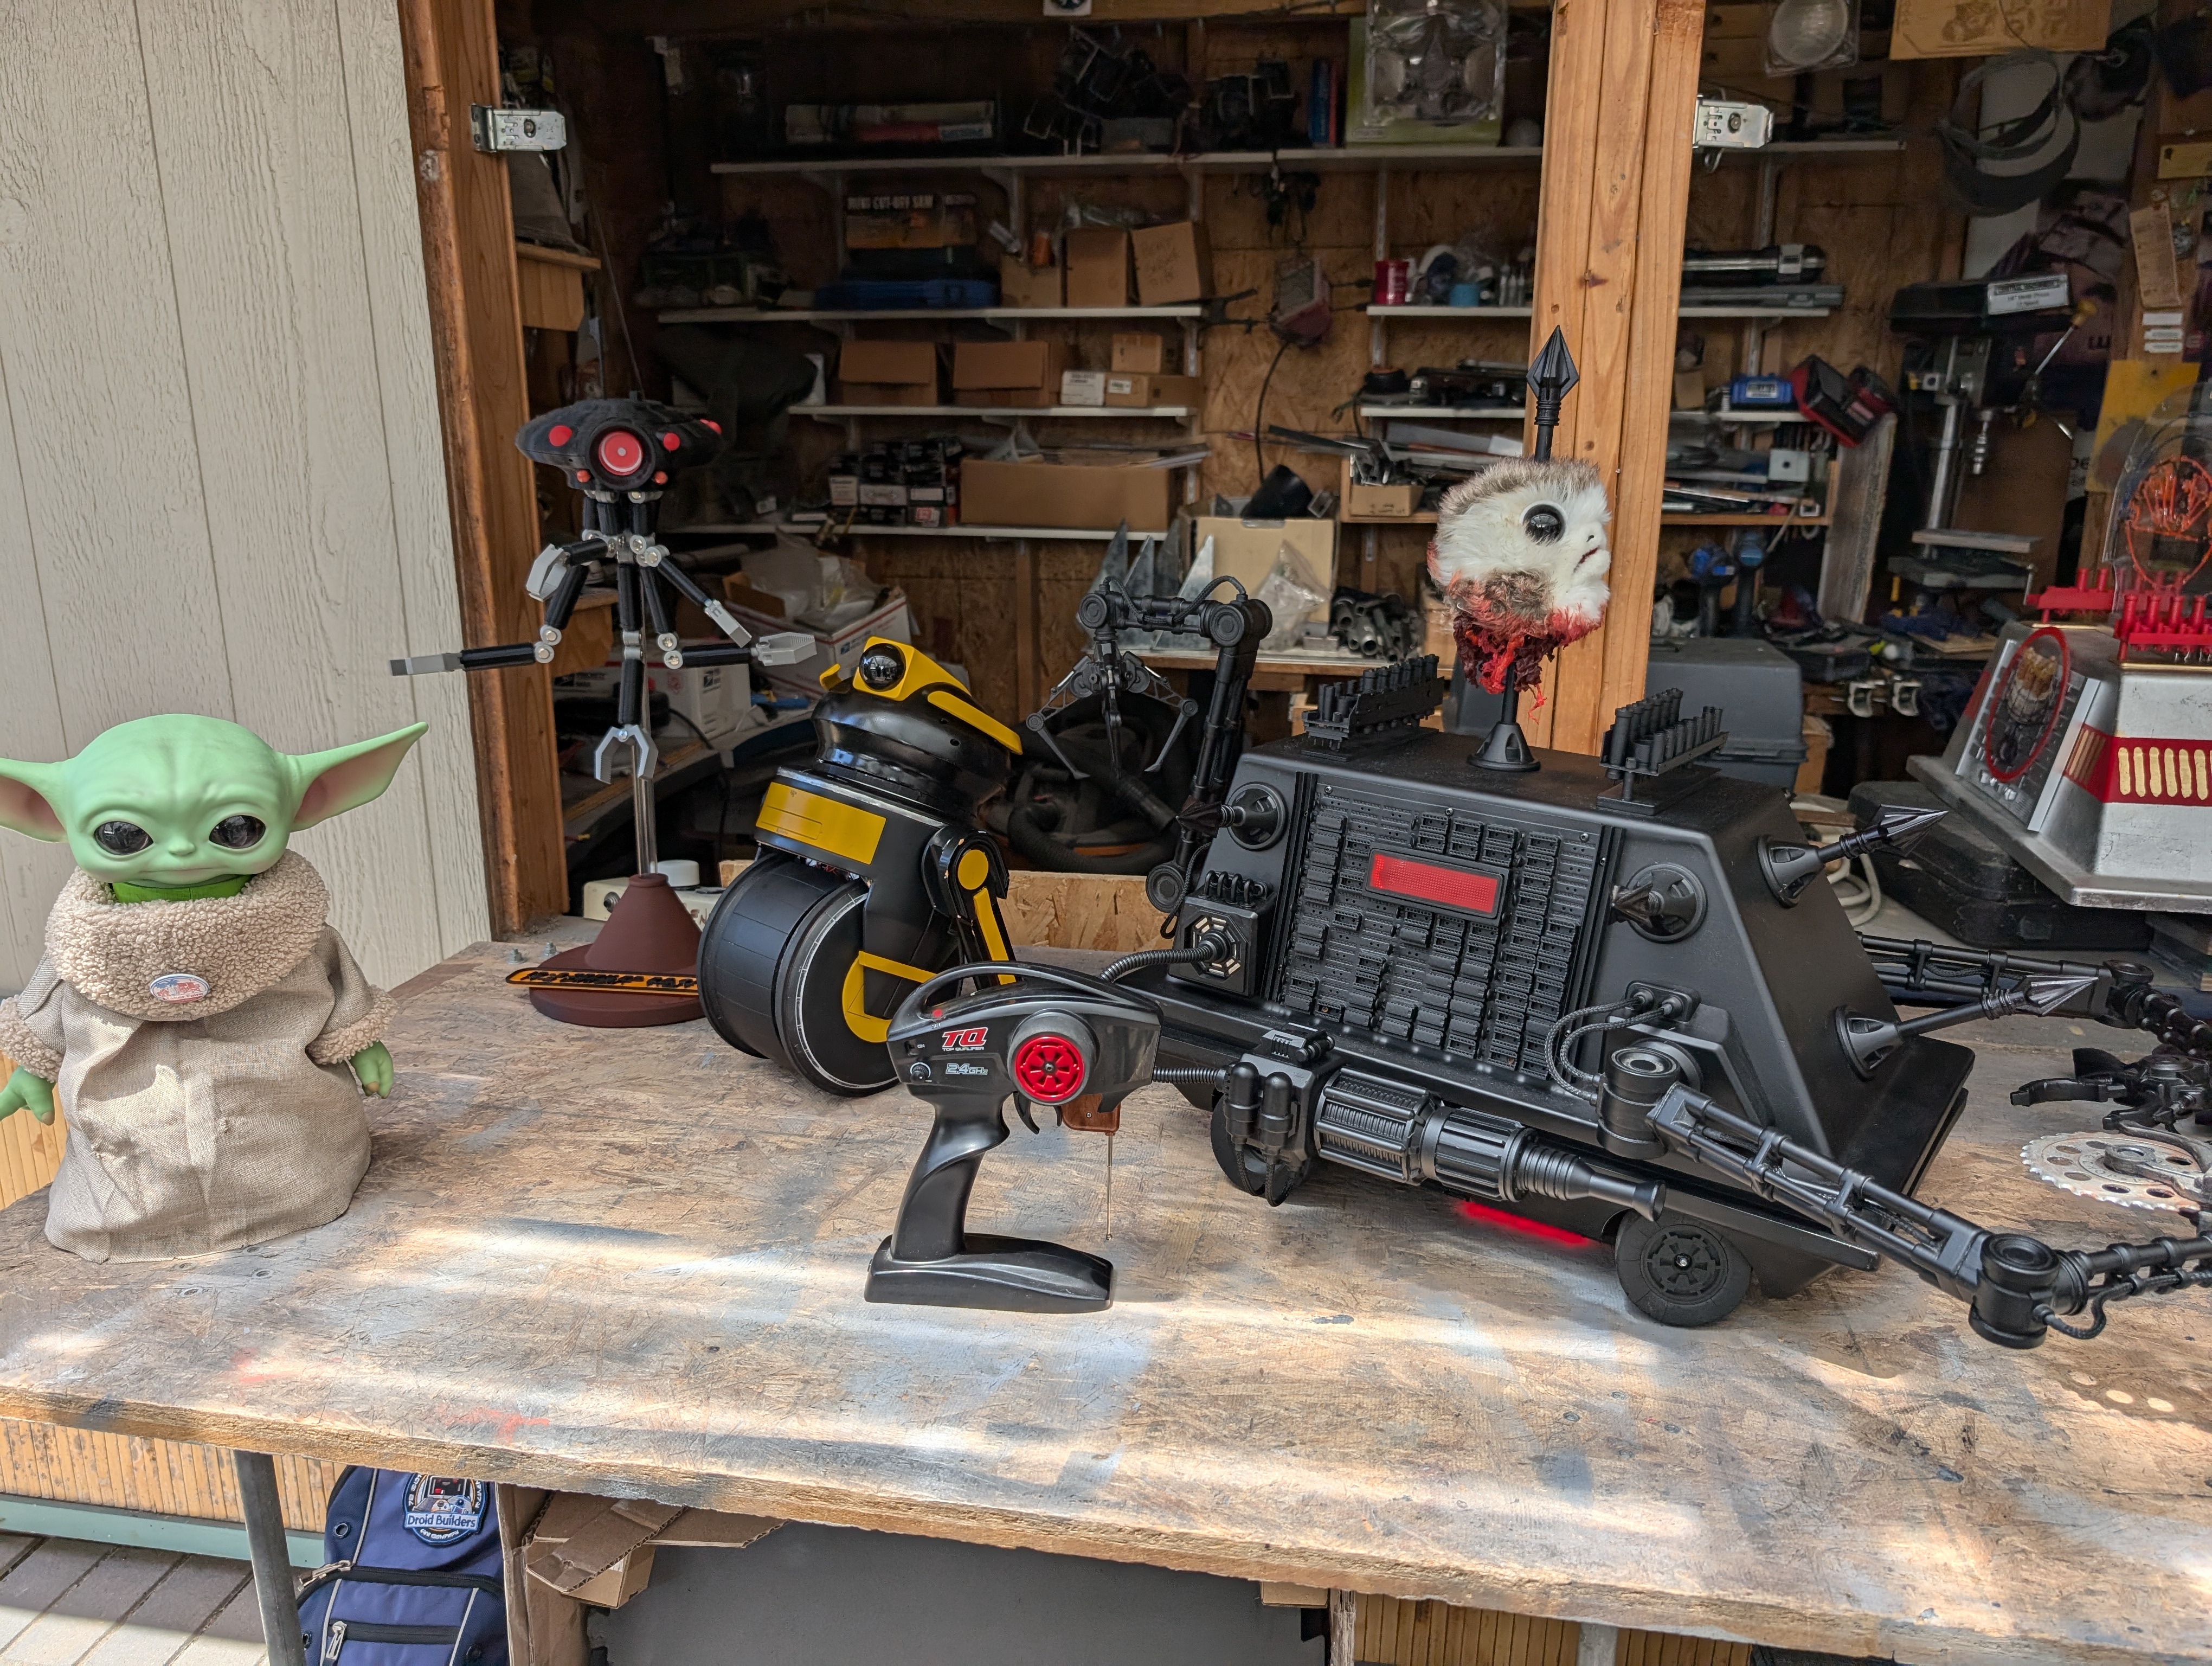
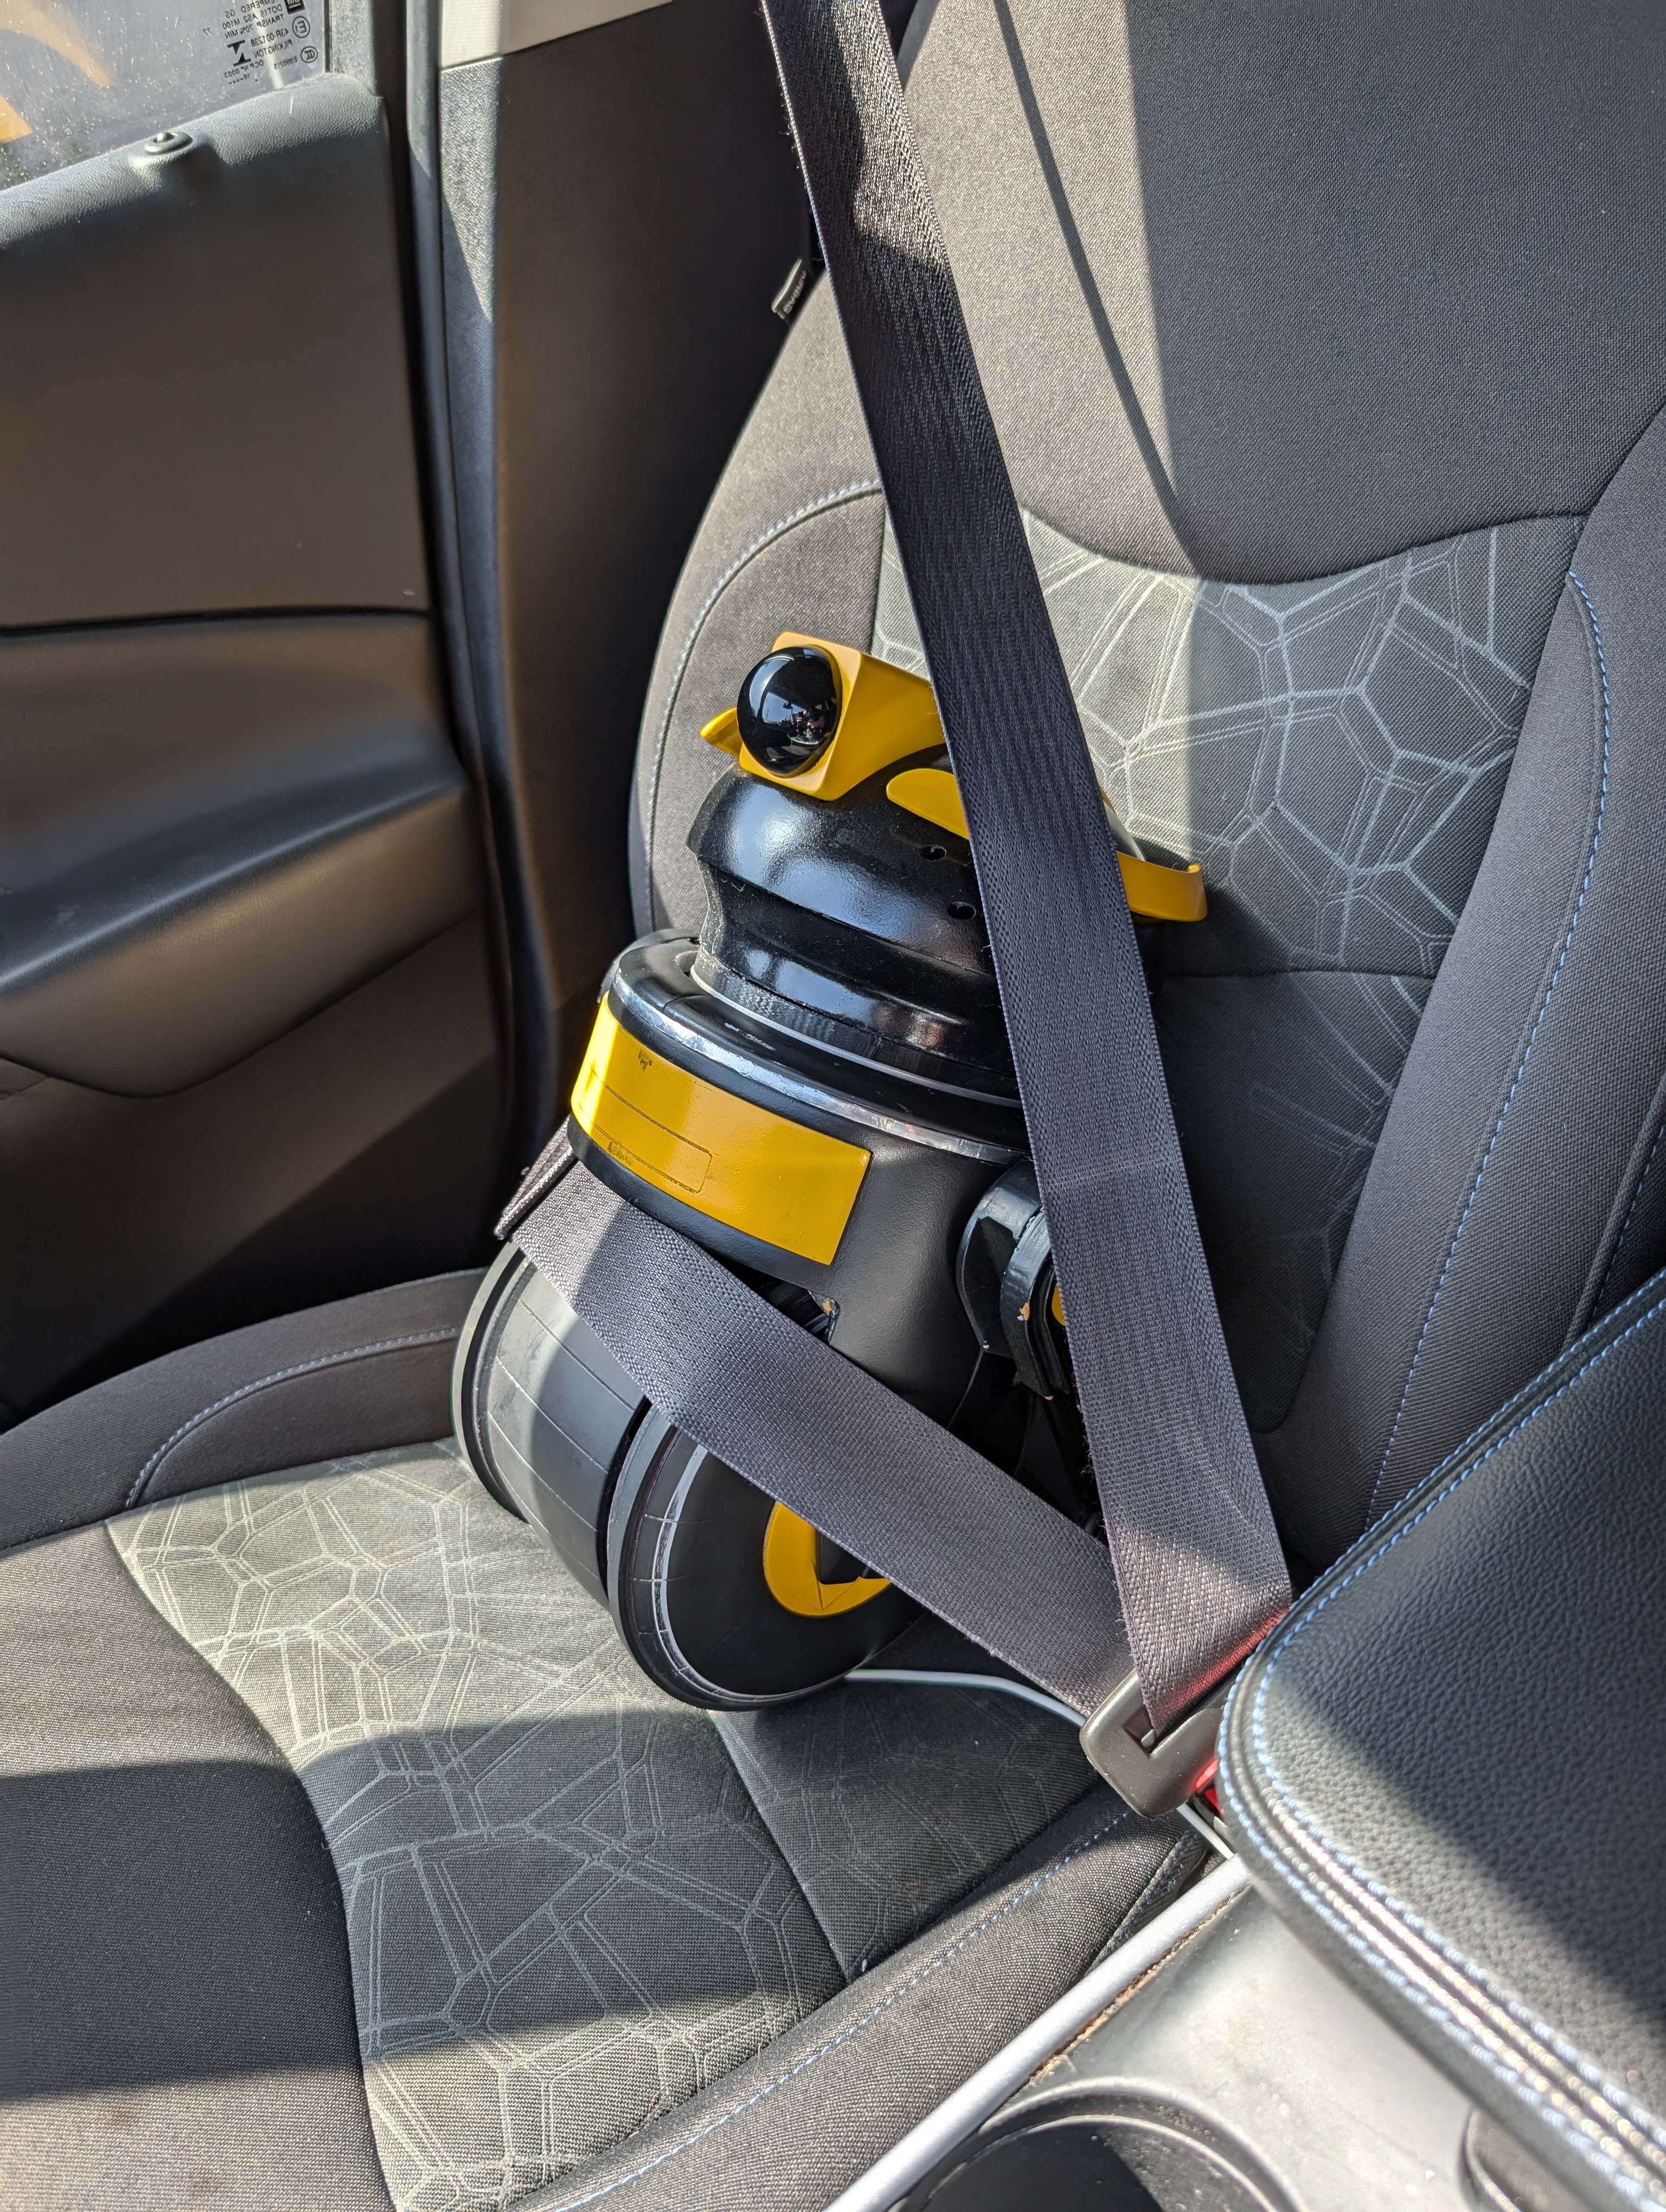
DD-3
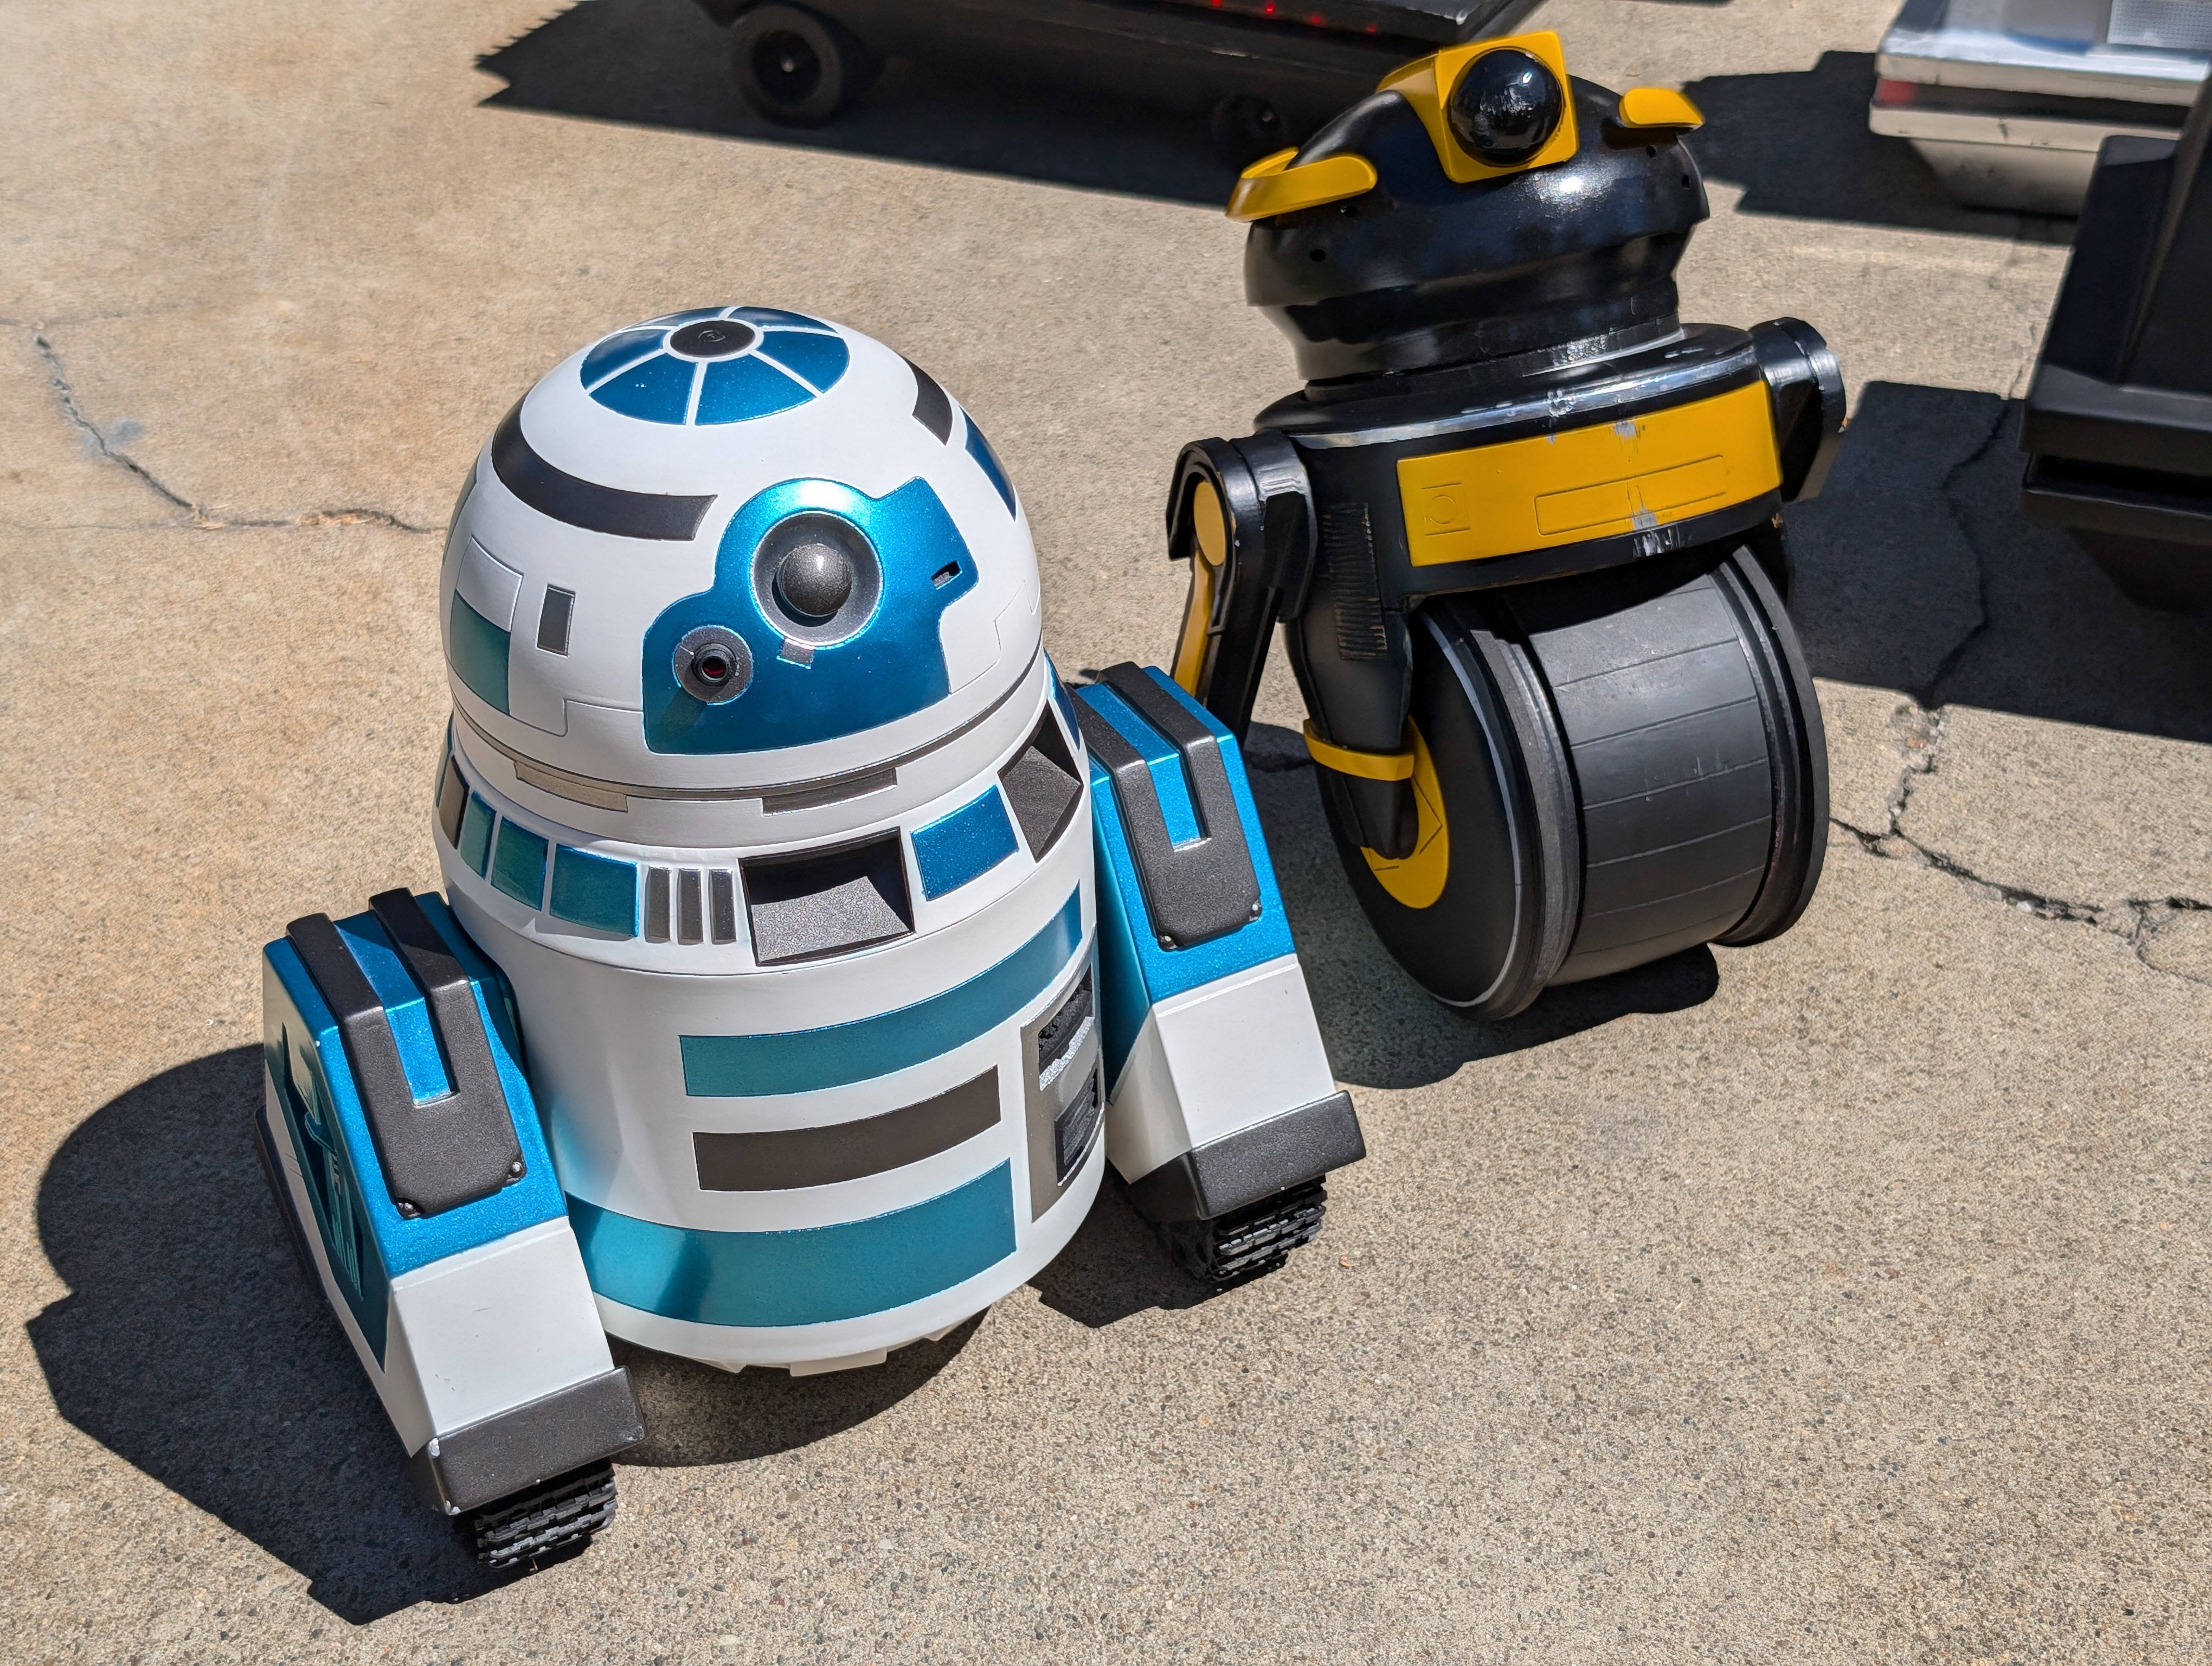
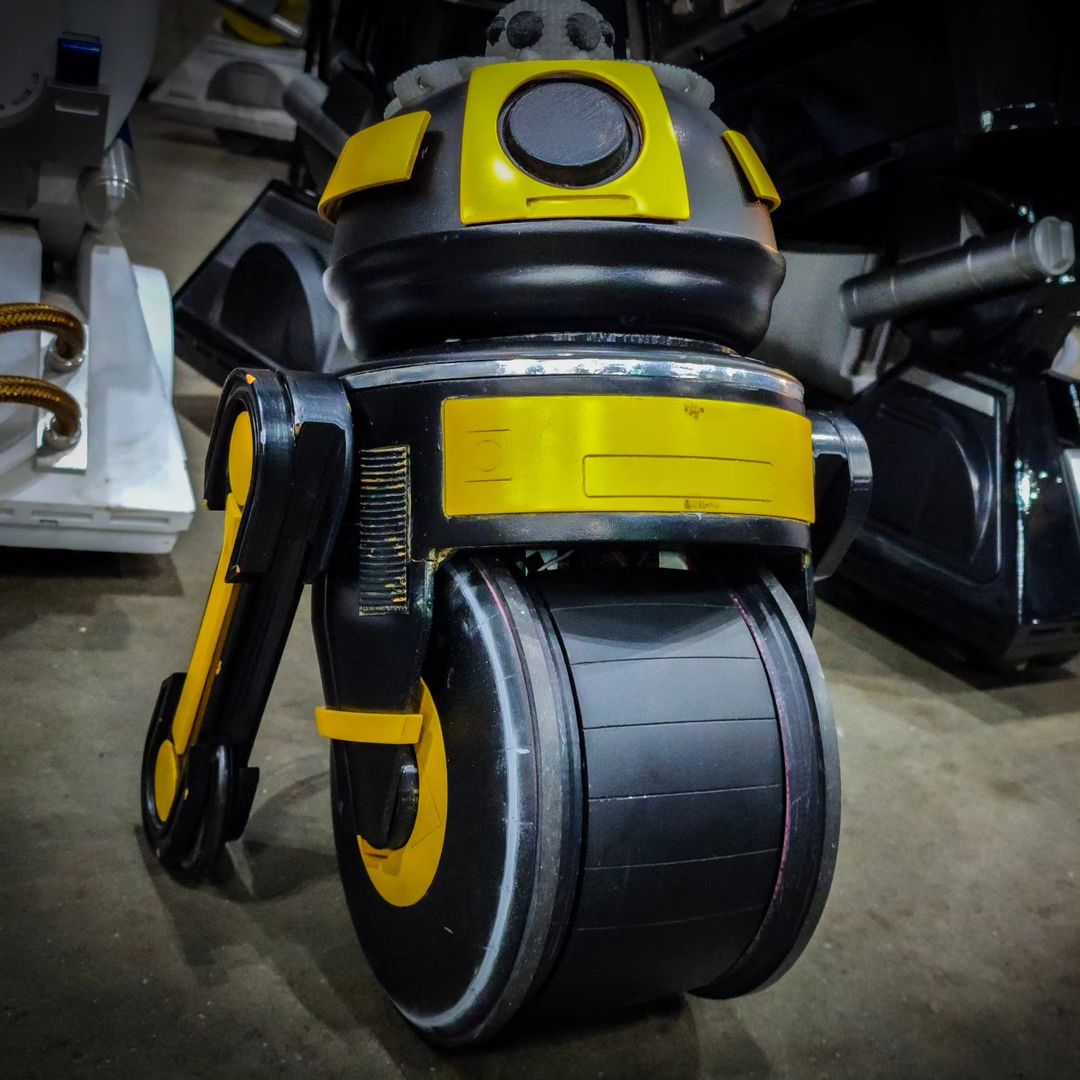
DD-3 is a Star Wars inspired fully functional droid. Built with personality in mind, DD-3 uses automation to give servos life and make DD-3 into a convincing character.
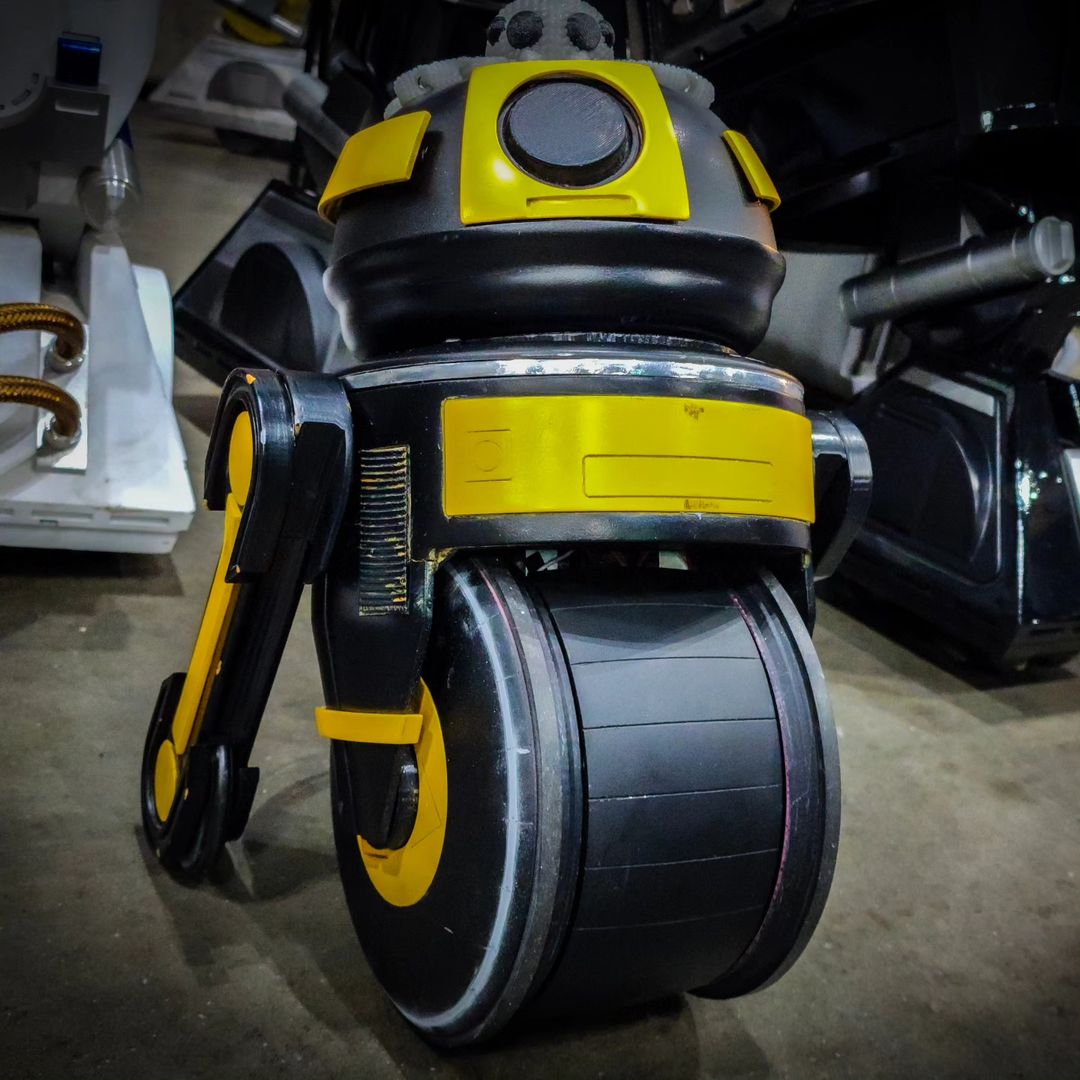
DD-3 tldr;
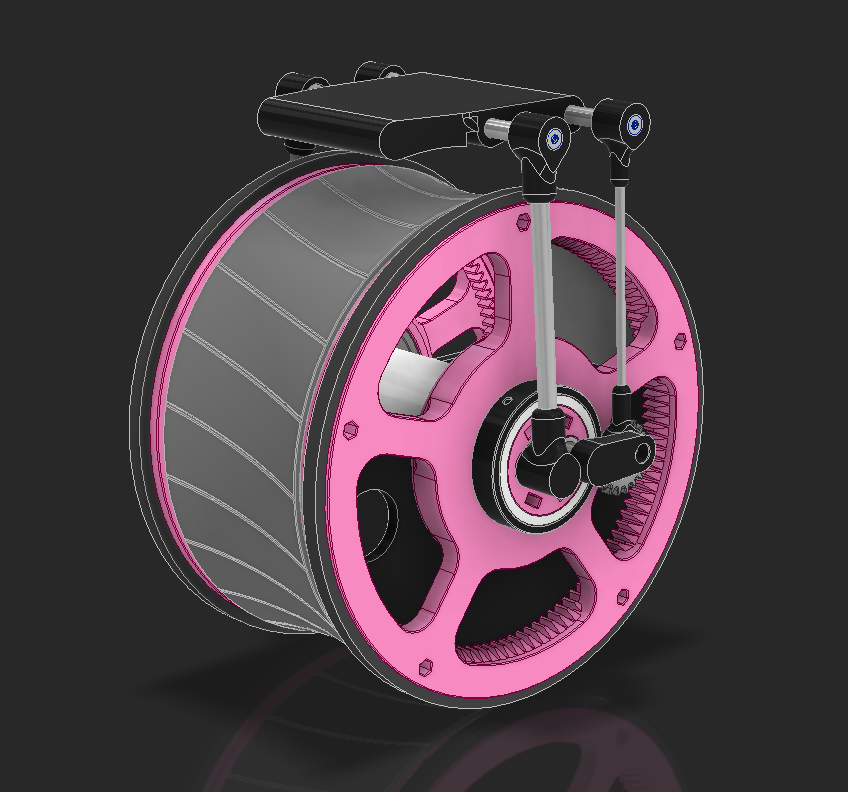
Originally this was going to be a D-O inspired droid, this is about as far as I got with that.
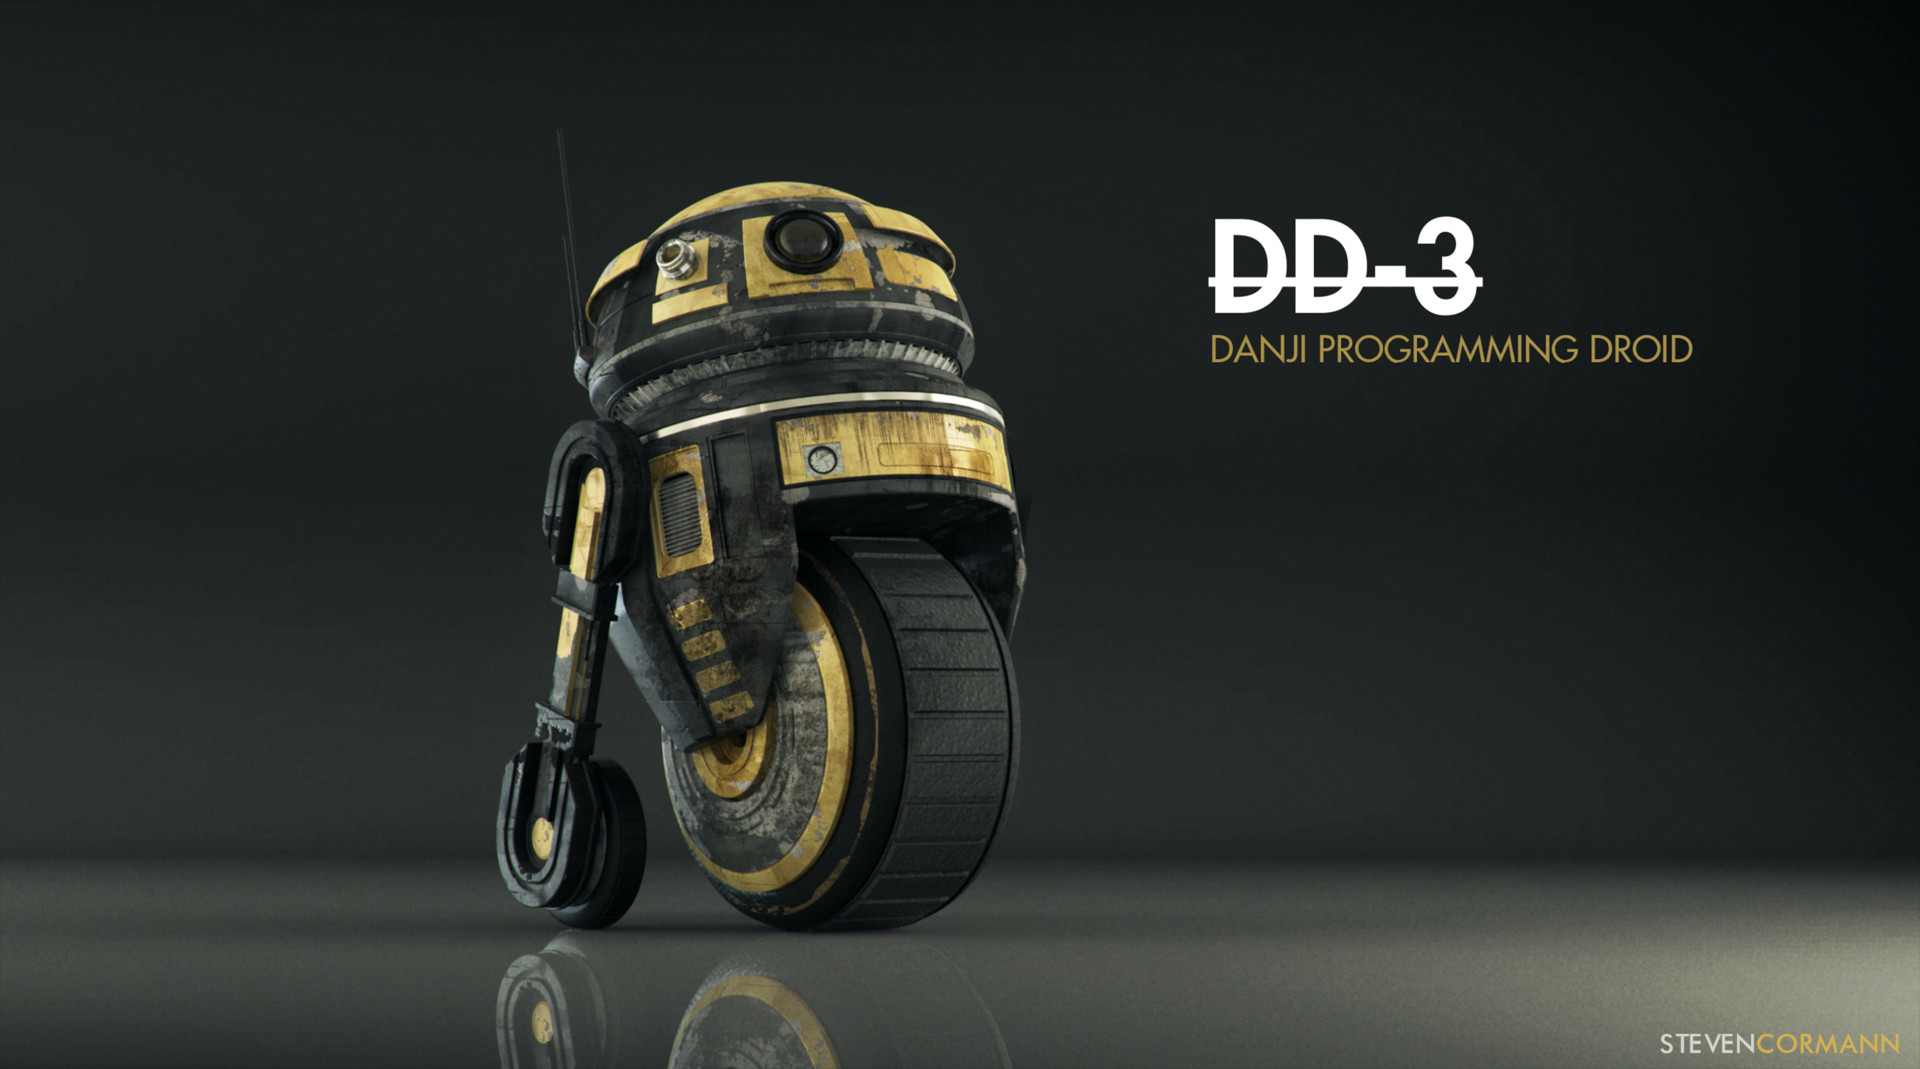
After finding an inspiring image from Steve Cormann, I switched directions and started in this direction.
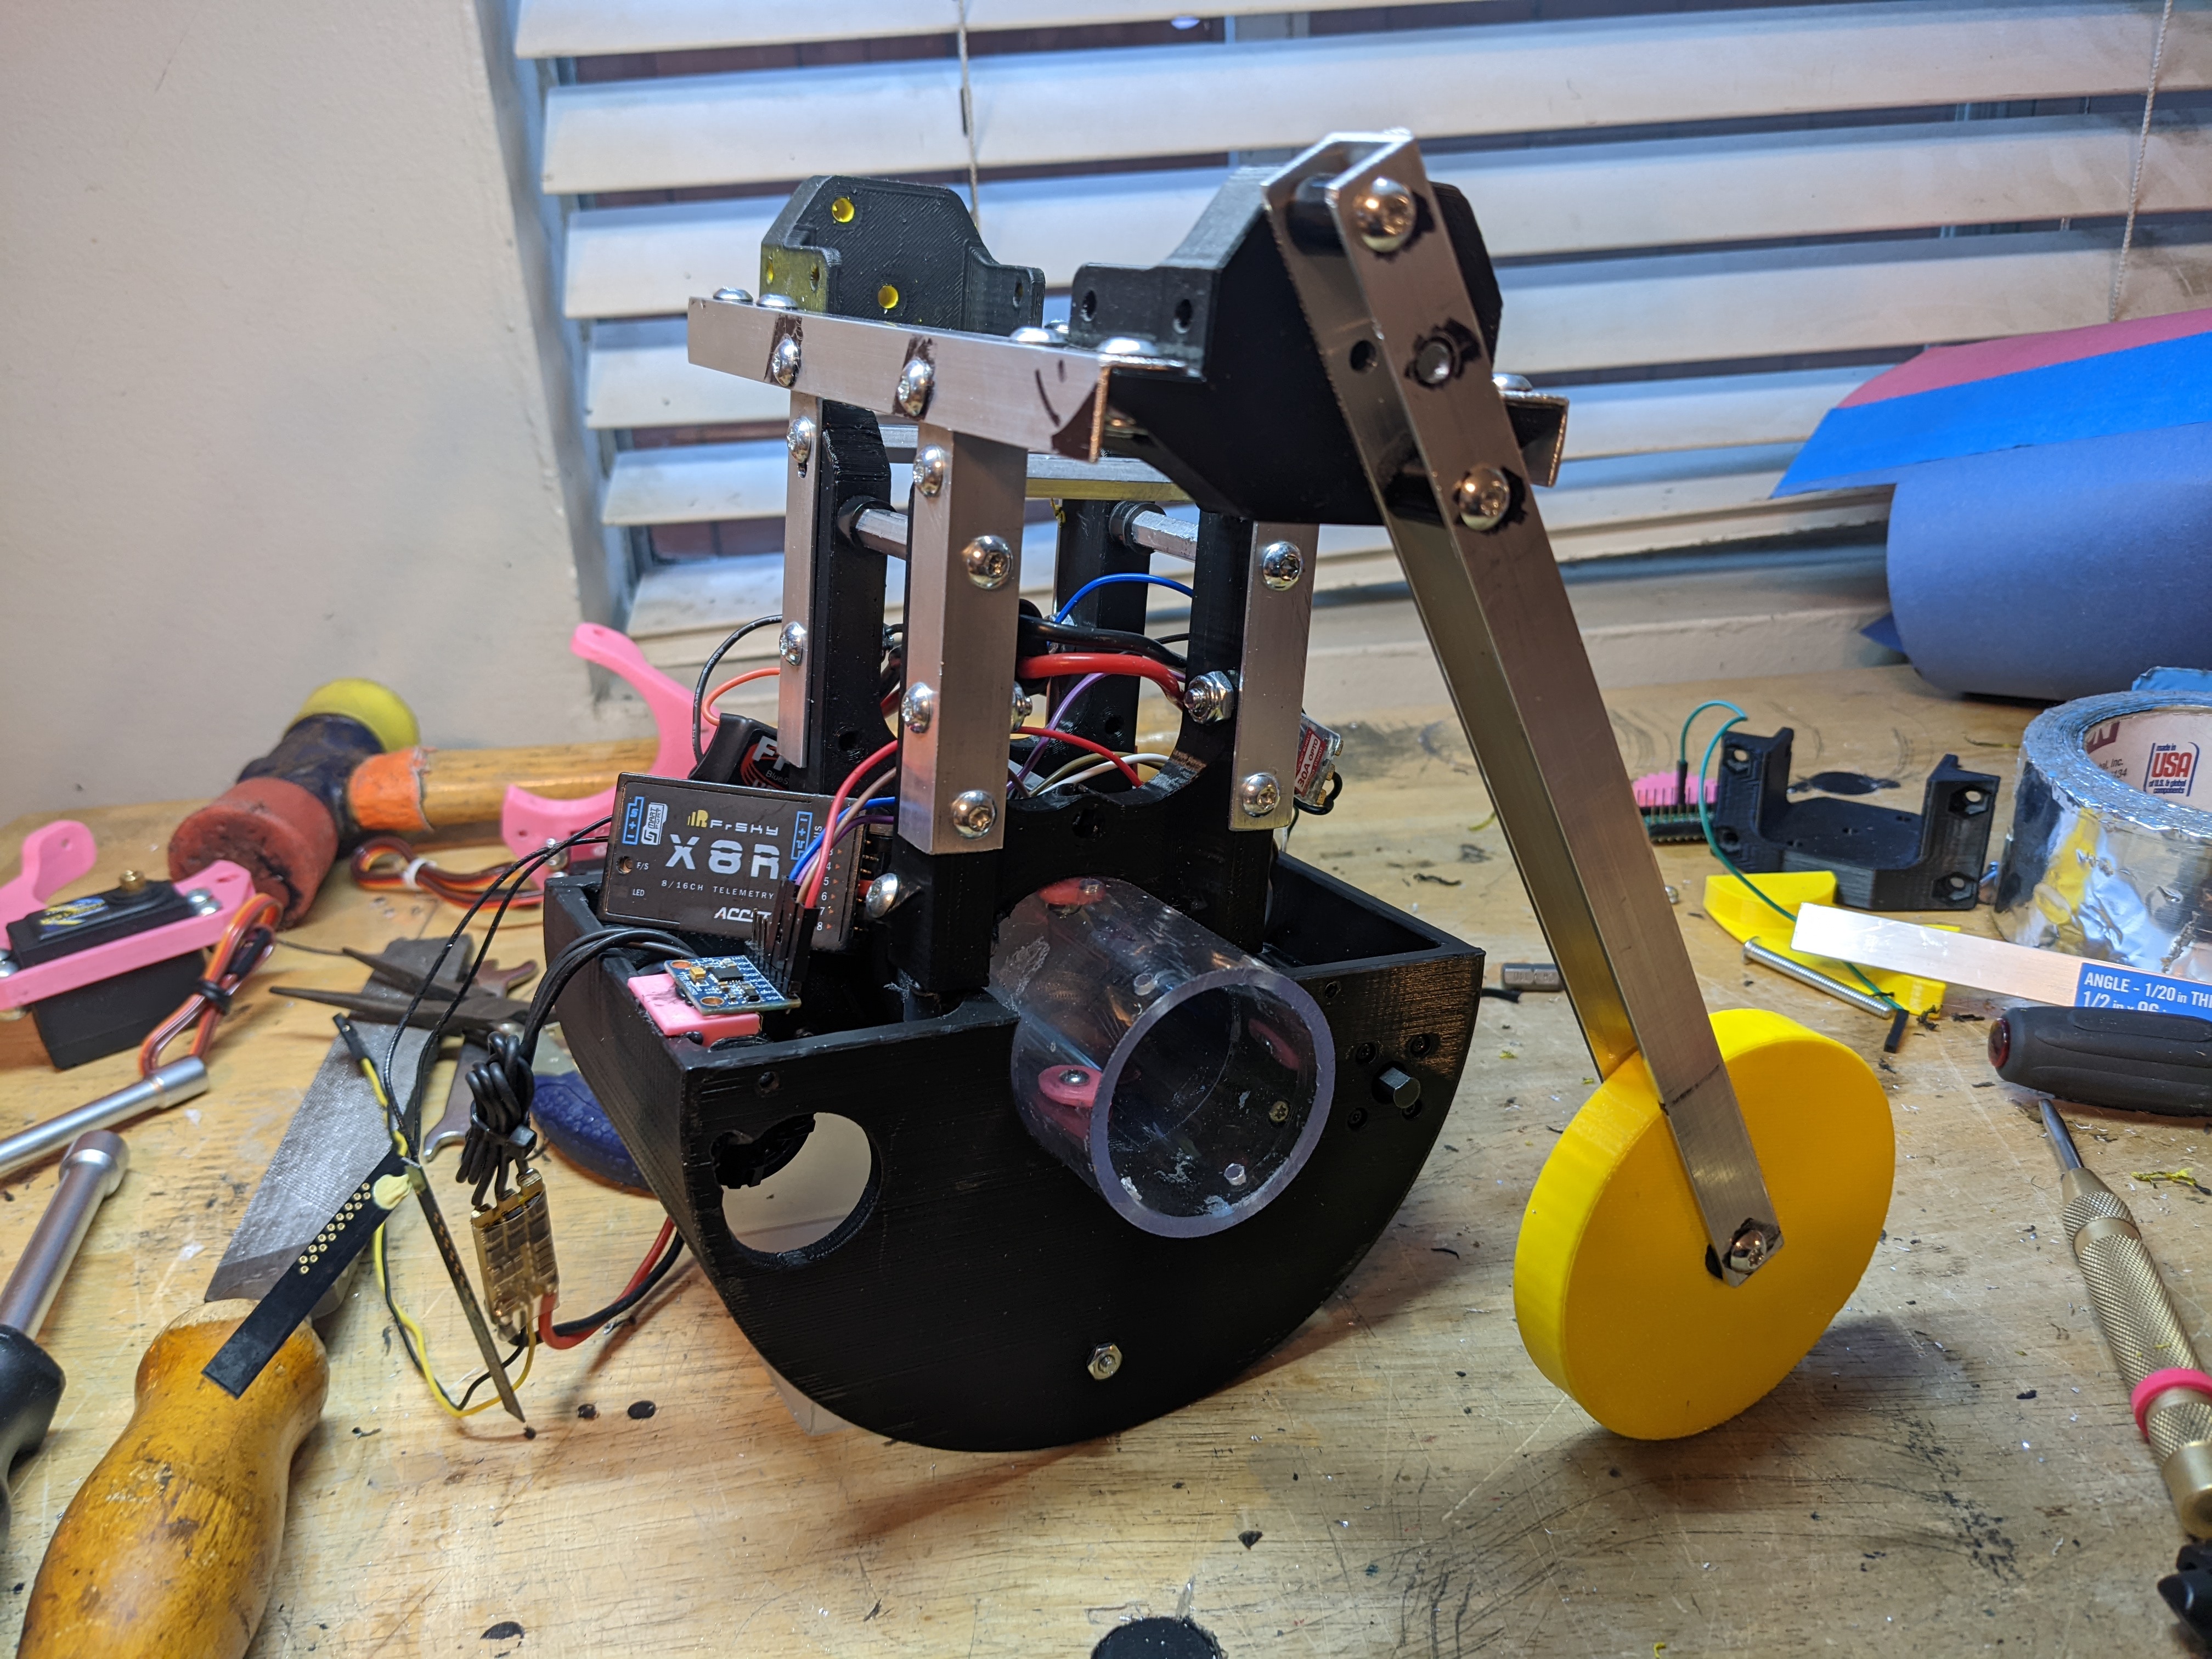
The chassis is built around a 3D printed half circle, with aluminum angle coming up for everything non-wheel related to get mounted to.
DD-3's code is open source and can be found here.
That's DD-3!
D-O
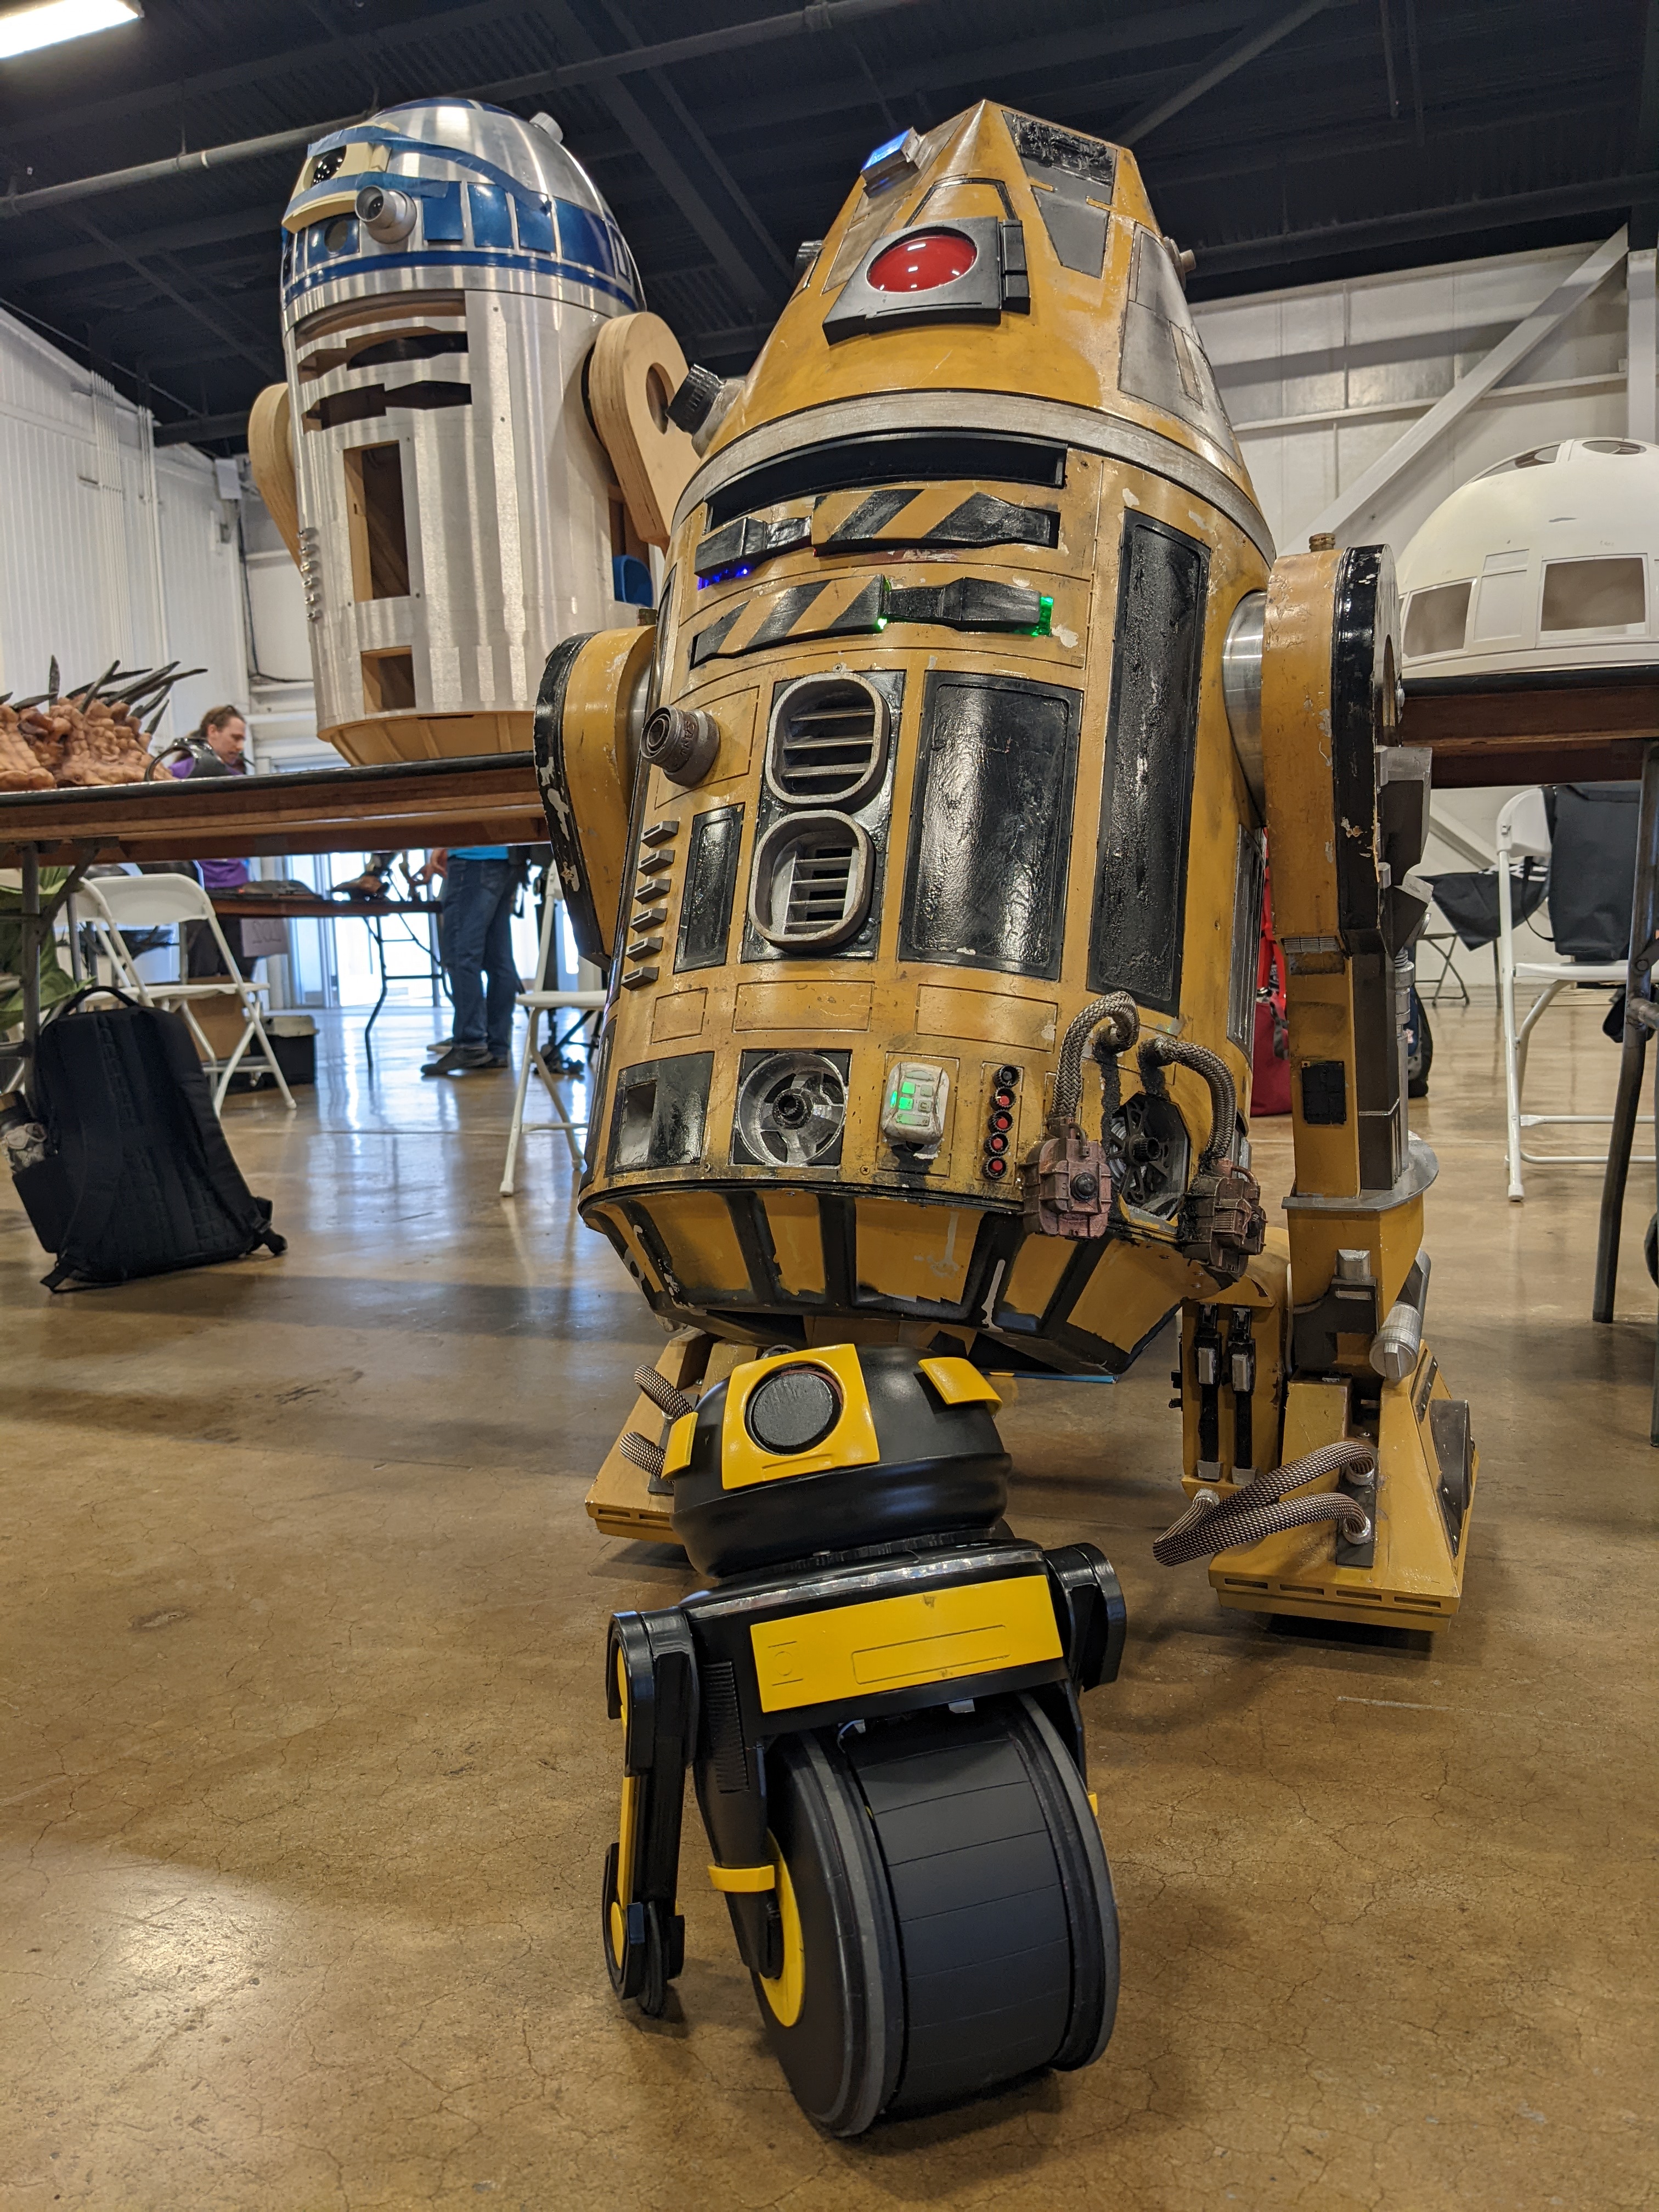
After rewatching Star Wars, I thought D-O was adorable and wanted to make my own. I've seen the community people who make Star Wars robots before and I've considered building an R2-D2 previously so this isn't a new idea.
Design
I found this video series by Matt Denton that showcases him designing, assembling, and troubleshooting D-O. To me, the interesting part of this project would be designing the parts, software, and aesthetics. I'm not bothered if my result ends up looking just like D-O or not.
Matt has larger 3D printers than I have, I have a Prusa Mini which has a 7" bed. So I'm restricted to the wheel being 7" in diameter.
The big design challenge with this robot is the linkages that go across the entire body. I liked the idea of having a large hollow center shaft that has axels running across to stabilize it, and the drive shaft is wide enough to have 2 axels running across. The problem with this is finding a bearing large enough.
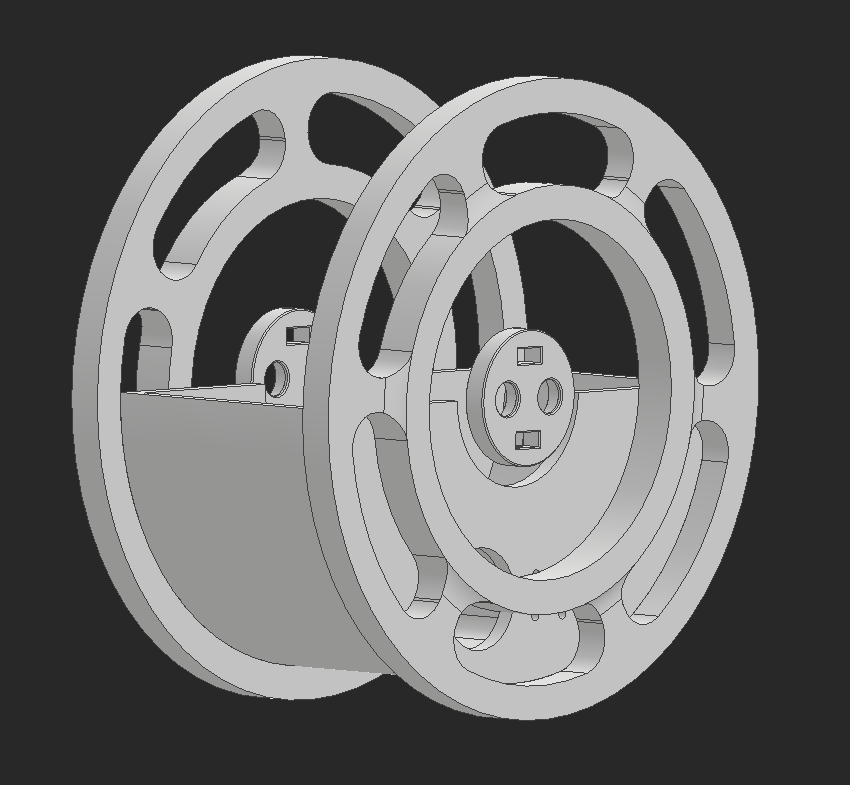
I found a ball bearing with 85mm OD, but after putting it in CAD it's clear how massive and heavy this bearing will be. The pink pieces hold bushings that will hold the axles that run across the robot to power the head.
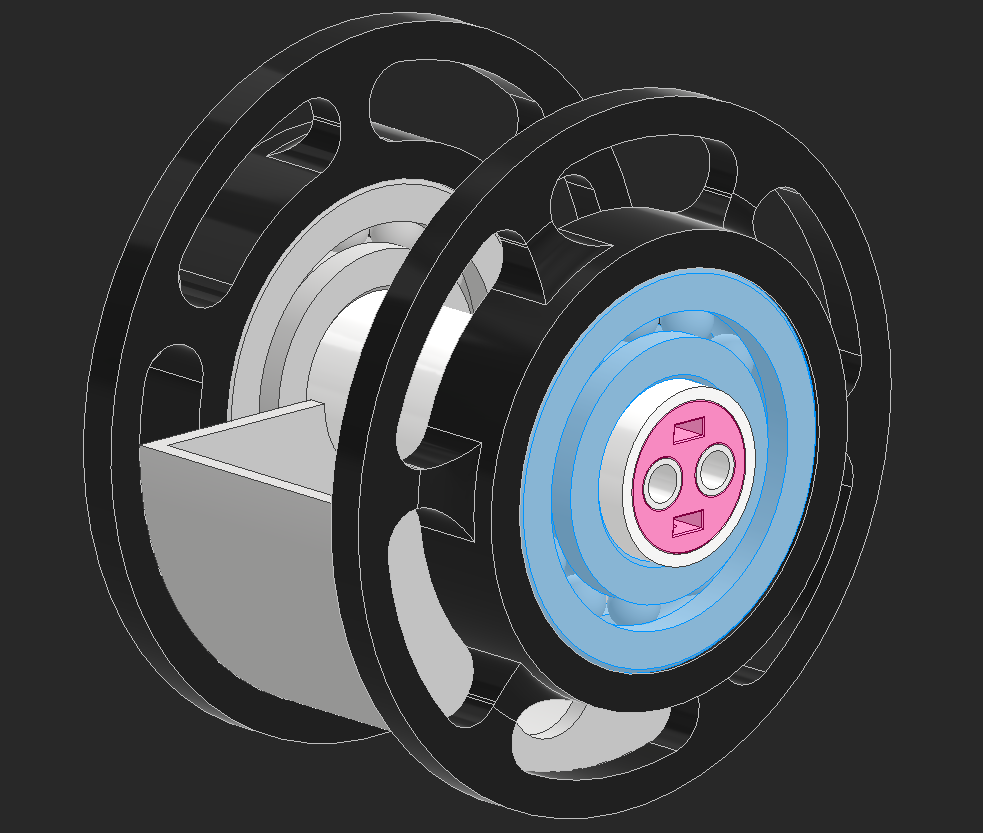
Finally, I found this ball bearing which has the same ID but a much more sane OD.
I added a ring gear to the wheel and the placement for the powered gear. This will go 260rpm on a 7" wheel, with 1806 2300kv brushless motor on 4s with a 19:1 gearbox from Robot Matter. I also found a 7" square o-ring that I can use as a tire.
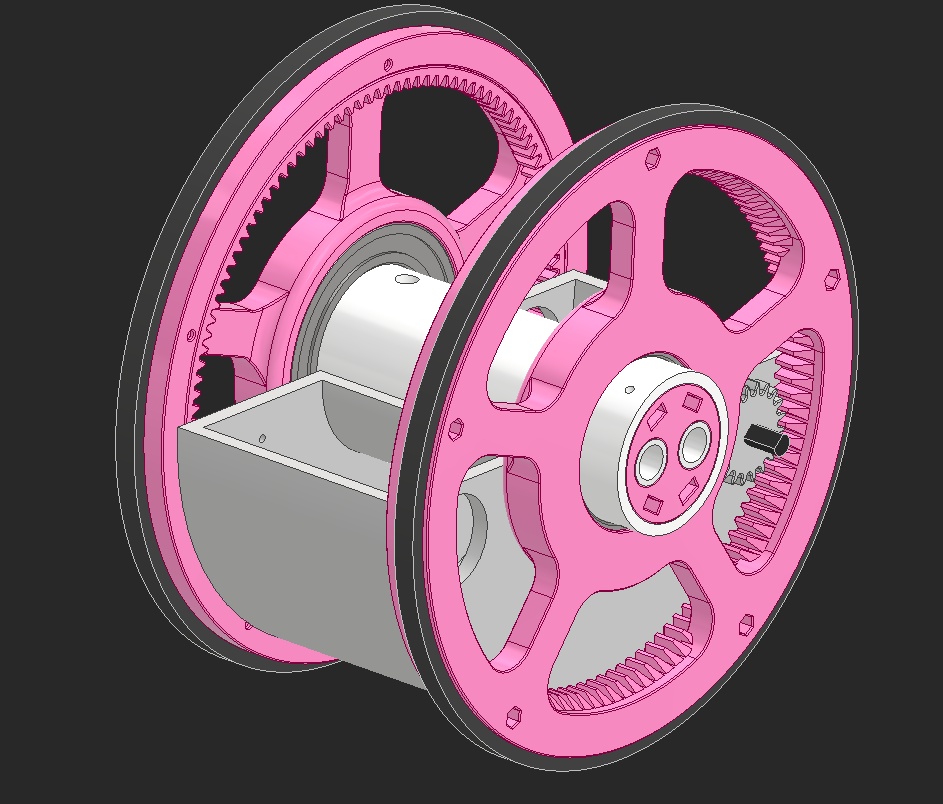
Playing with aesthetics, I liked the way an inverted center tire looked instead of the squishy tire that Matt Denton used.

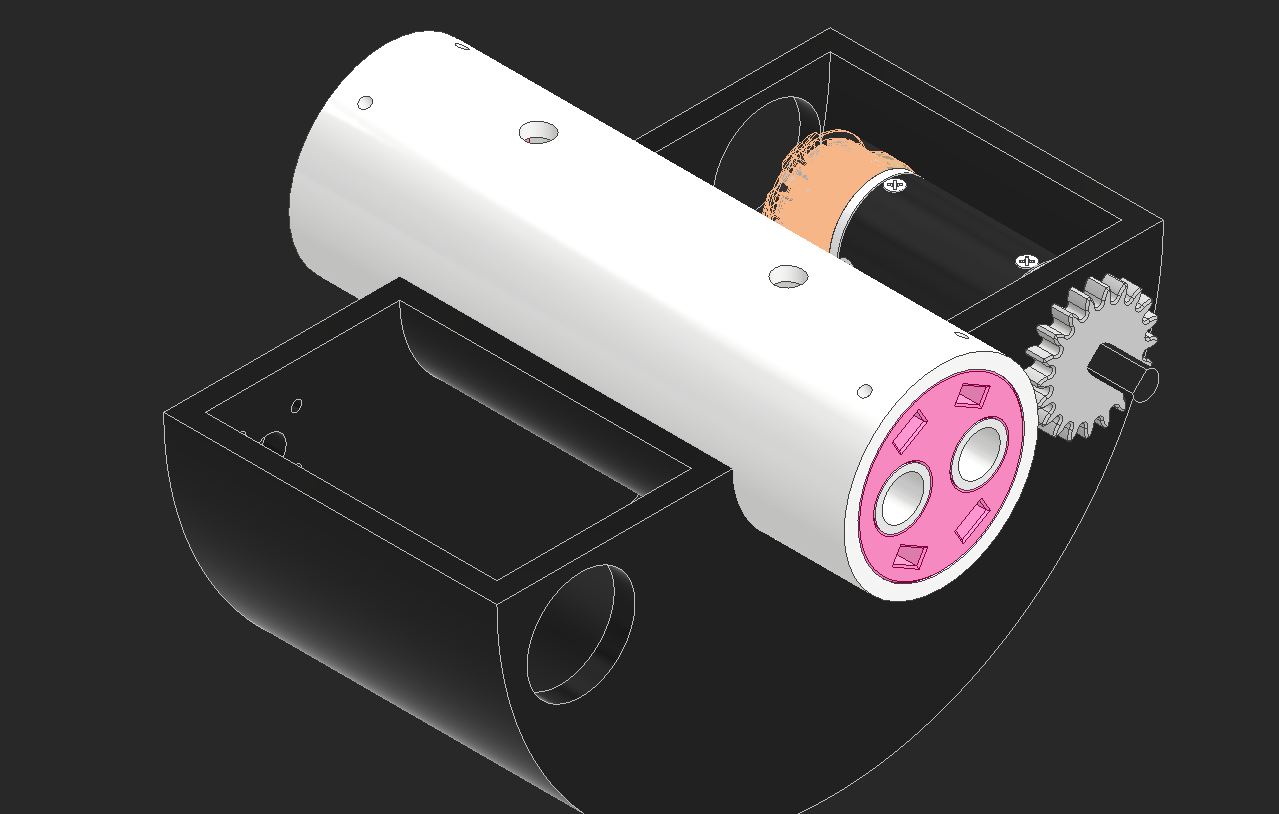
A cantilevered mechanism like the head on D-O felt wrong to me, so I wanted to design it to be not cantilevered. I made some geometry for the linkage and copied it to both sides. I also angled the linkages in because it looked way too wide when it was straight up. I'm doing the linkage the same way it's done on D-O, where one is a crankshaft and one directly powers the linkage, to give control over tilt and height.

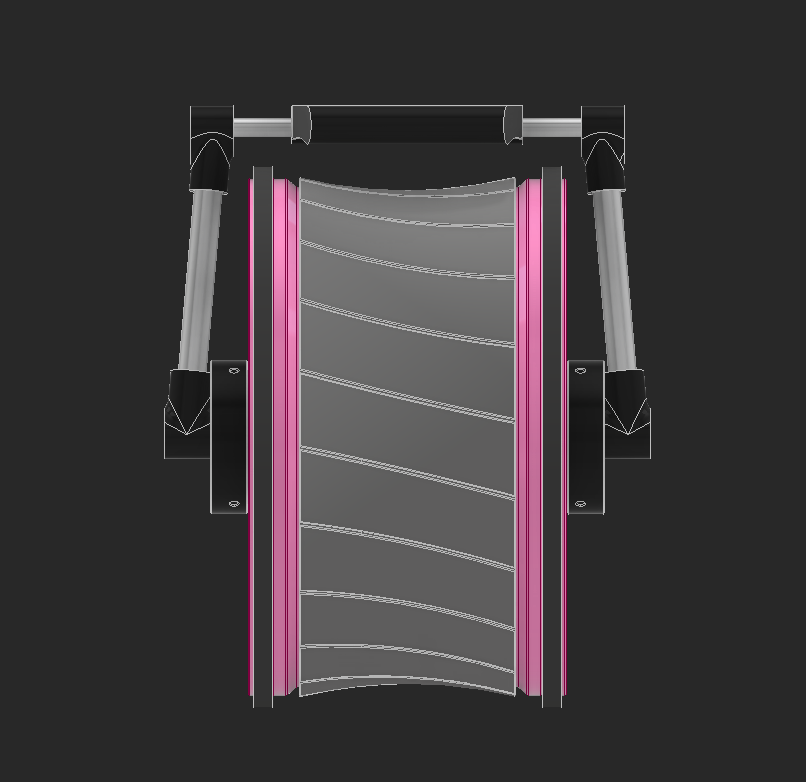
The linkages need a way to be powered and that would have to happen between the wheels. I placed a servo in the CAD here and it looks like it'll fit nicely.
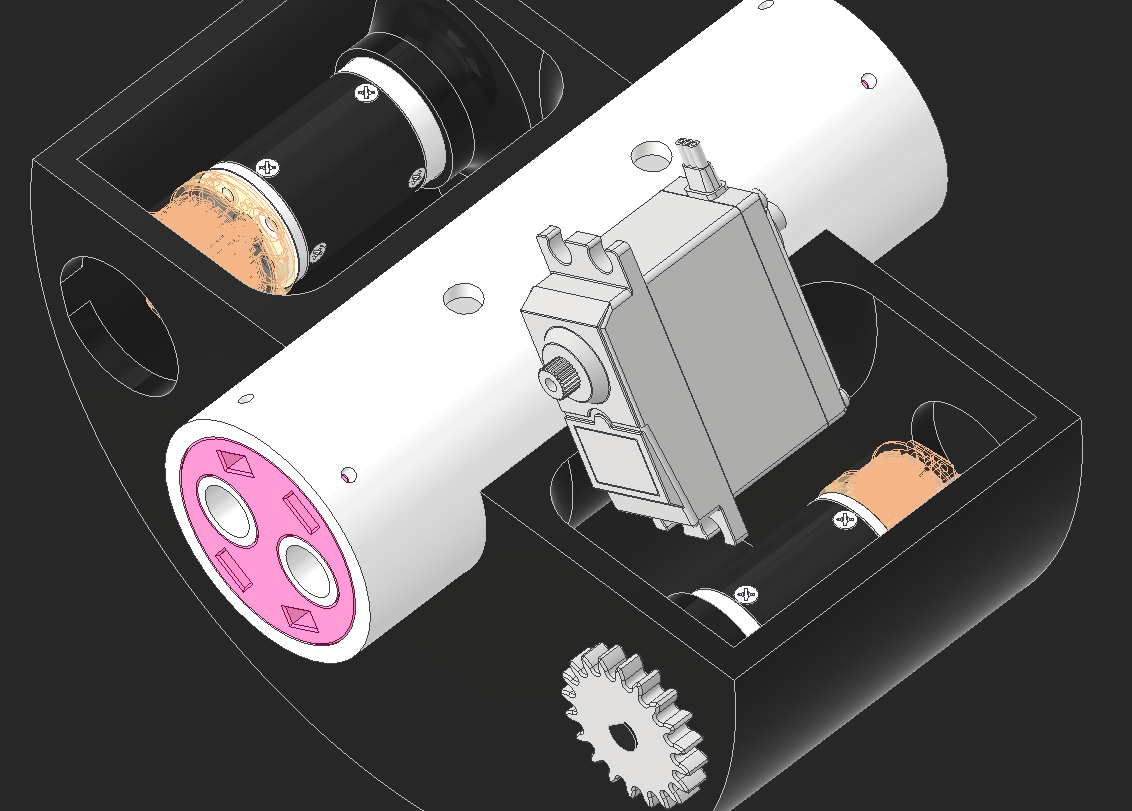
There isn't nice geometry to mount something off of, so I figured the best shot I'd have is to wrap around the center shaft and the support for it.


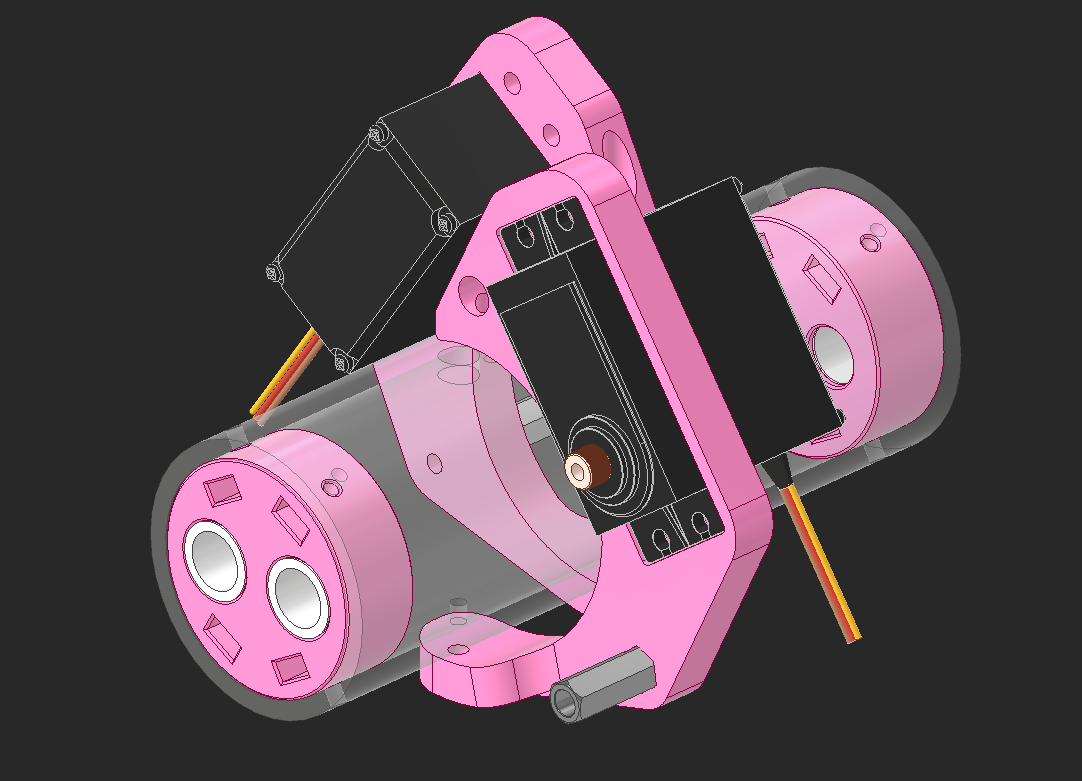
To get the aluminum rods to spin, my first idea was to use a portion of a gear. I very quickly stopped liking this idea because of how much material needs to get cut out of the main drive shaft.
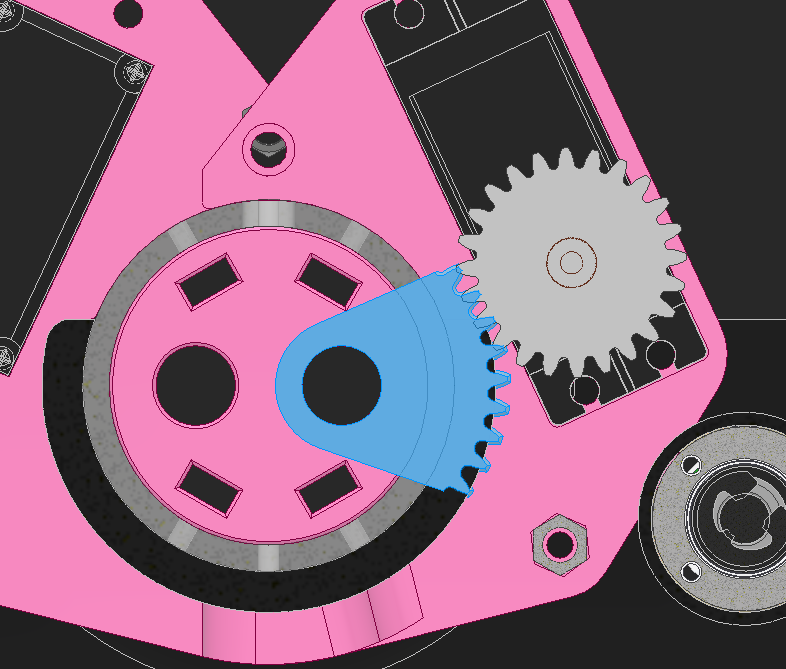

I played with a linkage instead and was very happy with the amount of material I'd have to remove.
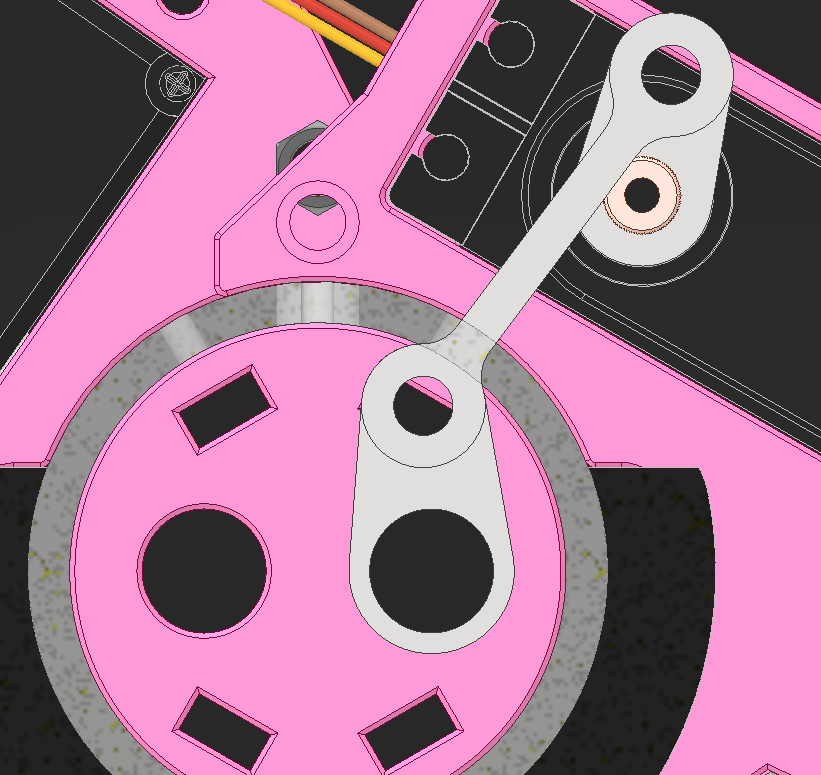
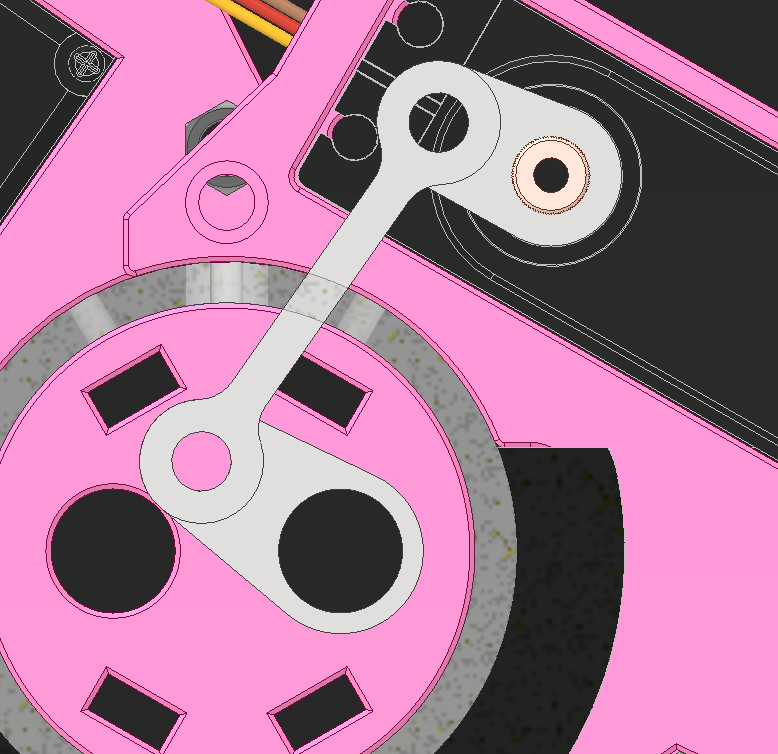
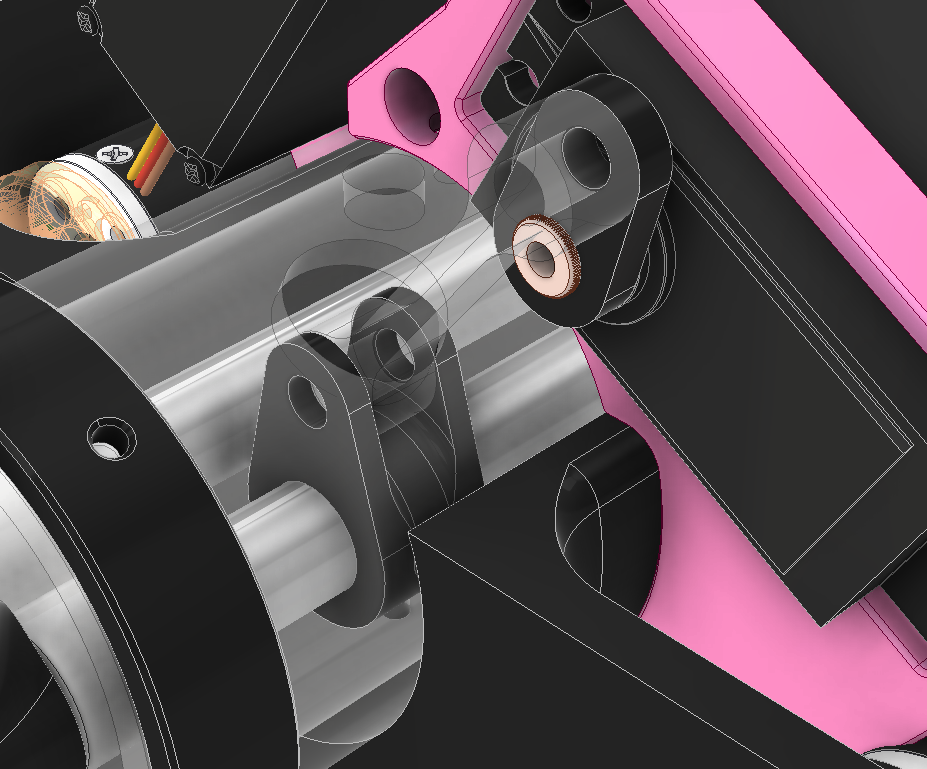
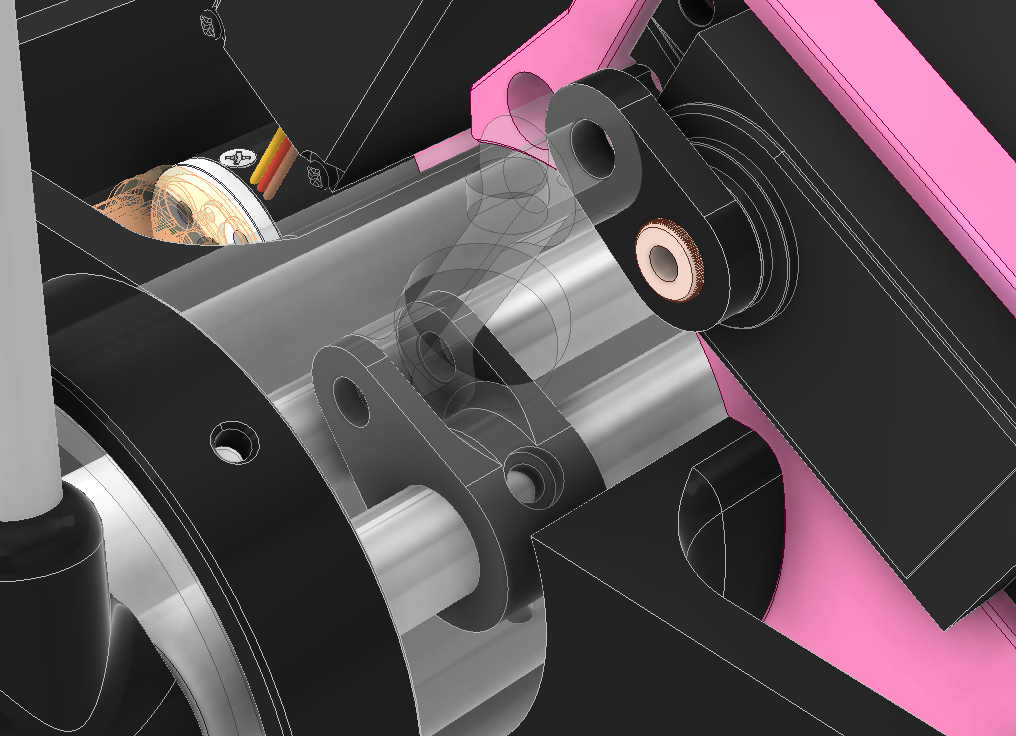
I designed the linkage for real and made the piece that clamps onto the aluminum rod. The hole that needs to be drilled is only 1/2".
Figuring out how to fit batteries was weirdly challenging. I knew they needed to go to the bottom because this robot needed to self-balance. In this image, the 3 rectangles are batteries. I'd have to find batteries that fit in the pocketing of the wheel.
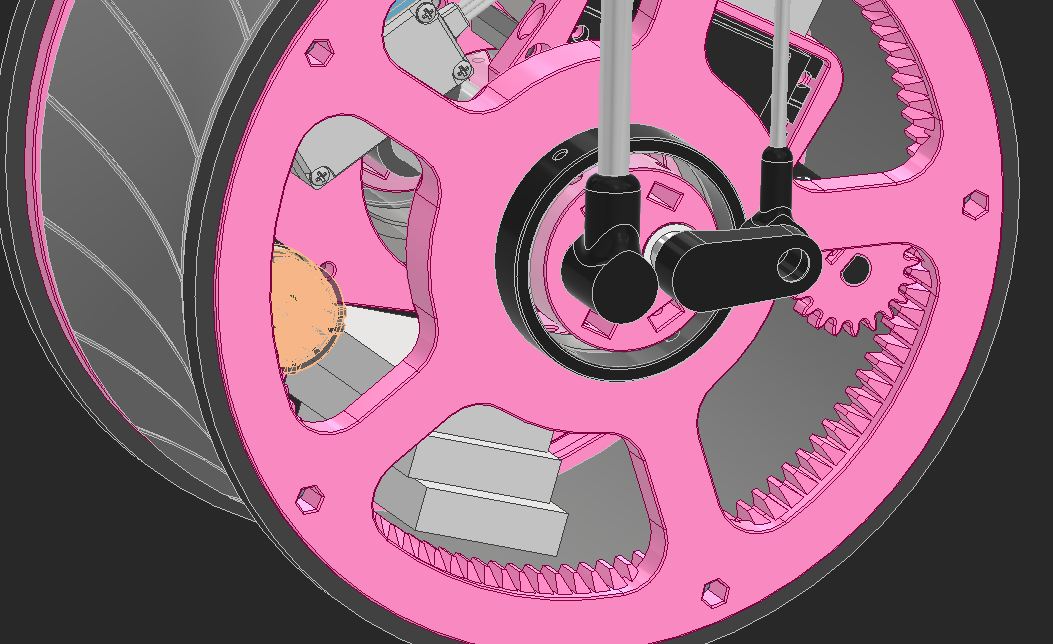
I also have to figure out a way to fit the batteries inside of the chassis. What I came up with was to cut out a chunk of the chassis, and have another printed piece that slides into it. This makes the main chassis significantly easier to print and lets me iterate battery holder geometry separate from the chassis.

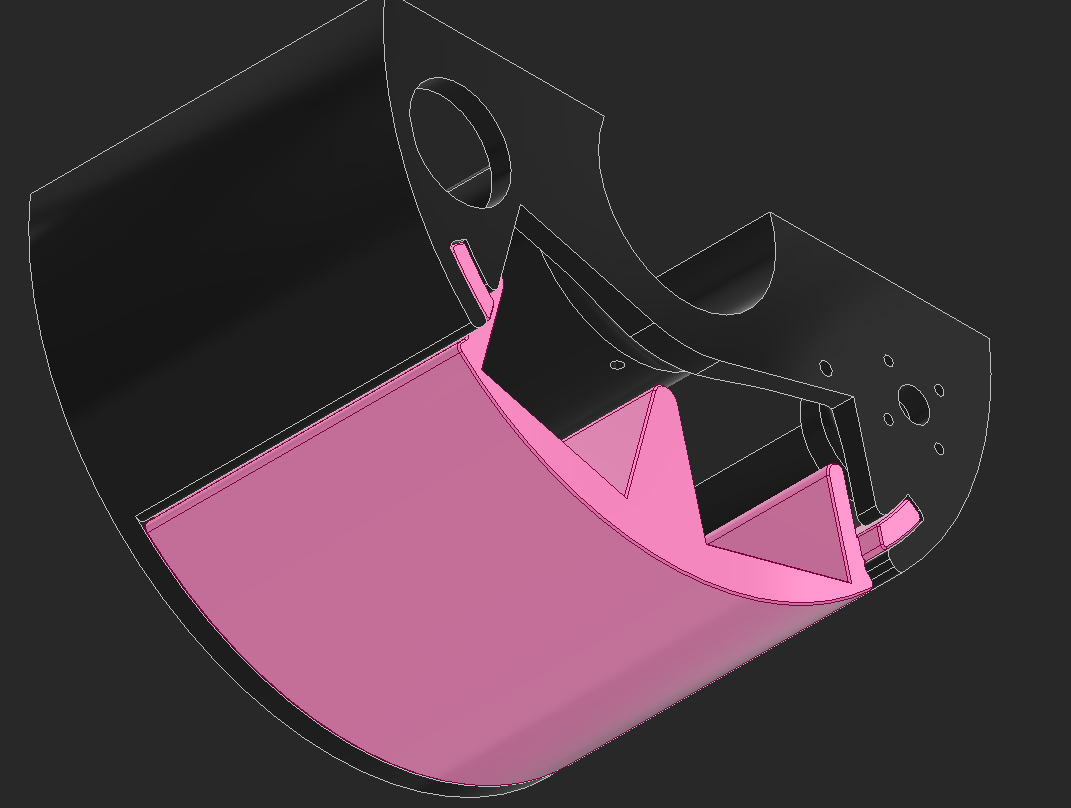
I fit a pca9685 servo board, a teensy, and an x8r receiver inside.
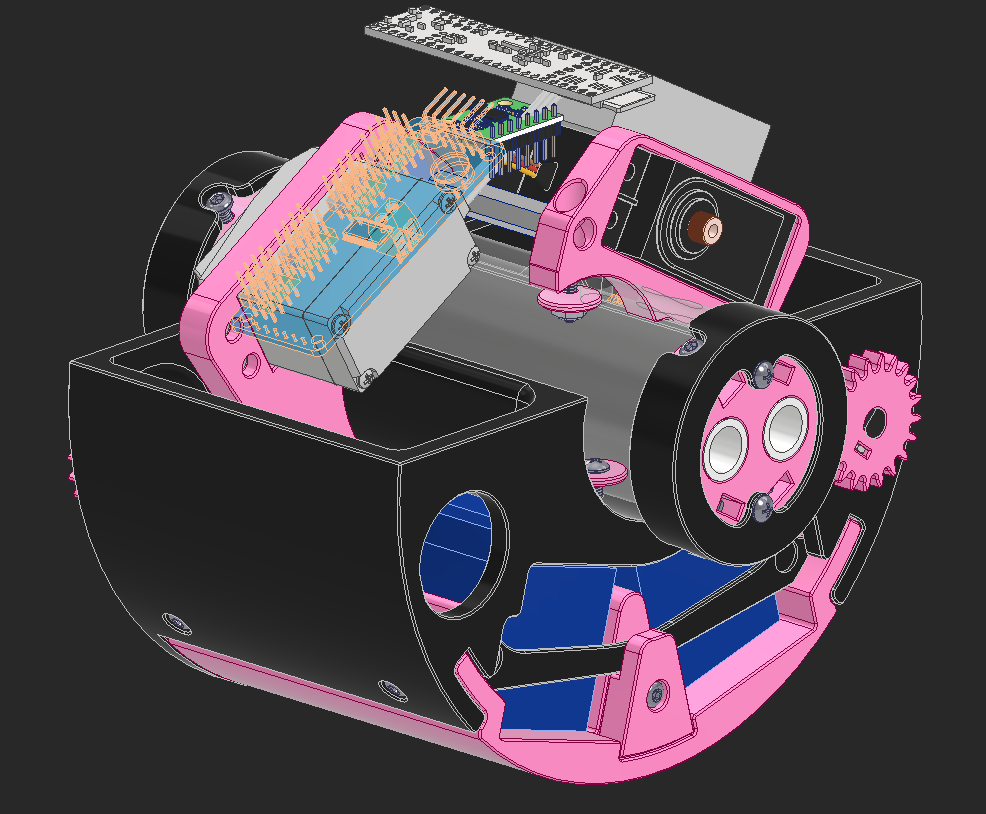
Assembly
I ordered everything I needed and the McMaster order came in first along with the Amazon order. I have everything I need to get started now except for the drive motors. I want to wait to print the main chassis until I get the drive motors in so I can do some tolerance tests on them before wasting a bunch of filament.

I thought there was a chance the 45mm ID bearing would fit nicely over the 1.75" OD polycarbonate tube I'm using, but they had a very noticeable amount of slop. I'll have to put aluminum tape over the shaft to fix this.

6 months later, the motors came in! I do my tolerance tests on the motor and I'm able to quickly get things printed. The battery holder fits nicely in the chassis.

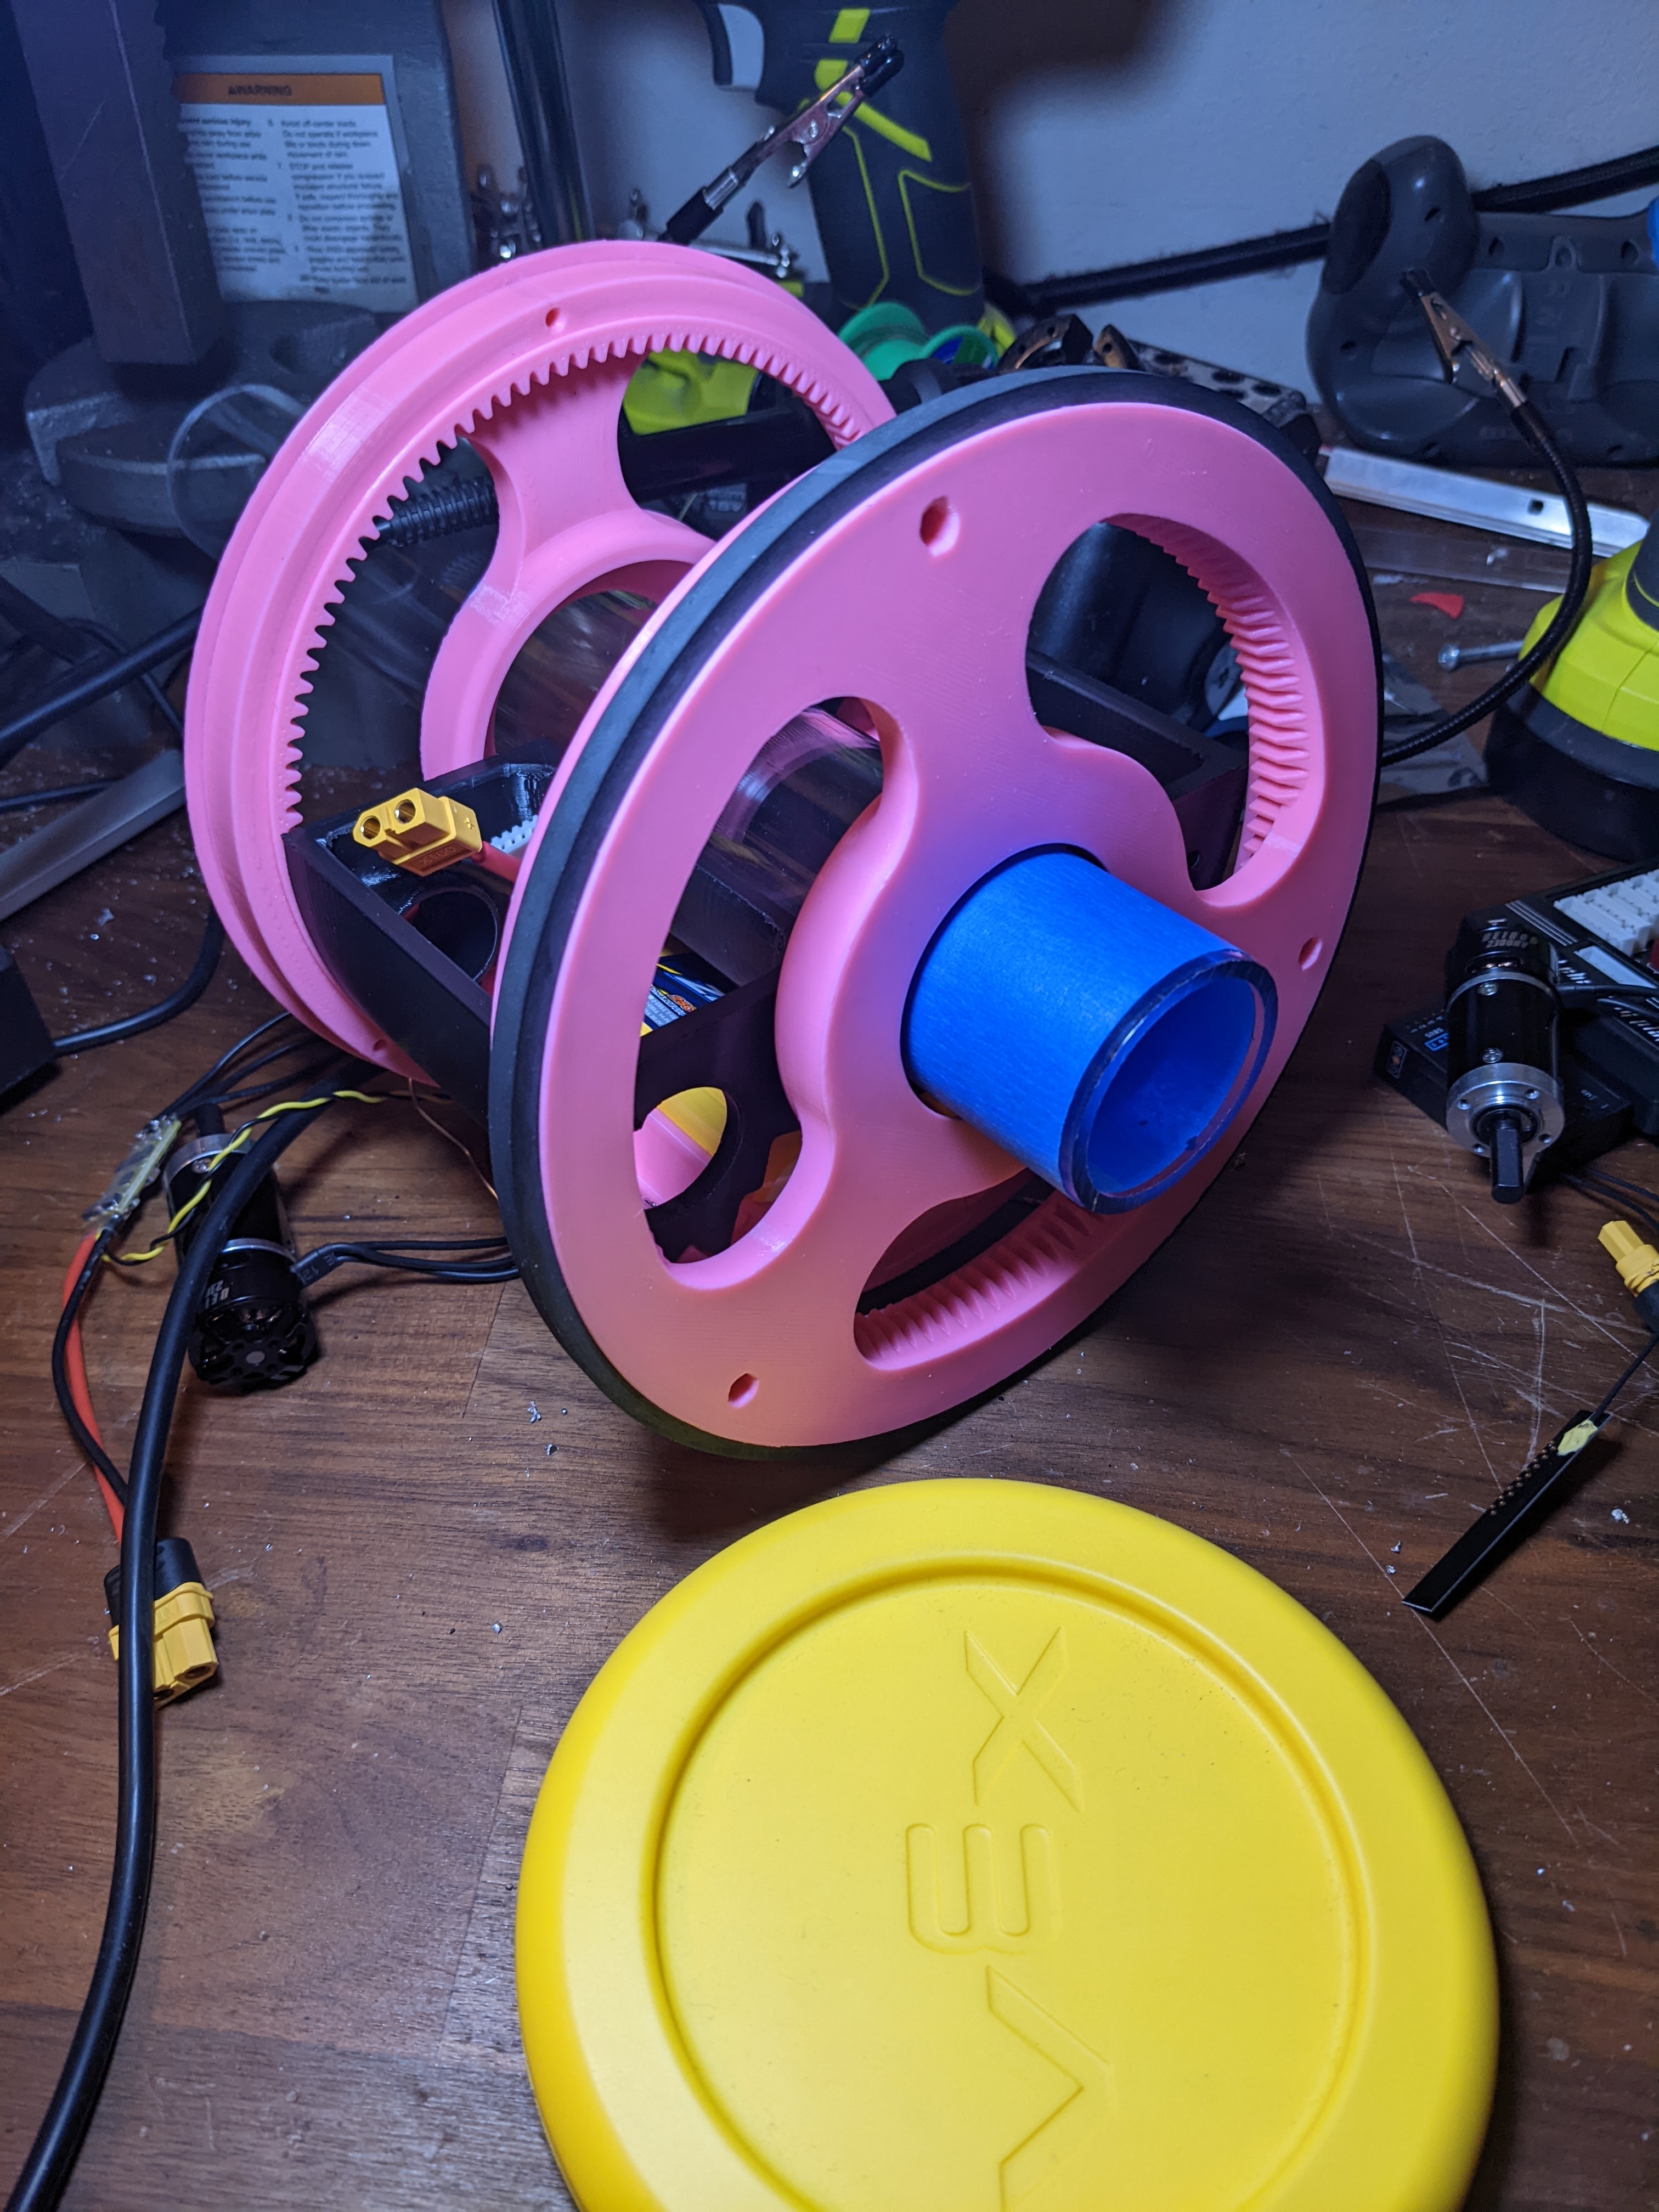
I wired the battery to the ESC and plugged it into the x8r and got the motors to spin. At this point, I realized how overkill my motors are for the size of this setup...
I hooked everything up to the receiver with no code running just to drive it around and see how it felt to drive.
The shaft isn't attached properly in those tests, so I need to drill holes in the tube to get everything mounted.
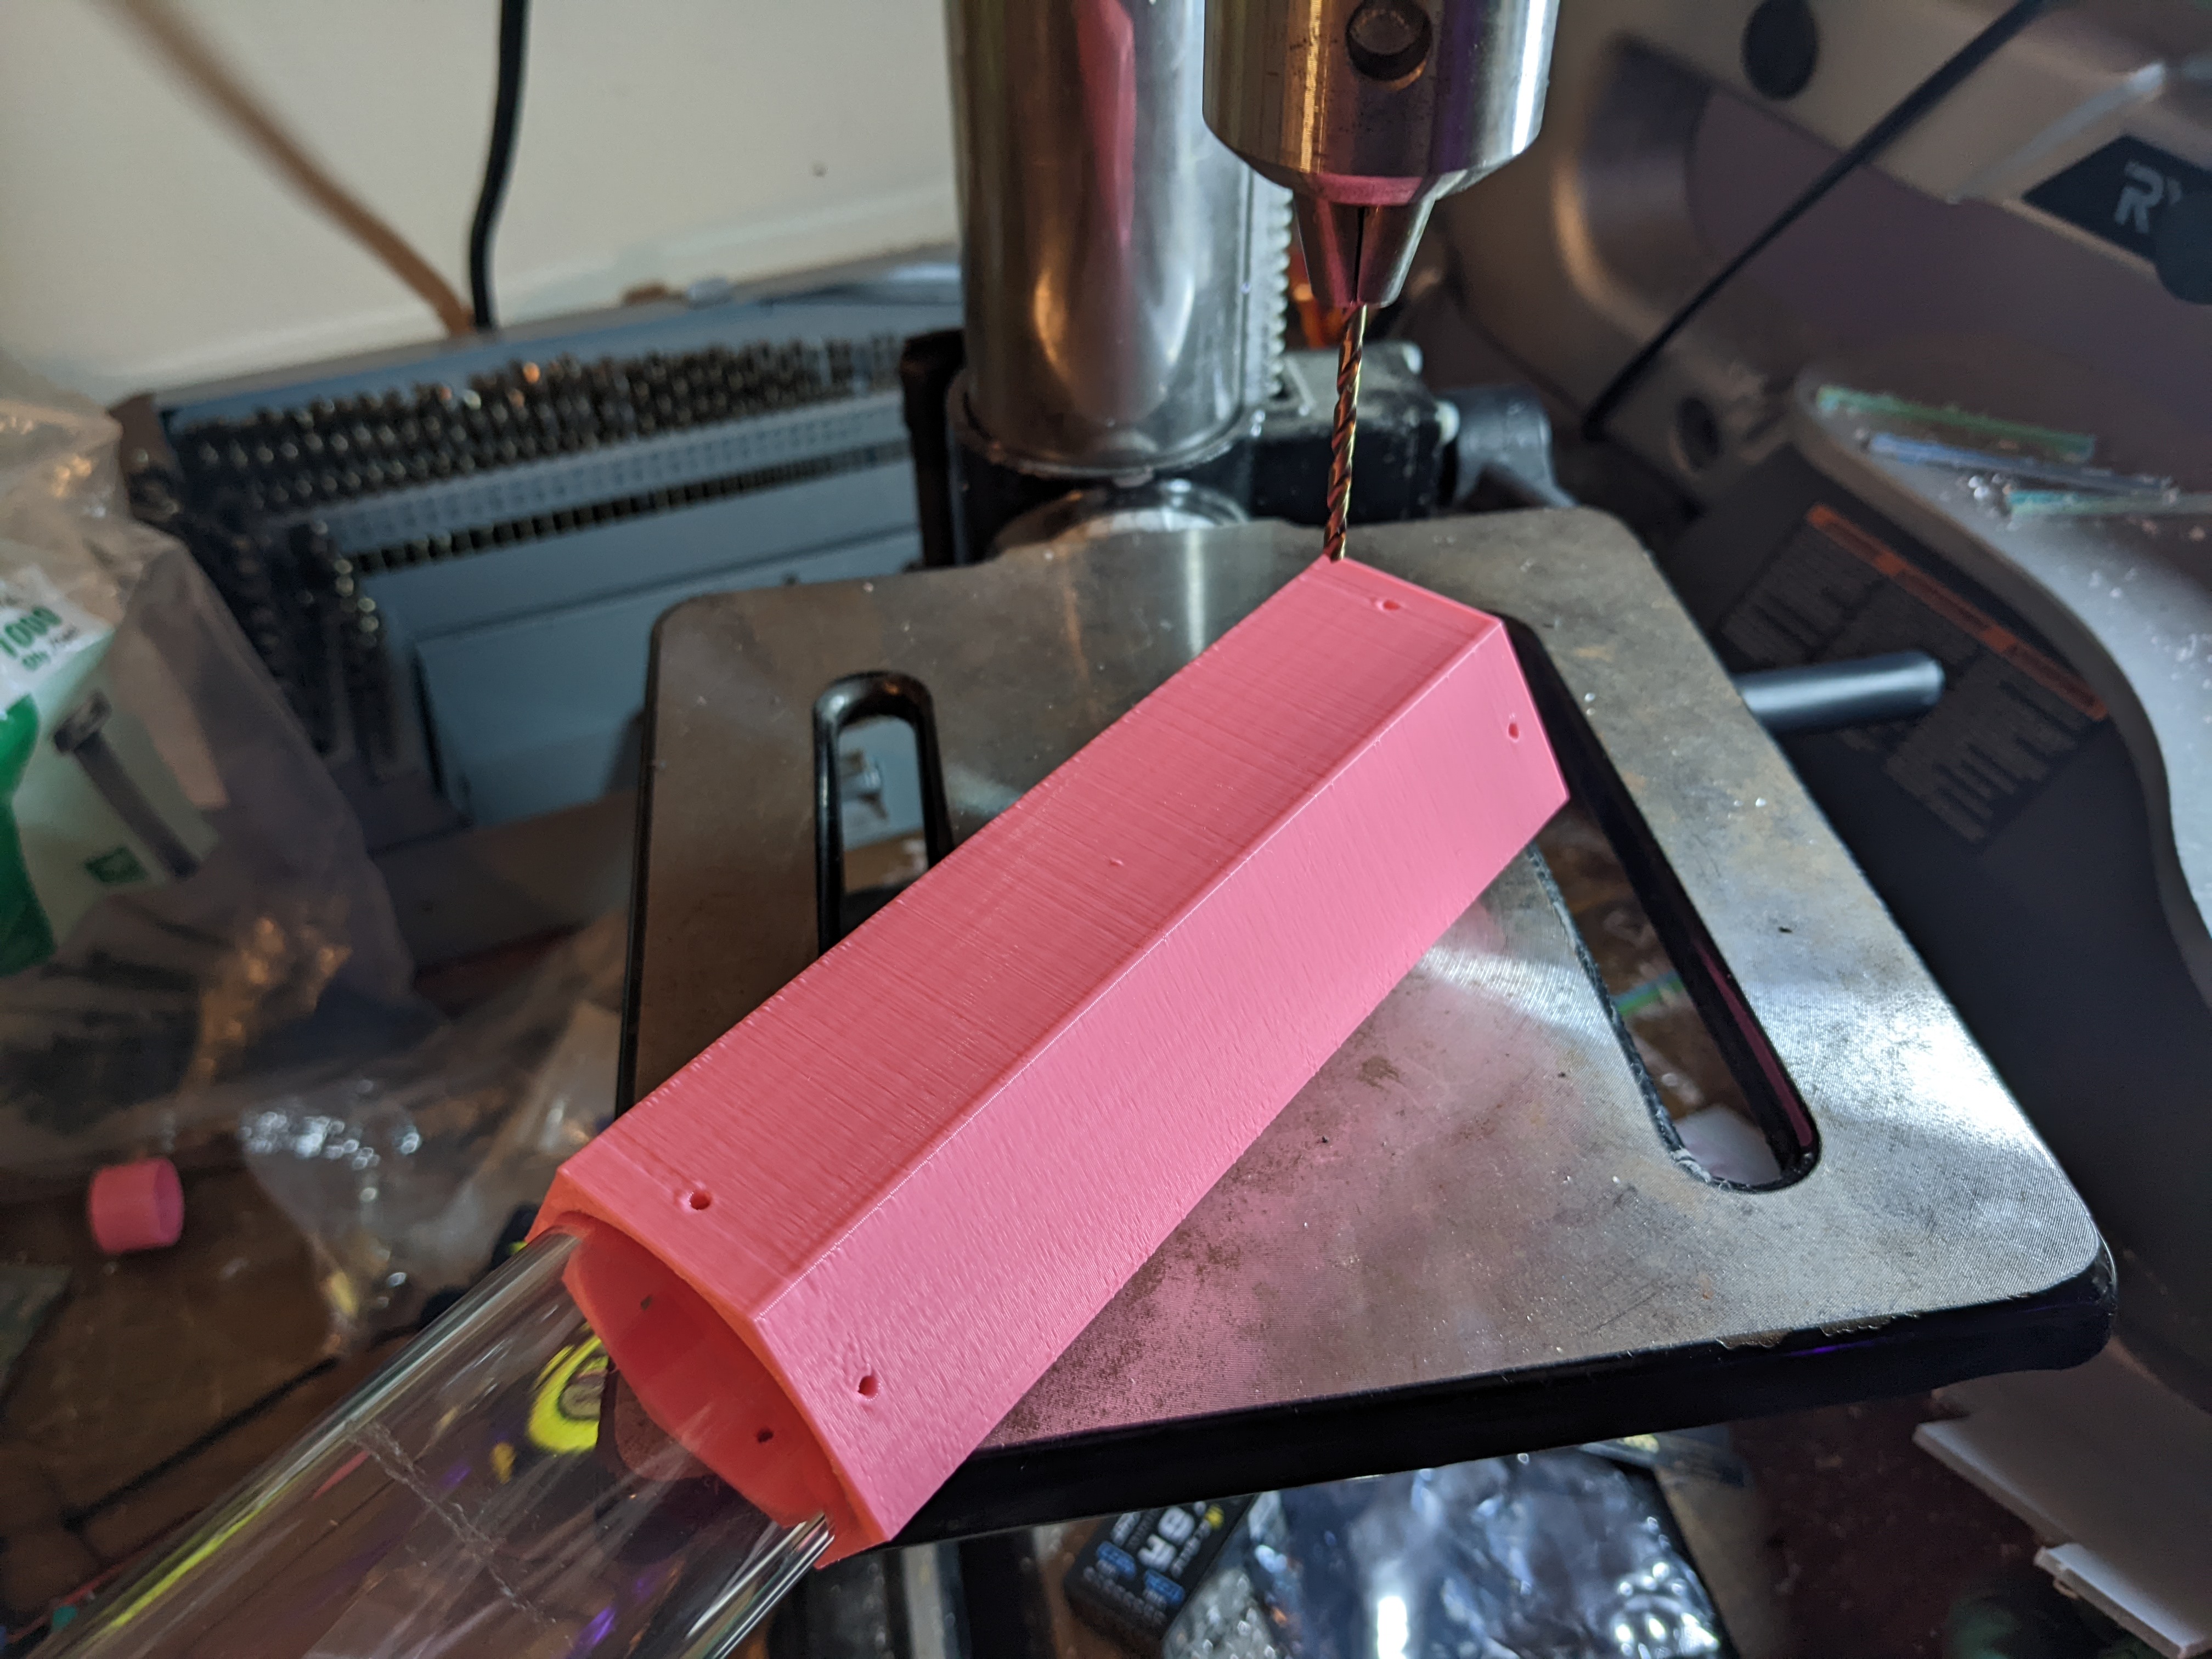
I used the holes I just drilled to index another jig.
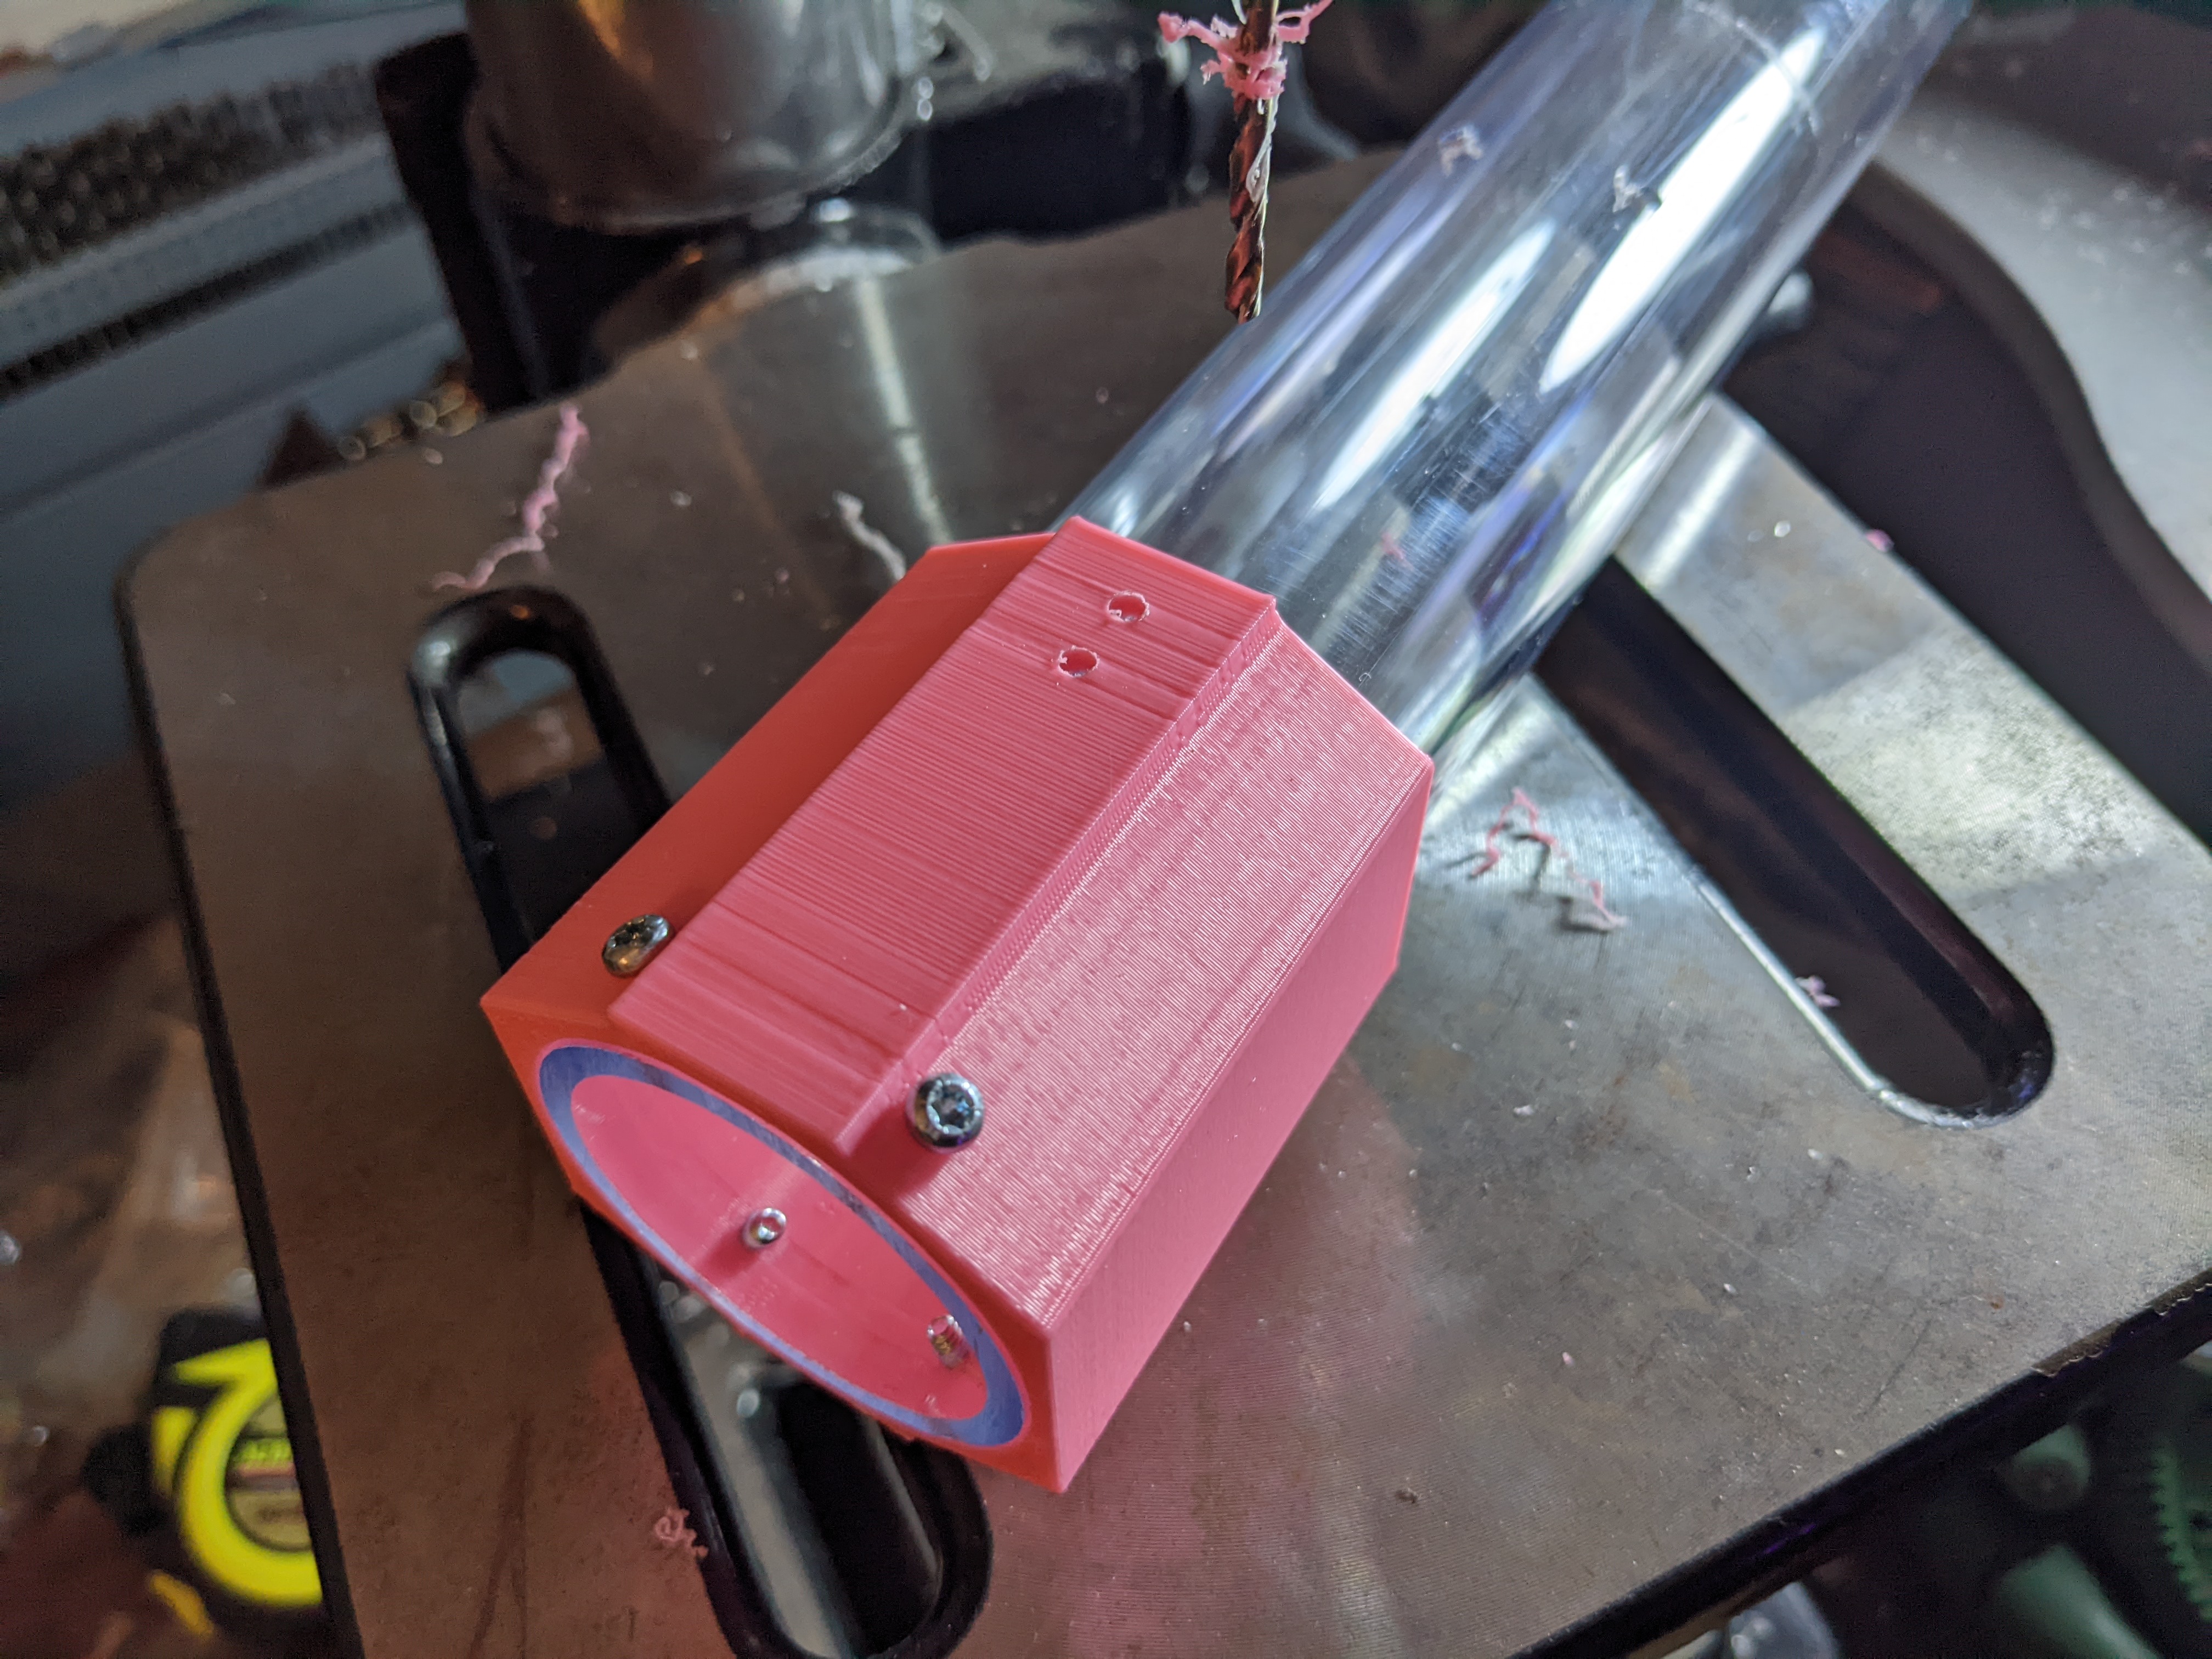
Mounting the shaft to the body was simple, and the servos could now be screwed in too.
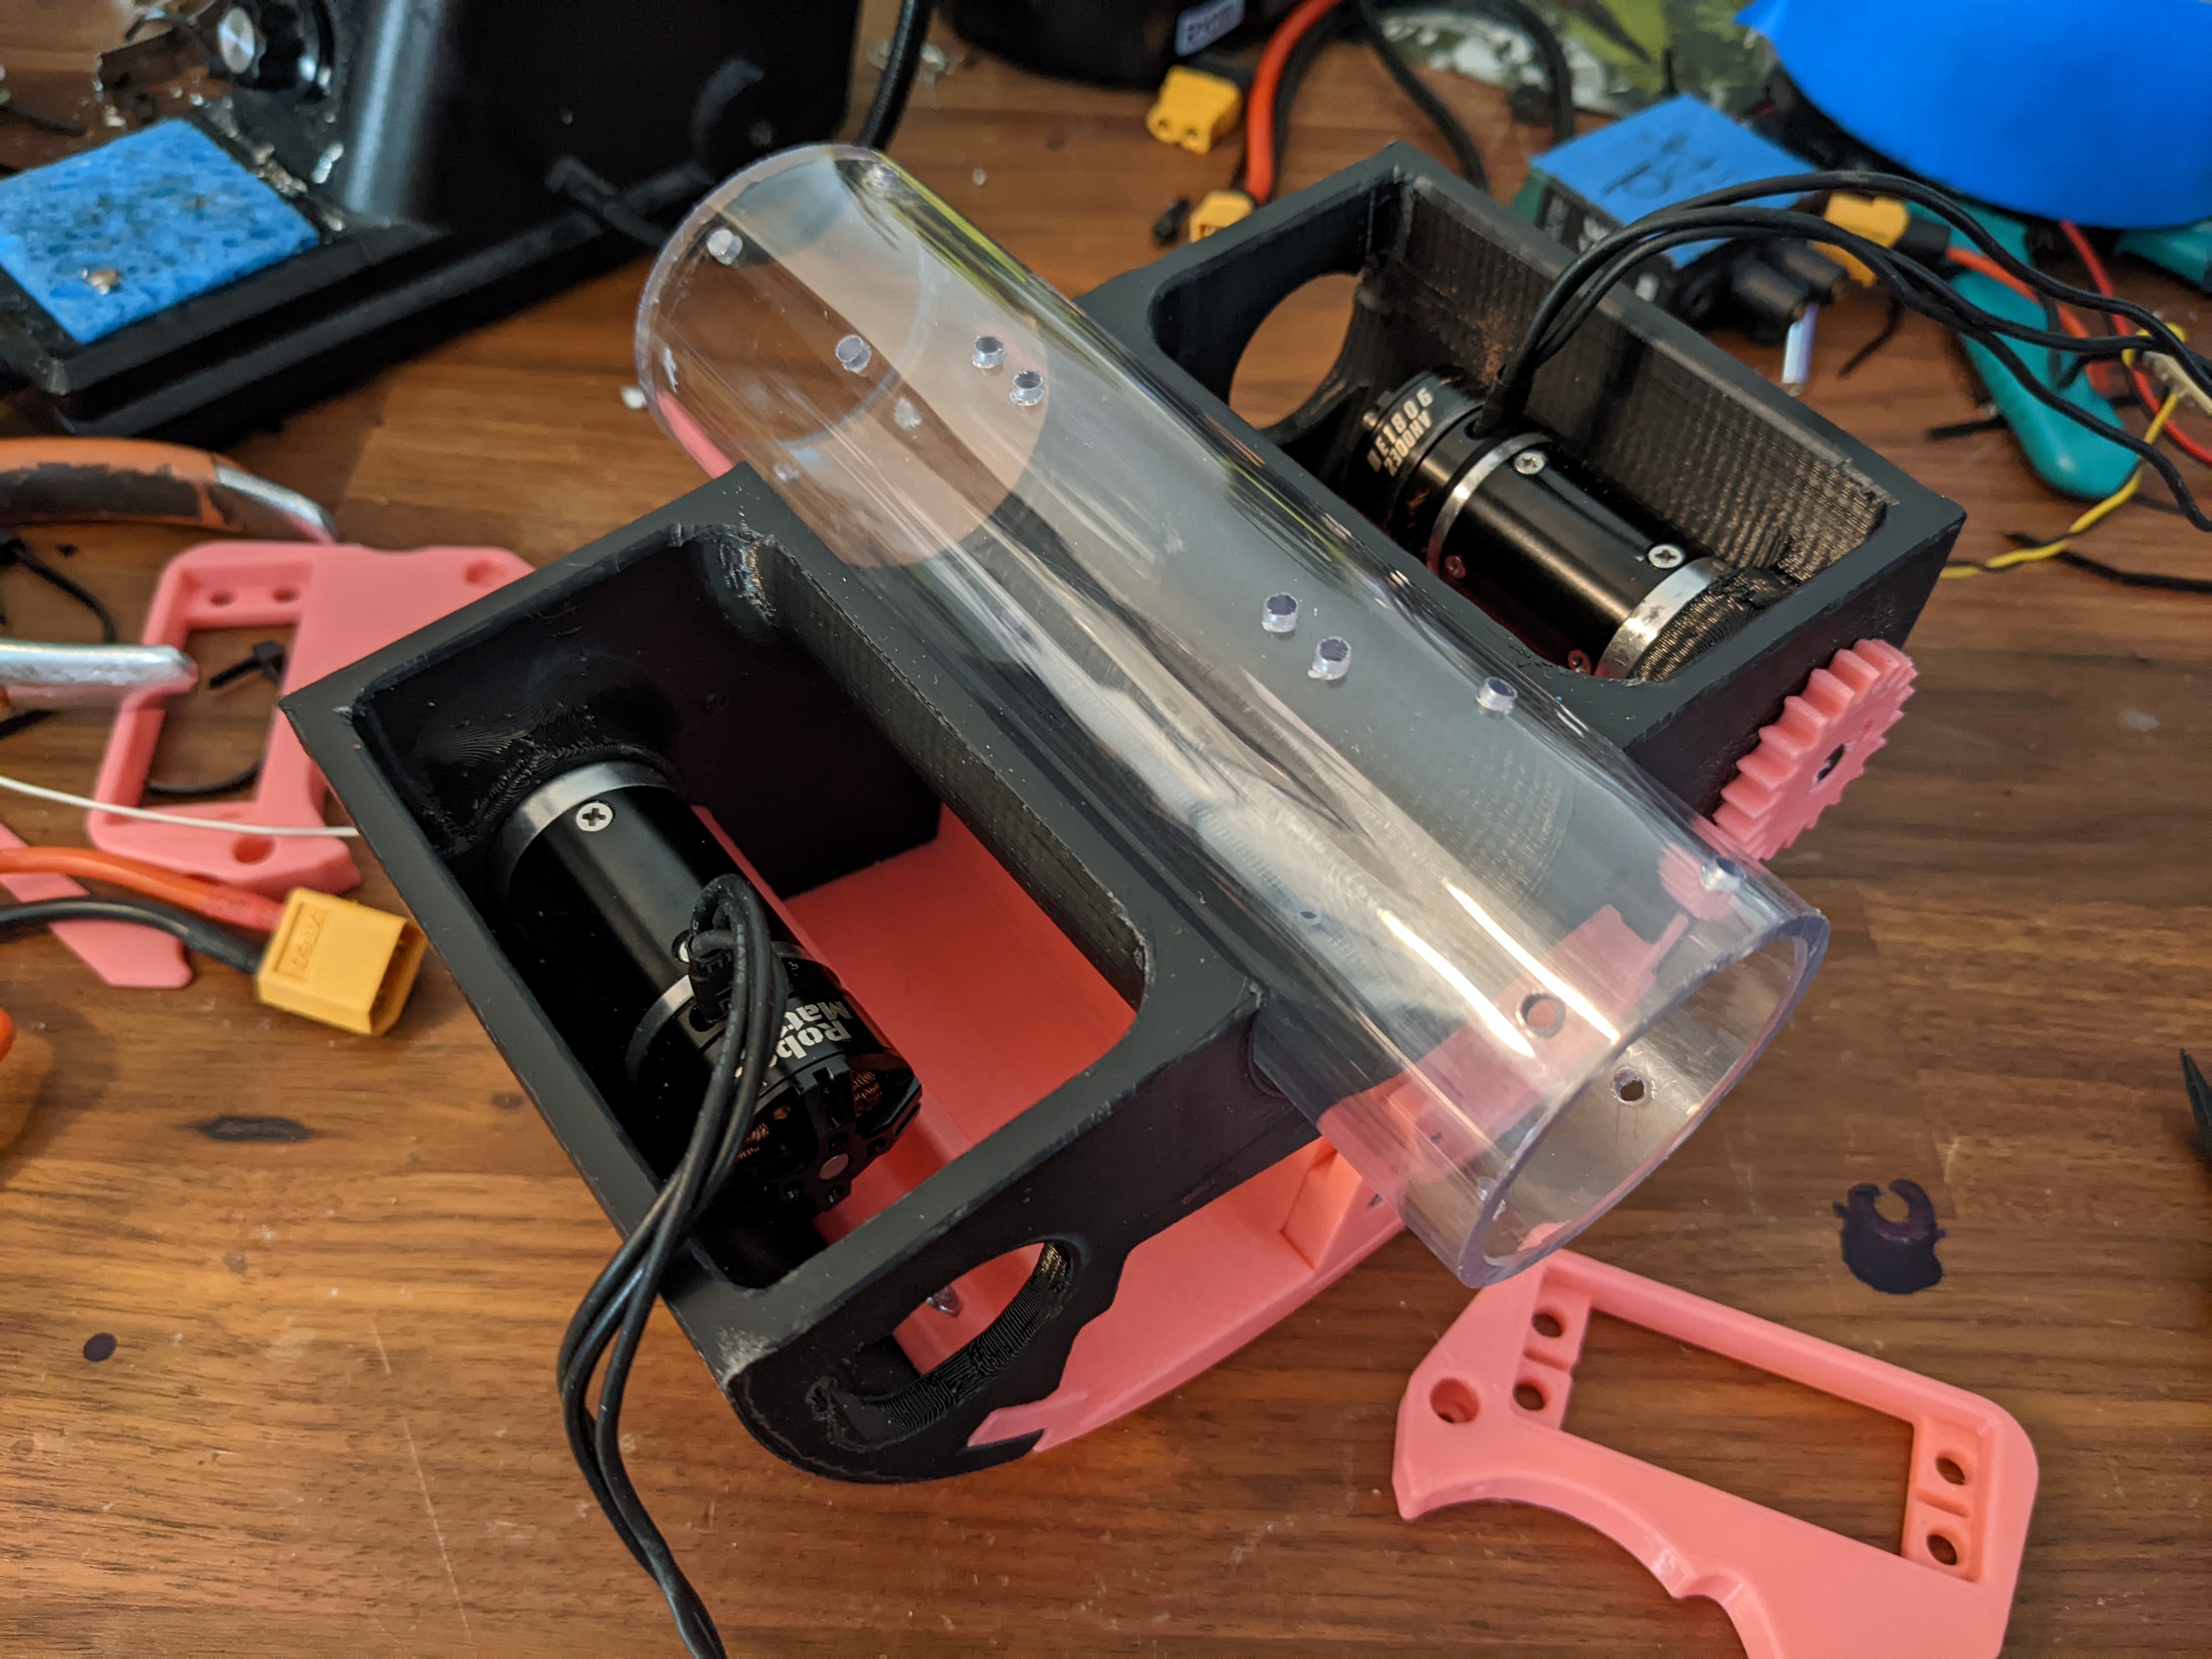

I got the outputs from the x8r hooked into the teensy and I pulled my PID class I made for EZ-Template. I found a library to interpret the mpu6050 and got some PID running to make sure I could get it running.
Changing the battery with the old holder required taking the wheel off which was incredibly annoying. I realized I could make the fake wheel removable and insert wheels along the front of the robot instead of the side. I started making a new battery holder out of some 1/16" polycarbonate I had.

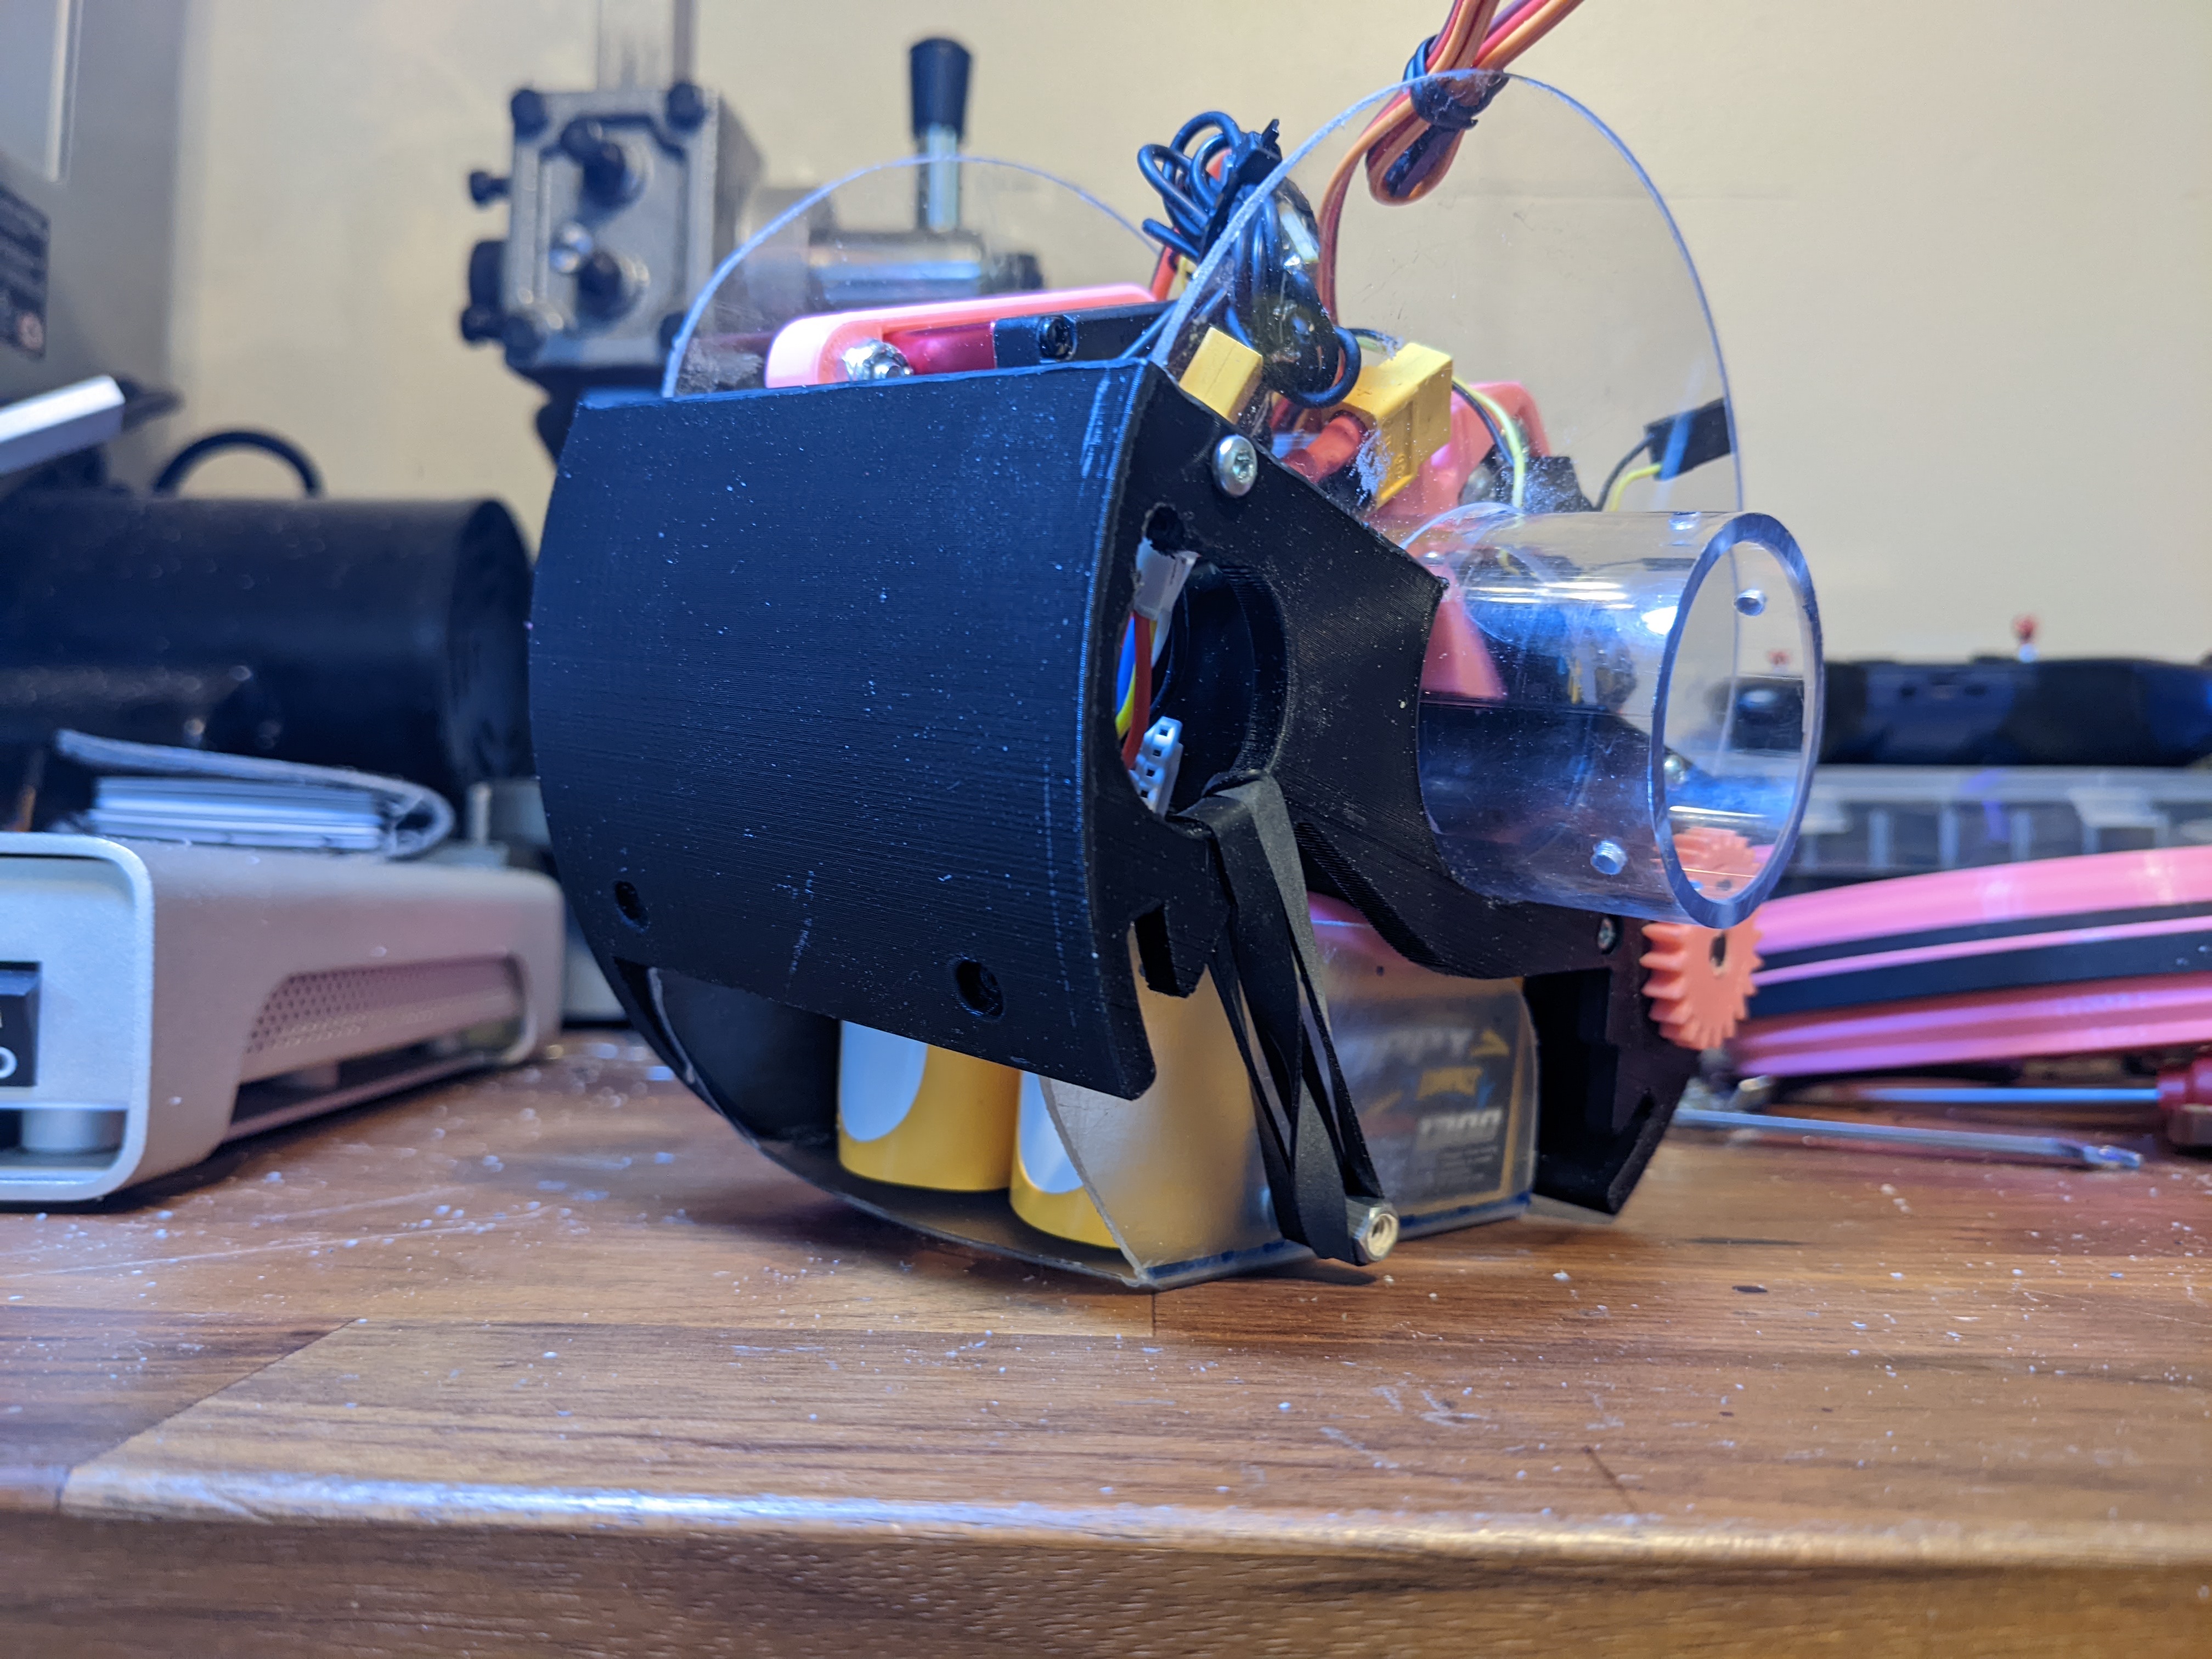
I won't show the picture here, but after I started testing PID on the robot fully assembled, the robot wouldn't turn off and in my attempt to turn it off my finger got caught in the gear. It ate a good chunk of skin off of my finger. I decided to take a little break before coming back to it, and need to think of some safeties to make sure something like that never happens again.
Open Sauce 2023
I didn't work on this project for ~3 weeks after it ate my finger. The next time I was running it, I needed to implement safeties to stop something like that from happening.
At Open Sauce I saw some self-balancing robots that used the same mpu6050 that I was trying to balance with which gave me more confidence that I could pull off what I was trying to pull off.
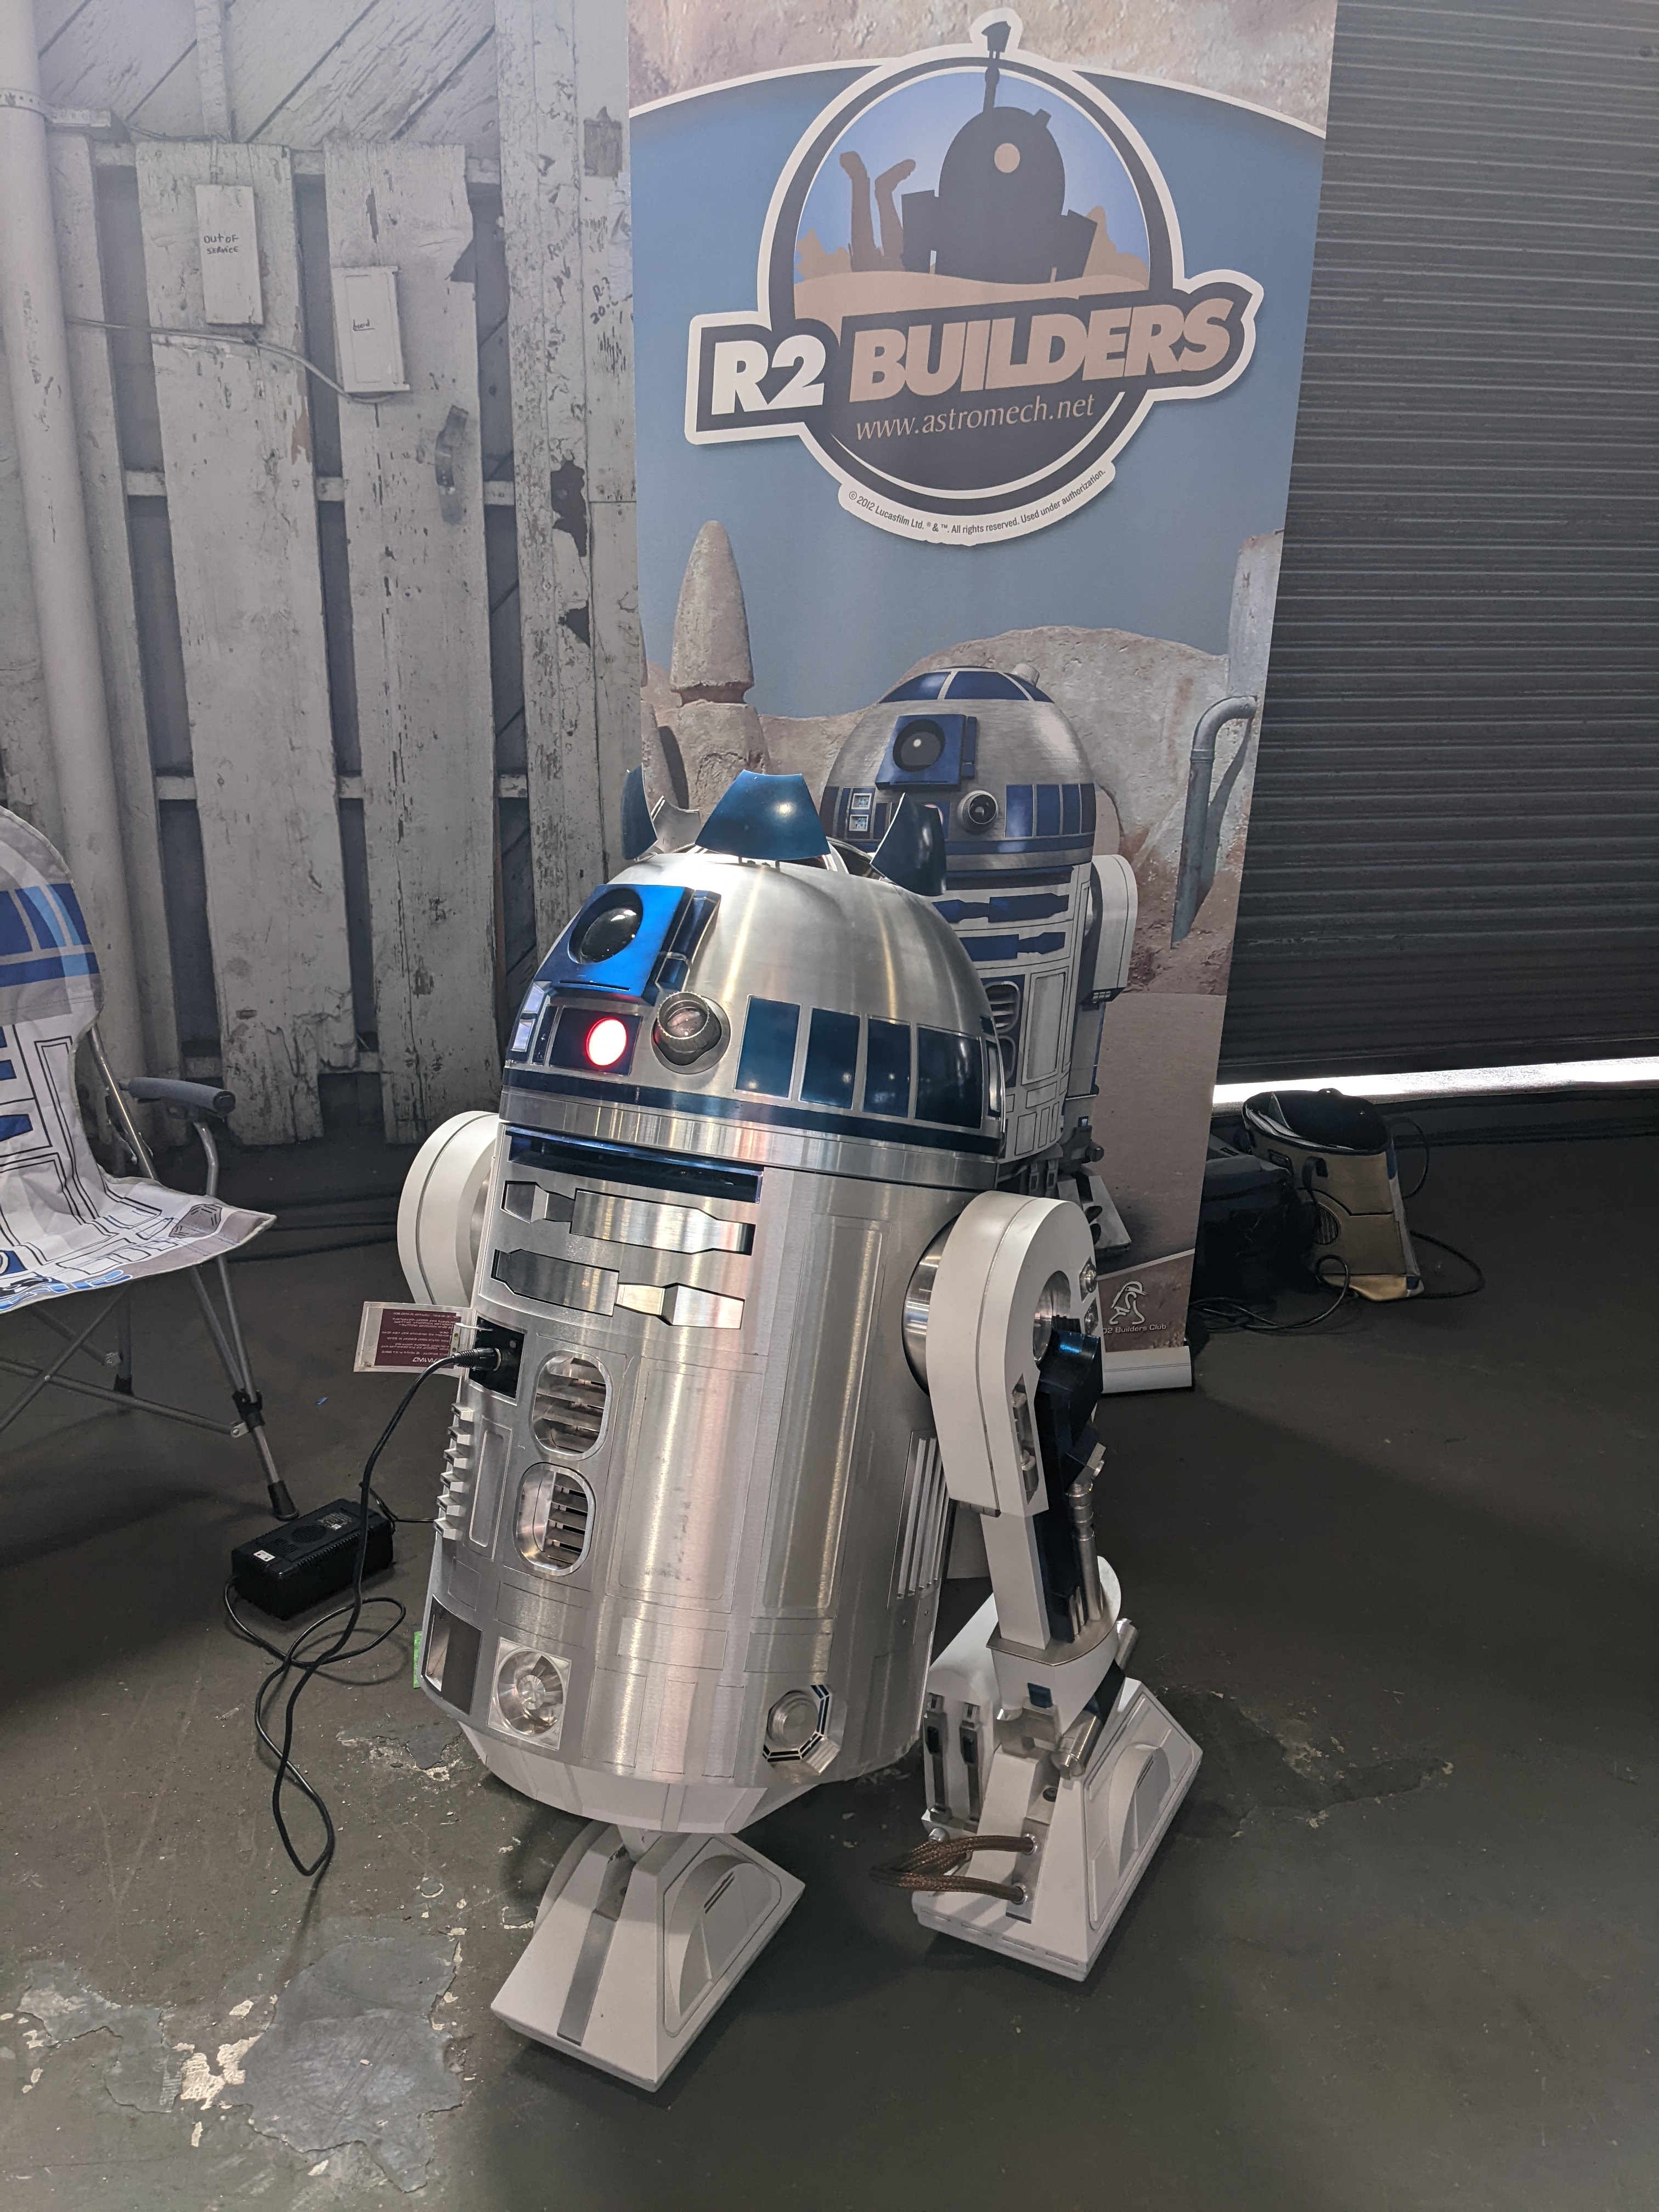
I also ran into the R2 Builders booth and discussed it with CuriousMarc. I remember watching his YouTube videos back in ~2016, it was very cool to meet him. He let me look inside the droid and we spoke for a bit. He told me to start simple before jumping into a larger project like an R2. I realized then I had to simplify this project to get it done and making the entire project rely on something I wasn't 100% sure would work as well as I hoped was concerning.
I started looking into drawings of droids and stumbled across this which feels so perfect. It has the D-O tire but adds arms, and the body looks like an R2 but the head is a BB-8. It seems perfect, and this became my reference photo for simplifying the project.

Long Beach Comic Con 2023
Goal: September 2-3, 2023
Plans
I saw there was a convention on September 2 and 3 and decided to sign up. This would be my deadline for getting the robot functional. I'd like to recreate the image the best I can.
A big requirement is for this robot to have personality. Nothing matches the personality of WALL-E, but I'd like to do as much as I can to give this personality. Something great about Chopper is the head tilt. It adds so many characters and it is something I'll be implementing in this robot.
The electronics plan is to use a Teensy 3.2 in the body and the head and communicate over serial between the two.
Design and Assembly
The first thing I needed to do was check the dimensions. I can't easily modify the width of the robot, so I need to make sure the width of the body looks about correct. I took some construction paper to see how I felt about it, and the dimensions I liked were the same as the scaled dimensions from the reference image. Moving forward I'll just grab dimensions from the reference image.
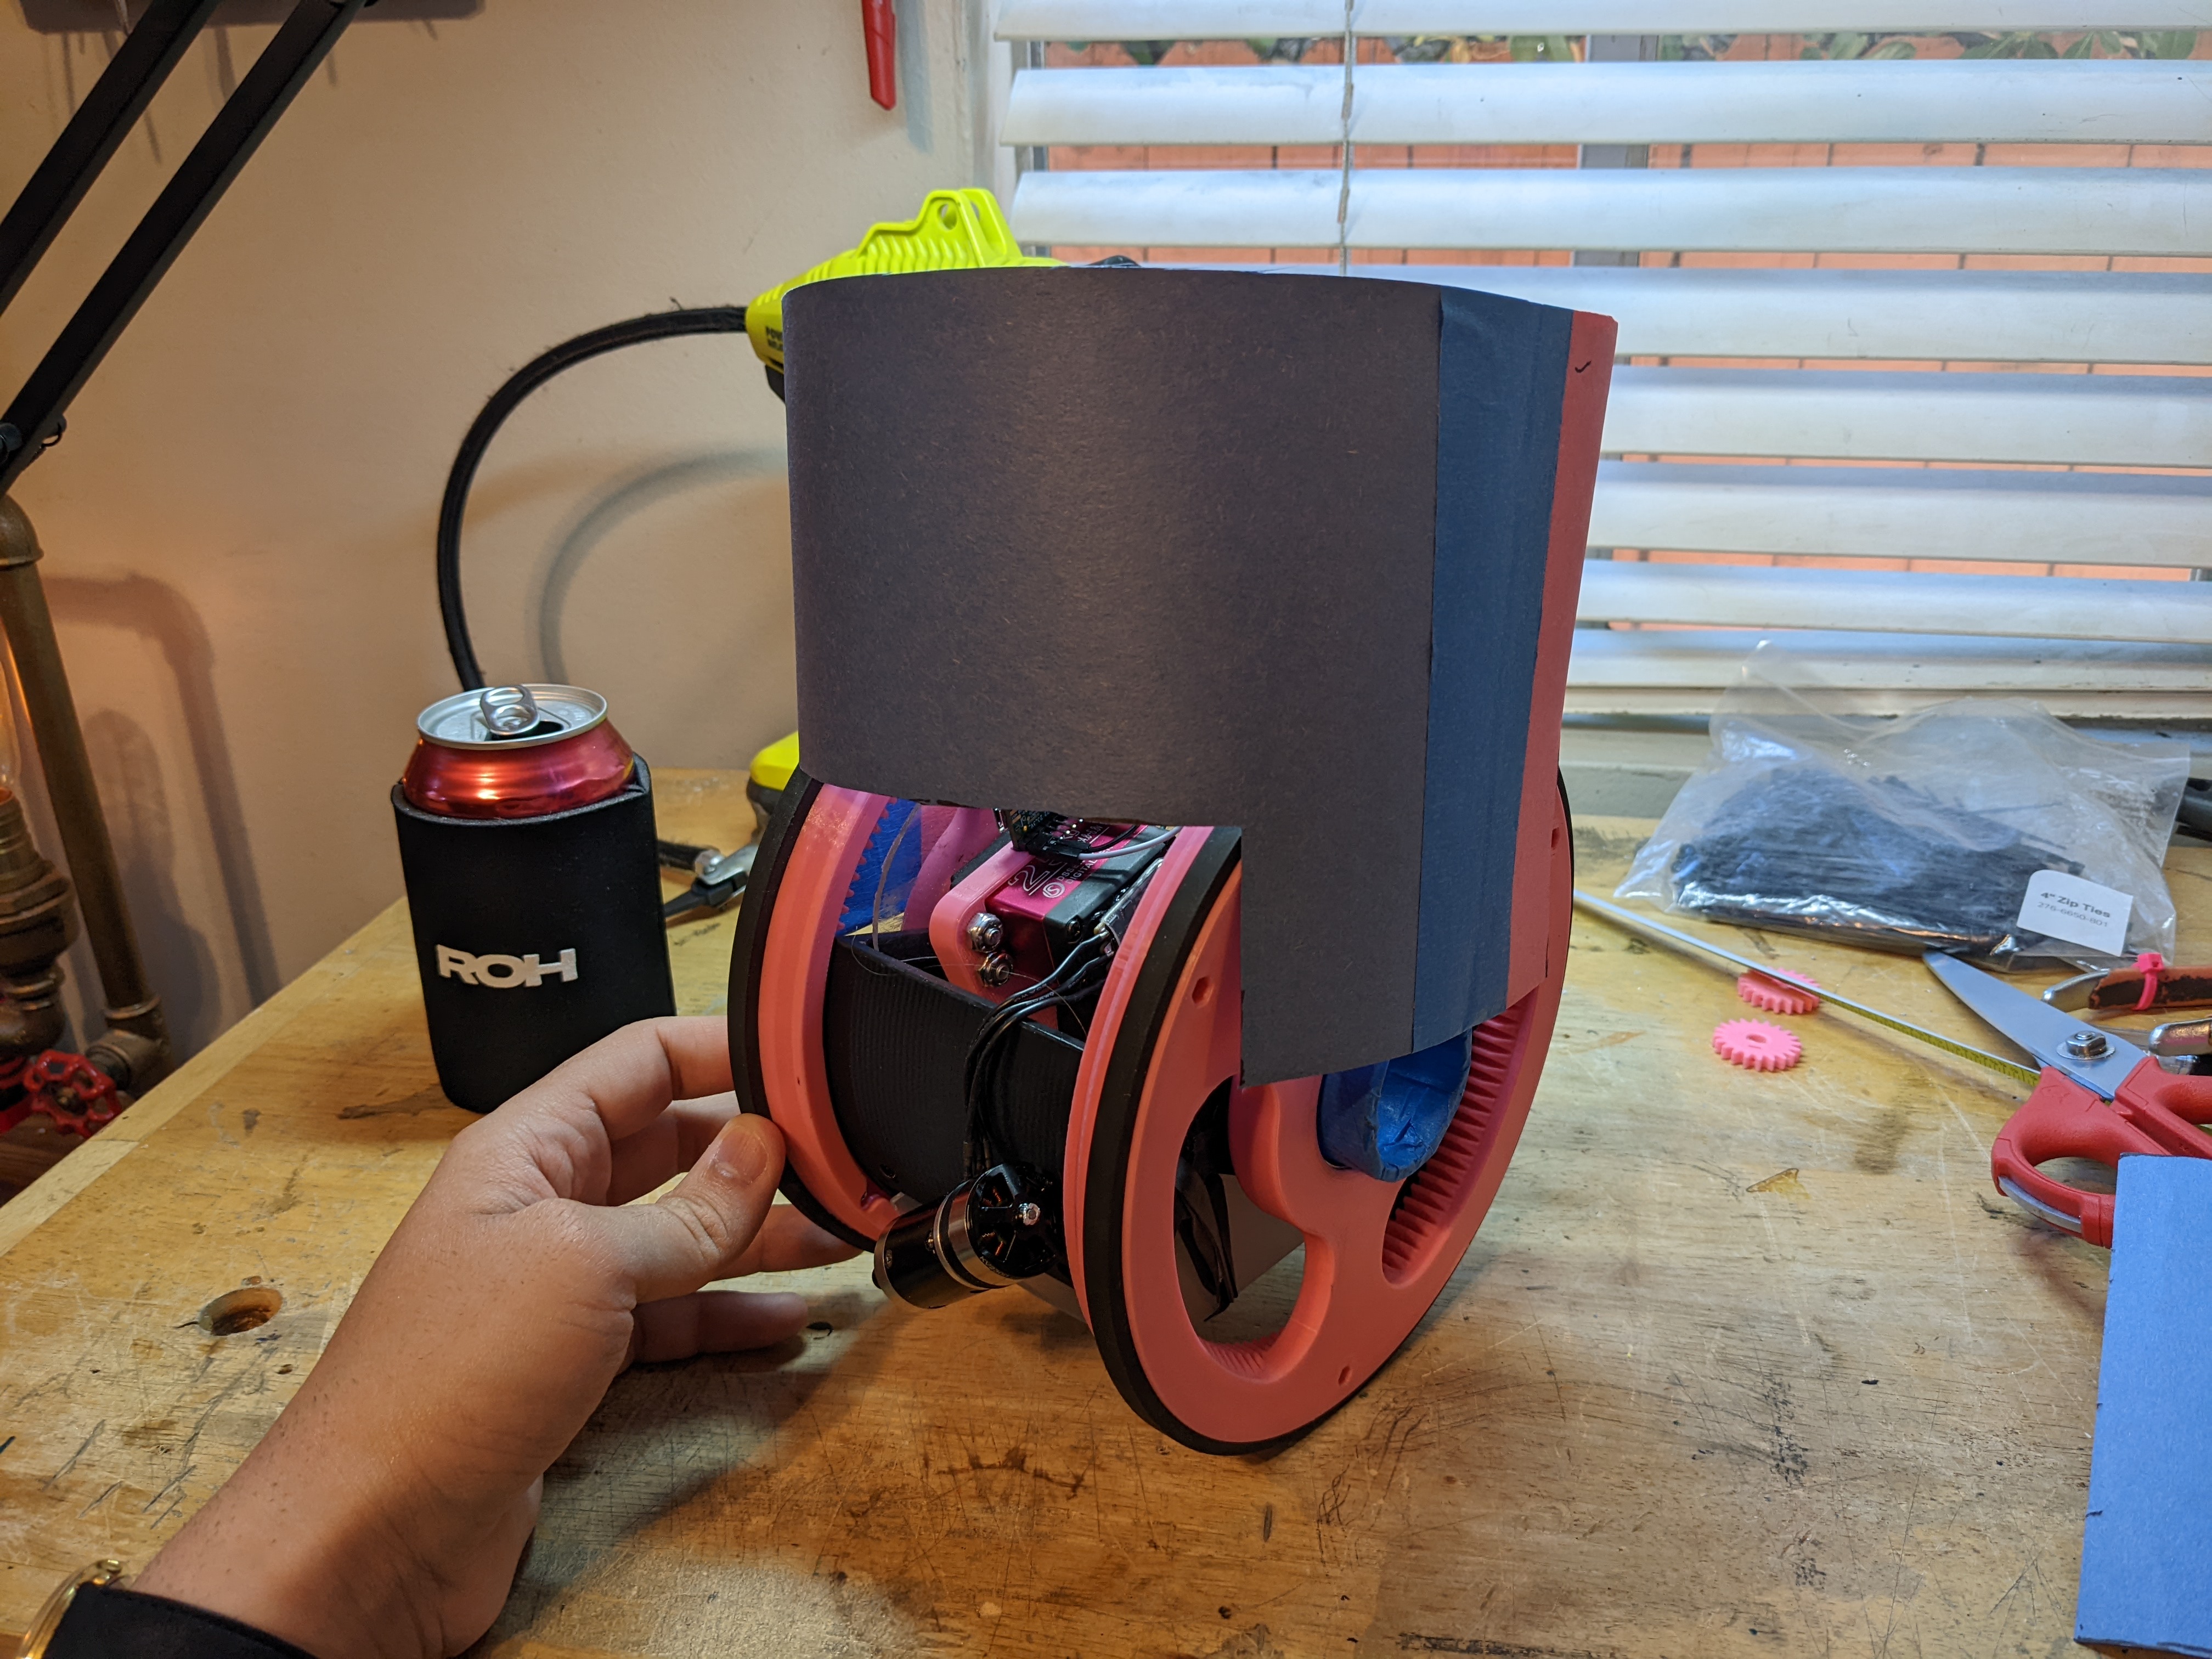
The main challenge with this is figuring out how to have a structure above the wheels that gets covered by the body. I decided to build a T inside the robot where the edges of the T will sit above the wheel. I replaced the servo mounts with a shoe-horn-like piece that has a 1/2" aluminum angle gets mounted to.
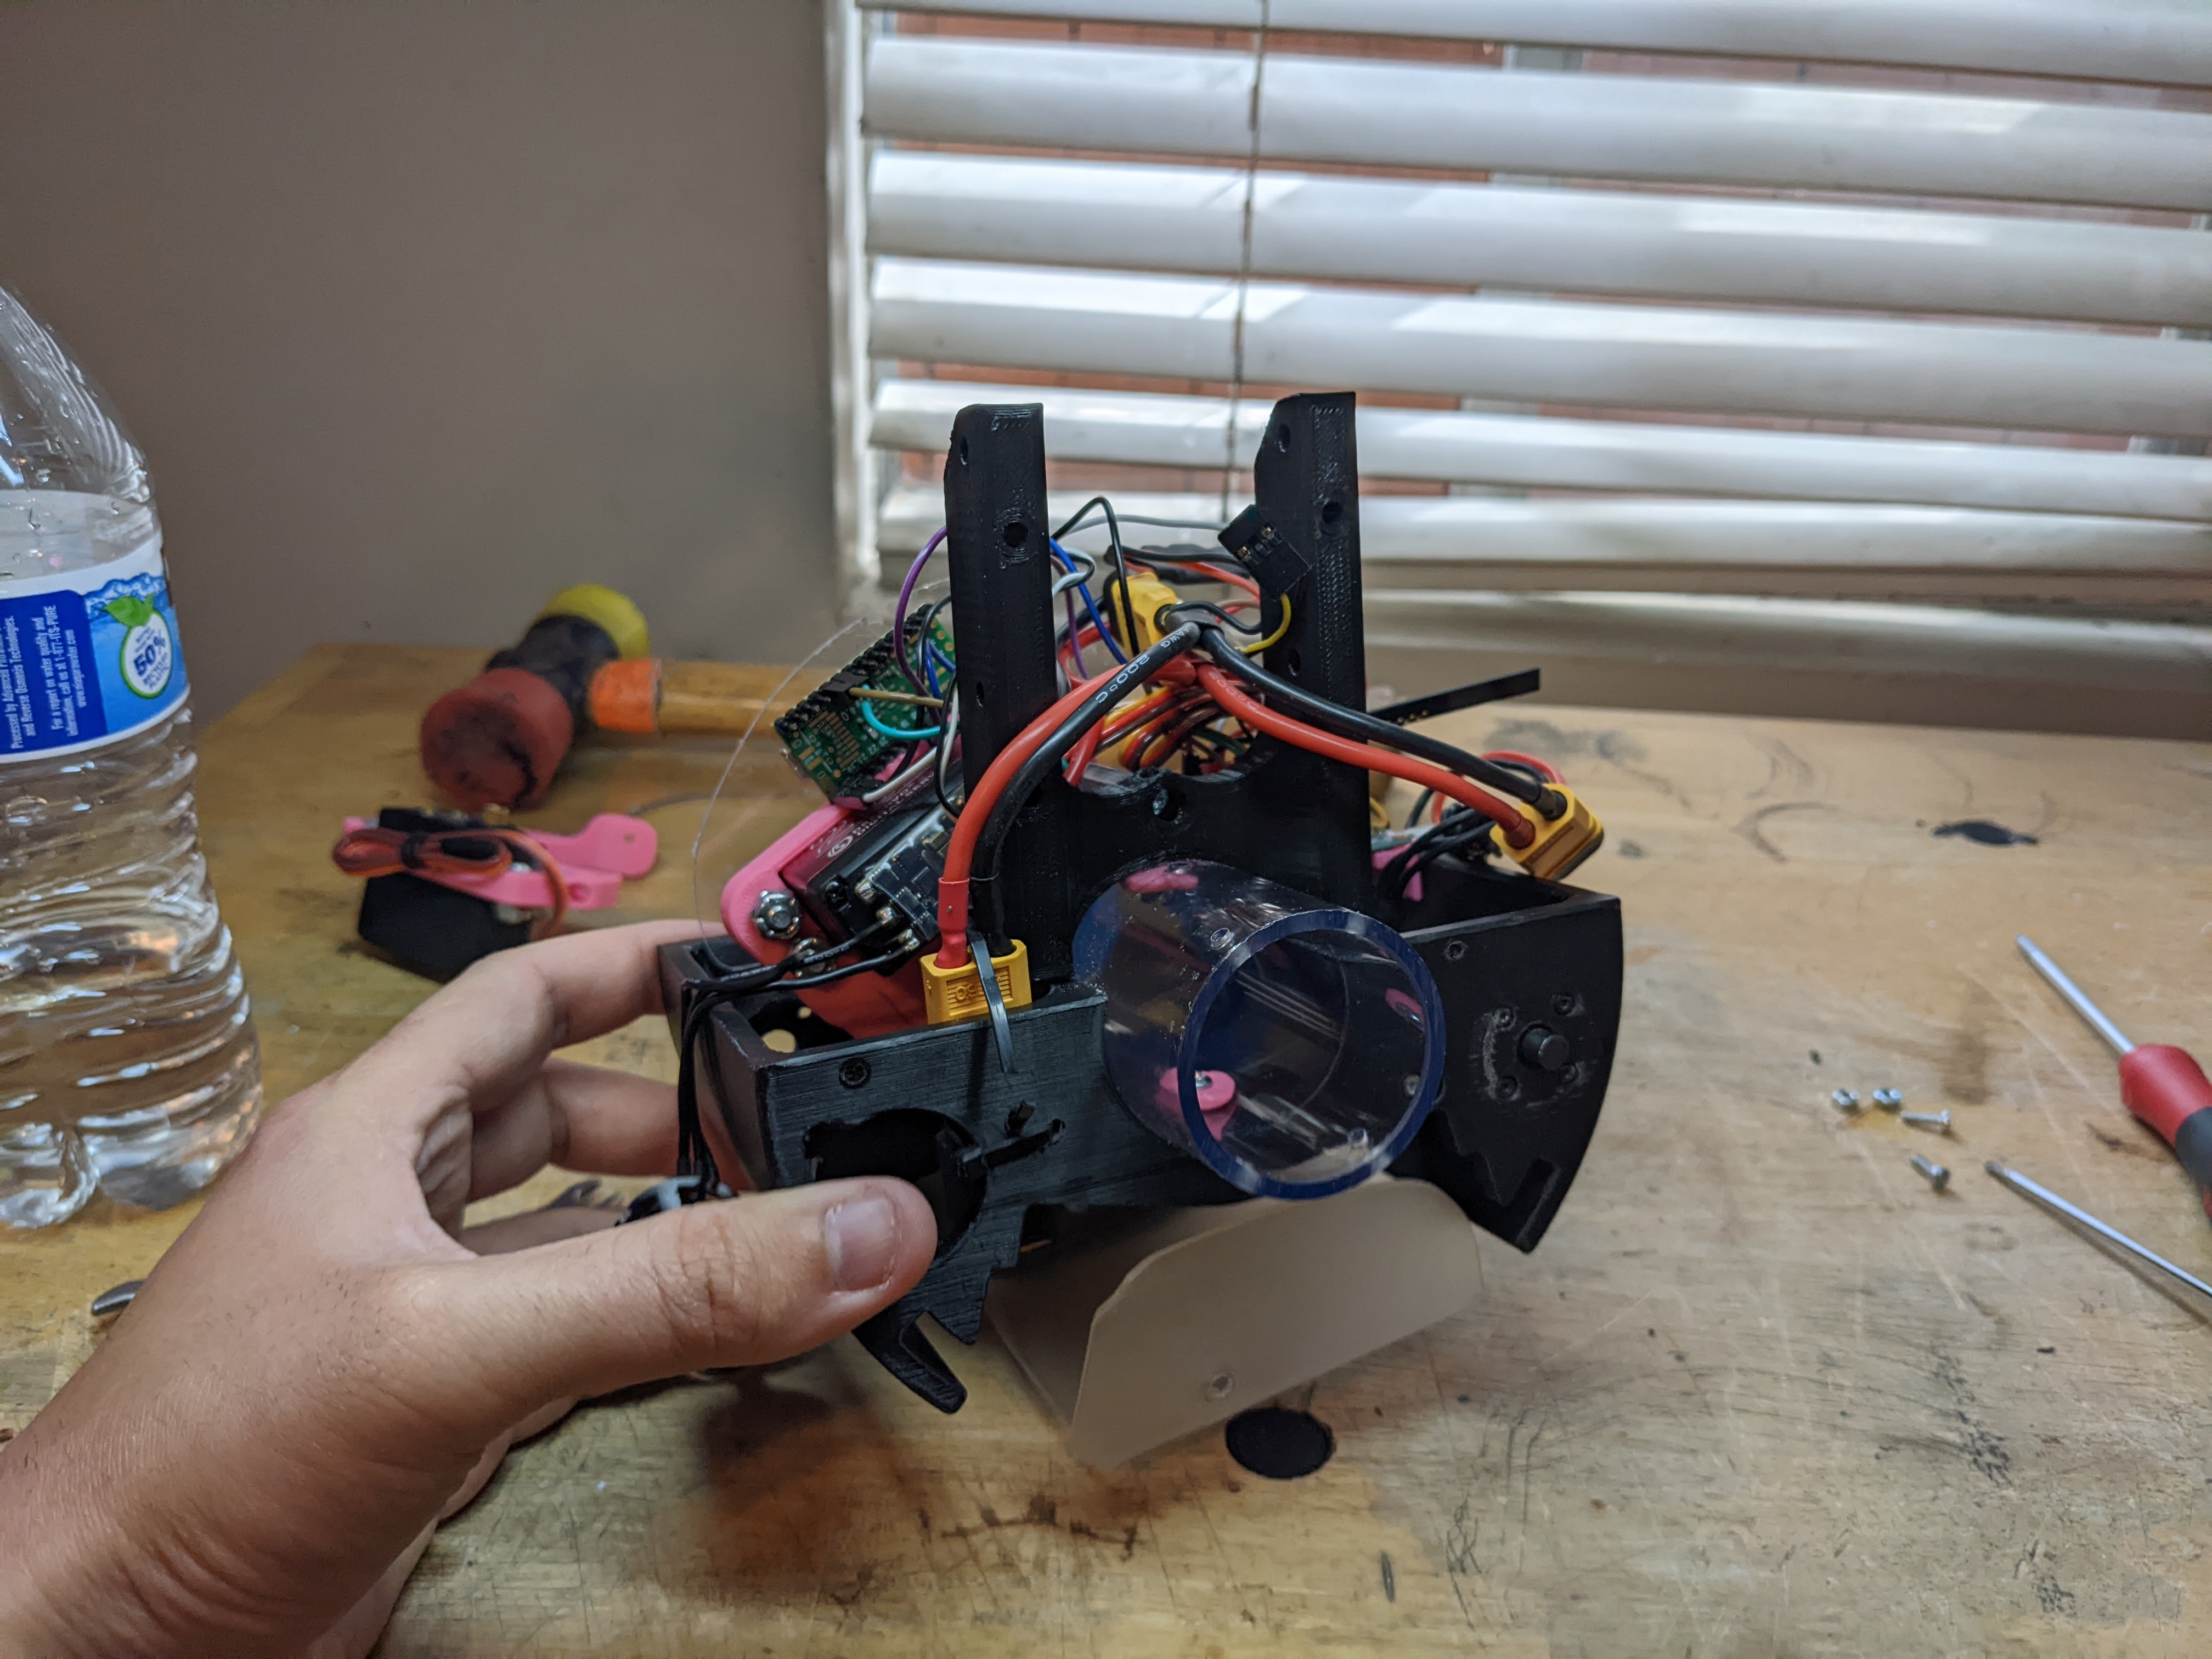
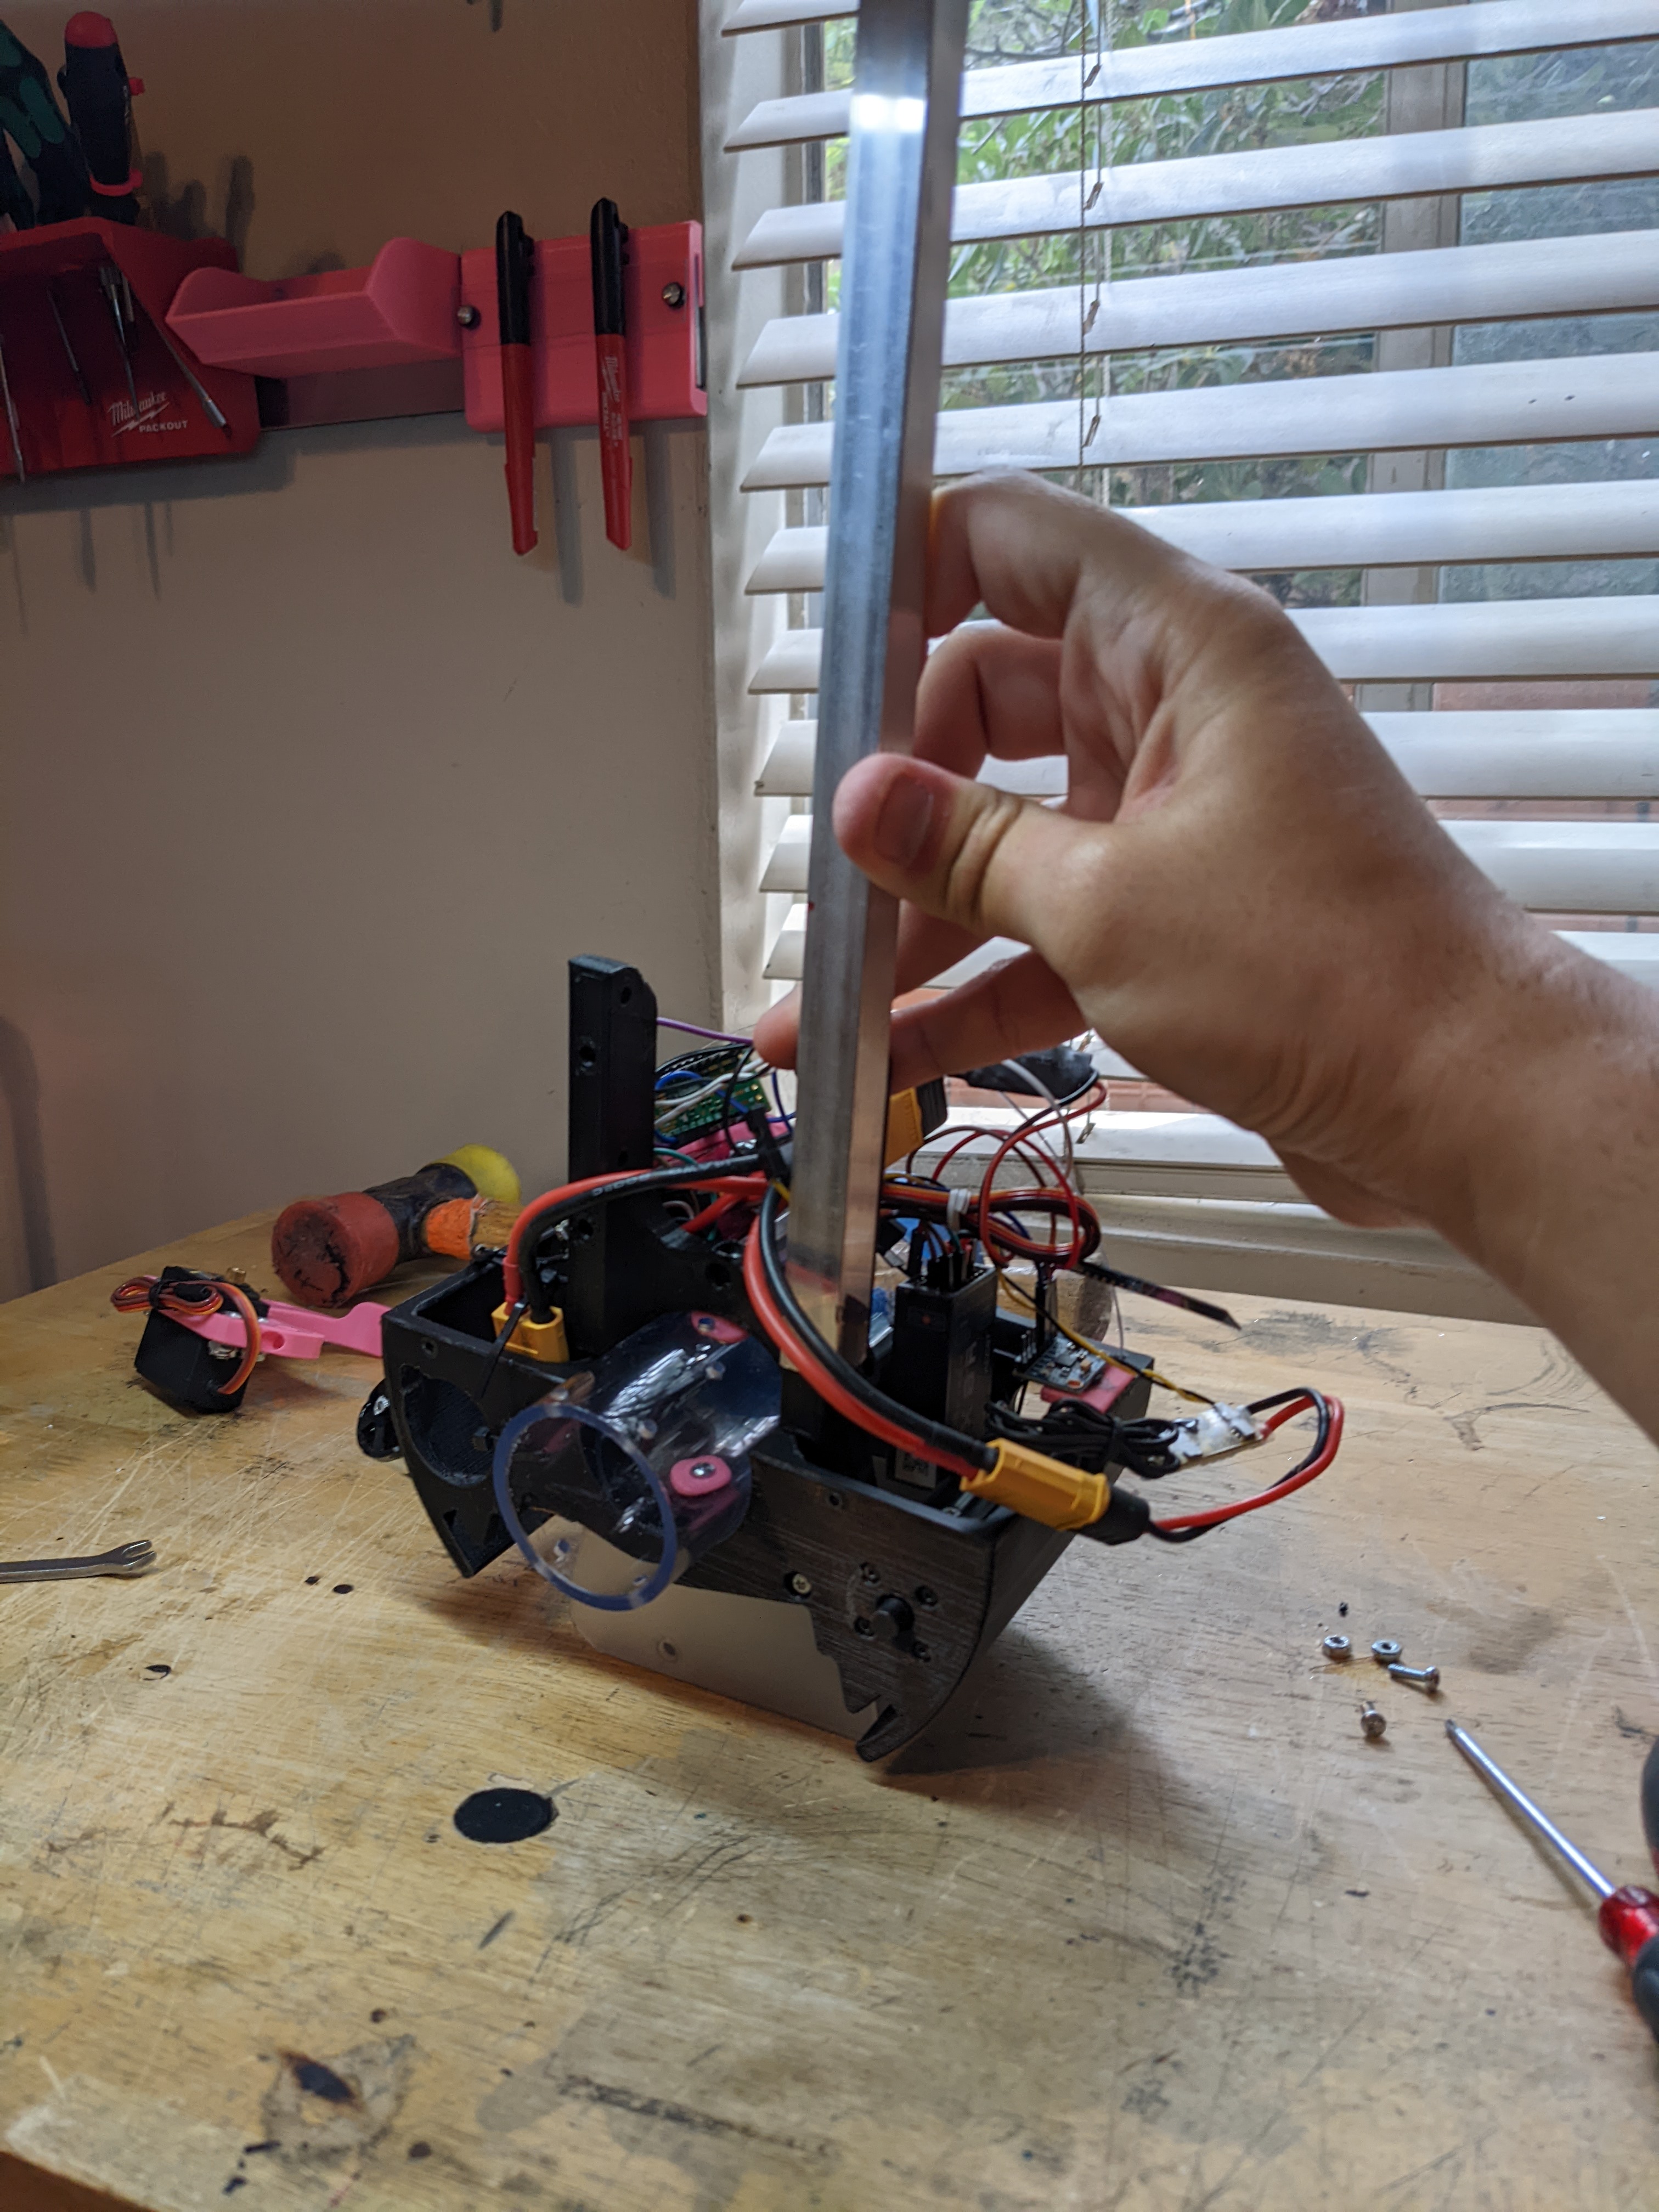
The legs needed to get mounted diagonally and needed a mount at the end of this T structure. How this piece is designed changes how the T exactly gets made so I decided to design this first. This has captive nuts and sits inside of the 1/2" angle. I also needed to make sure there was space at the corners for the body to sit, which distances the length of the arms on the T.


Through this, I also realized that any decorative cover that goes over the wheel is affected by this. There is a limit to the thickness of it based on the leg mount shown above because there is a slight overhang on the leg mount to the wheel. I made a test wheel cap to make sure clearance is all good.
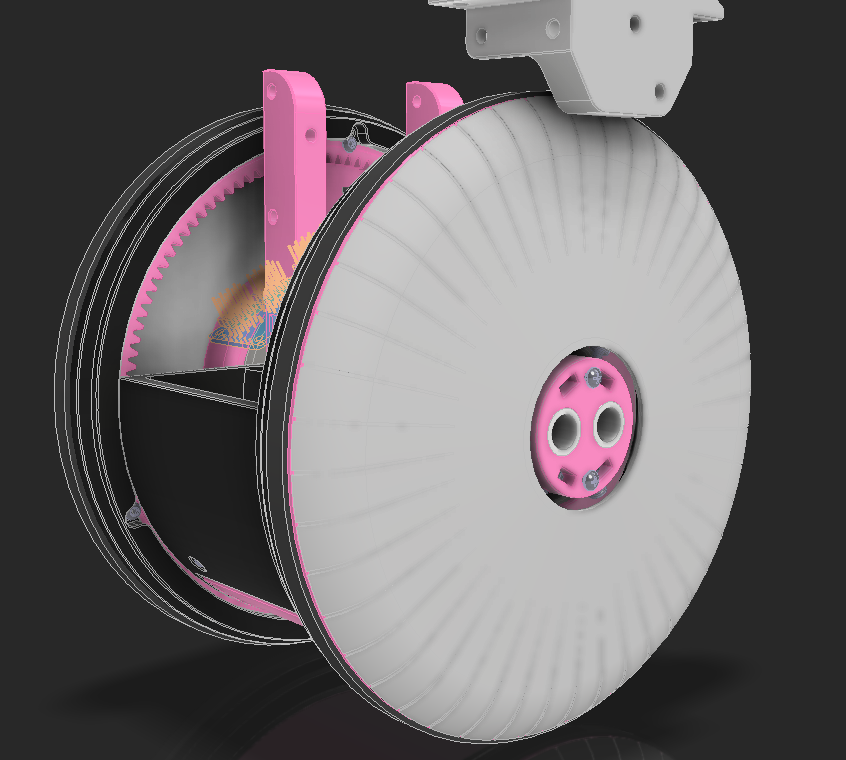
I got a little too into it and ended up designing a wheel cap more and I printed it to see it. This will become the first part I play with finishing and making it look like it's not 3D printed.

I got both servo mounts replaced with the new horseshoe pieces and got all 4 pieces of angle on. I have screws going through in multiple axes and have standoffs going between everything to make sure it stays square.

Because of the orientation of the angle, I had to flip the leg mounts upside down to what I originally wanted. When comparing how the new dimensions lined up with the reference image, it all looked the same. So this was ok and I left it.
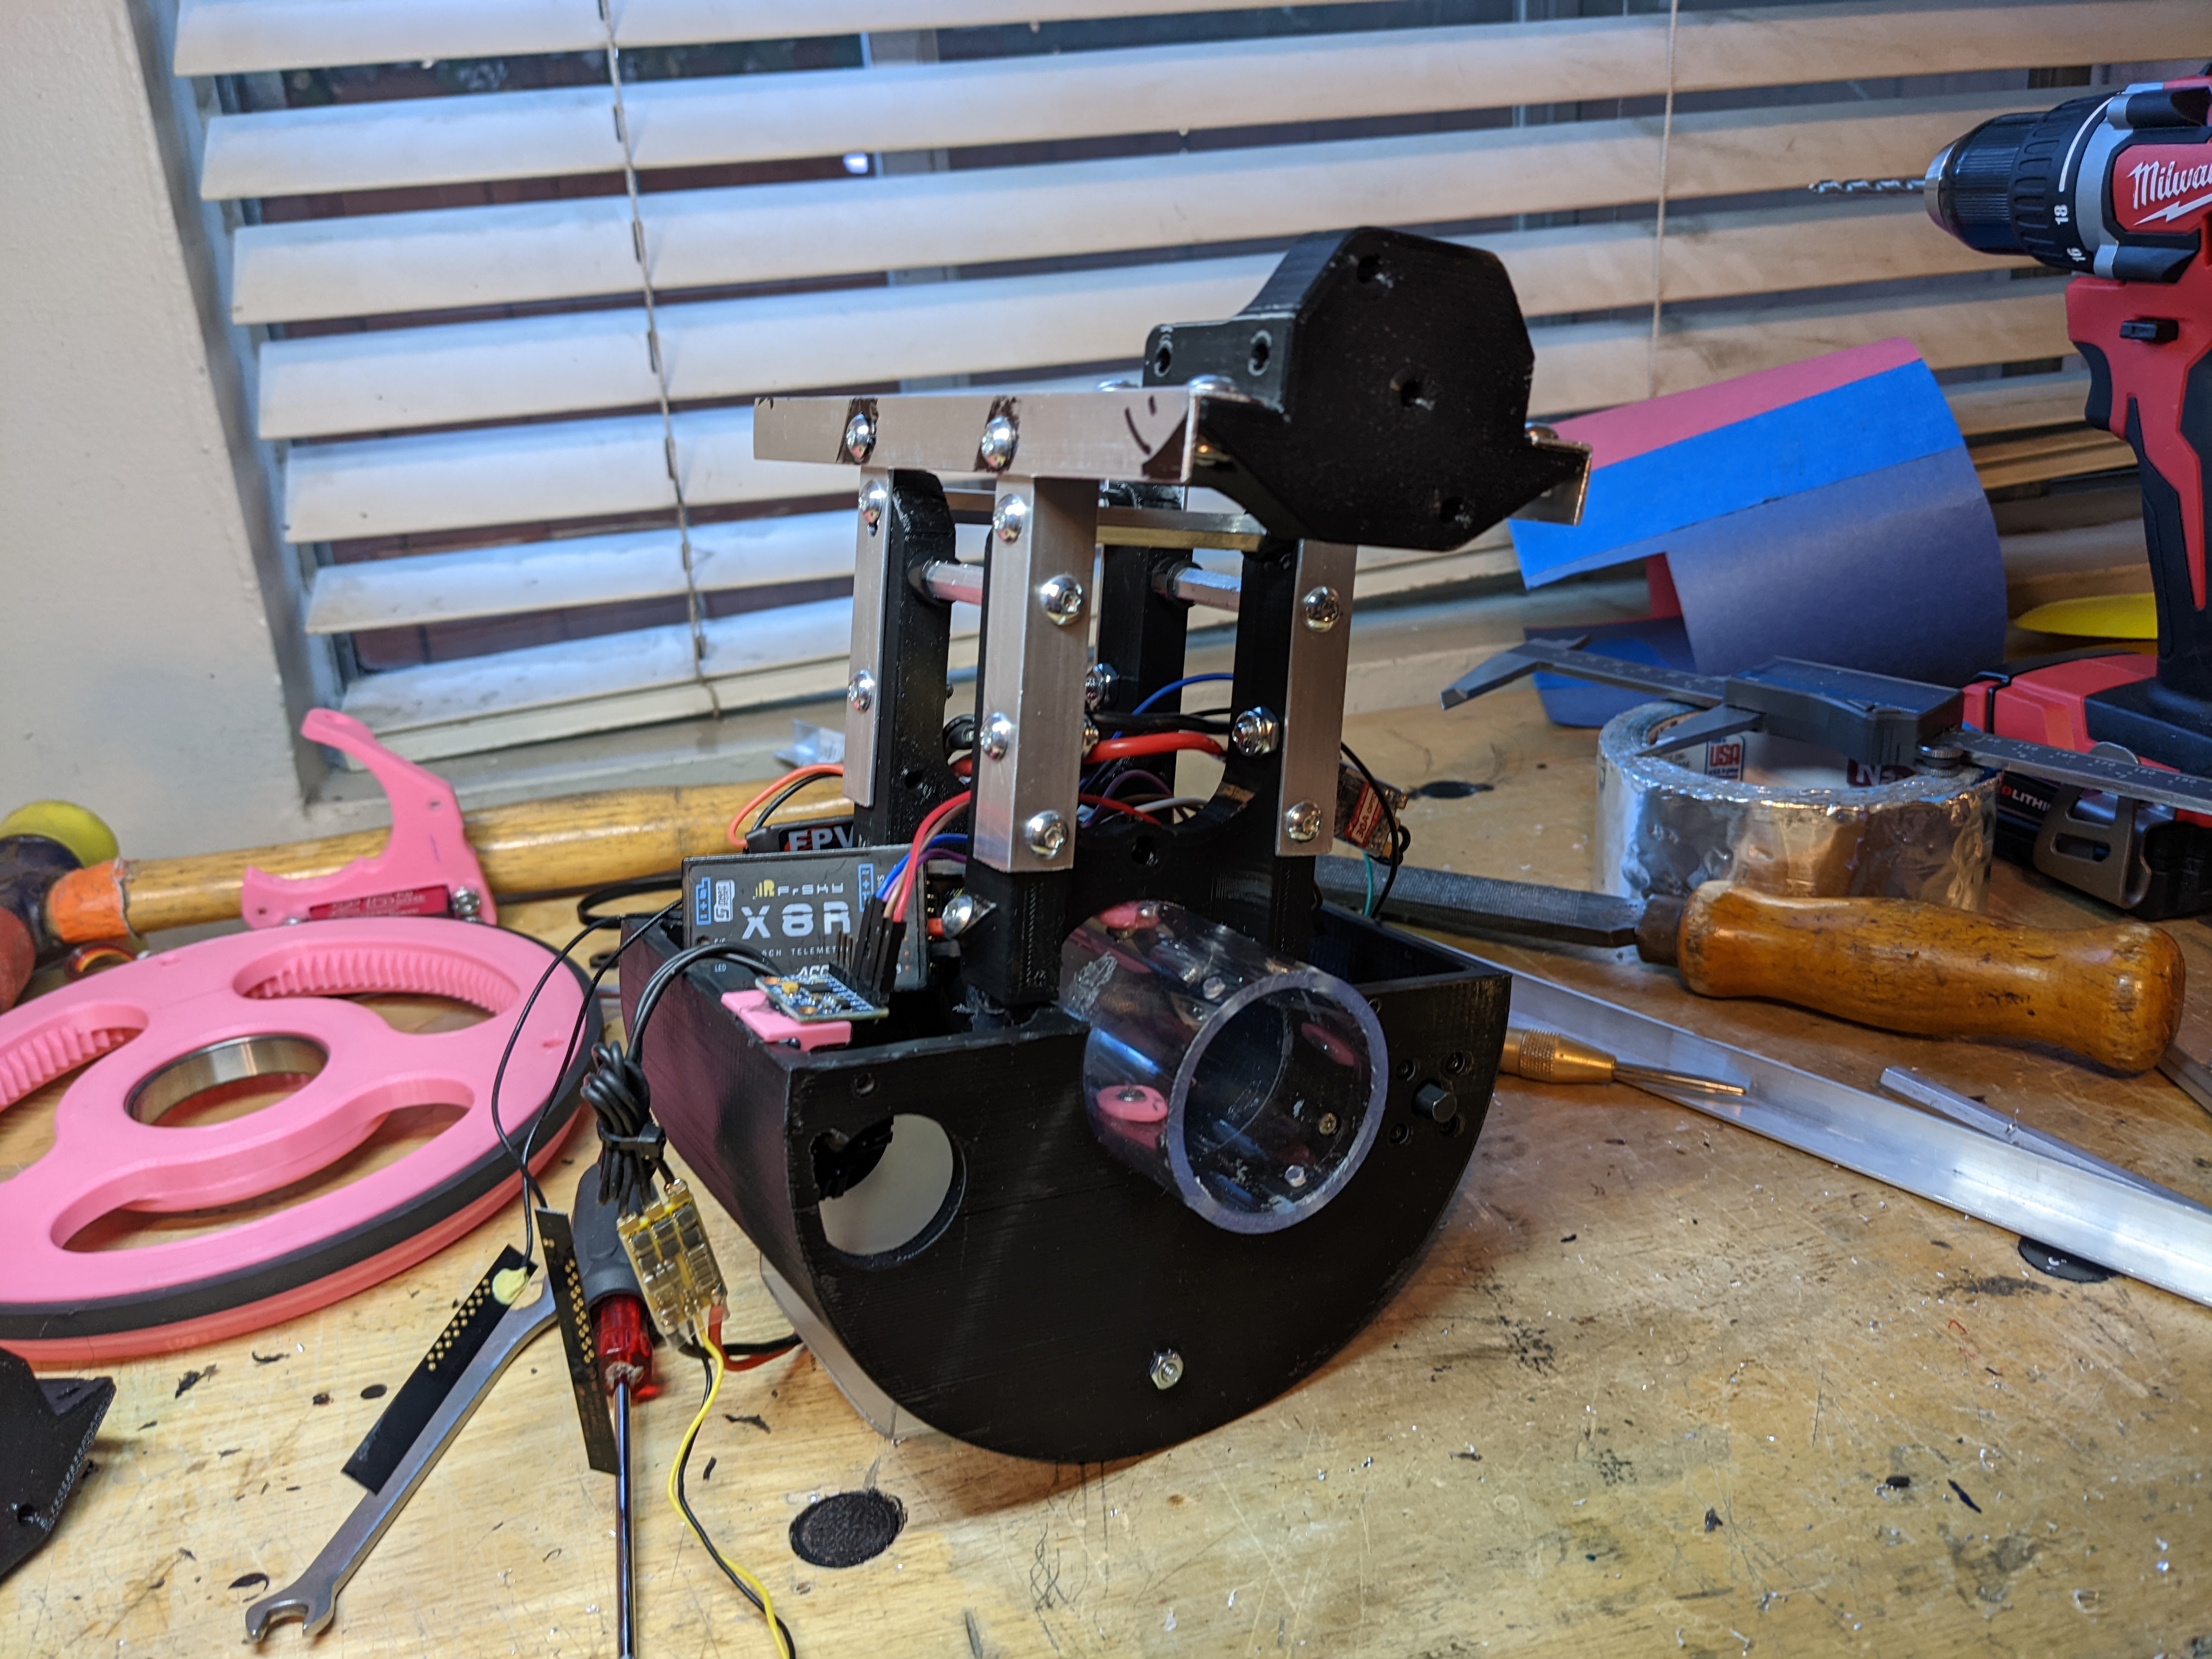
Working on this with 1 wheel became increasingly annoying as more weight was added higher up. I would need legs on this if I wanted to easily continue work on it, so I needed to figure out how the legs were going to be made. I sanity-checked the angle of the legs and this feels correct.

The legs are 1/2" aluminum c-channel that I cut out the center of to have the wheel sit. This wheel is temporary as I come up with a better aesthetically fitting design, but works for testing functionality and stopping this from falling over.
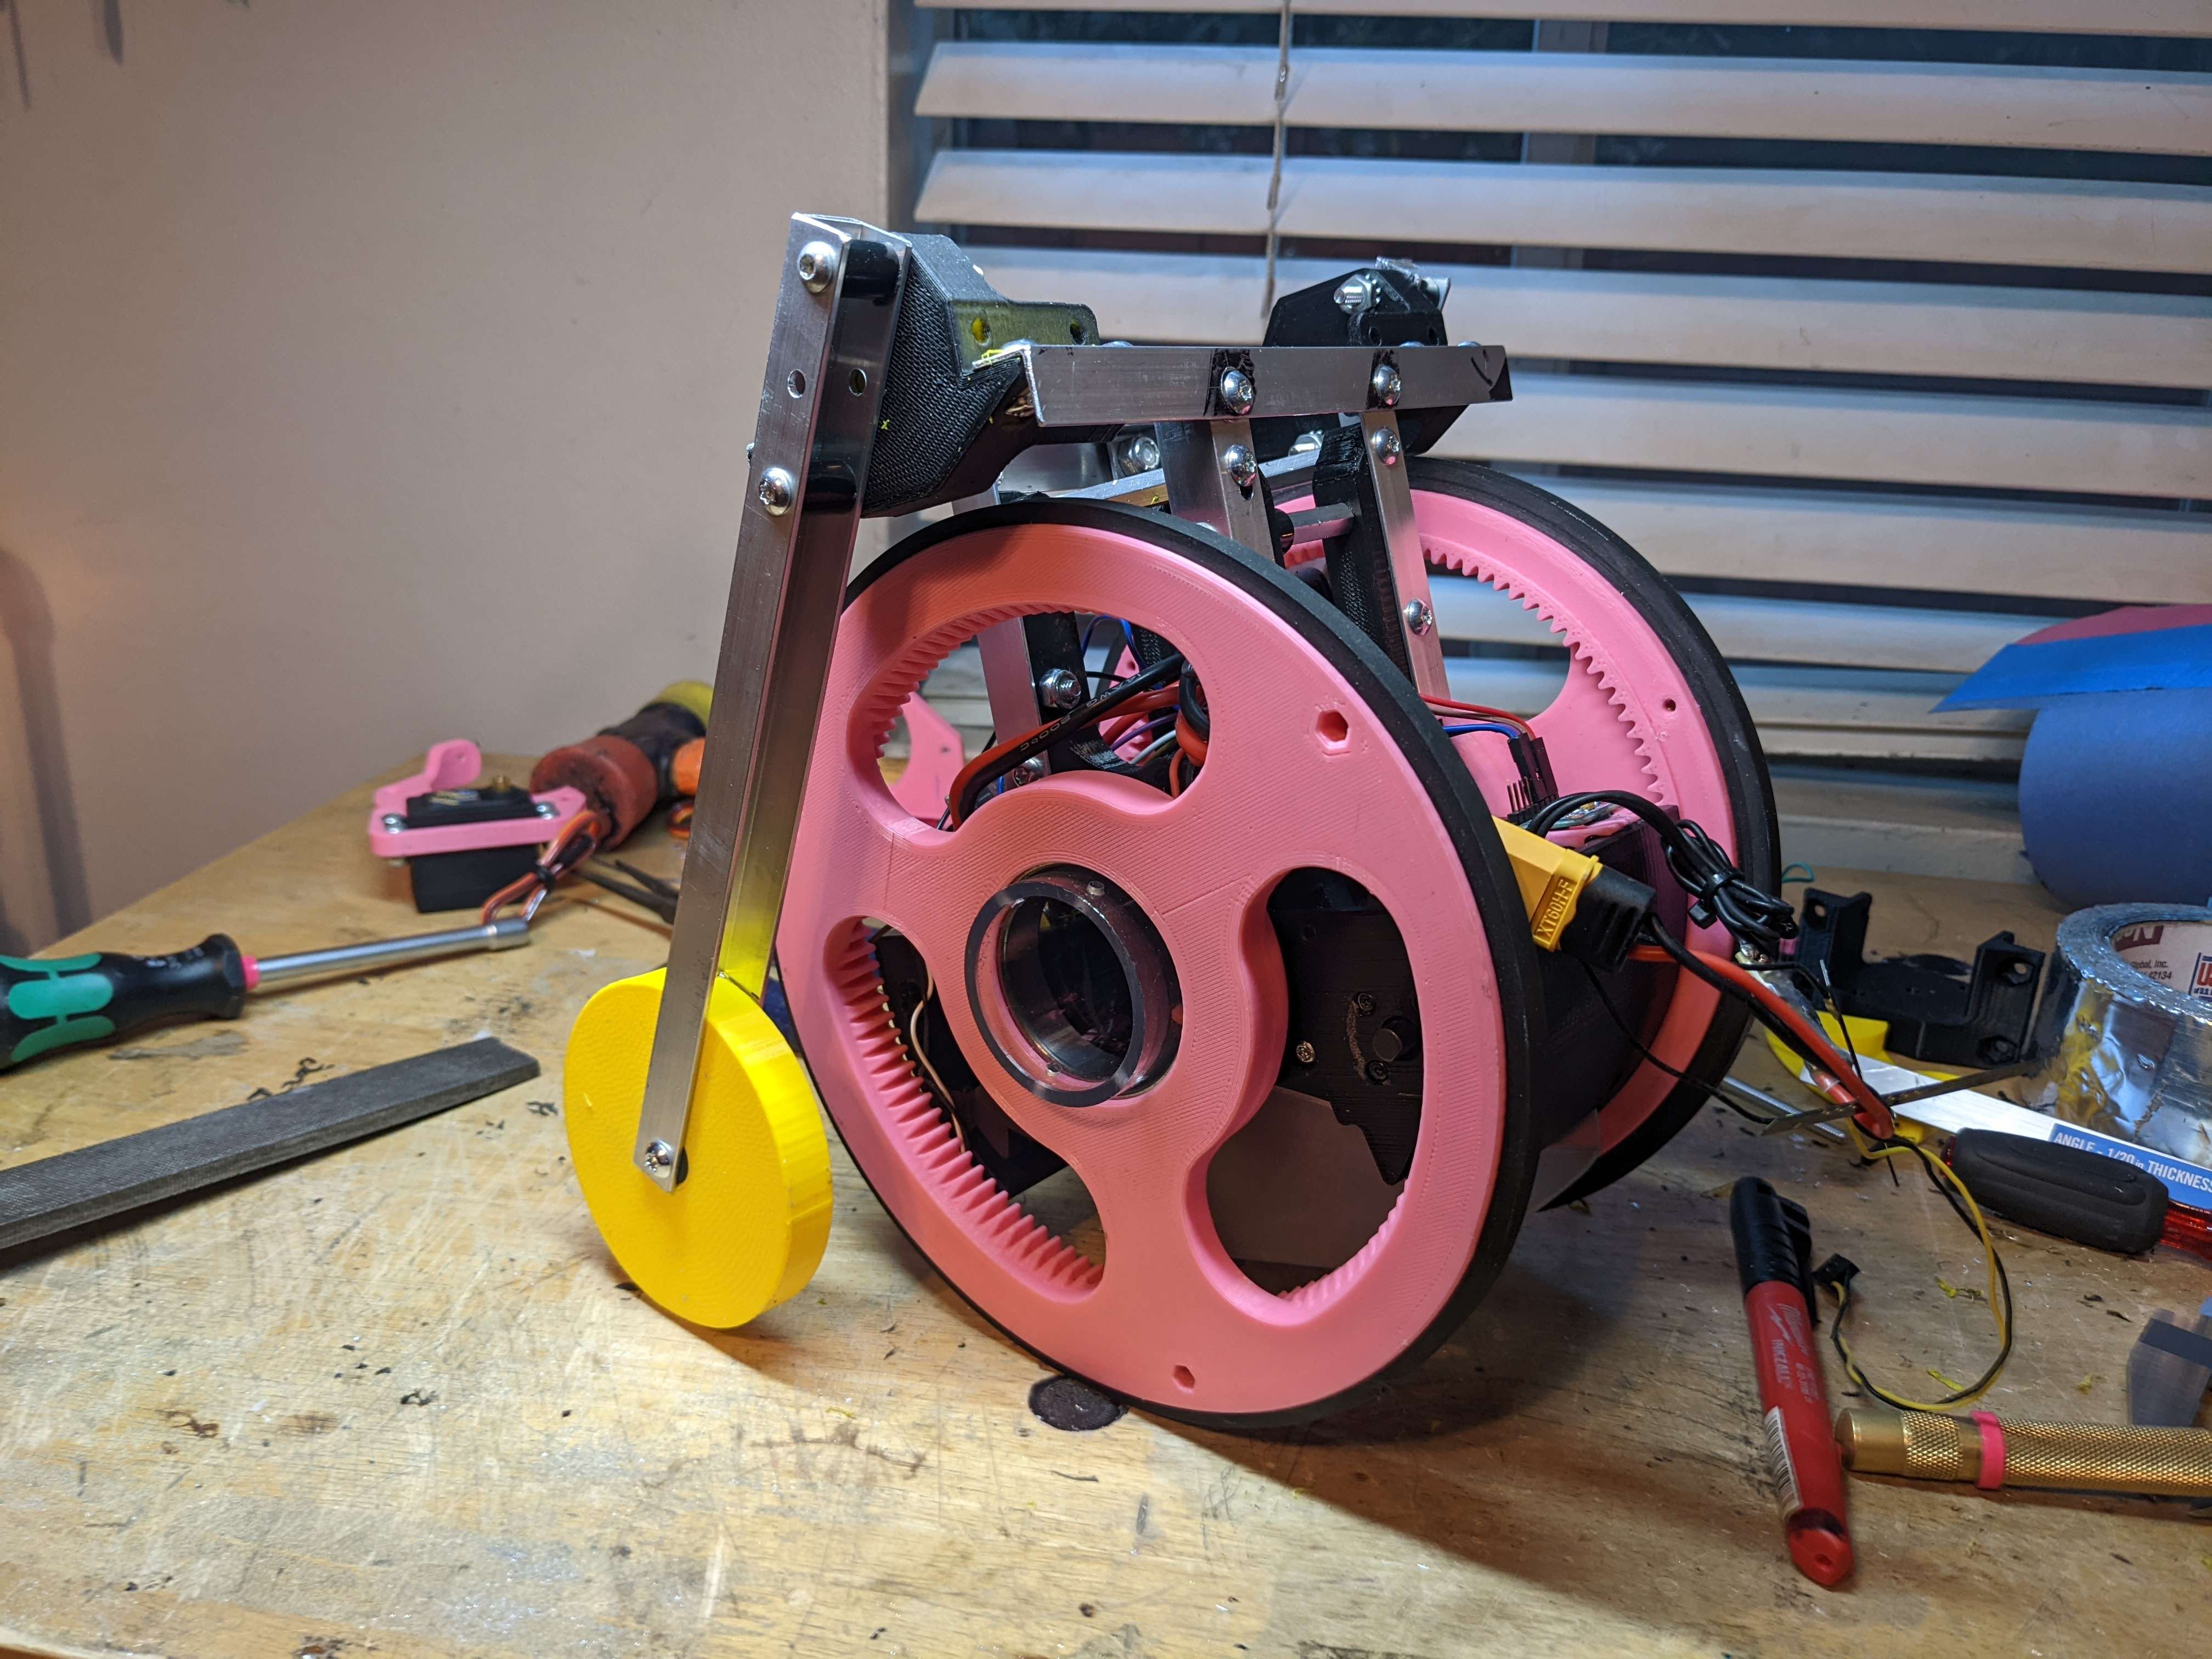
I was on/off sanding and painting the wheel hubs. I very quickly learned how important and annoying sanding is. I ended up with something that I felt was good, and I'd be doing this much more throughout this project and would get better at this.

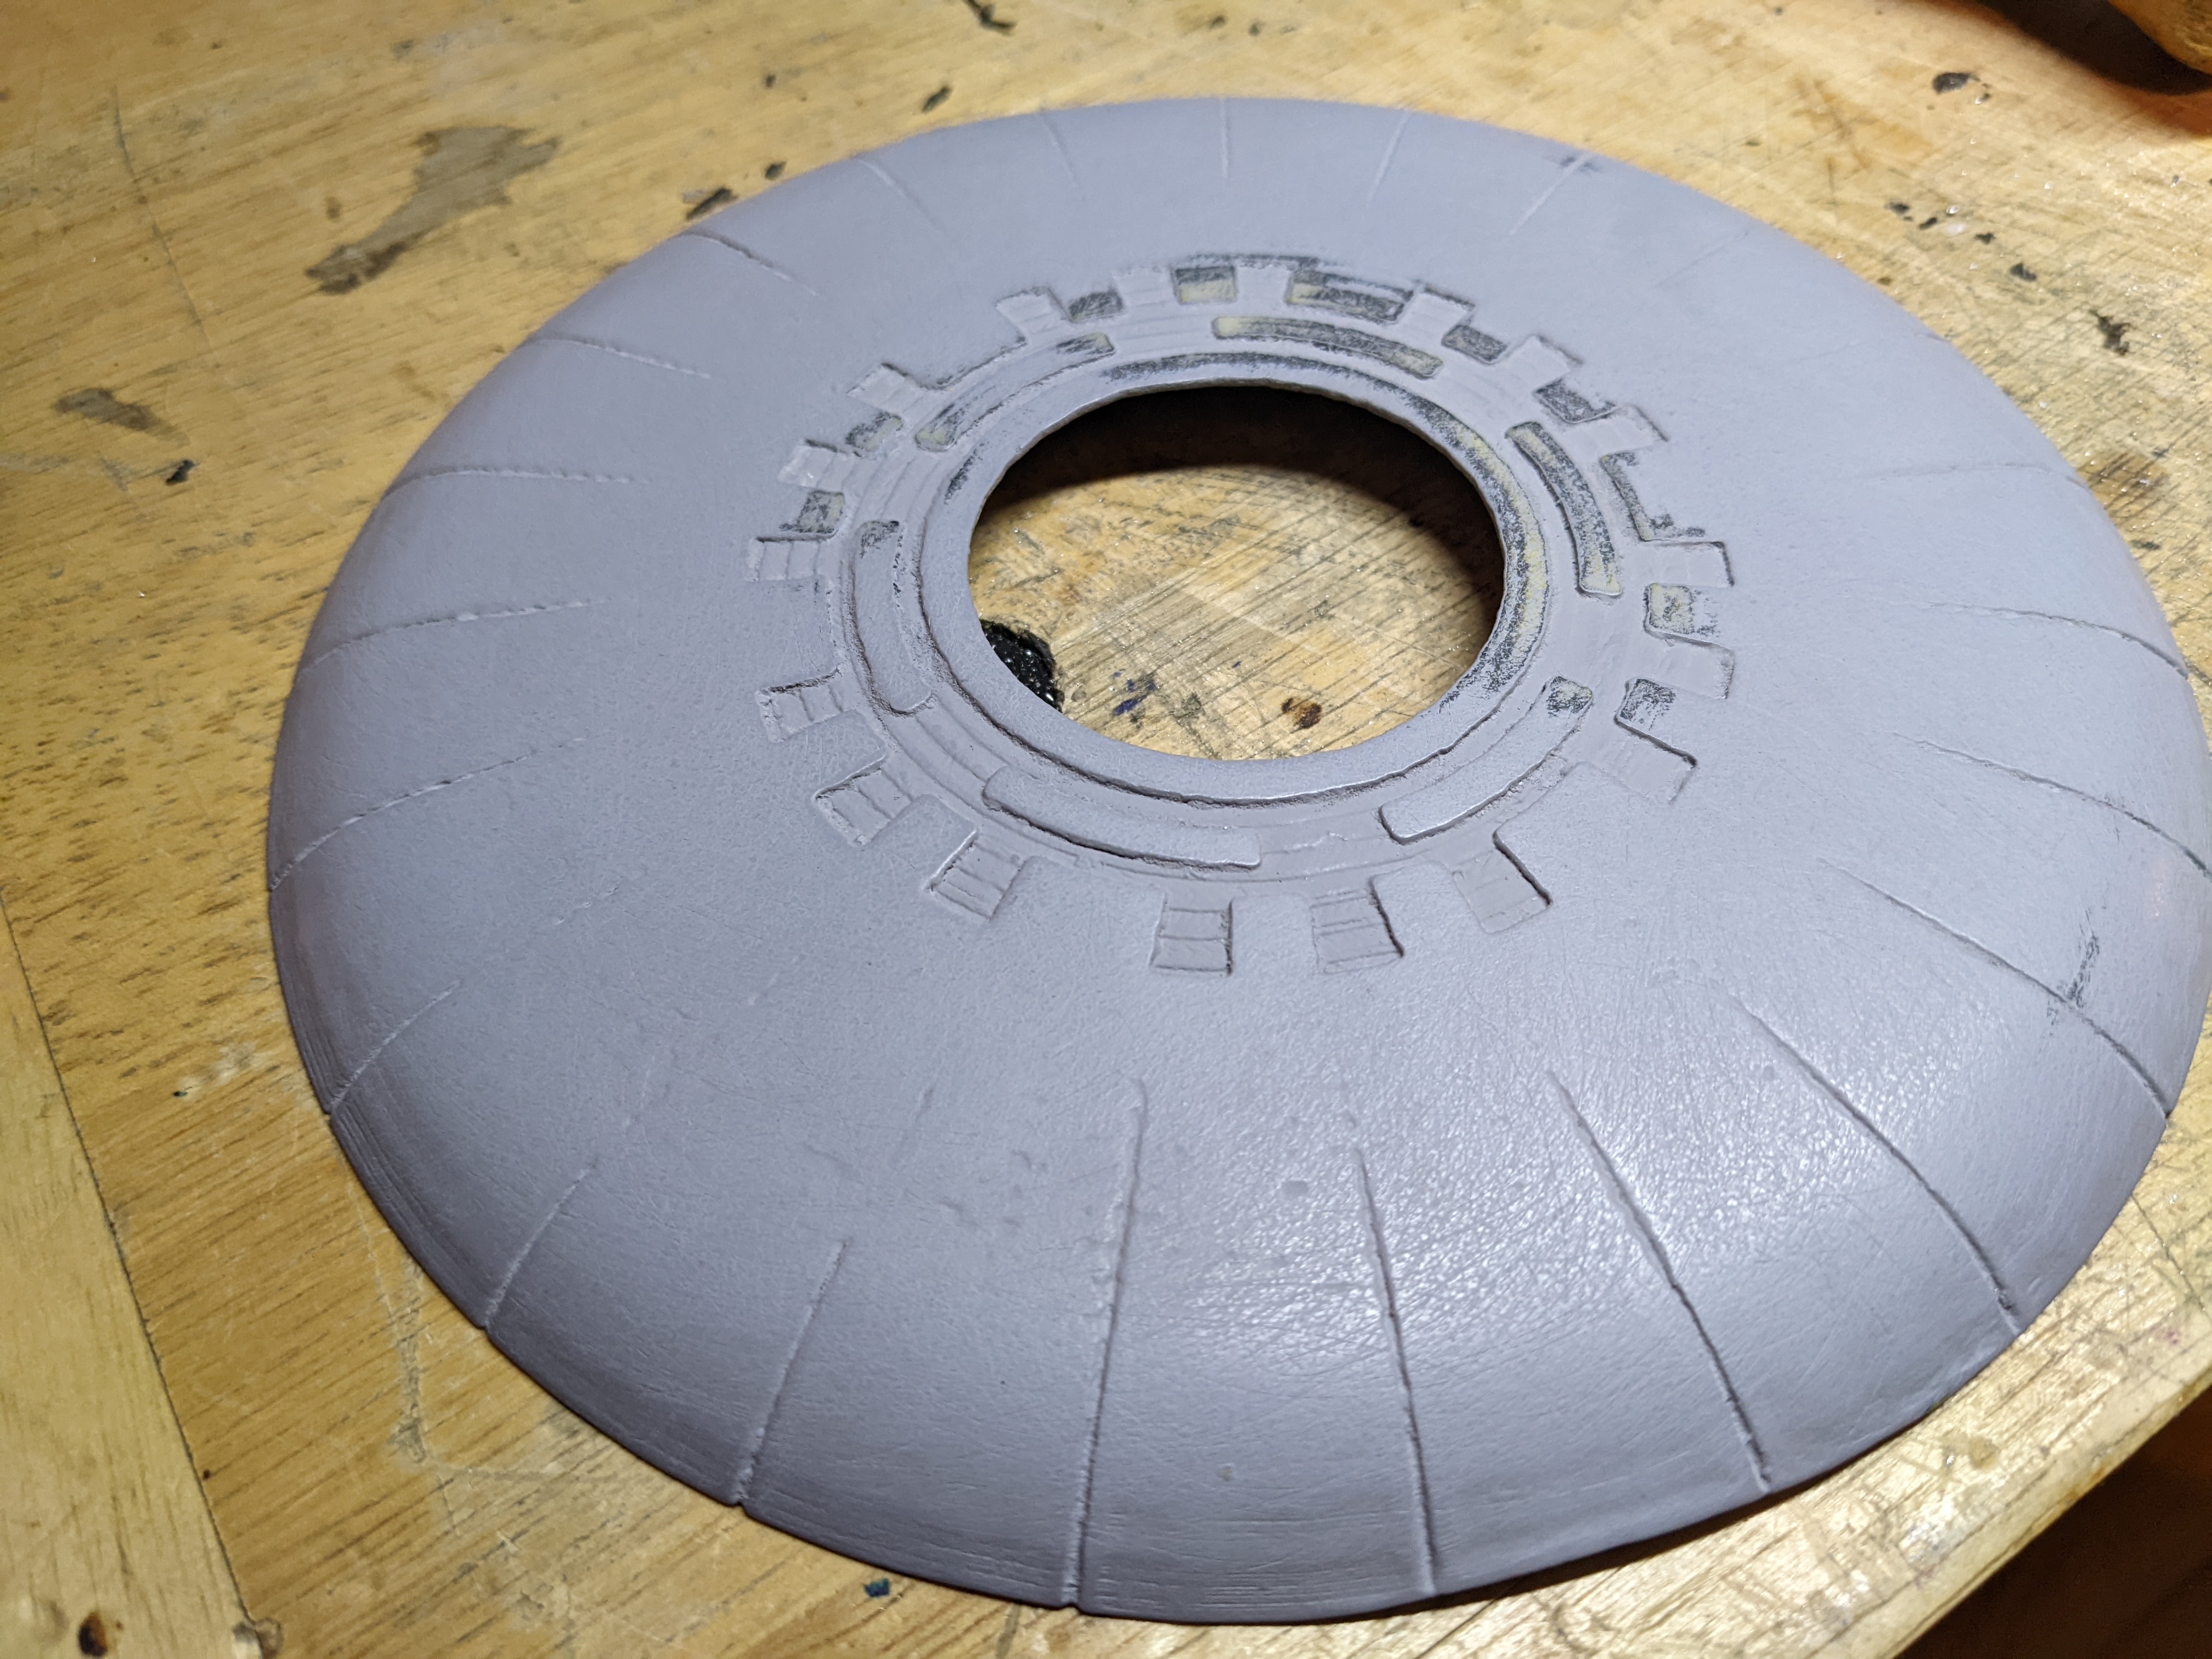
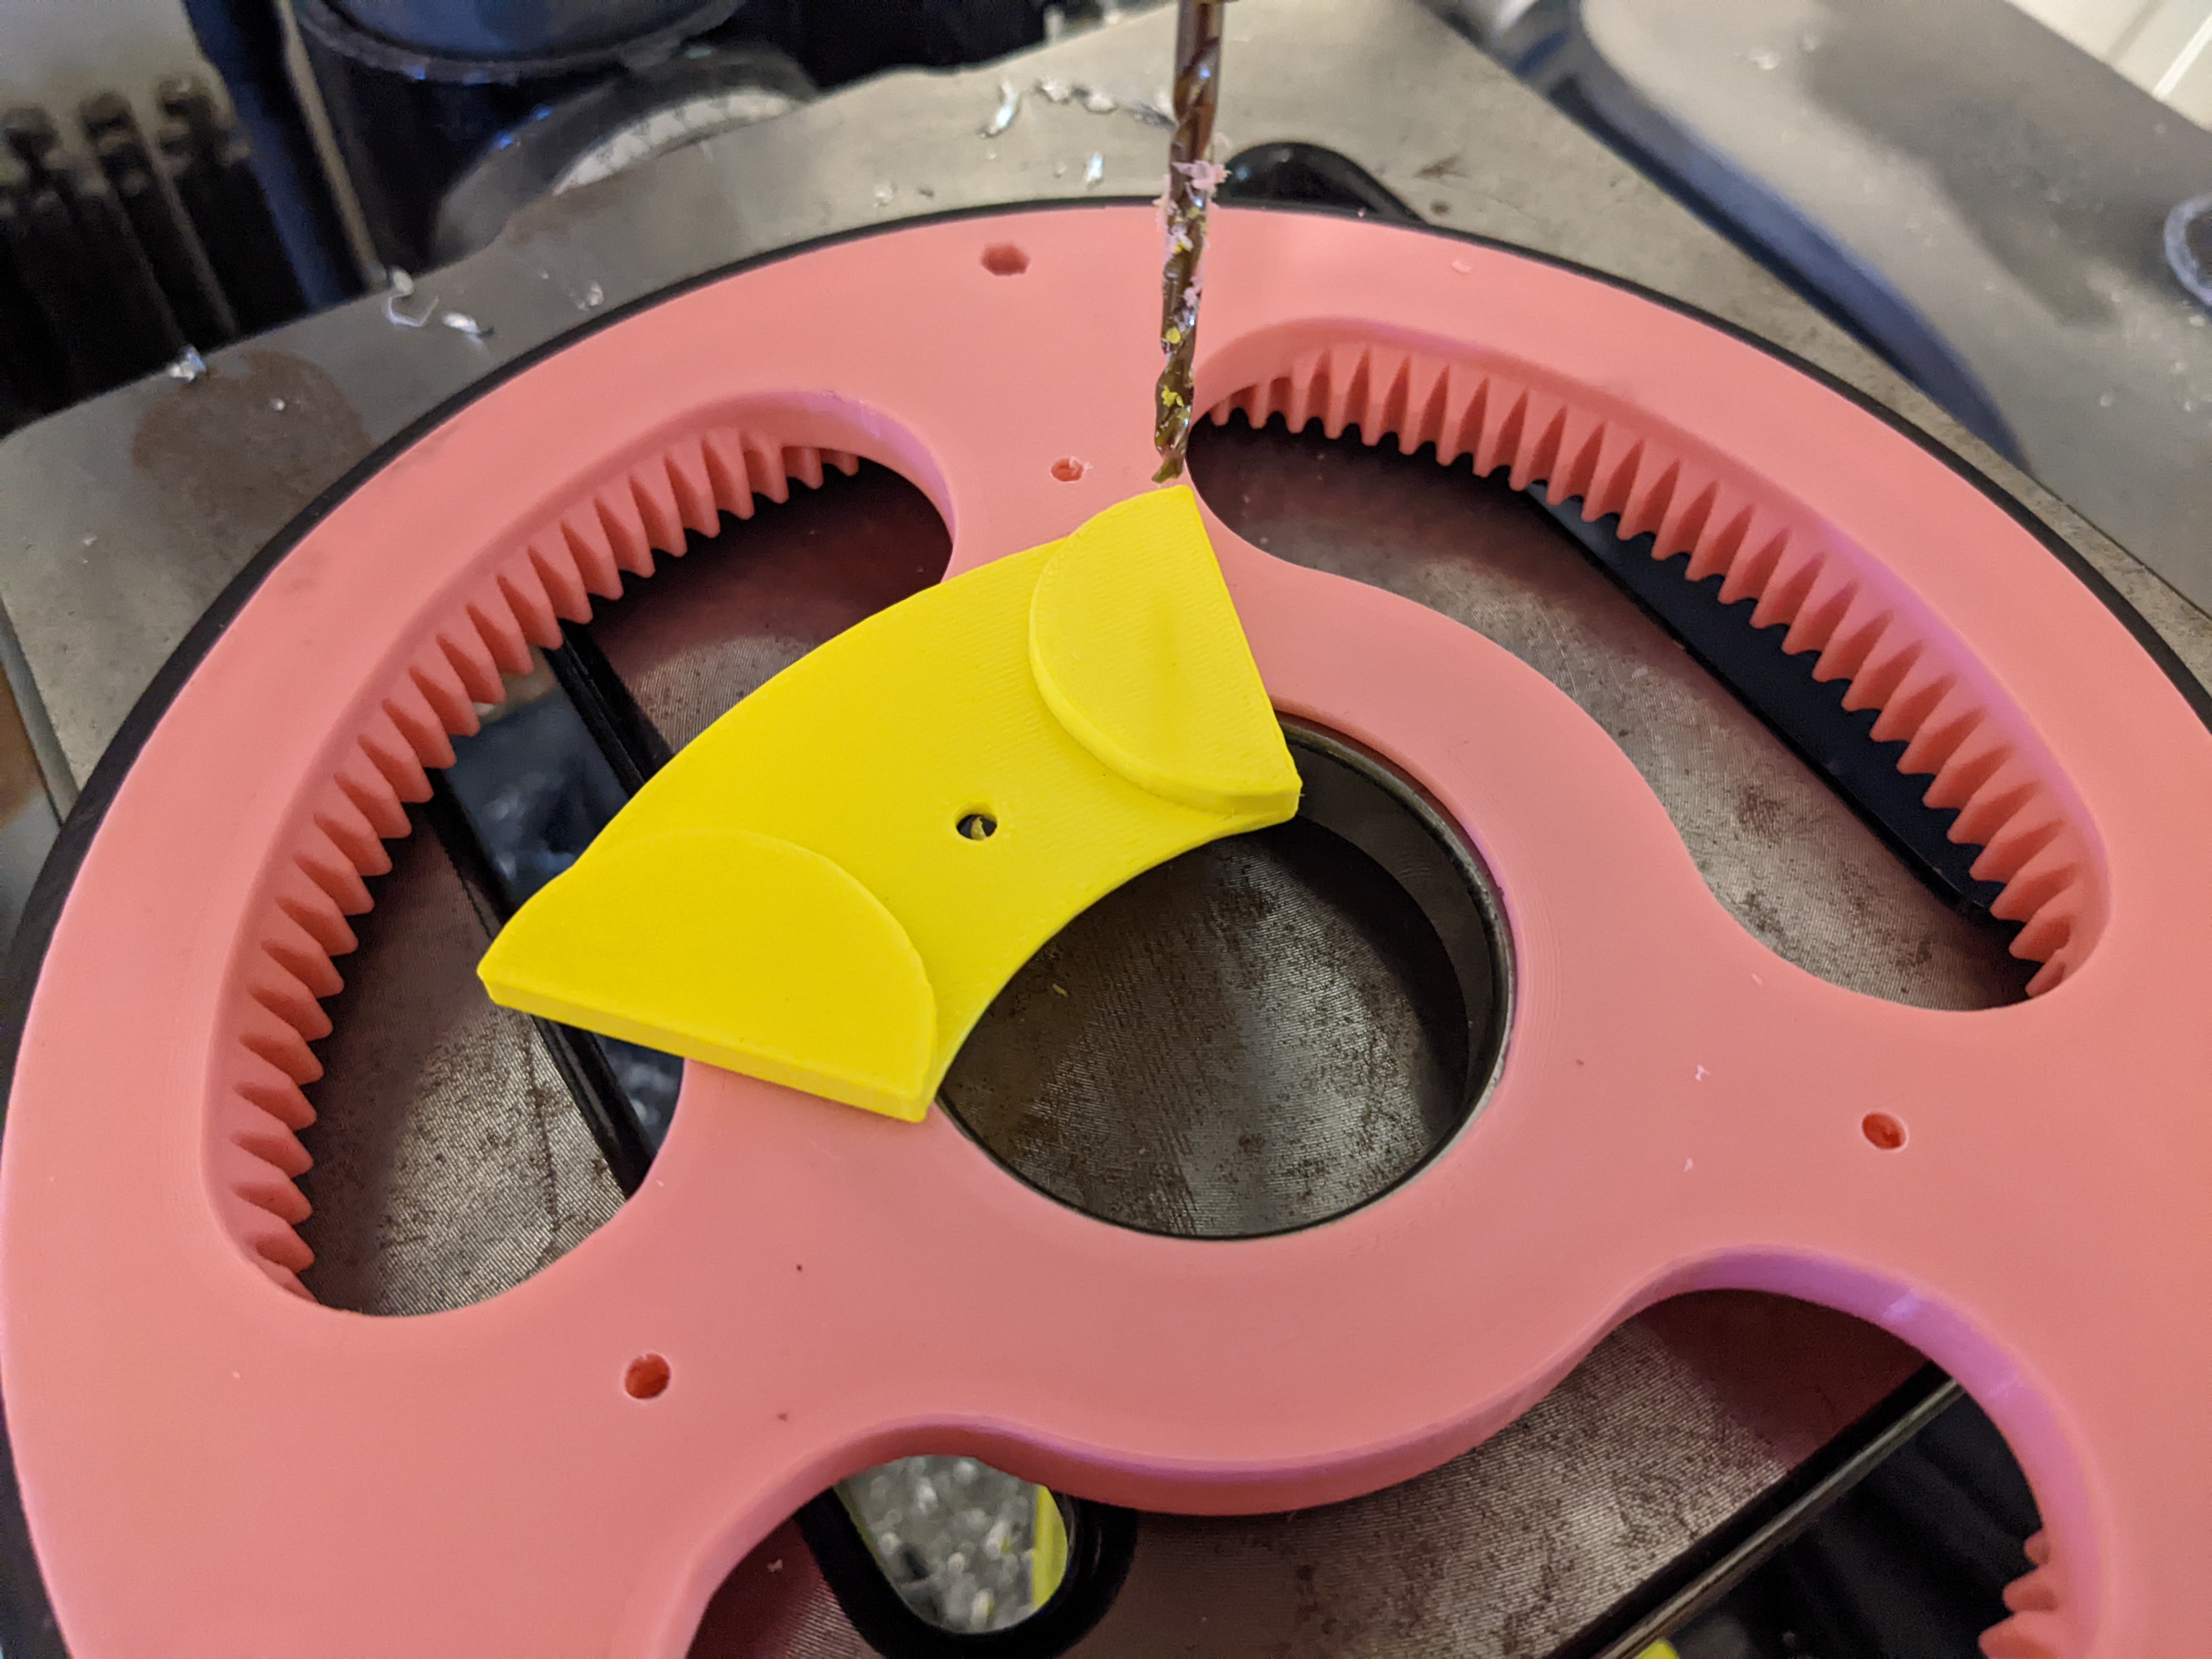
The wheel hub caps have holes for 4-40 screws to thread into, but the wheels do not have holes for this. I printed a jig so I could drill these holes out in the wheel, I didn't feel like this was worth reprinting the entire wheel for.

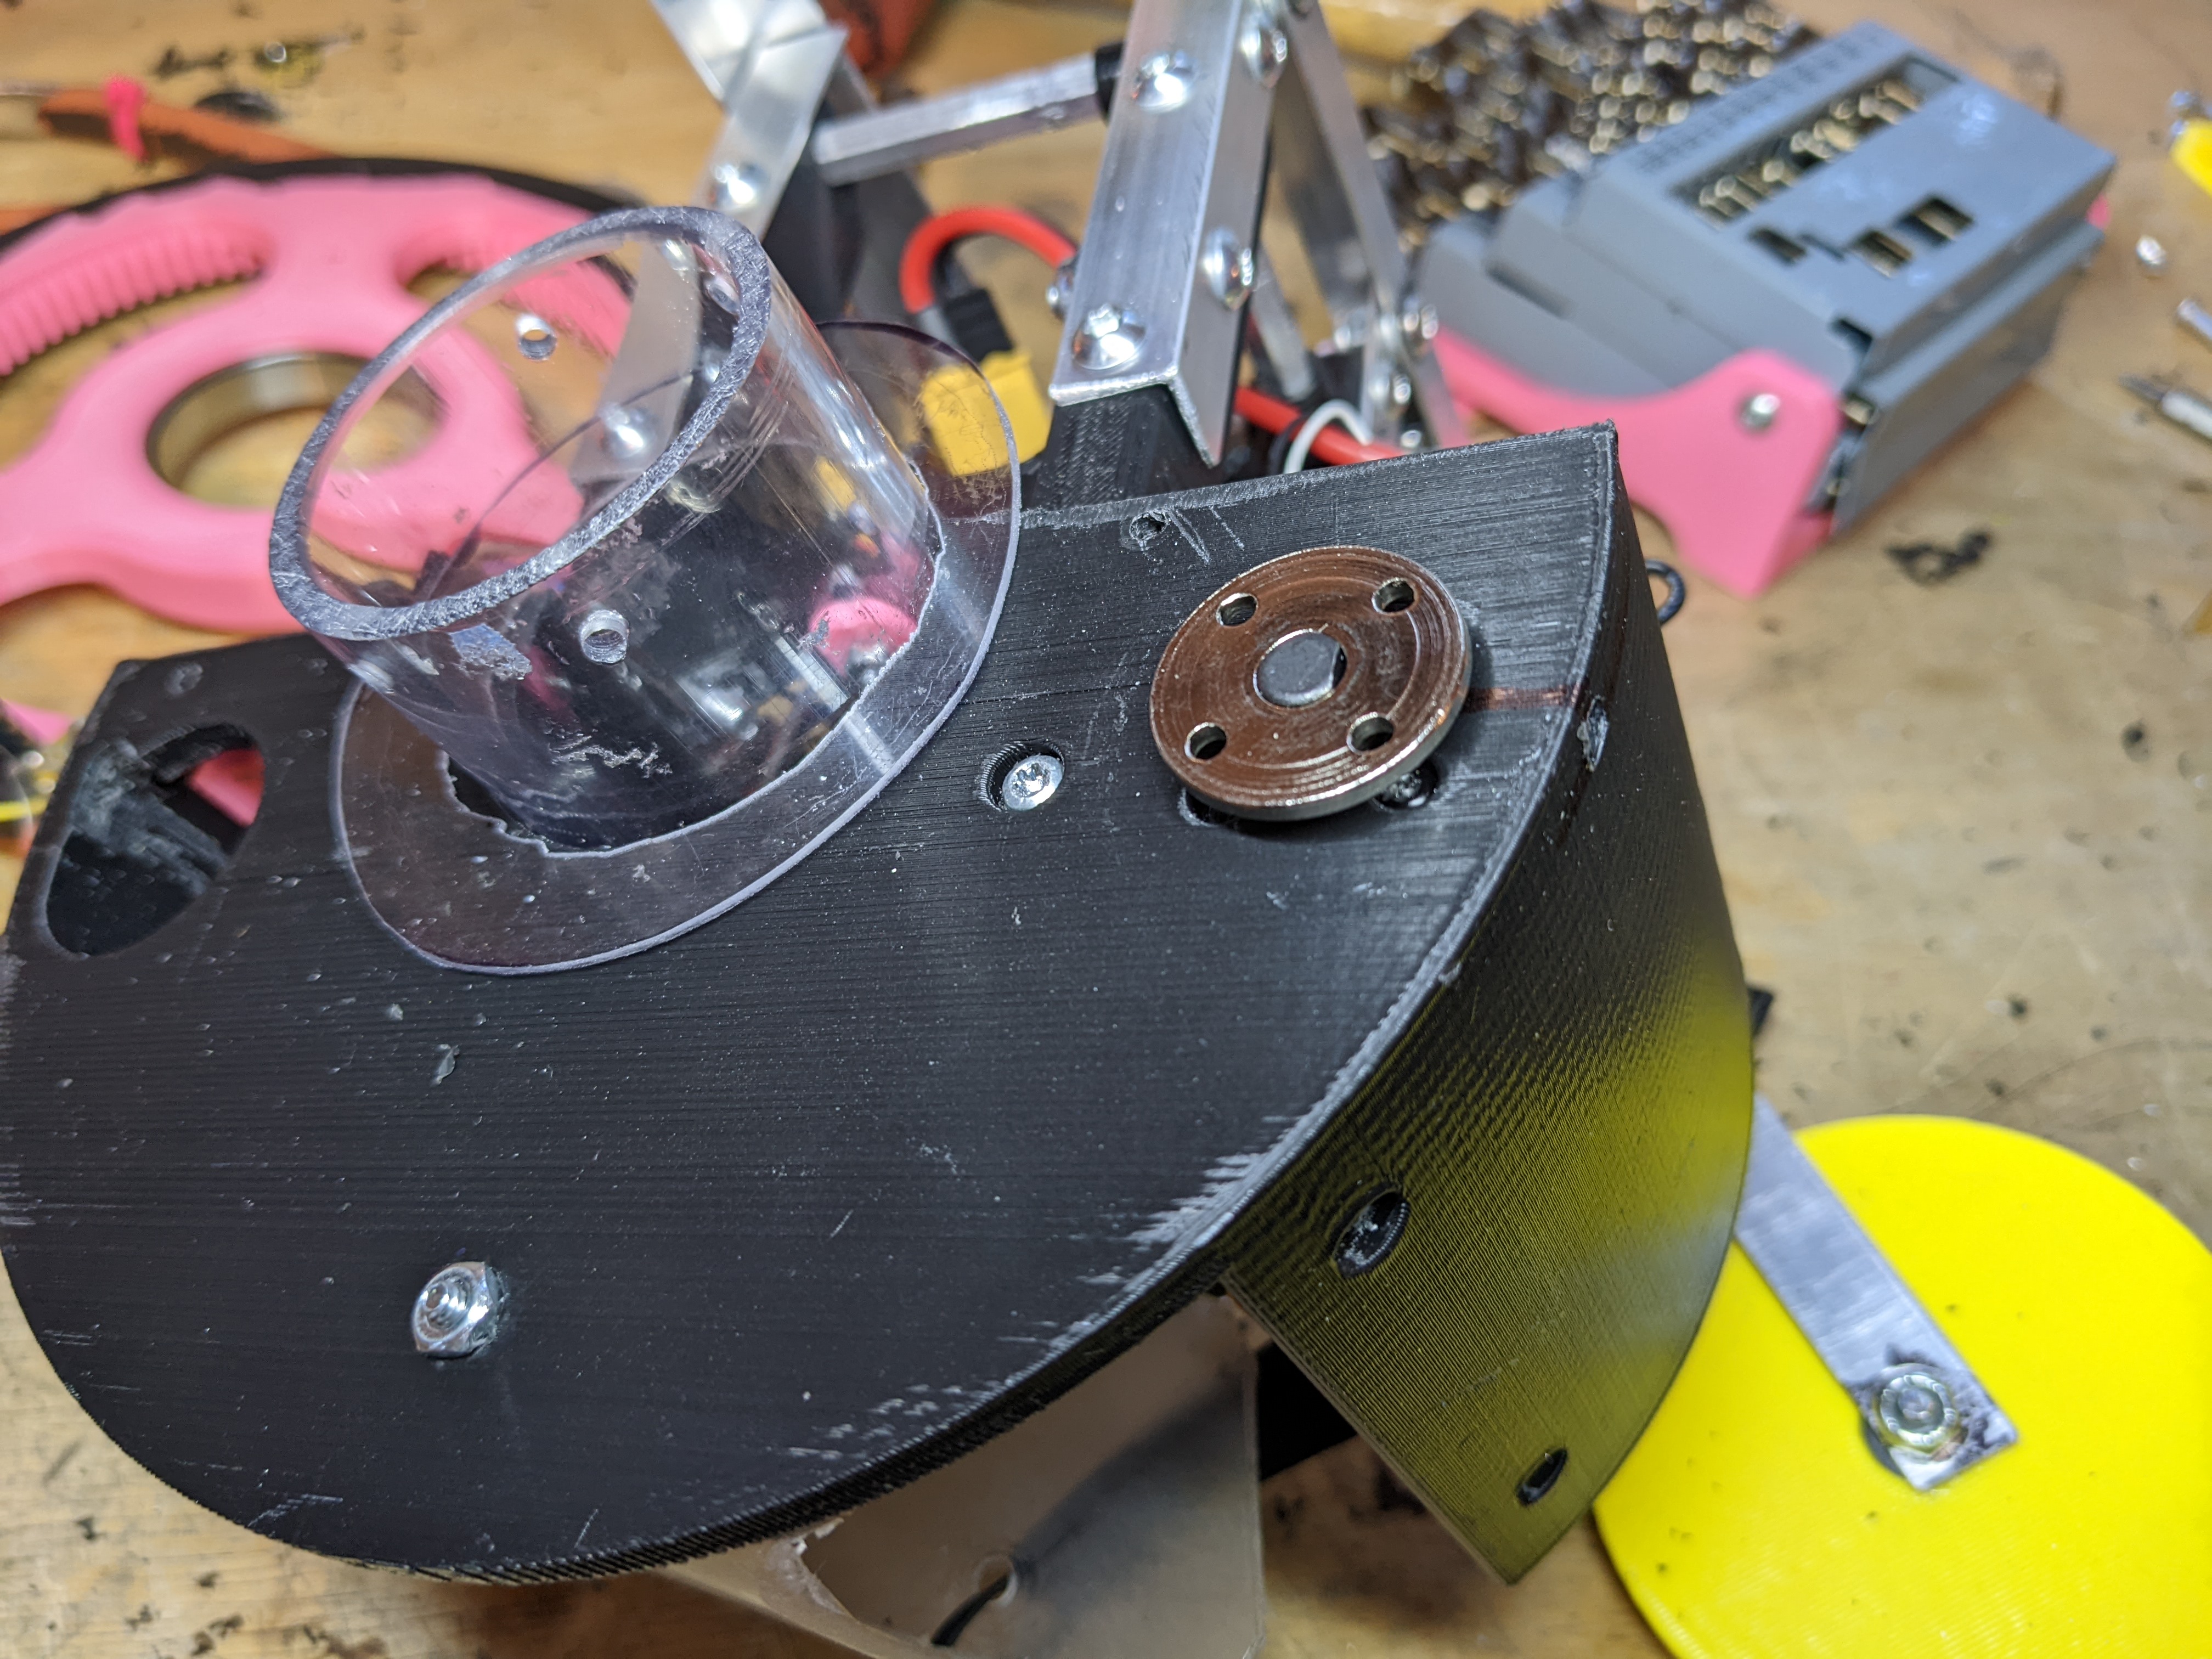
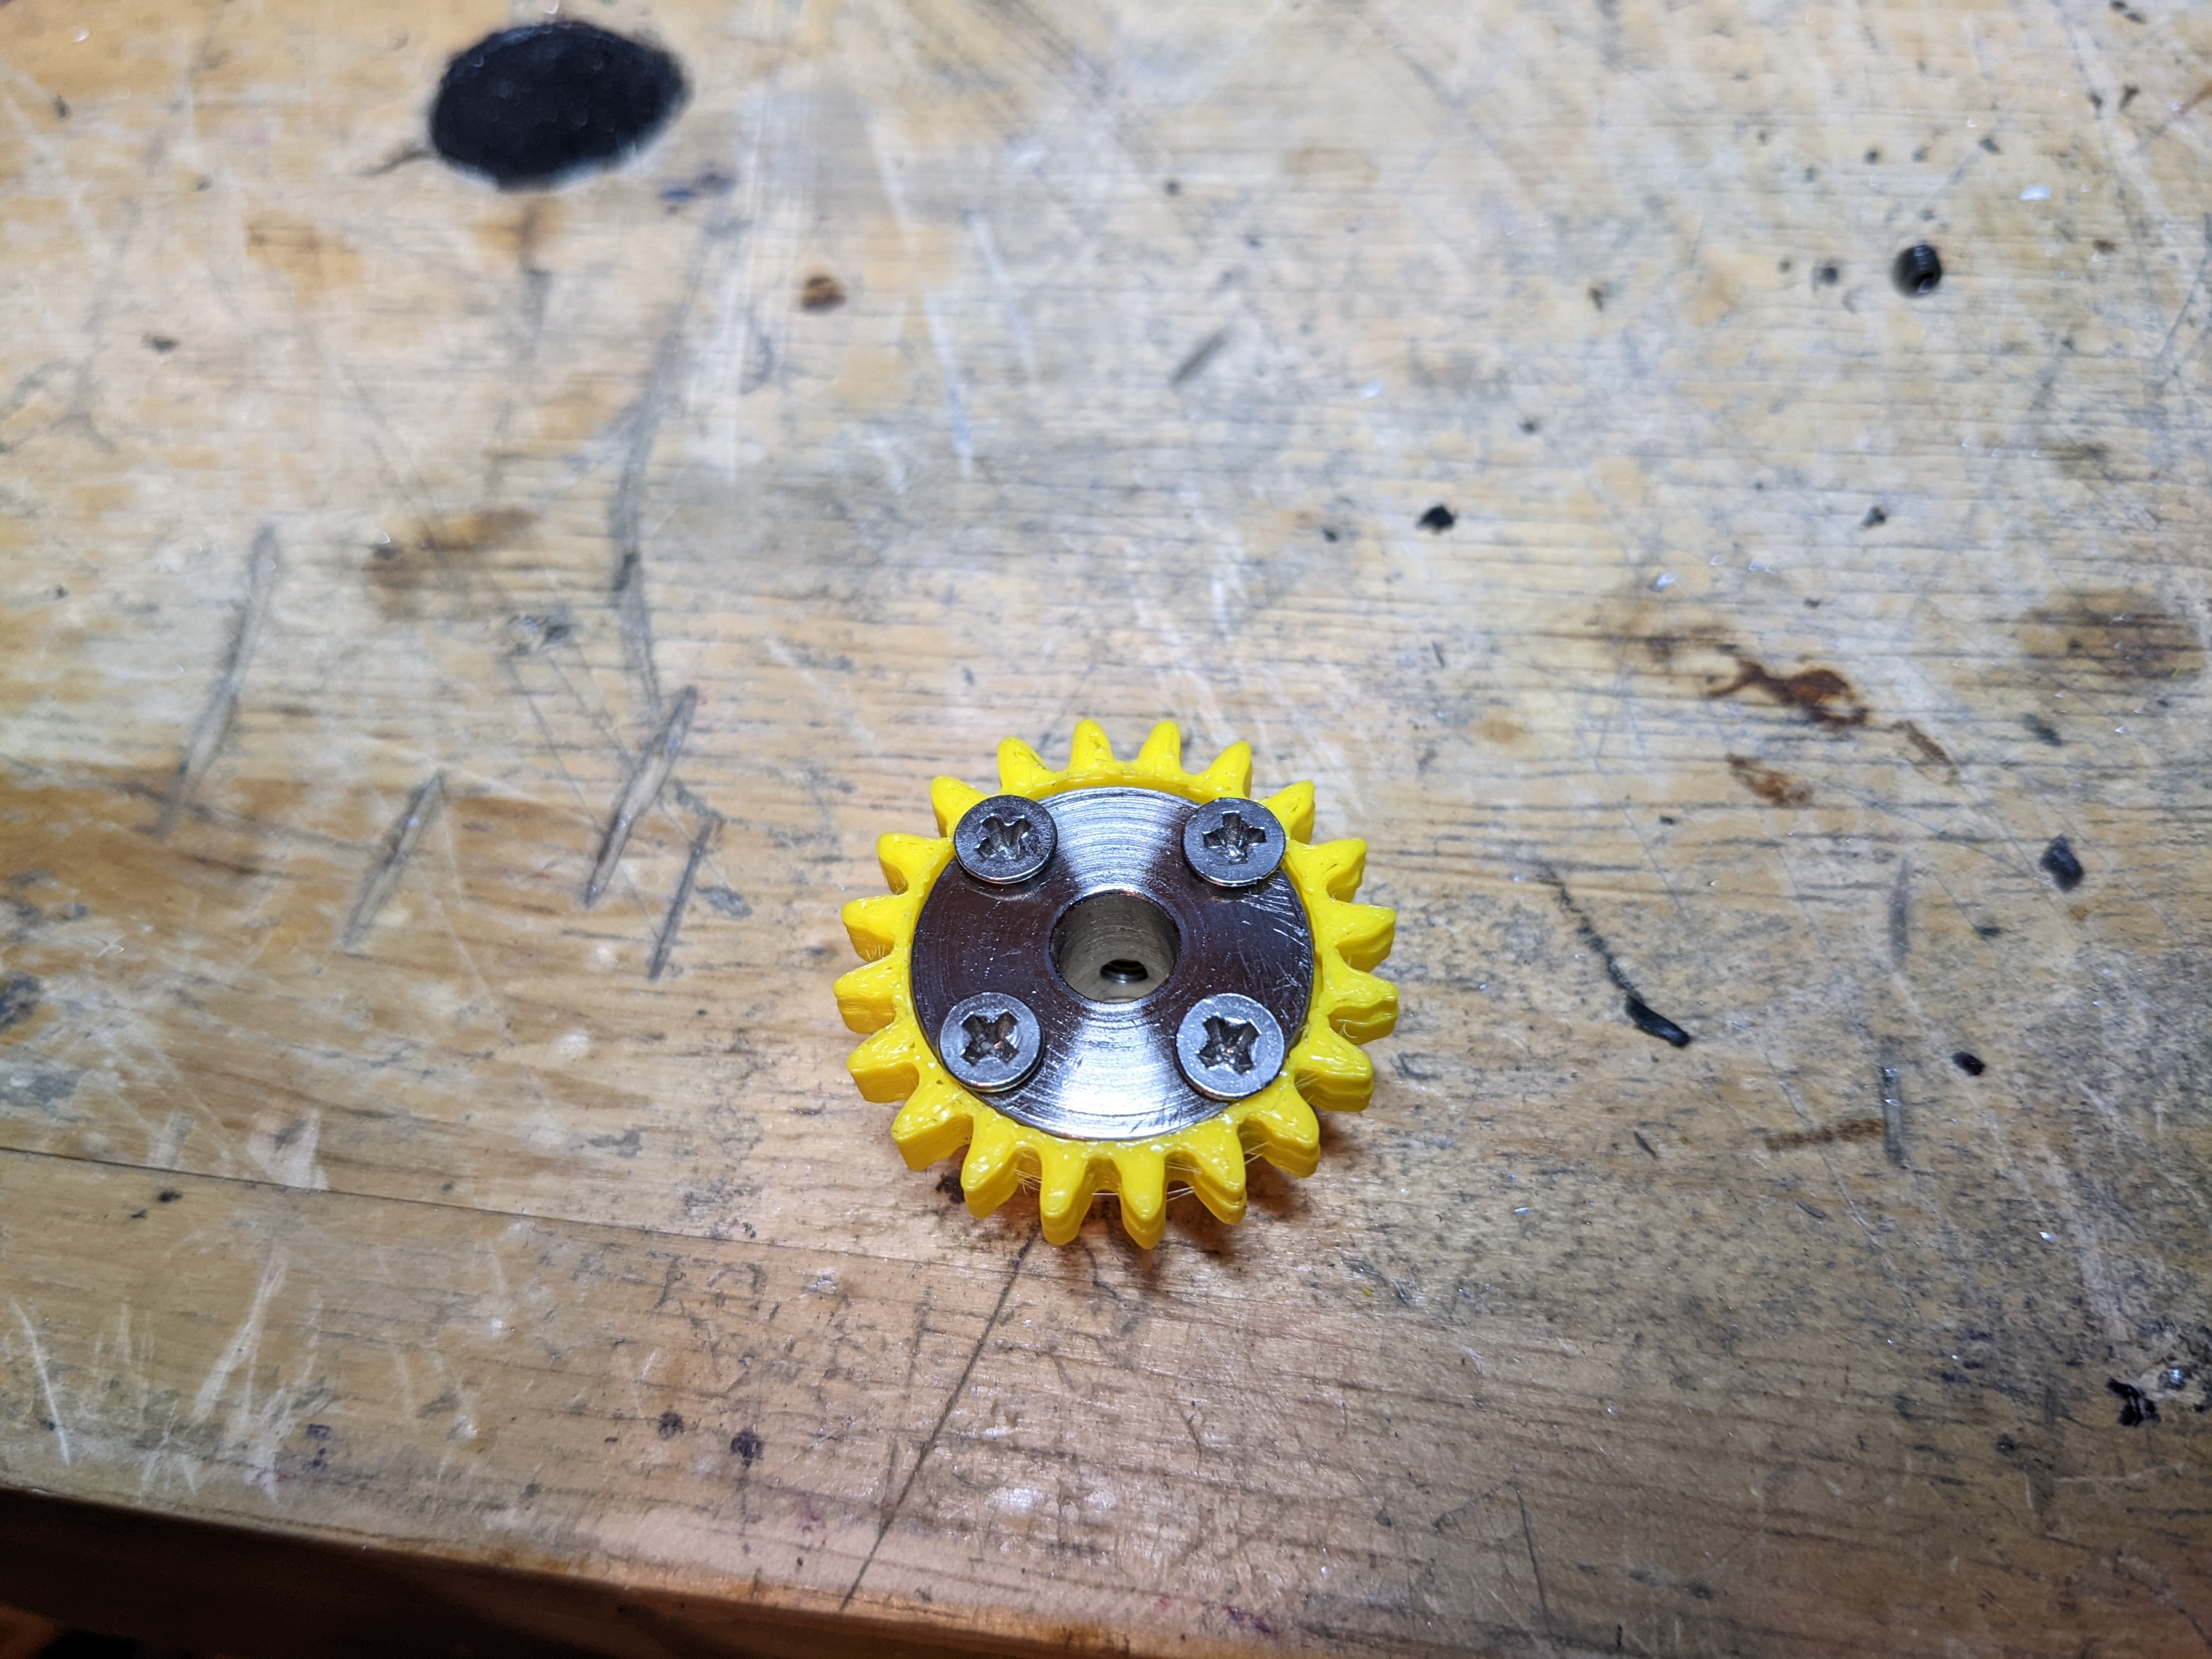
An issue on D-O was the gear being press-fitted onto the motor shaft eventually stripped. I found aluminum hubs on Amazon and decided to make a gear to interface with this. I needed to drill a hole in the body so the set screw was accessible.
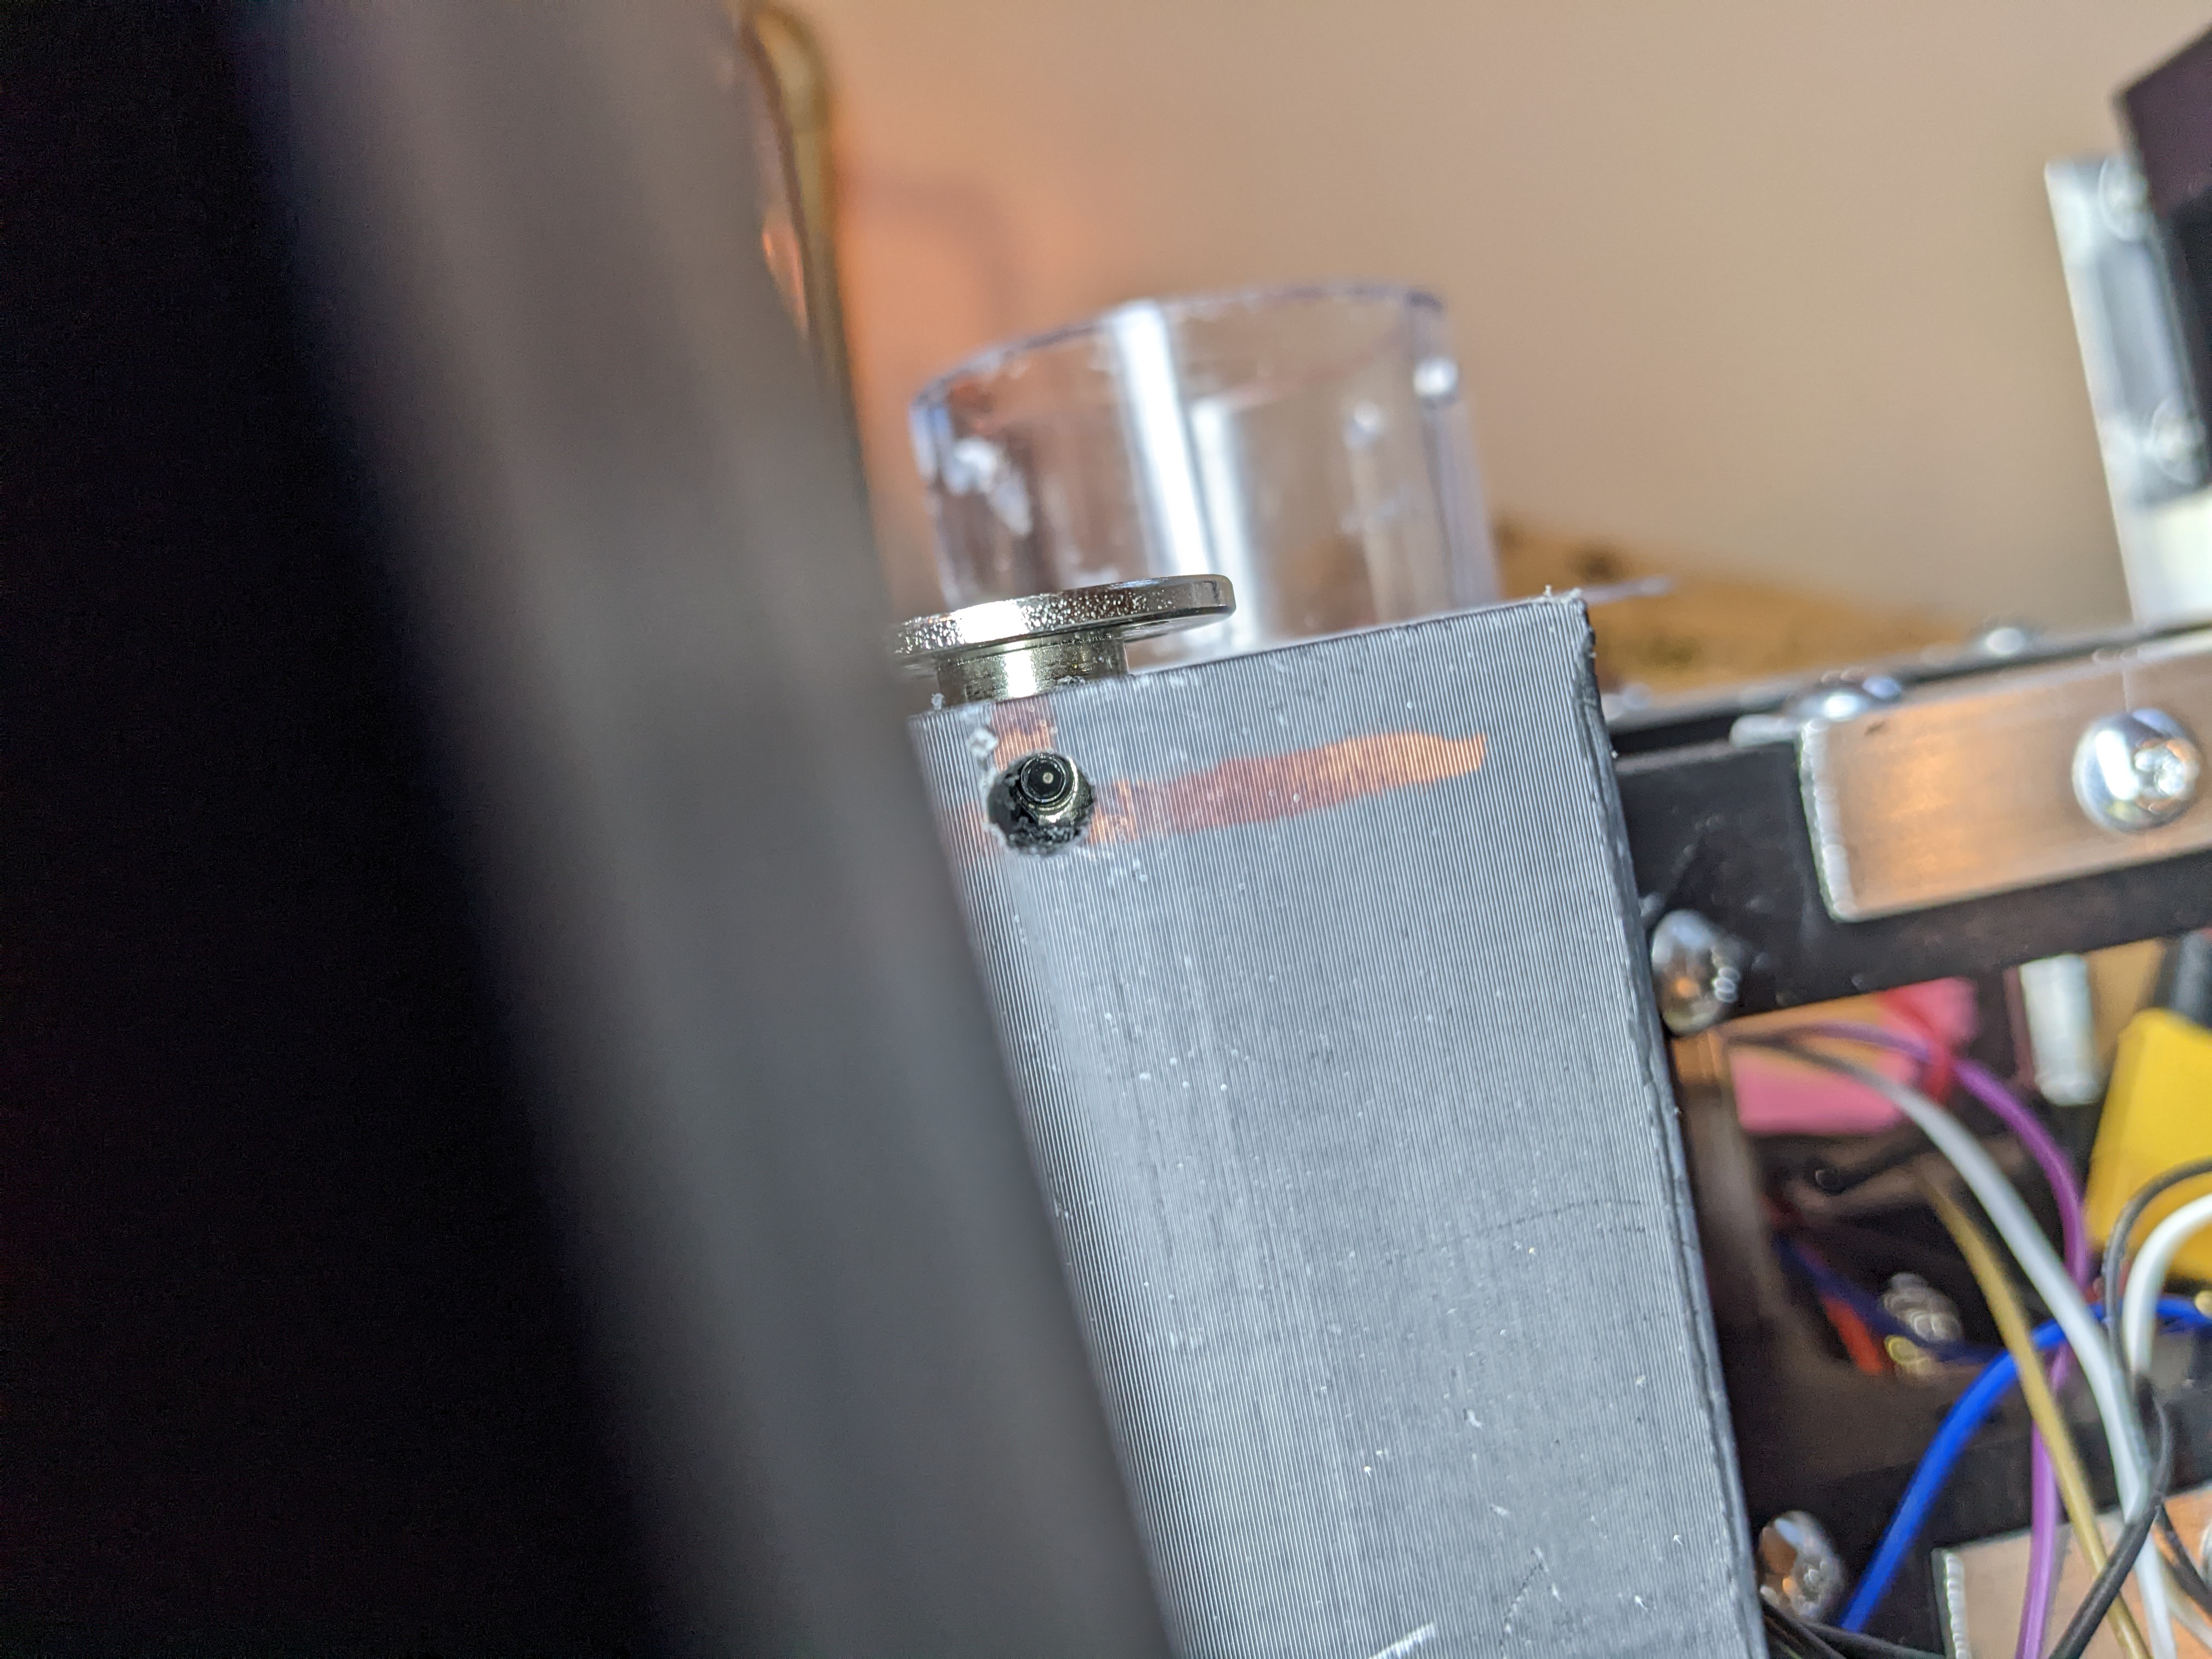
The metal hub was a little larger than the smallest point on my gear so I used my "lathe" (drill + belt sander) to make it smaller. I checked the diameter frequently with calipers.


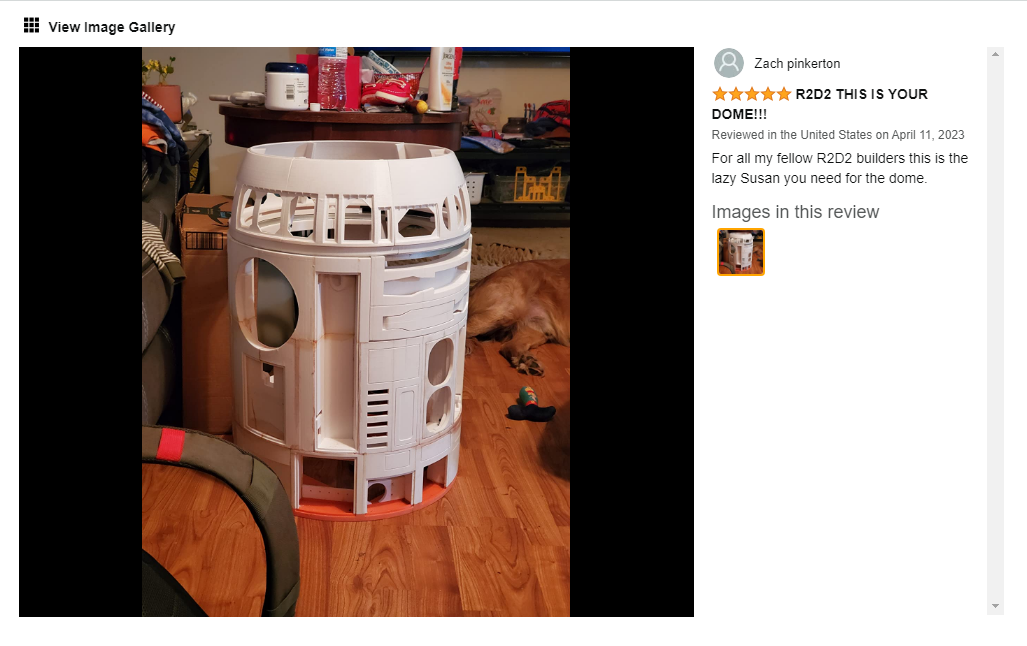
Thank you to Zach Pinkerton for leaving this review on this lazy susan! I have no idea if this is the best one or not, but the review is enough for me.
I printed mounts for the lazy susan with space for bushings, and printed brackets to hold a screw that the entire lazy susan pivots off of.
I made a mount for the servo and cut out a linkage from 1/8" polycarbonate to connect the servo horn to the lazy susan.
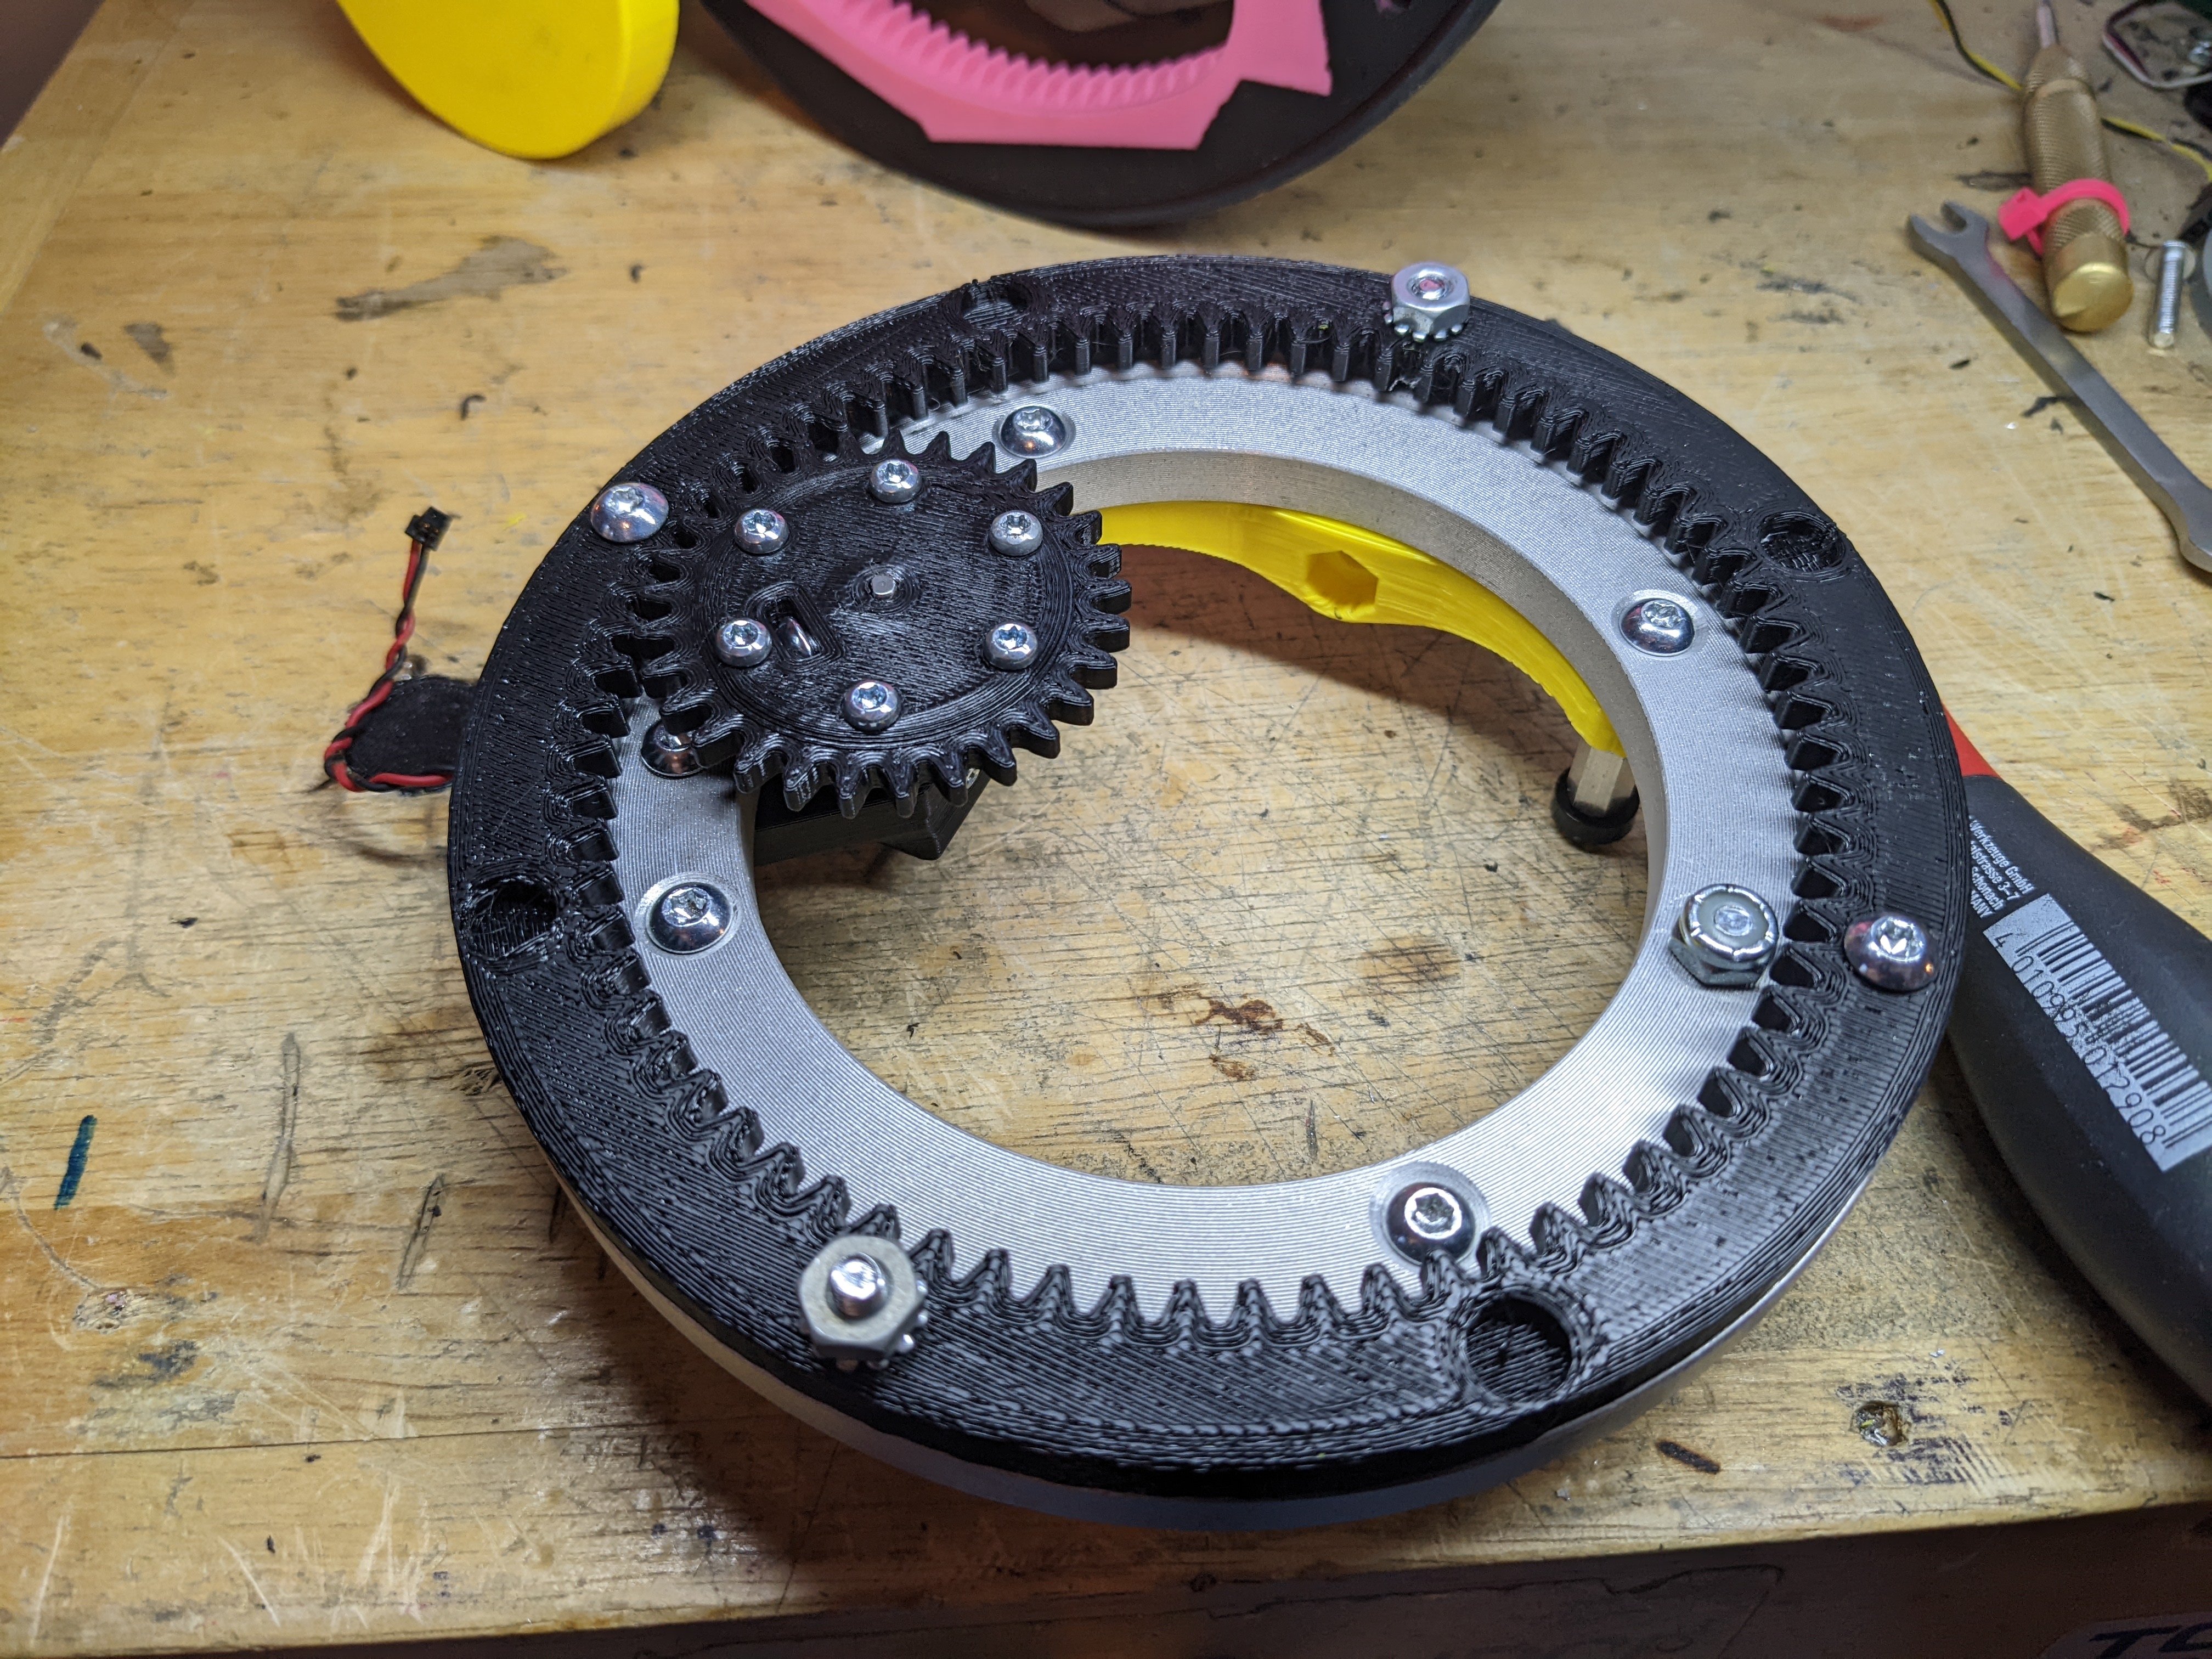
To make the head spin I designed a ring gear similar to how the wheels work. I'll use an N20 motor to make the head spin.
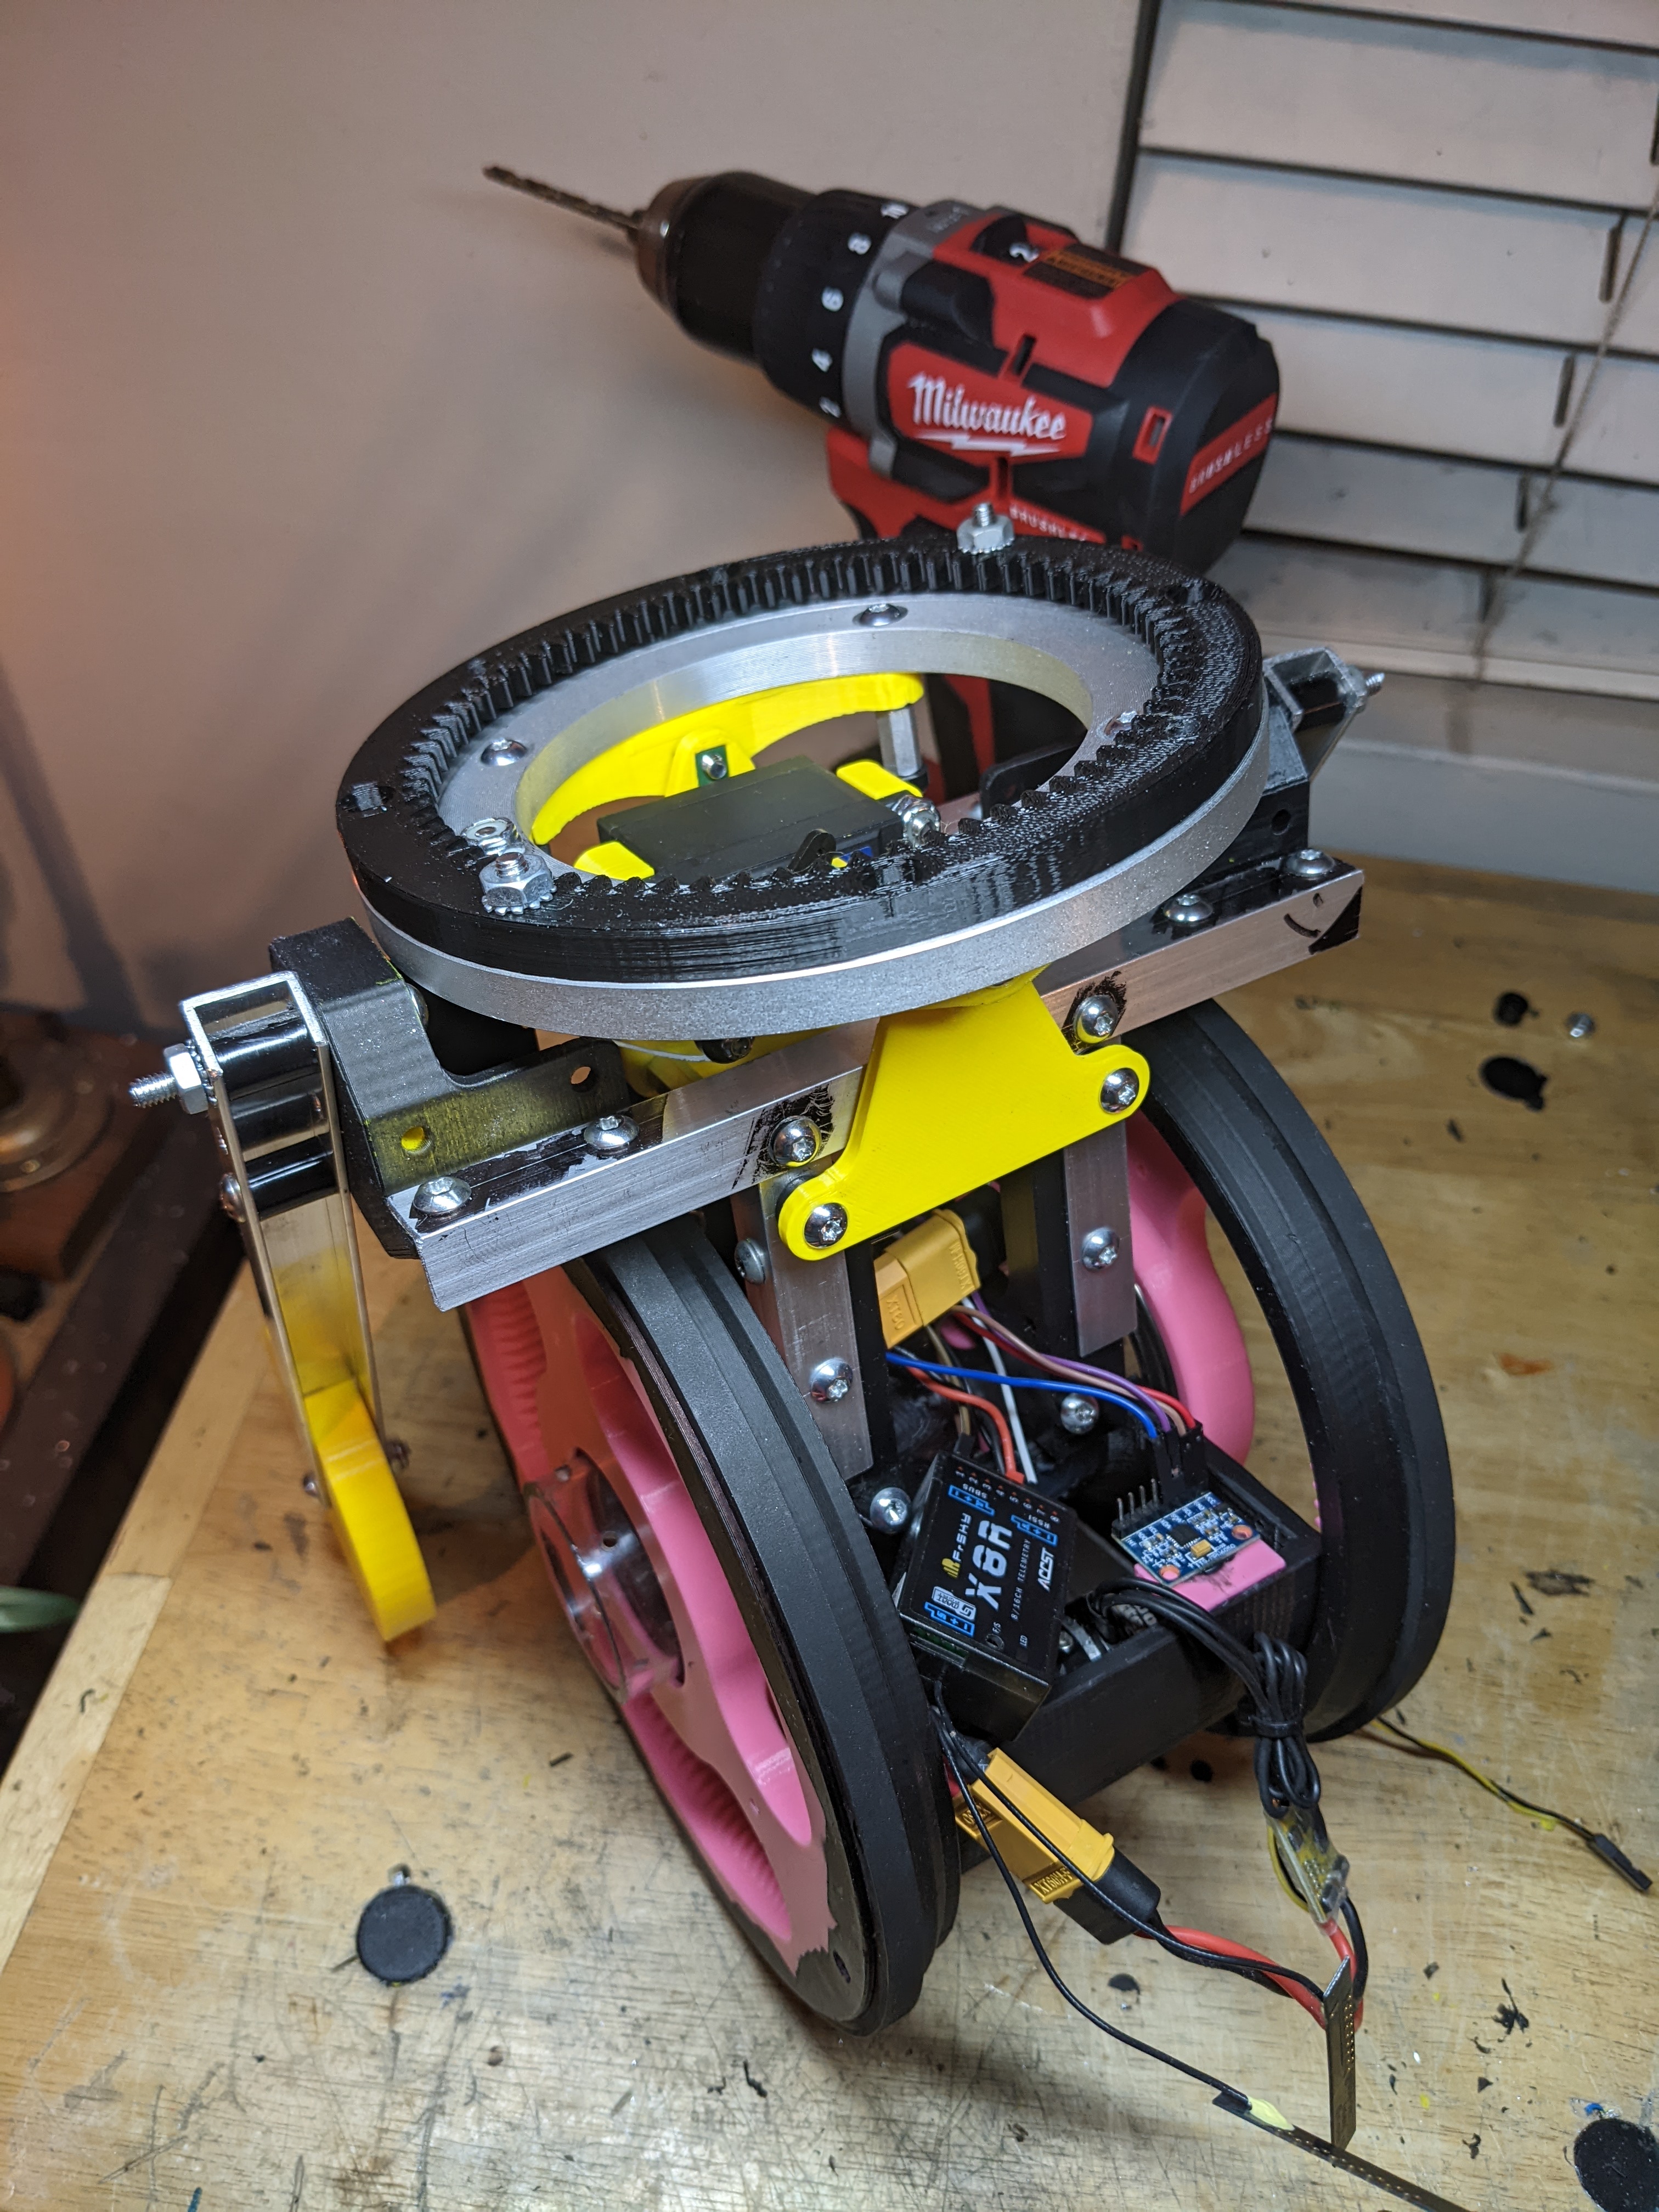
I designed a press-fit mount for the motor that has a set screw to hold the motor in place. This mounts to the part of the lazy susan that is stationary.
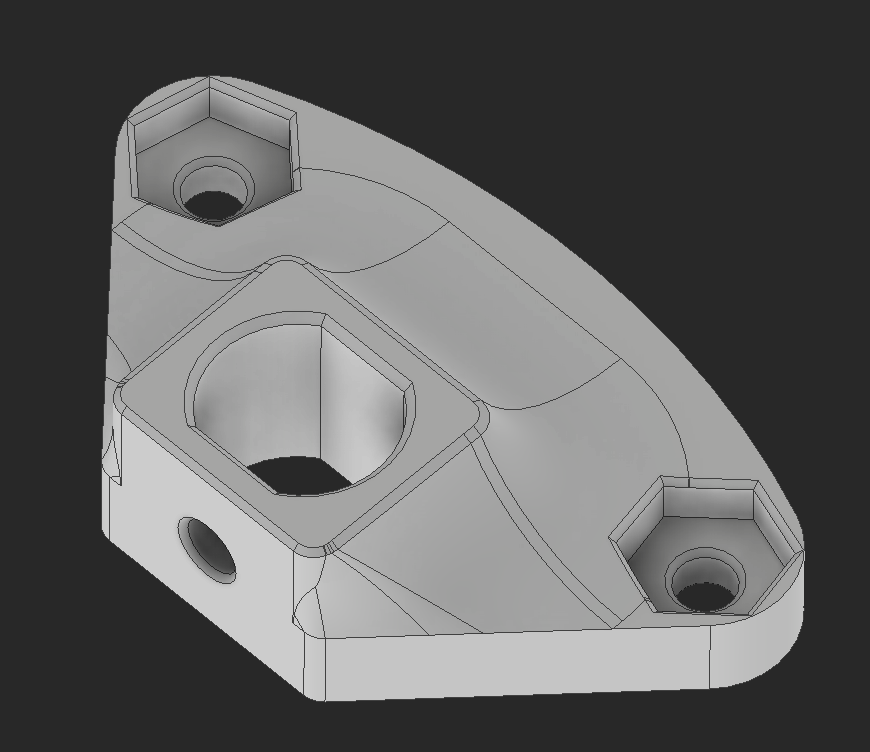
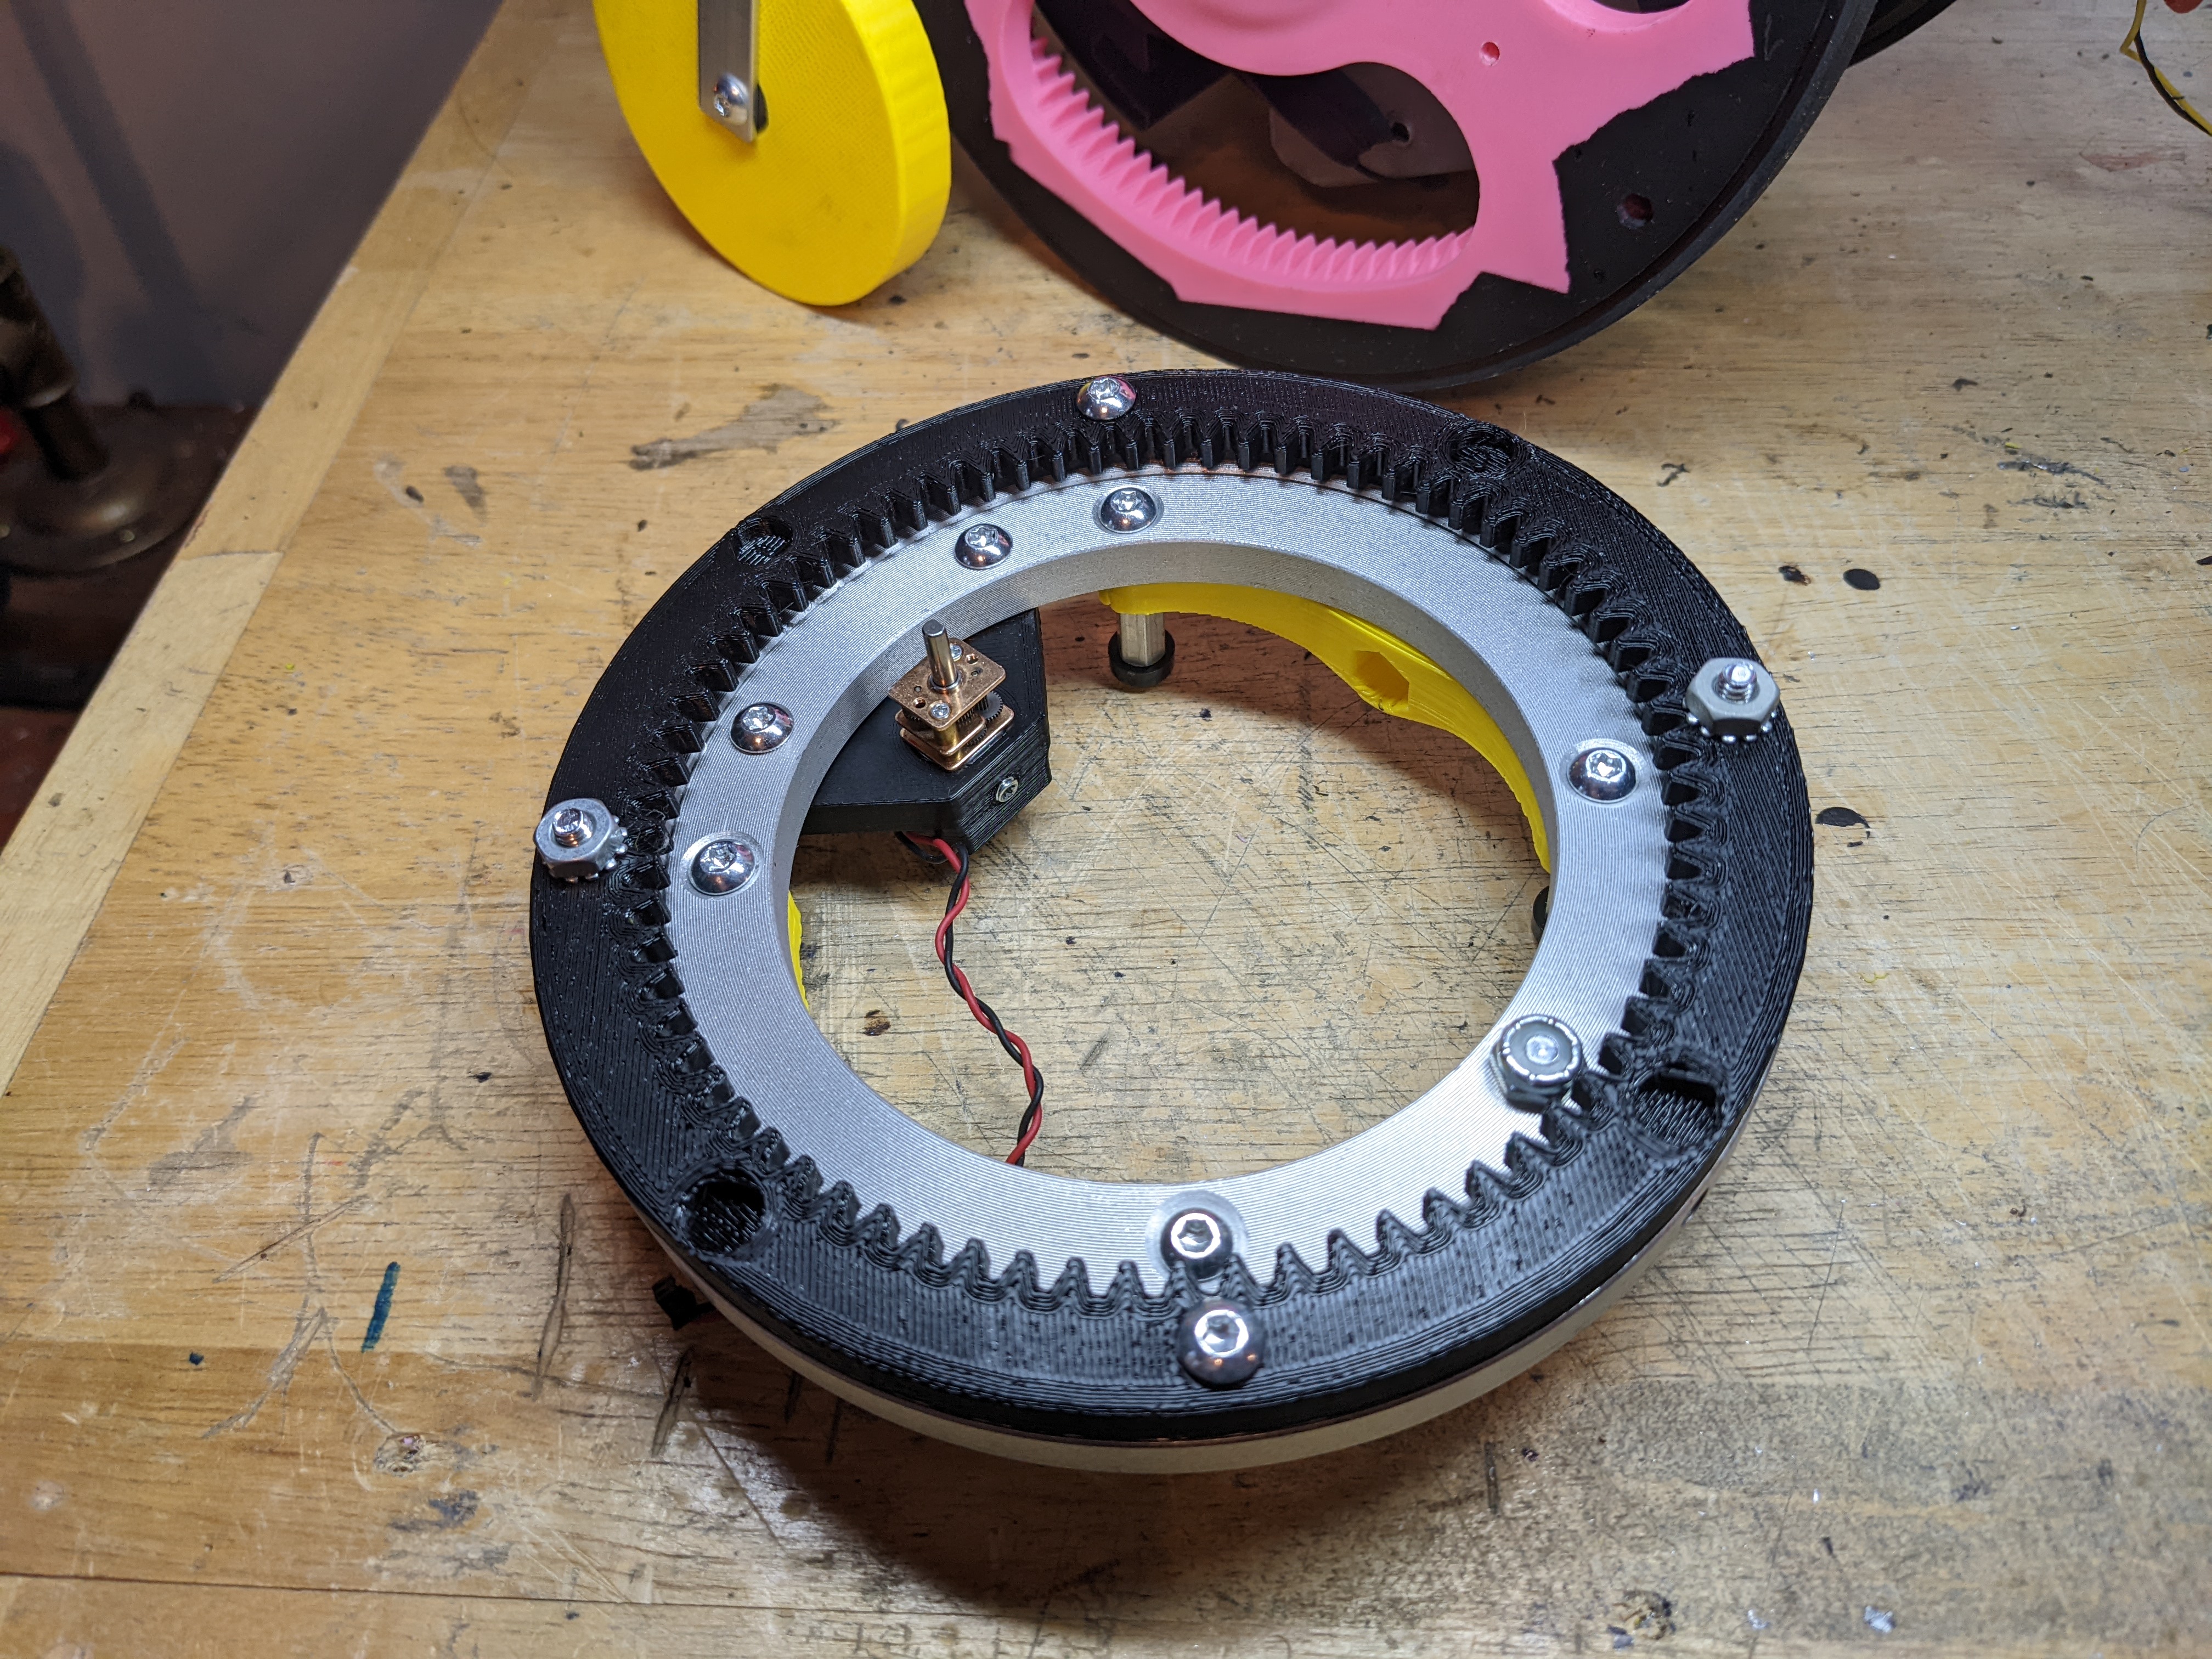
I didn't want to buy more aluminum hubs and I feel the head won't be under an intense amount of force, so I've come up with a strange solution. Using a VEX shaft collar with a 1/4" screw, I can make geometry in the gear to fit around this. Then I can clamp the shaft collar to the motor and the gear will clamp around the shaft collar. This is surprisingly stable, and I imagine this will only work in small scale very low-torque situations like this.


I (finally) switched out the painter's tape for "adhesive shim" aka aluminum tape. The bearings now press fit over the shafts.

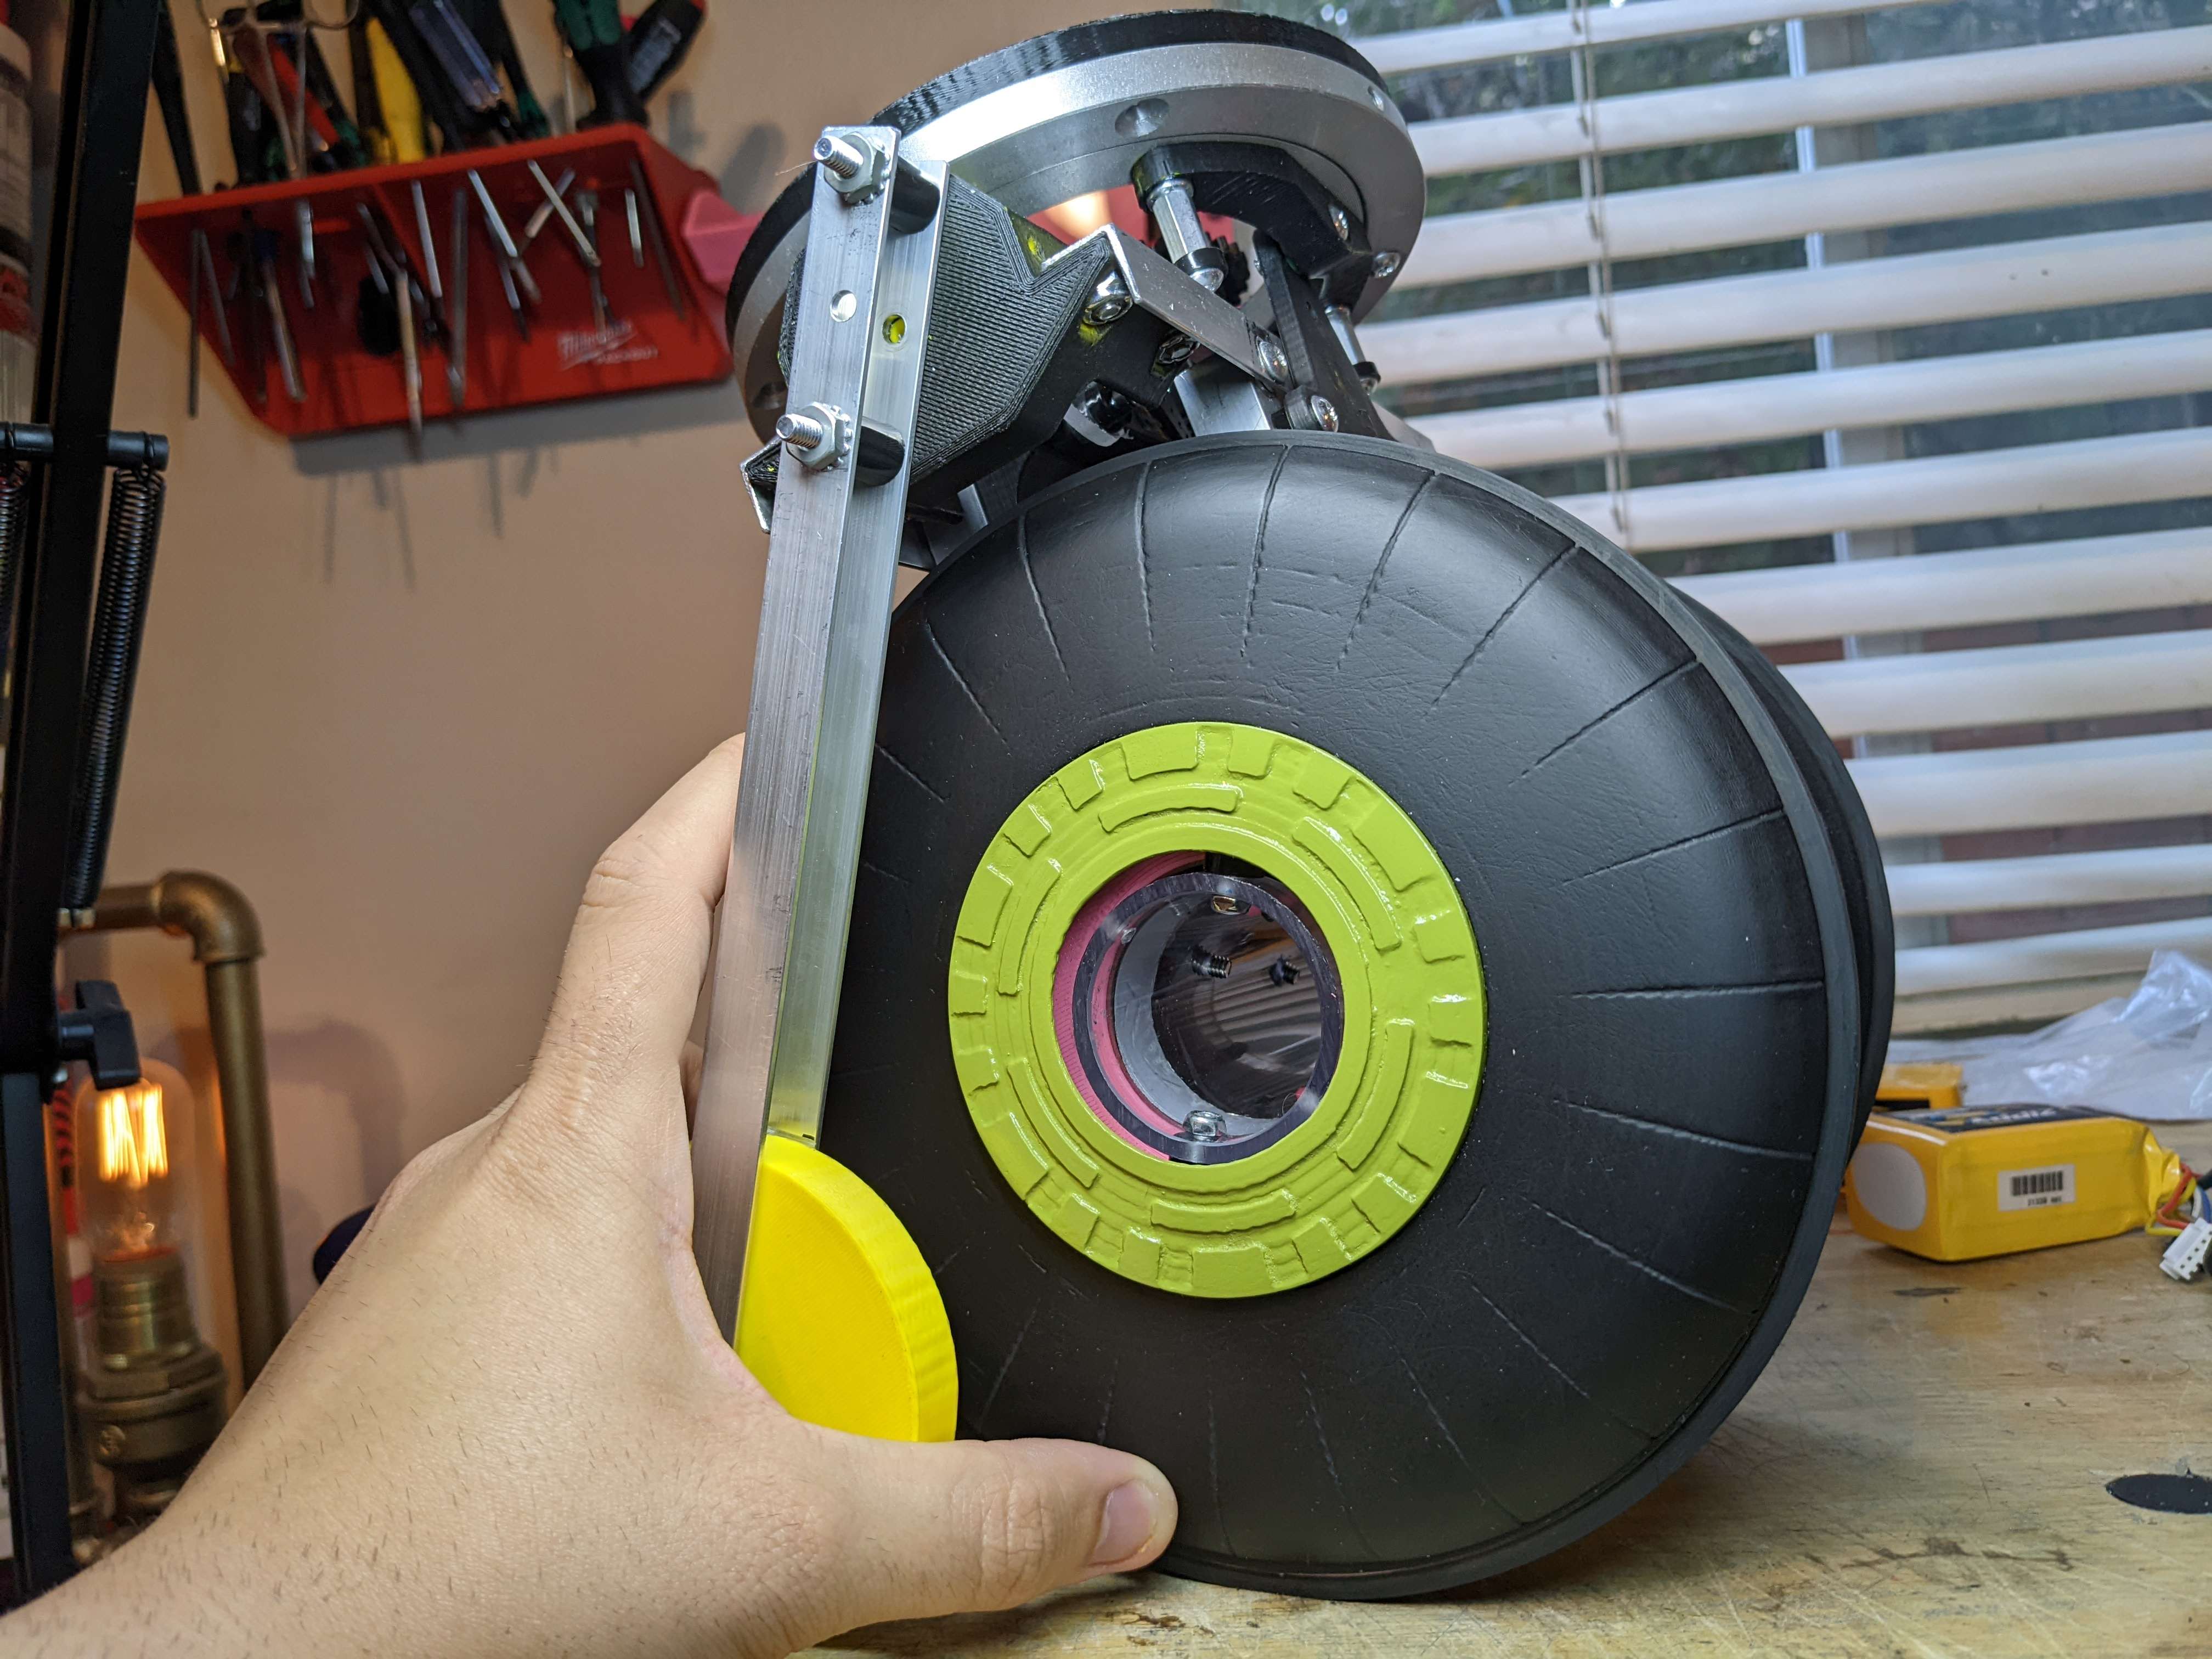
I tried to assemble the robot and realized that I cannot assemble the wheels with the hub caps, they block where screws need to go to keep the wheel from falling off the shaft. I split the design into 2 parts and have the inner part mounted with magnets. This also makes it significantly easier to get the color split between the two parts.

I made this test body to check how the dimensions felt on the actual robot, and I wasn't happy with it. I felt like everything needed to come down farther.
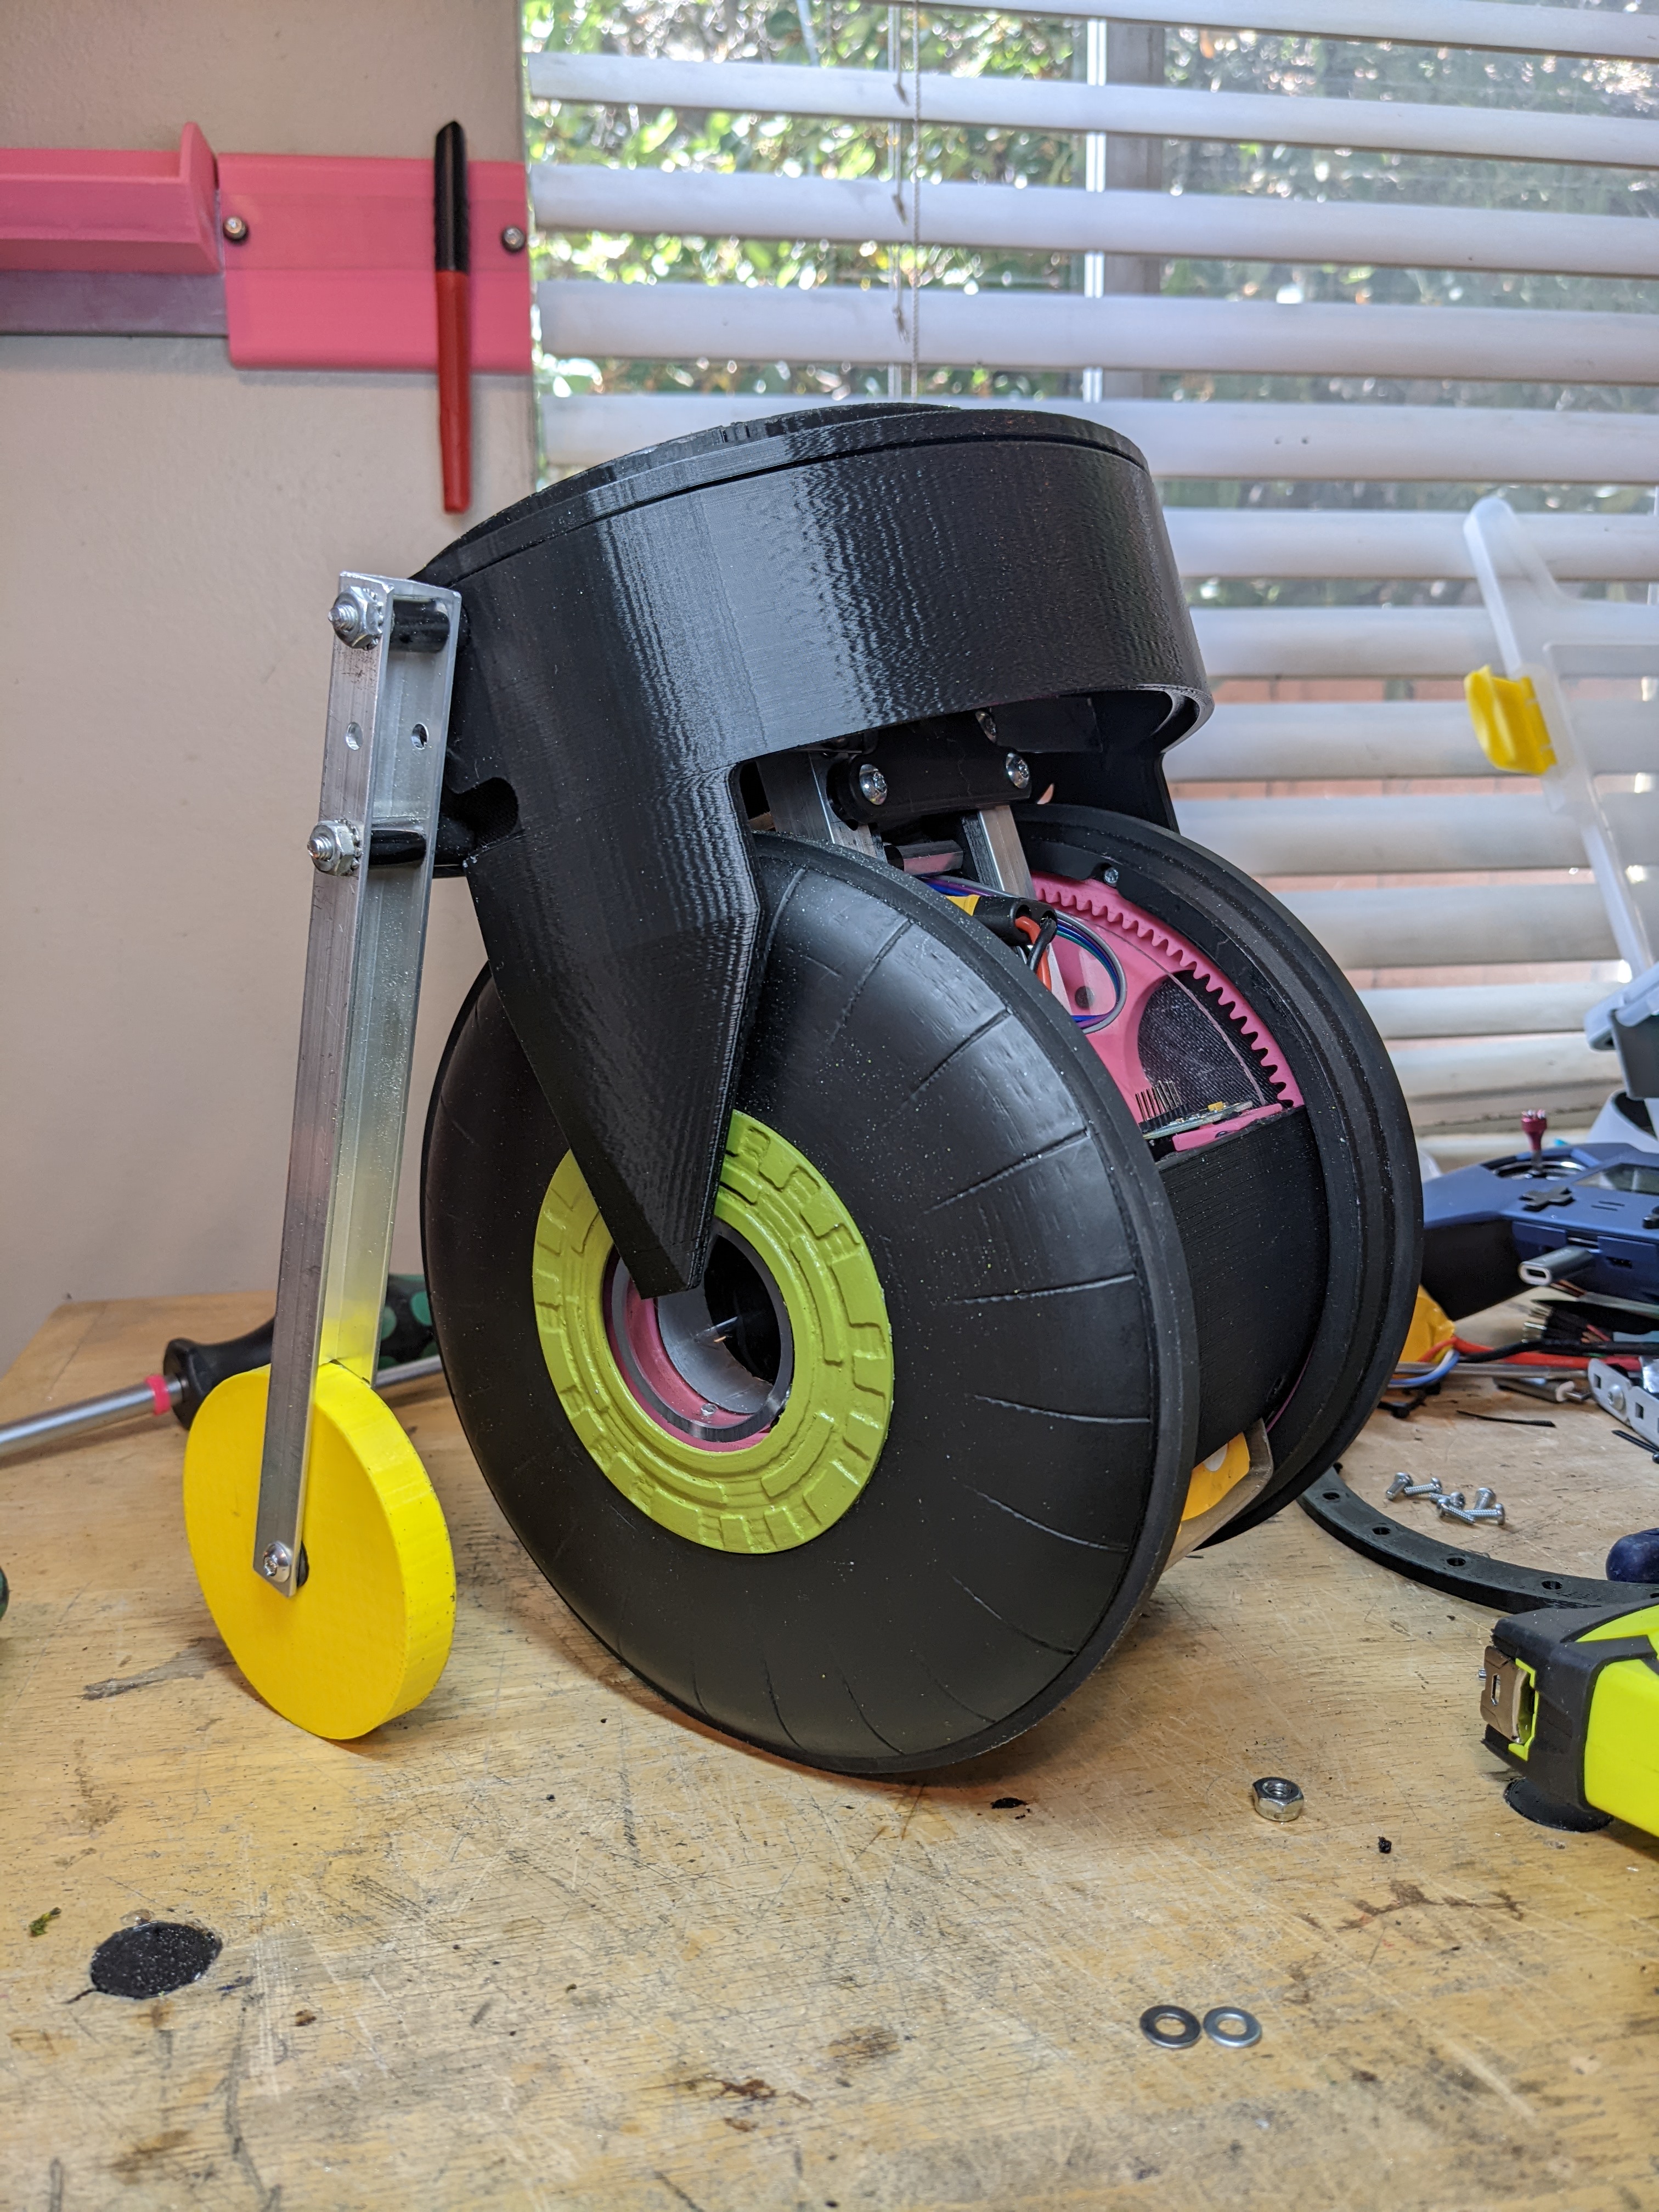
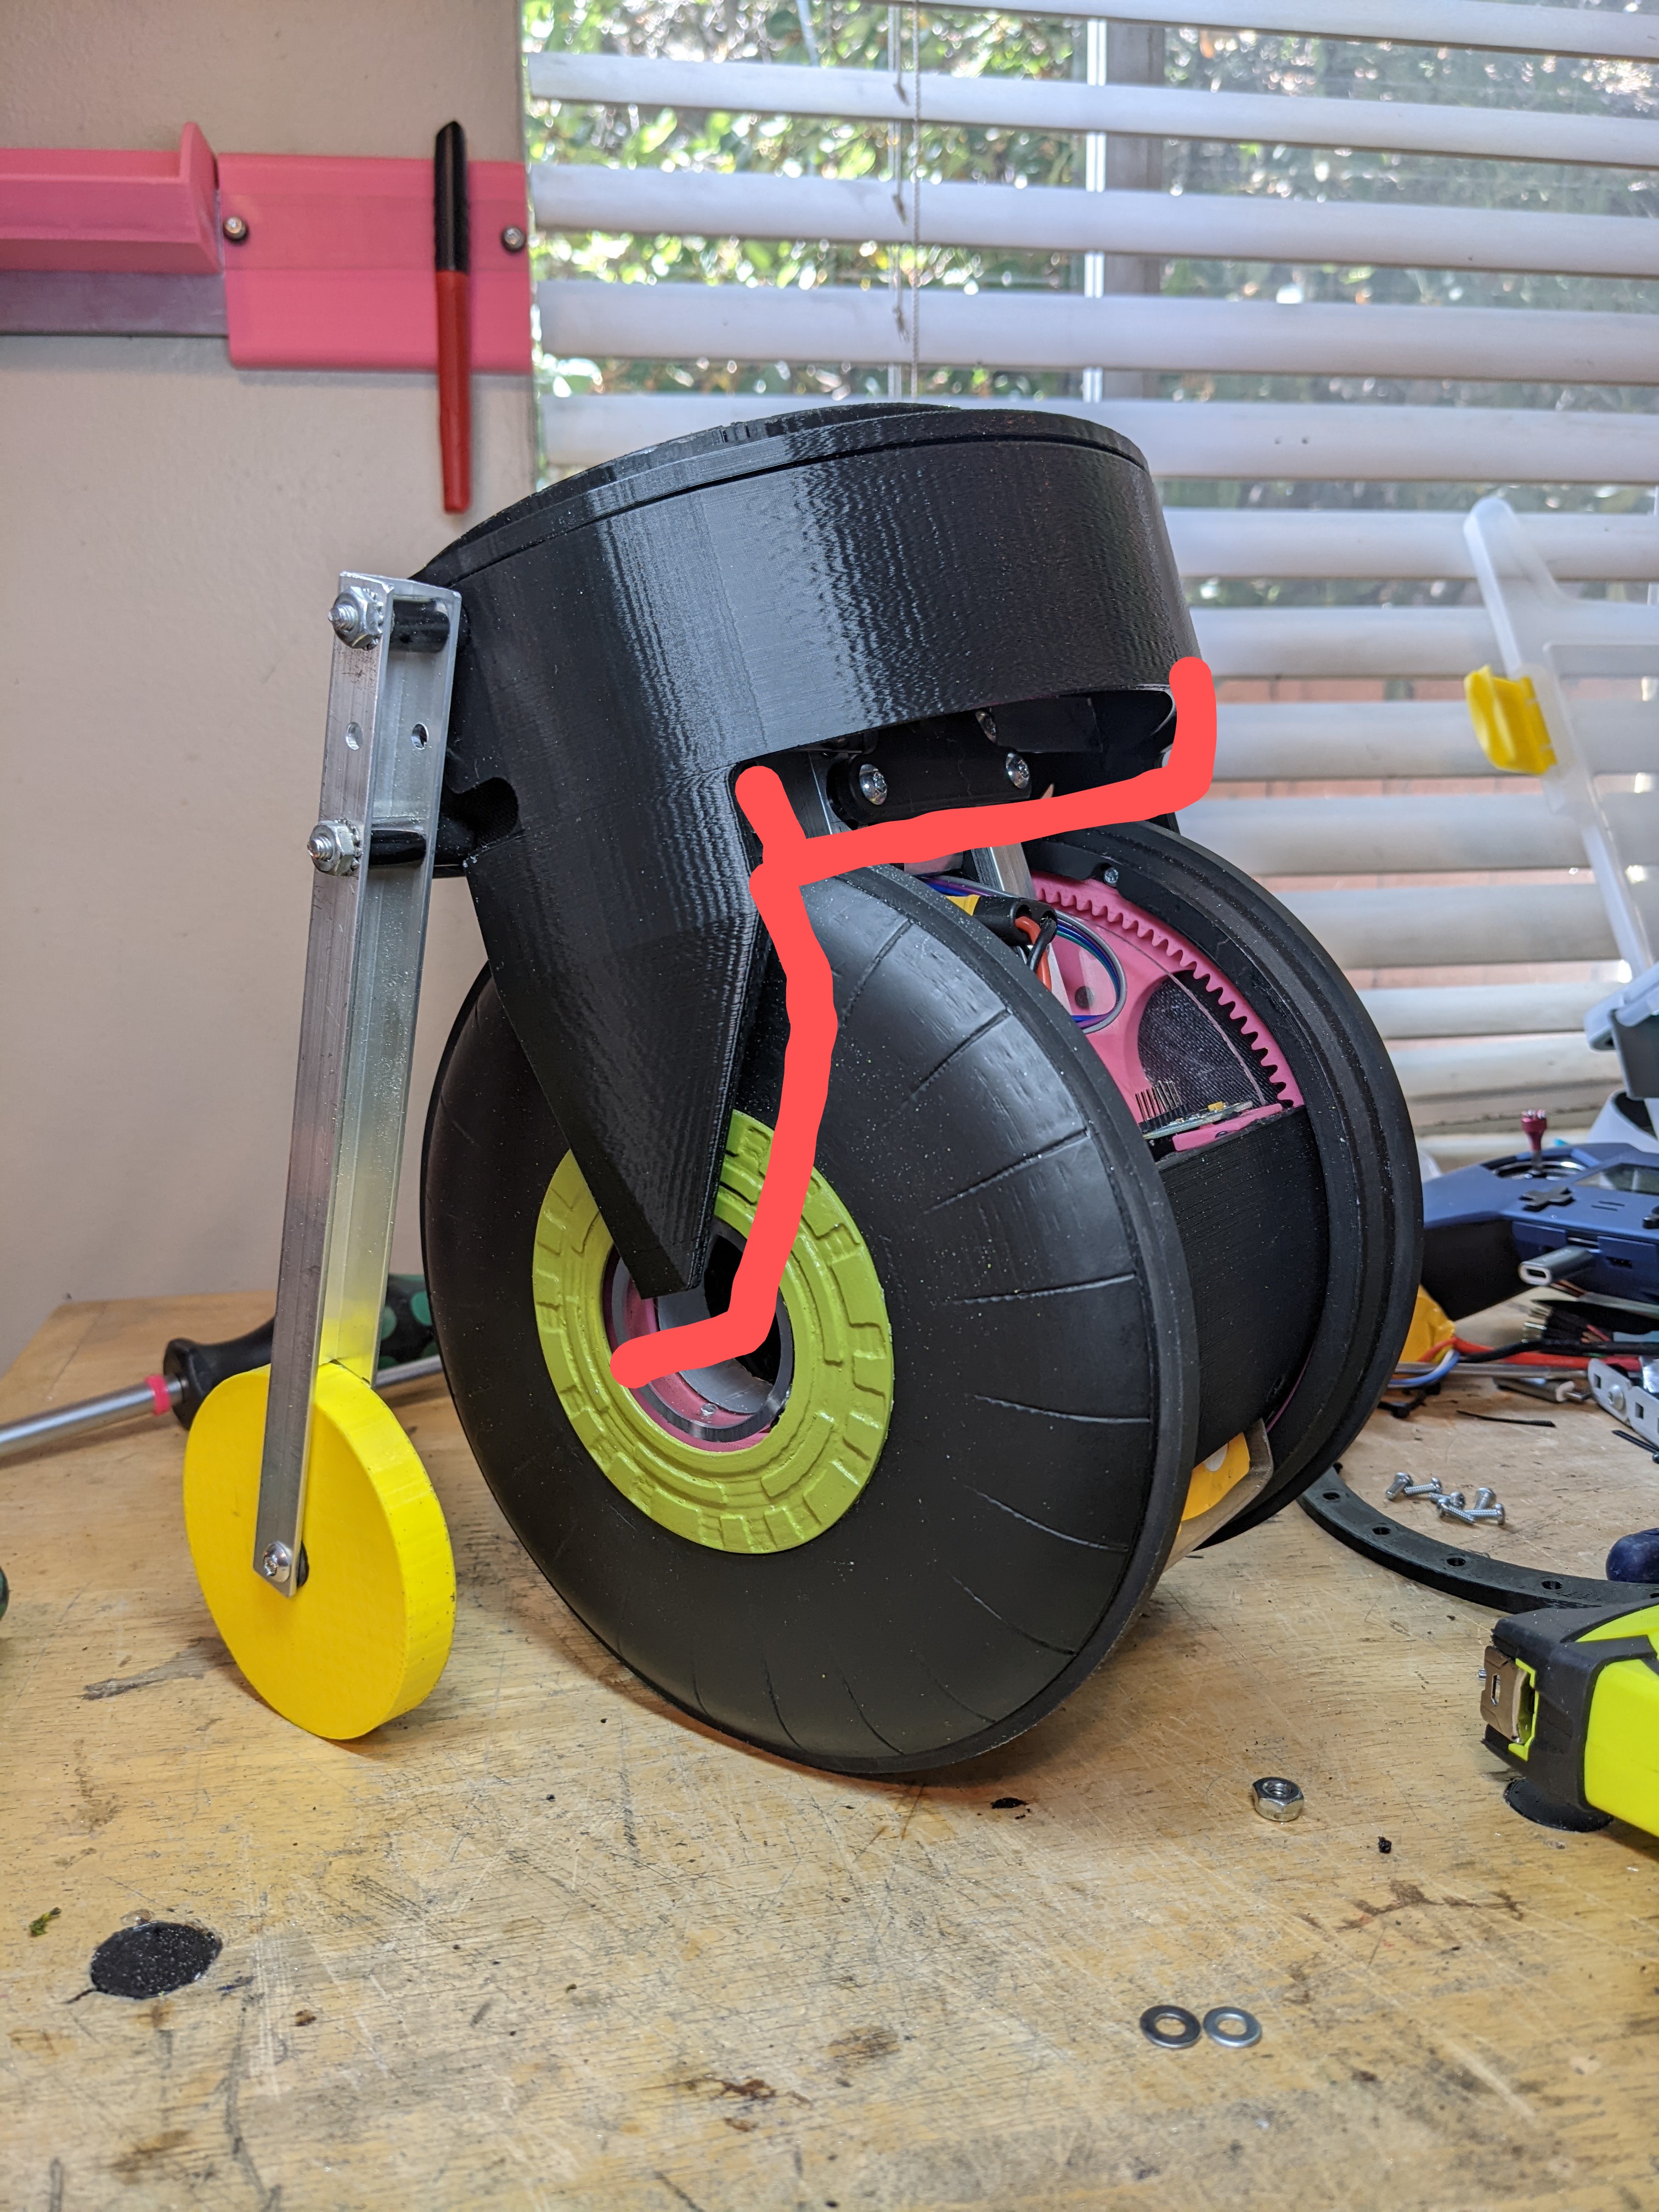
Something I did get right on this design is the lip underneath the body. This allows me to figure out what to put there, and it doesn't limit me mechanically to anything while I continue to work on this.
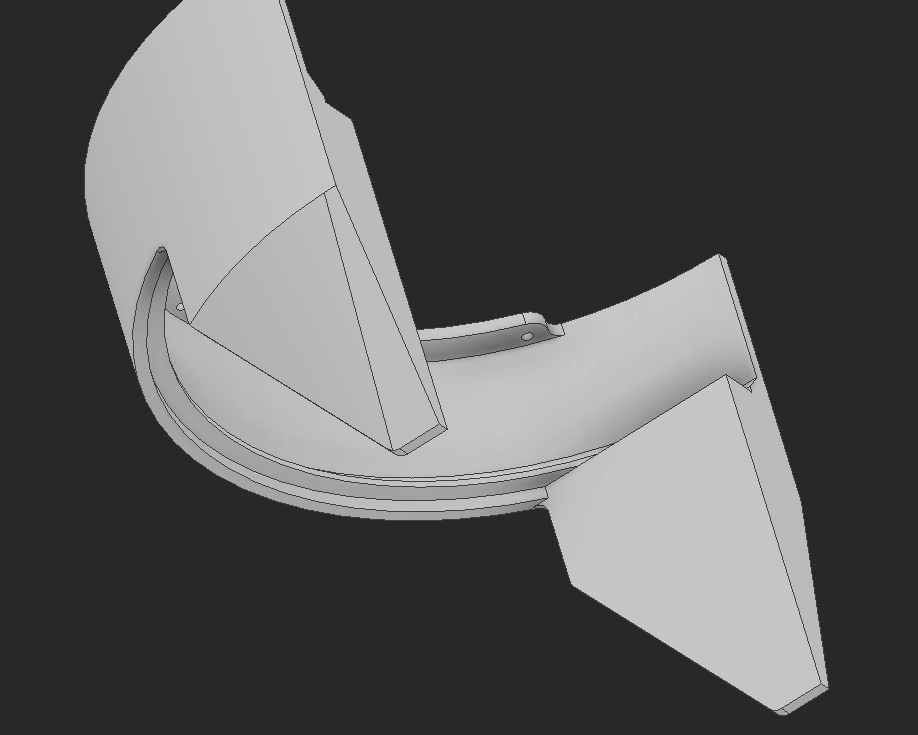
I added these new dimensions and added pockets for vents and a decorative front plate. The dimensions for this ended up feeling perfect.
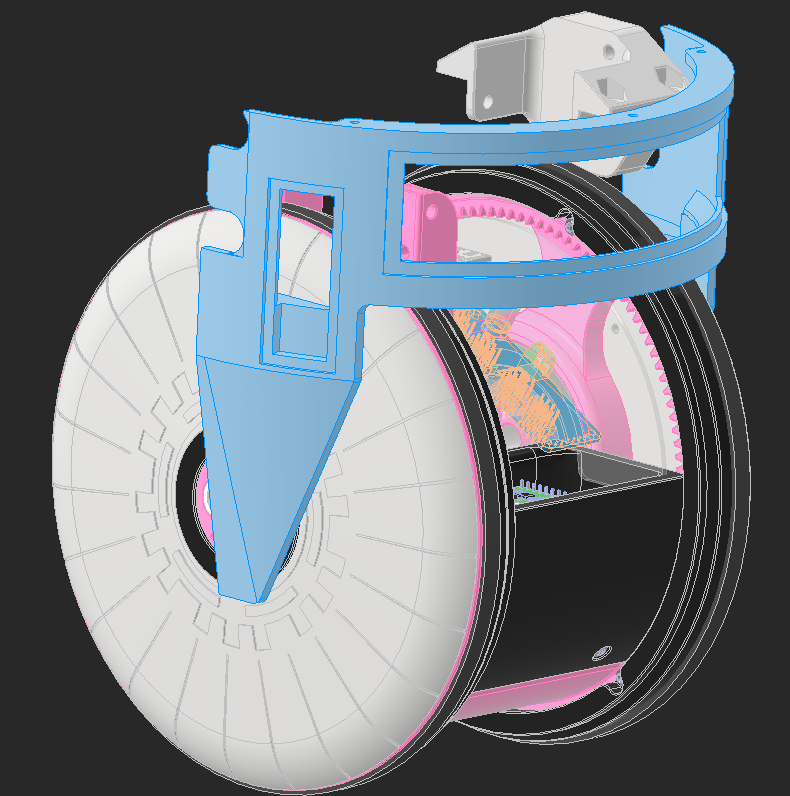
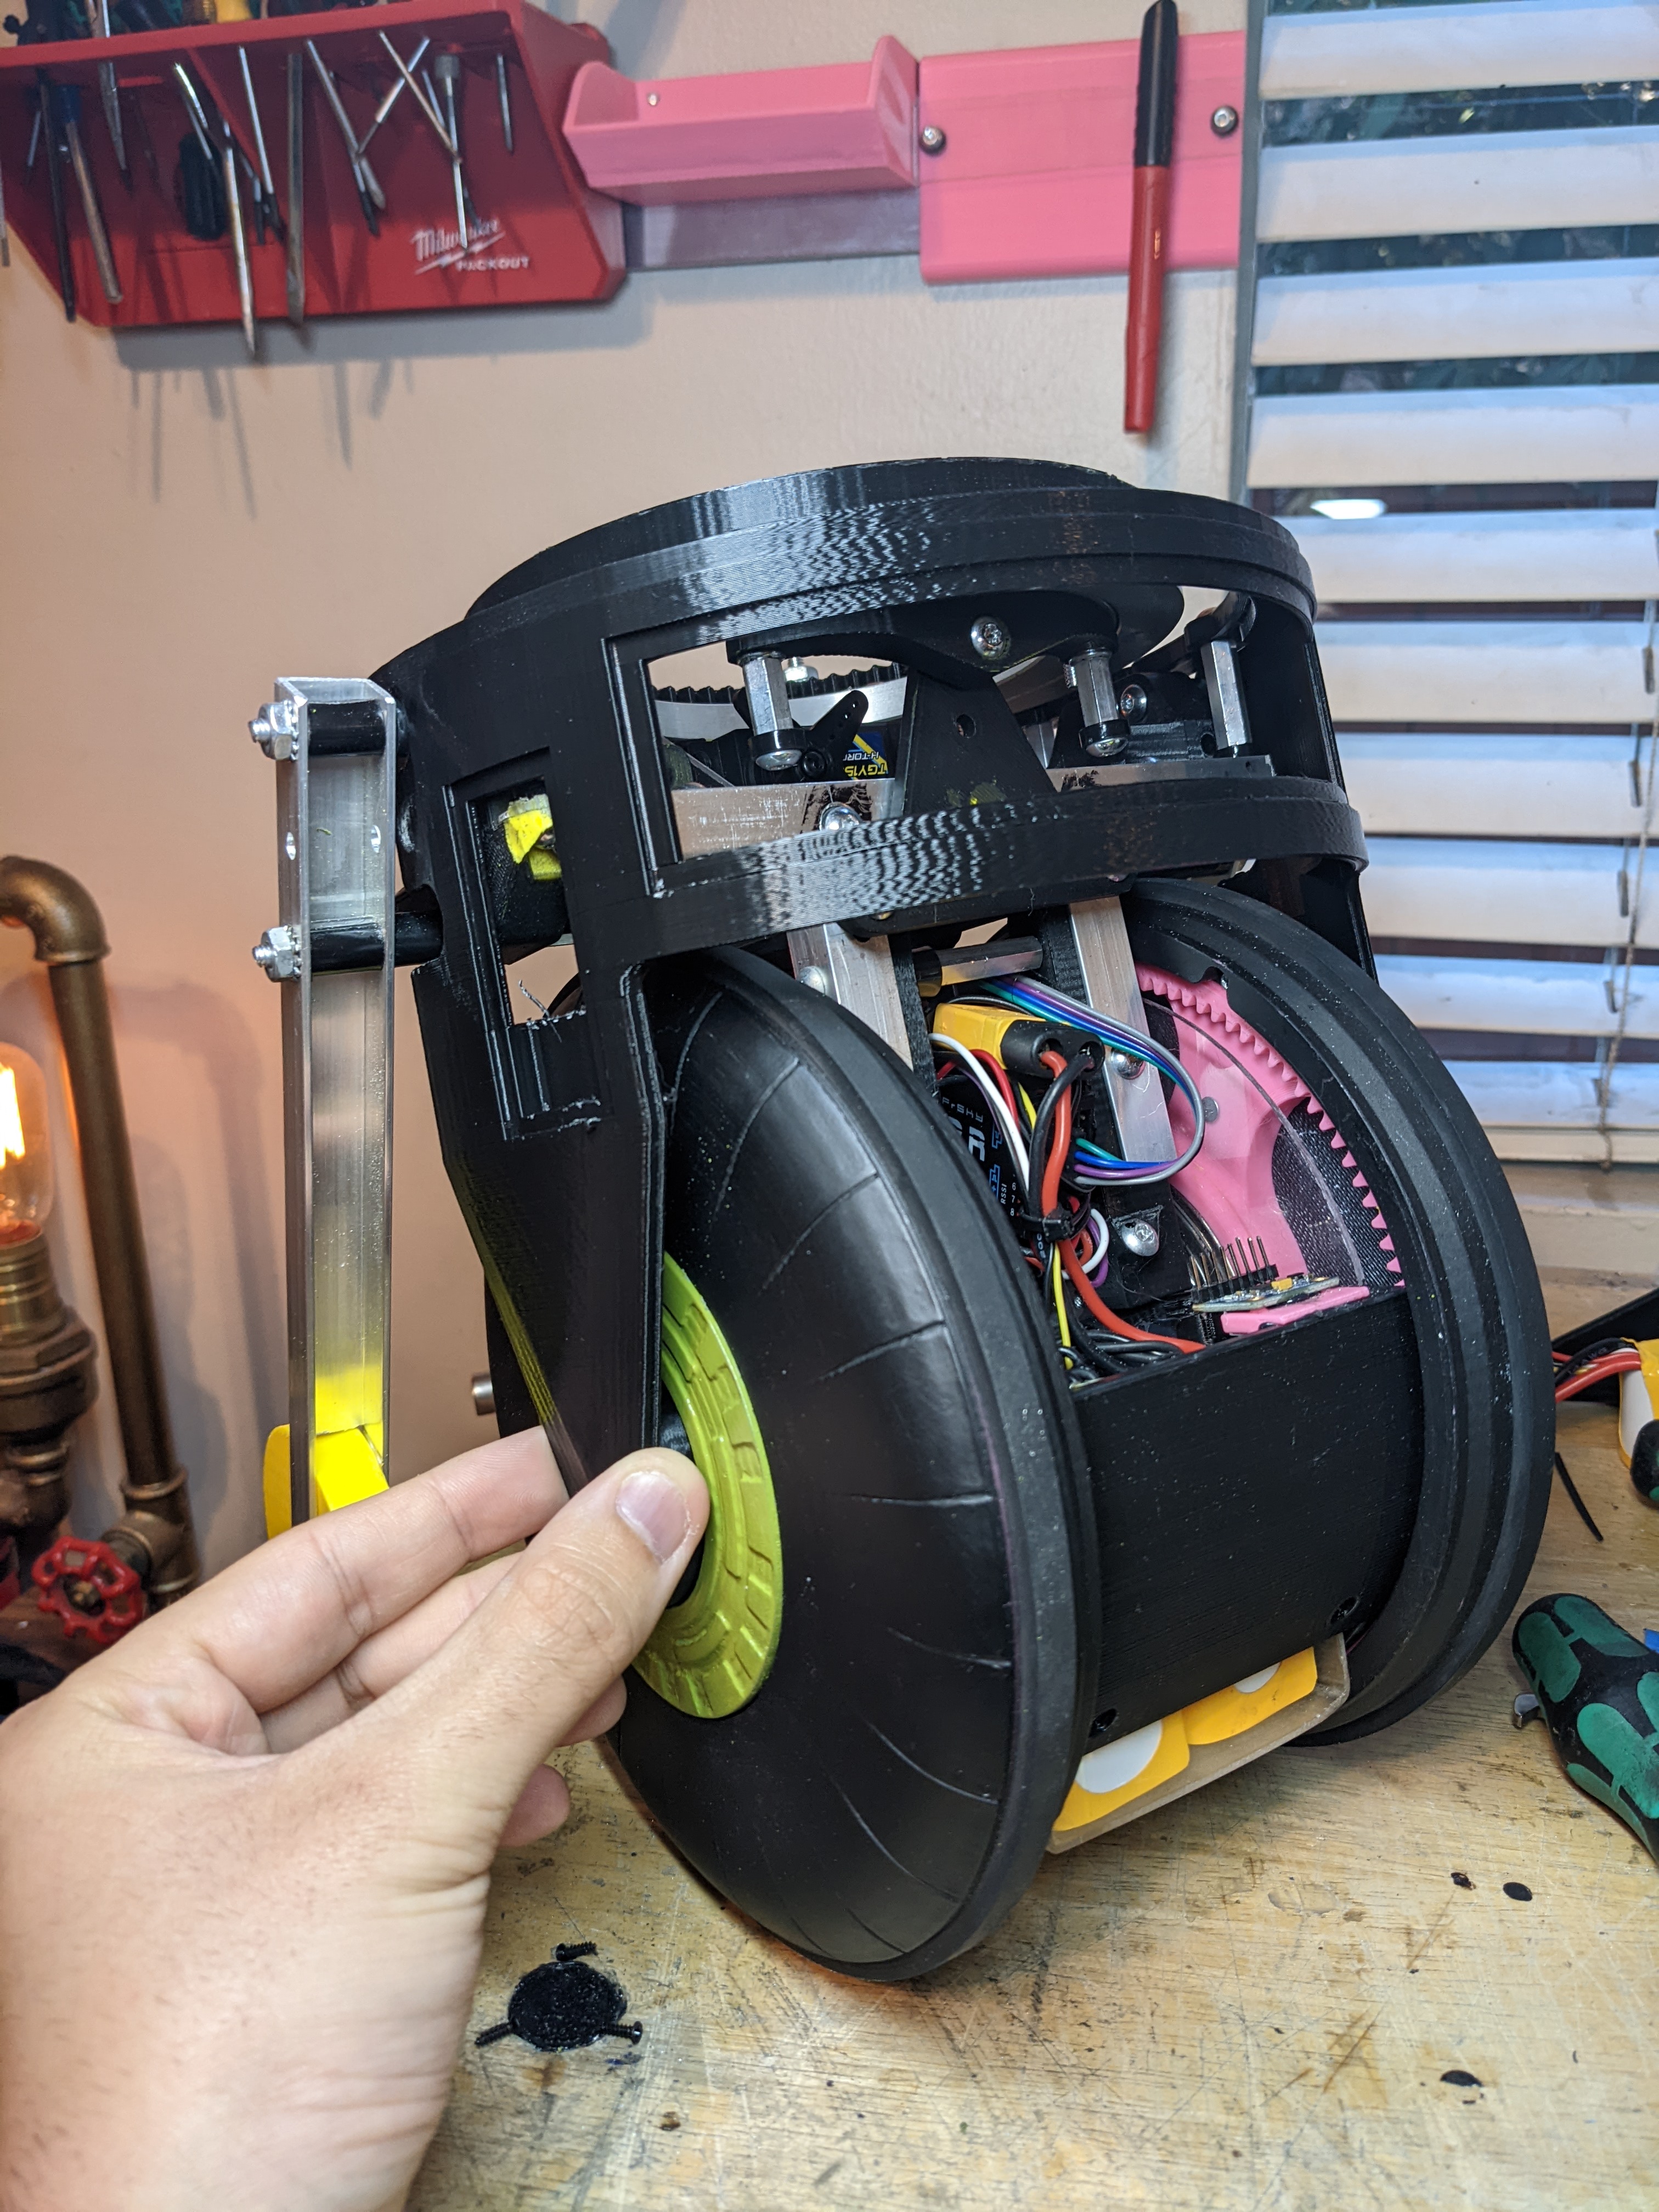
I tried a new wheel design using a VEX flex wheel but I'm really not happy with it, instead, I'll try using an o-ring.
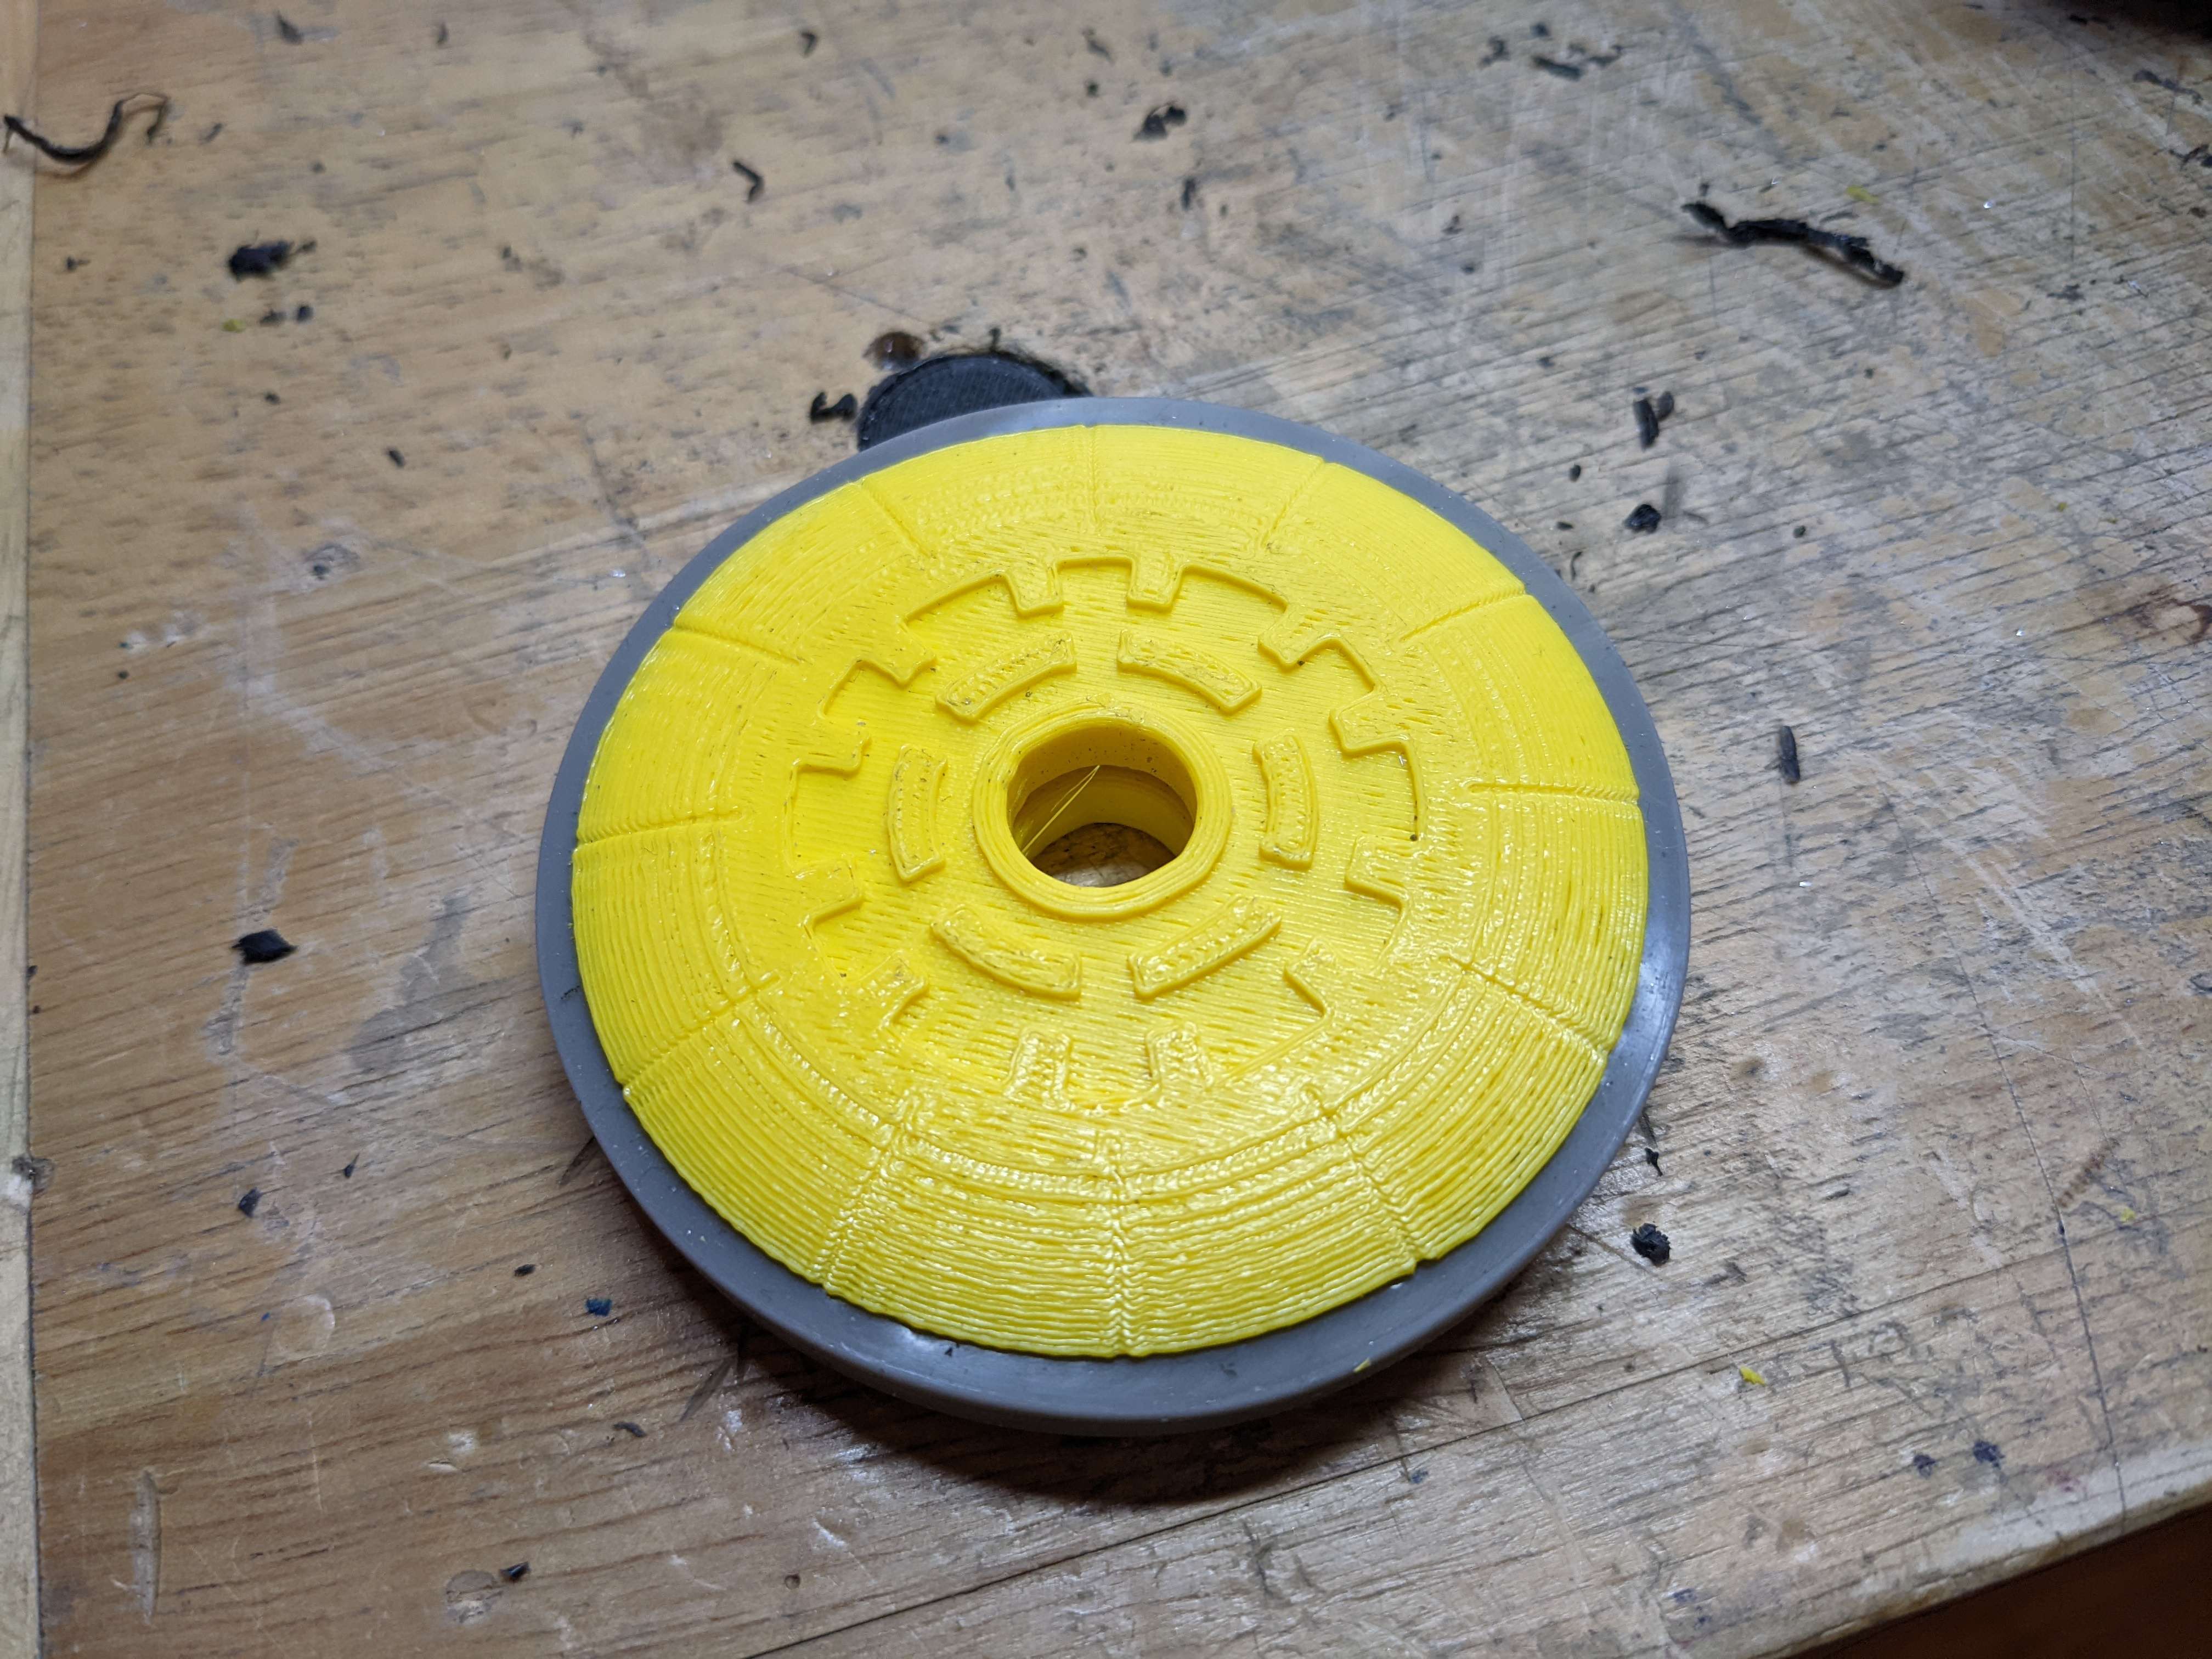
I designed a new wheel that I think looks better and uses an o-ring instead of a VEX flex wheel. I also made the leg design, but this won't be the final version. My Prusa Mini is small and I cannot fit this entire leg on the printer. I'll need to split it up into multiple pieces. Designing each part of this leg from scratch while trying to figure out how to get it all to fit seems like a nightmare. So instead I've designed the leg as a single part, and once I'm happy with it I'll pull the dimensions for the separated pieces.


I wasn't too happy with the back of the leg, I felt it needed more of the hook shape around the wheel. Once I added that I was pretty happy with the way it looked.
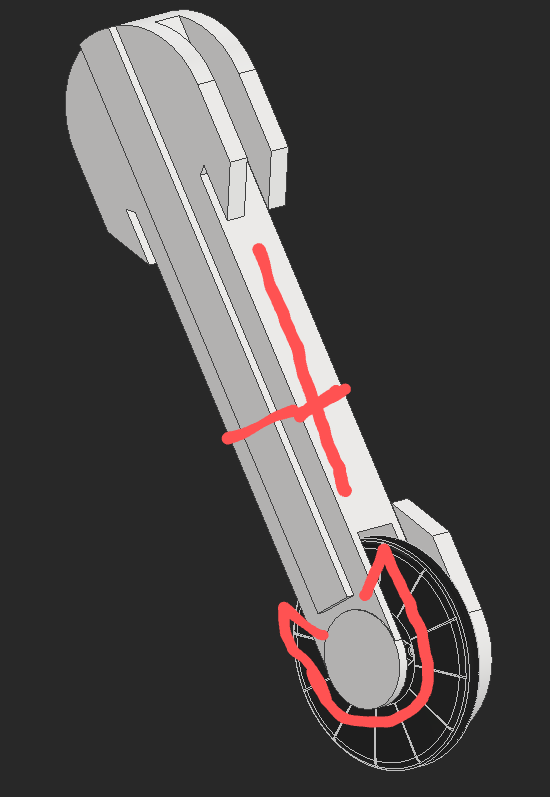
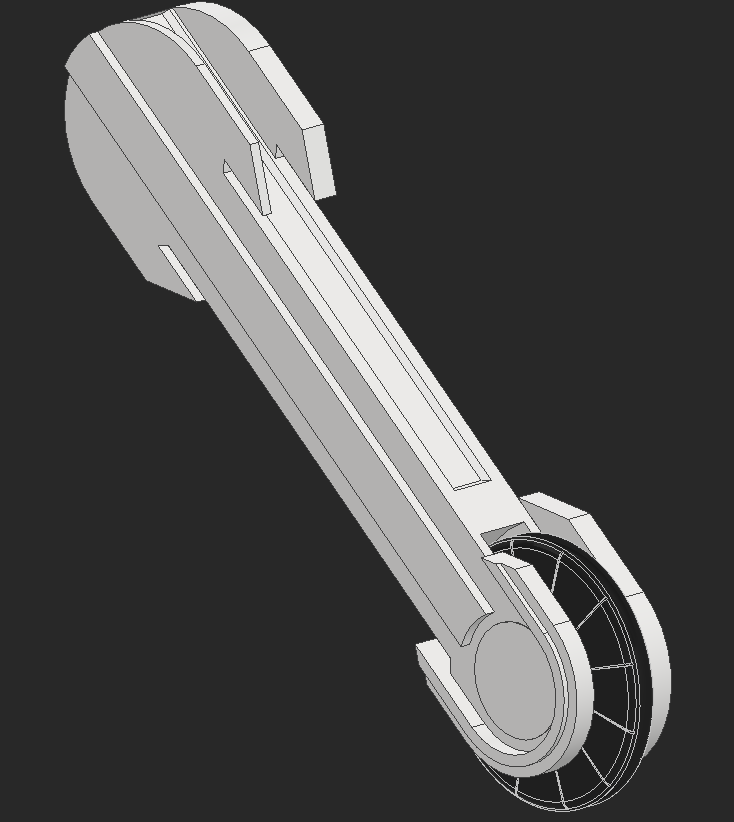
I wanted some mechanical interlocking between the pieces on the leg, so I have these chamfers that make sure these two parts are indexed together.
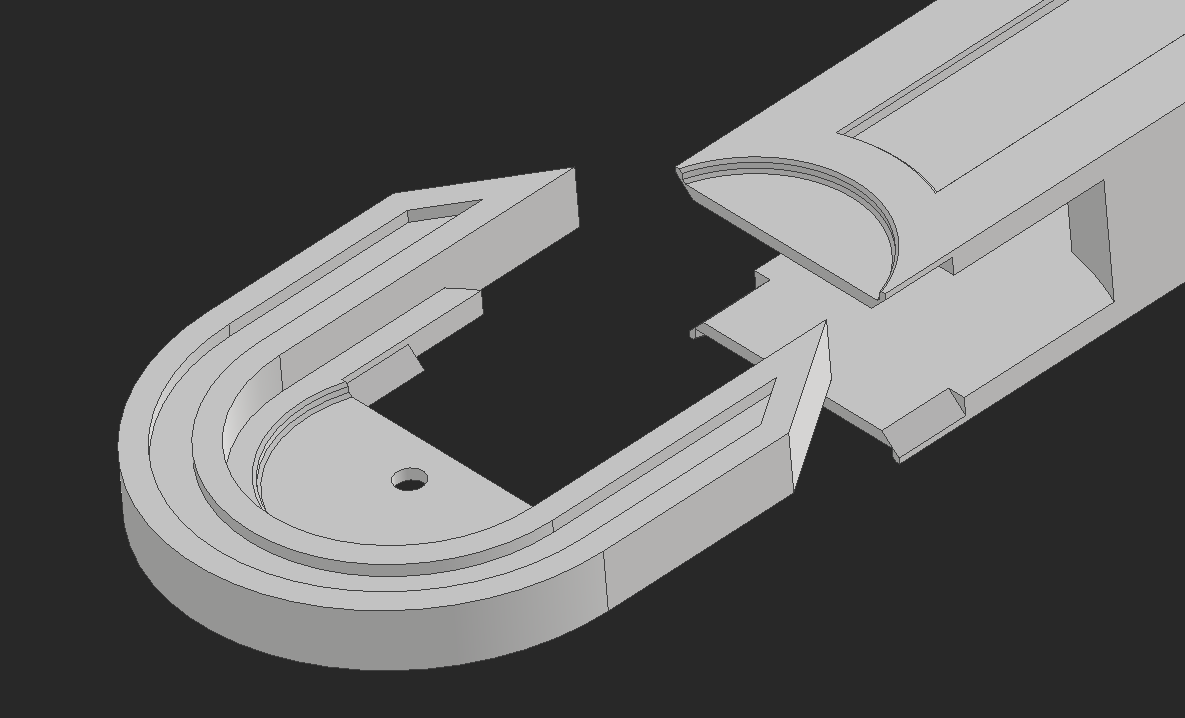
All of the parts come together like this. I changed the shape of the top portion of the leg because more space was needed to cover the keps nuts that hold the metal in place.
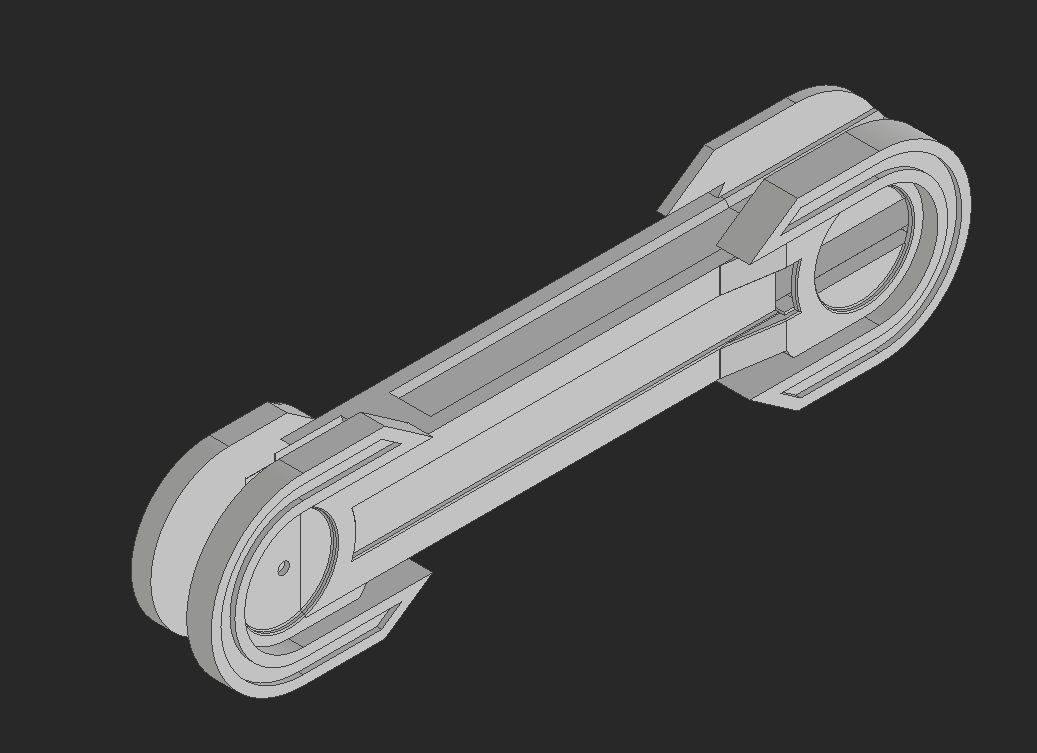
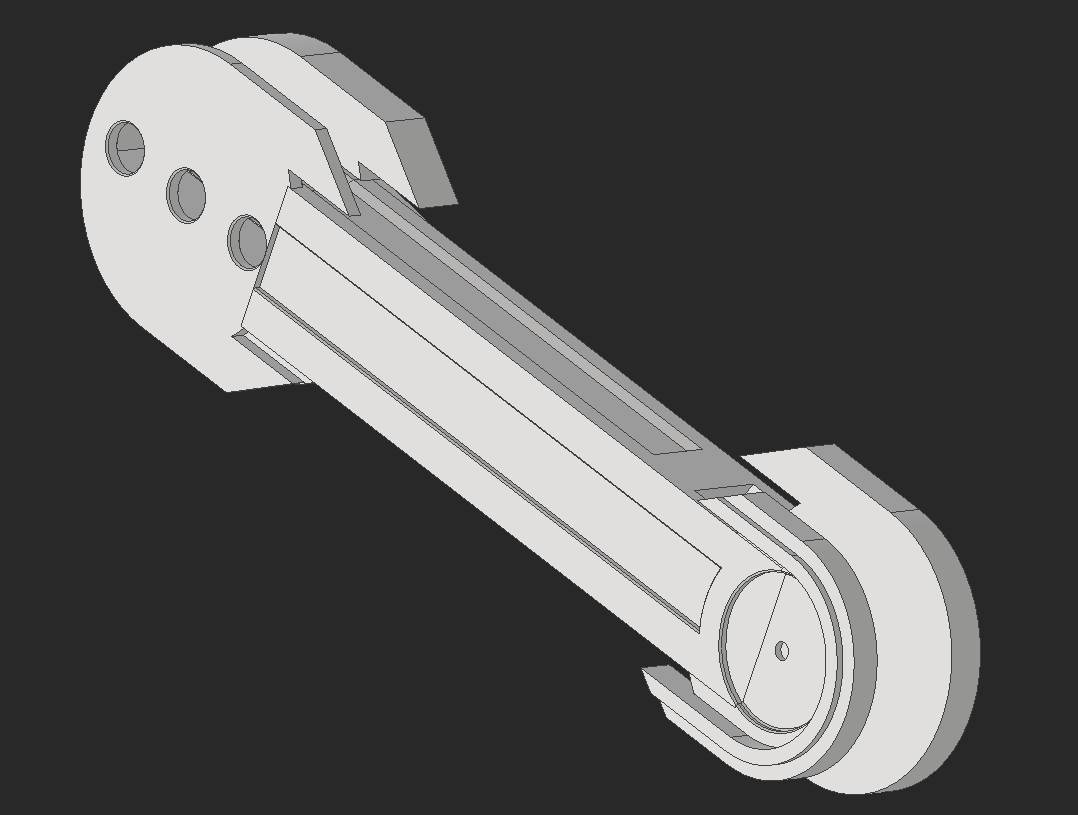
I decided to have separate parts that are painted a different color that attaches to the leg.
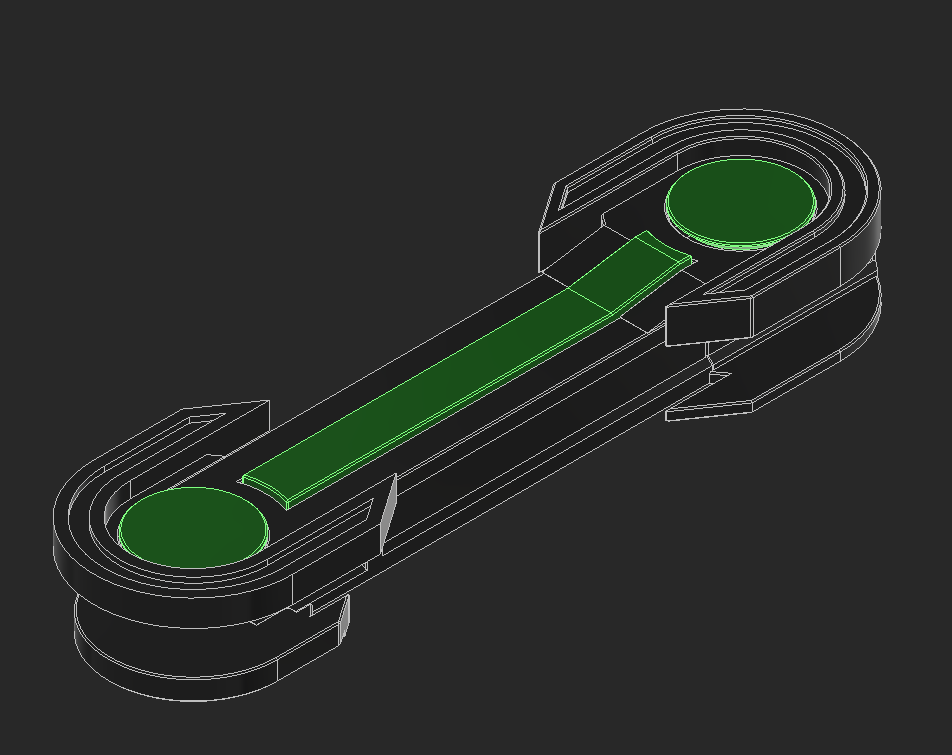
The electronics need covering. I had the idea to make a piece that flexes around the body and clicks into place over the main printed chassis. This part is printed and ideally will flex around the chassis.

The center tire idea worked! The legs are also all coming together and working as I expected.


For the head, I want it to be mounted with magnets. For that, I need the head to index with the lazy susan. I made 3D printed cones to mount to the lazy susan, and have the receiving ends of that on a plate that the head will get mounted to.
I started painting the legs while I designed and worked on the head. The head is a $0.50 bowl that I got from Target. I wasn't sure if it would work or not, but the dimensions looked about right so I picked it up. I liked the dimensions so I went ahead with using it. I also kind of liked the idea of using this wall greens medicine cap as the eye.
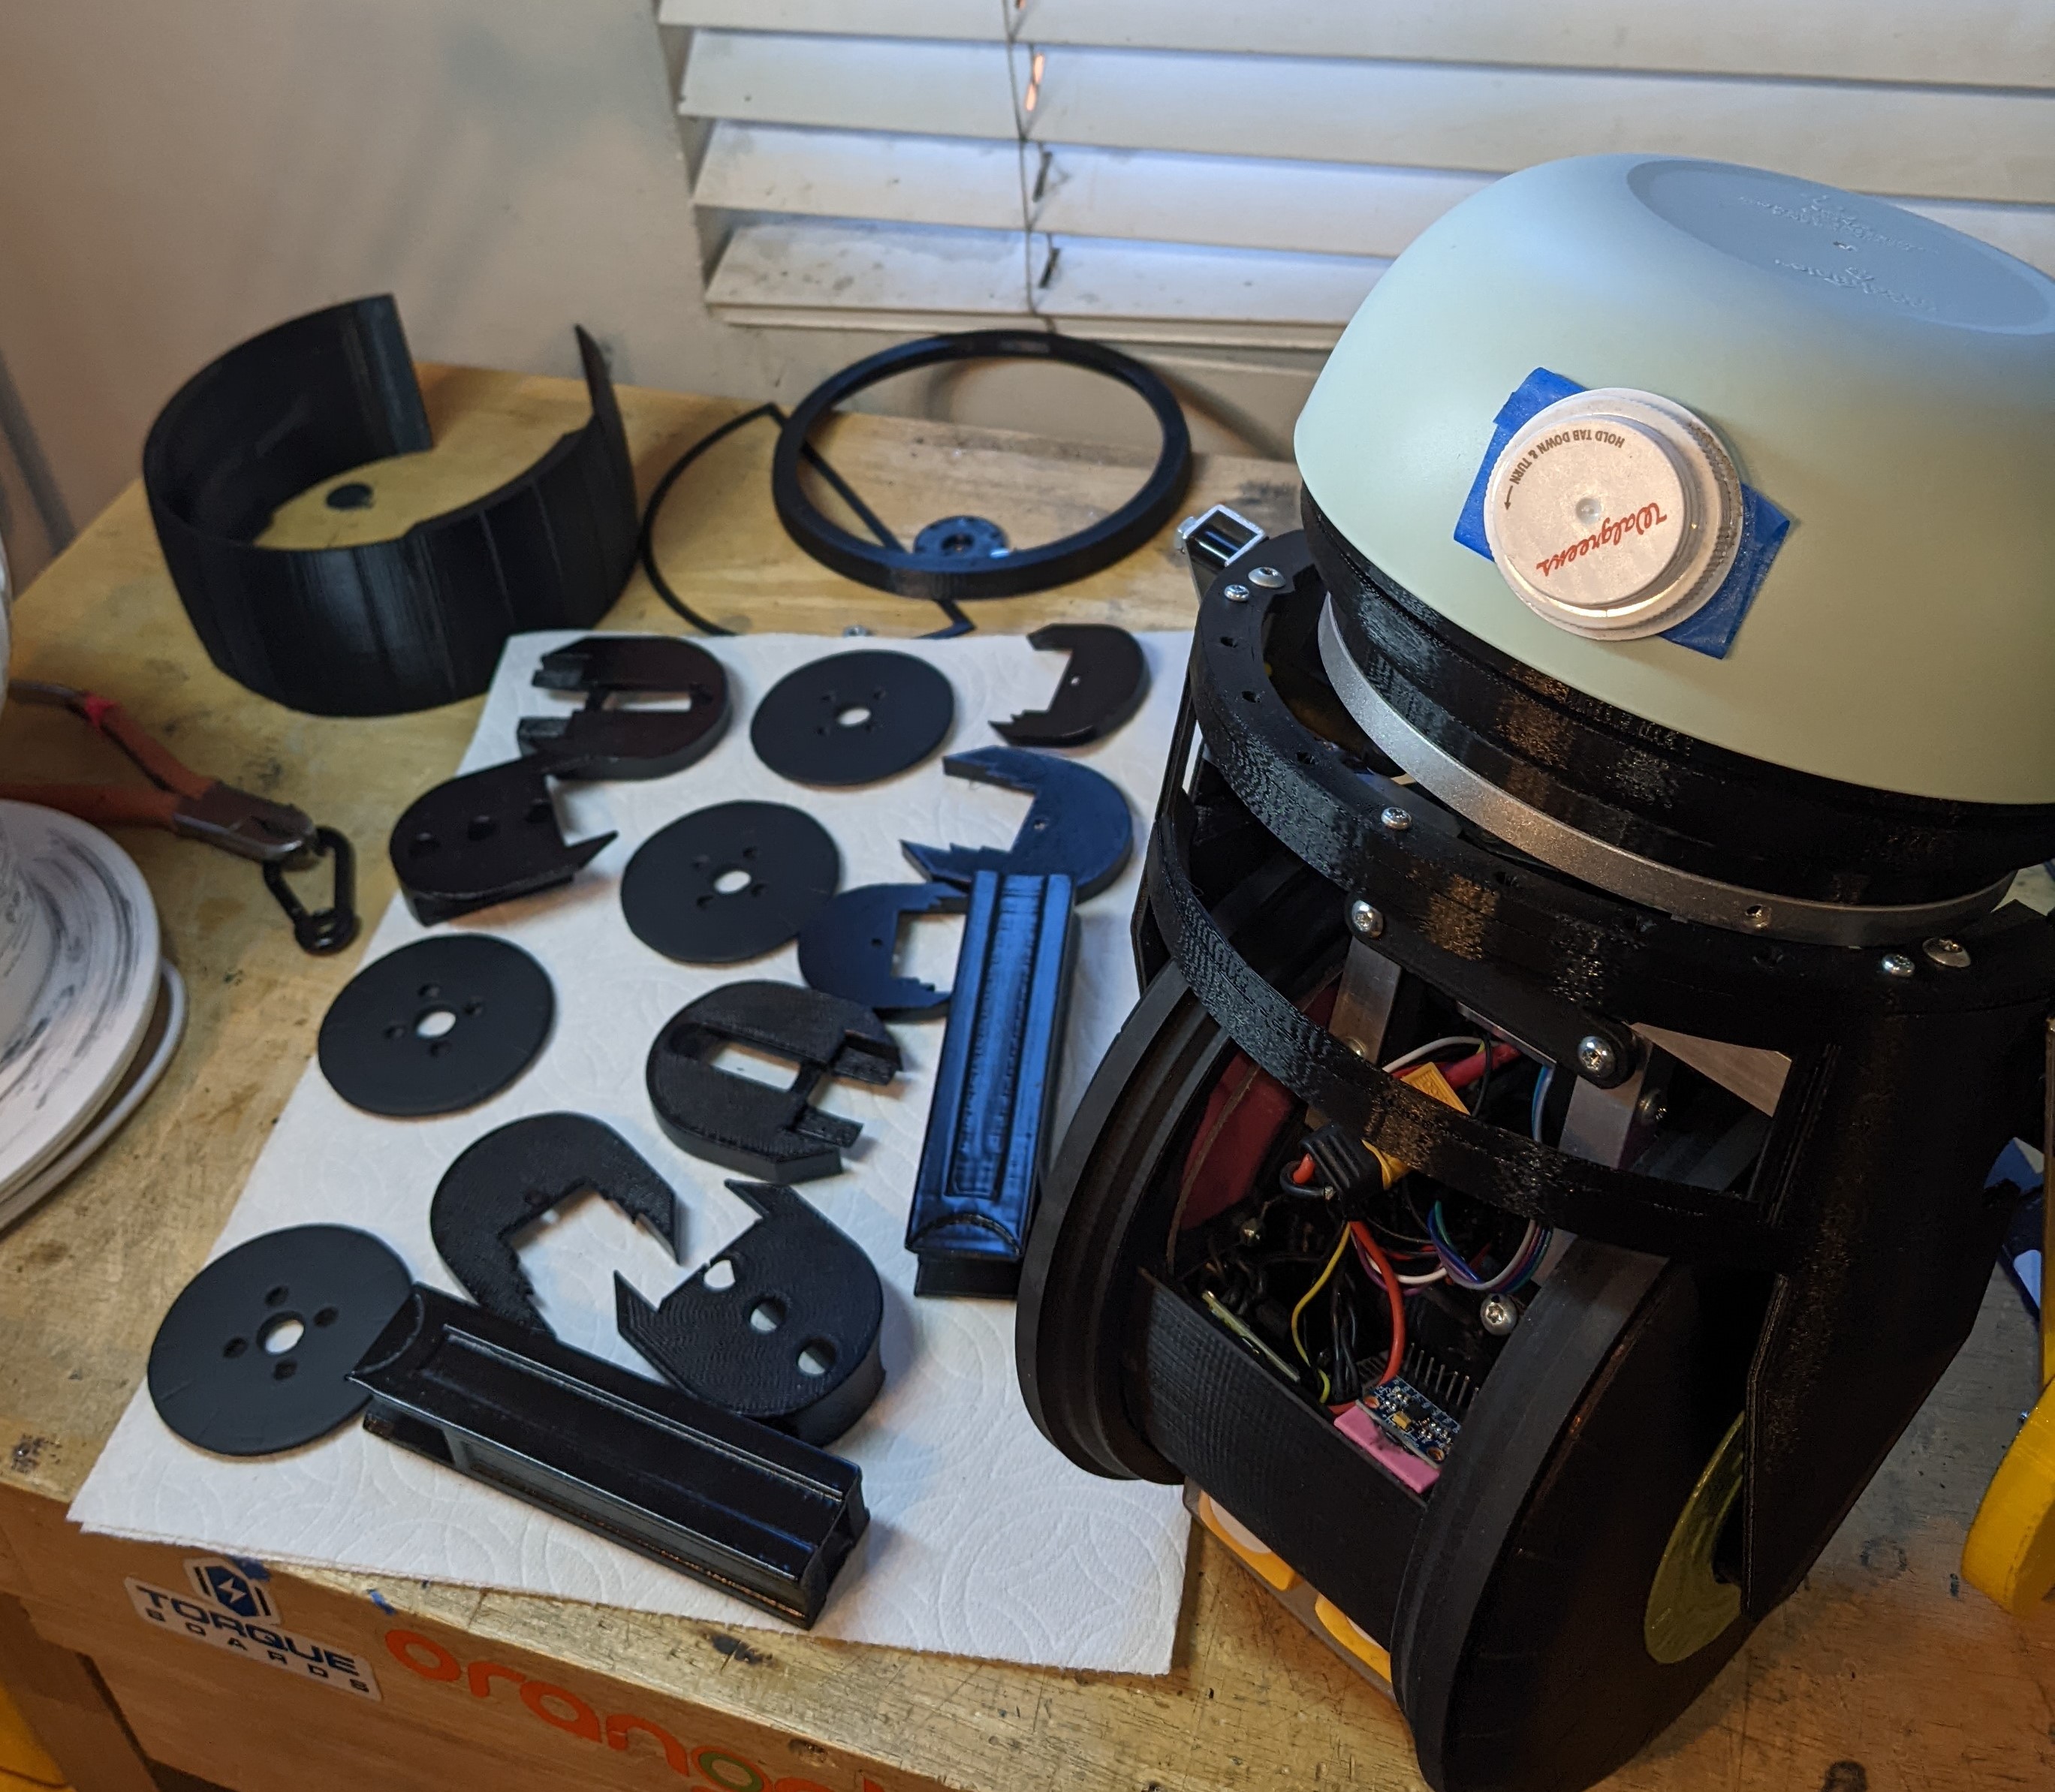
I CADed the bowl and added some decoration around it. I have the eye around a ball joint I'm going to 3D print and a cover around the eye. I also made "eyebrows" that are going to move in and out to give the robot more expression. I tried adding a top part that is colored, but the robot looks like it has a receding hairline, so I won't be going forward with that.

The eyebrows are connected to a linkage to move them in and out slightly, and the eye has an X and Y servo that will move it in both axes.
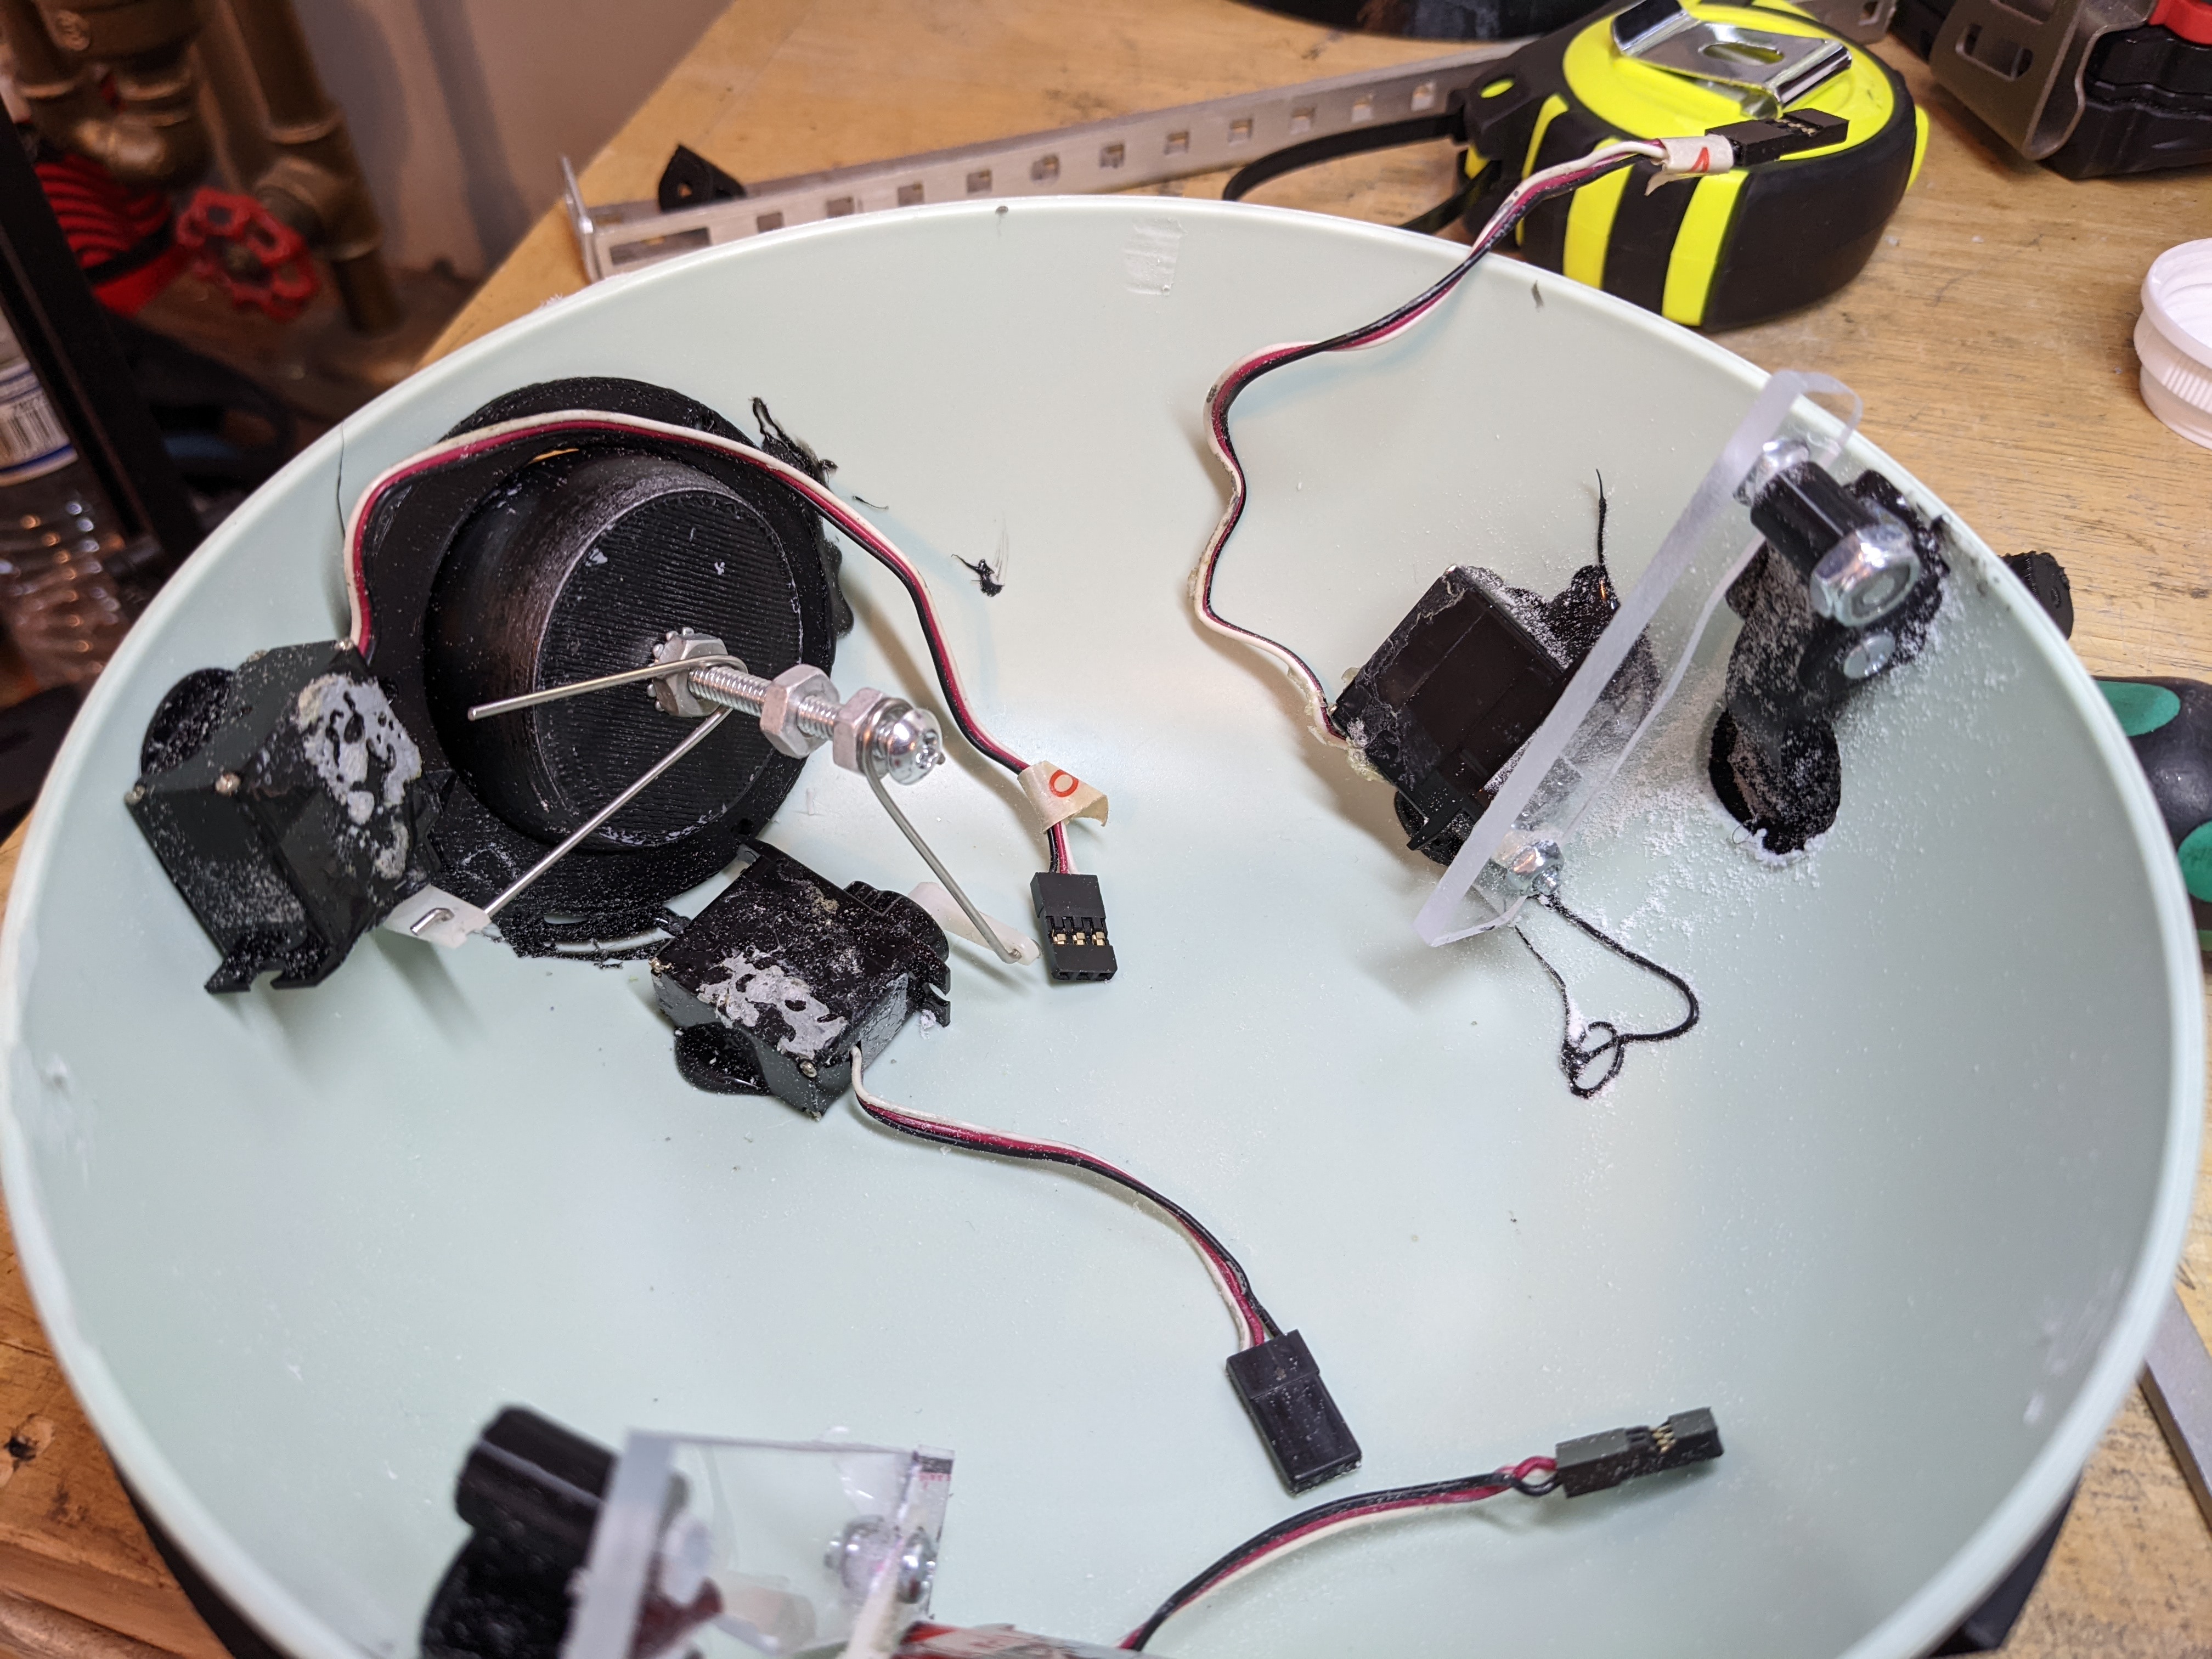

To fill the crevice in the bottom of the bowl, I used durhams putty. This is a very cheap powder, which is ~$3, and the powder gets added to water. I can control the viscosity of it by changing the ratio of powder to water, and then I can fill in the area with this. It's very sandable, and does cure to be "rock hard".

I got the head primed and painted and got the rest of the structure painted.
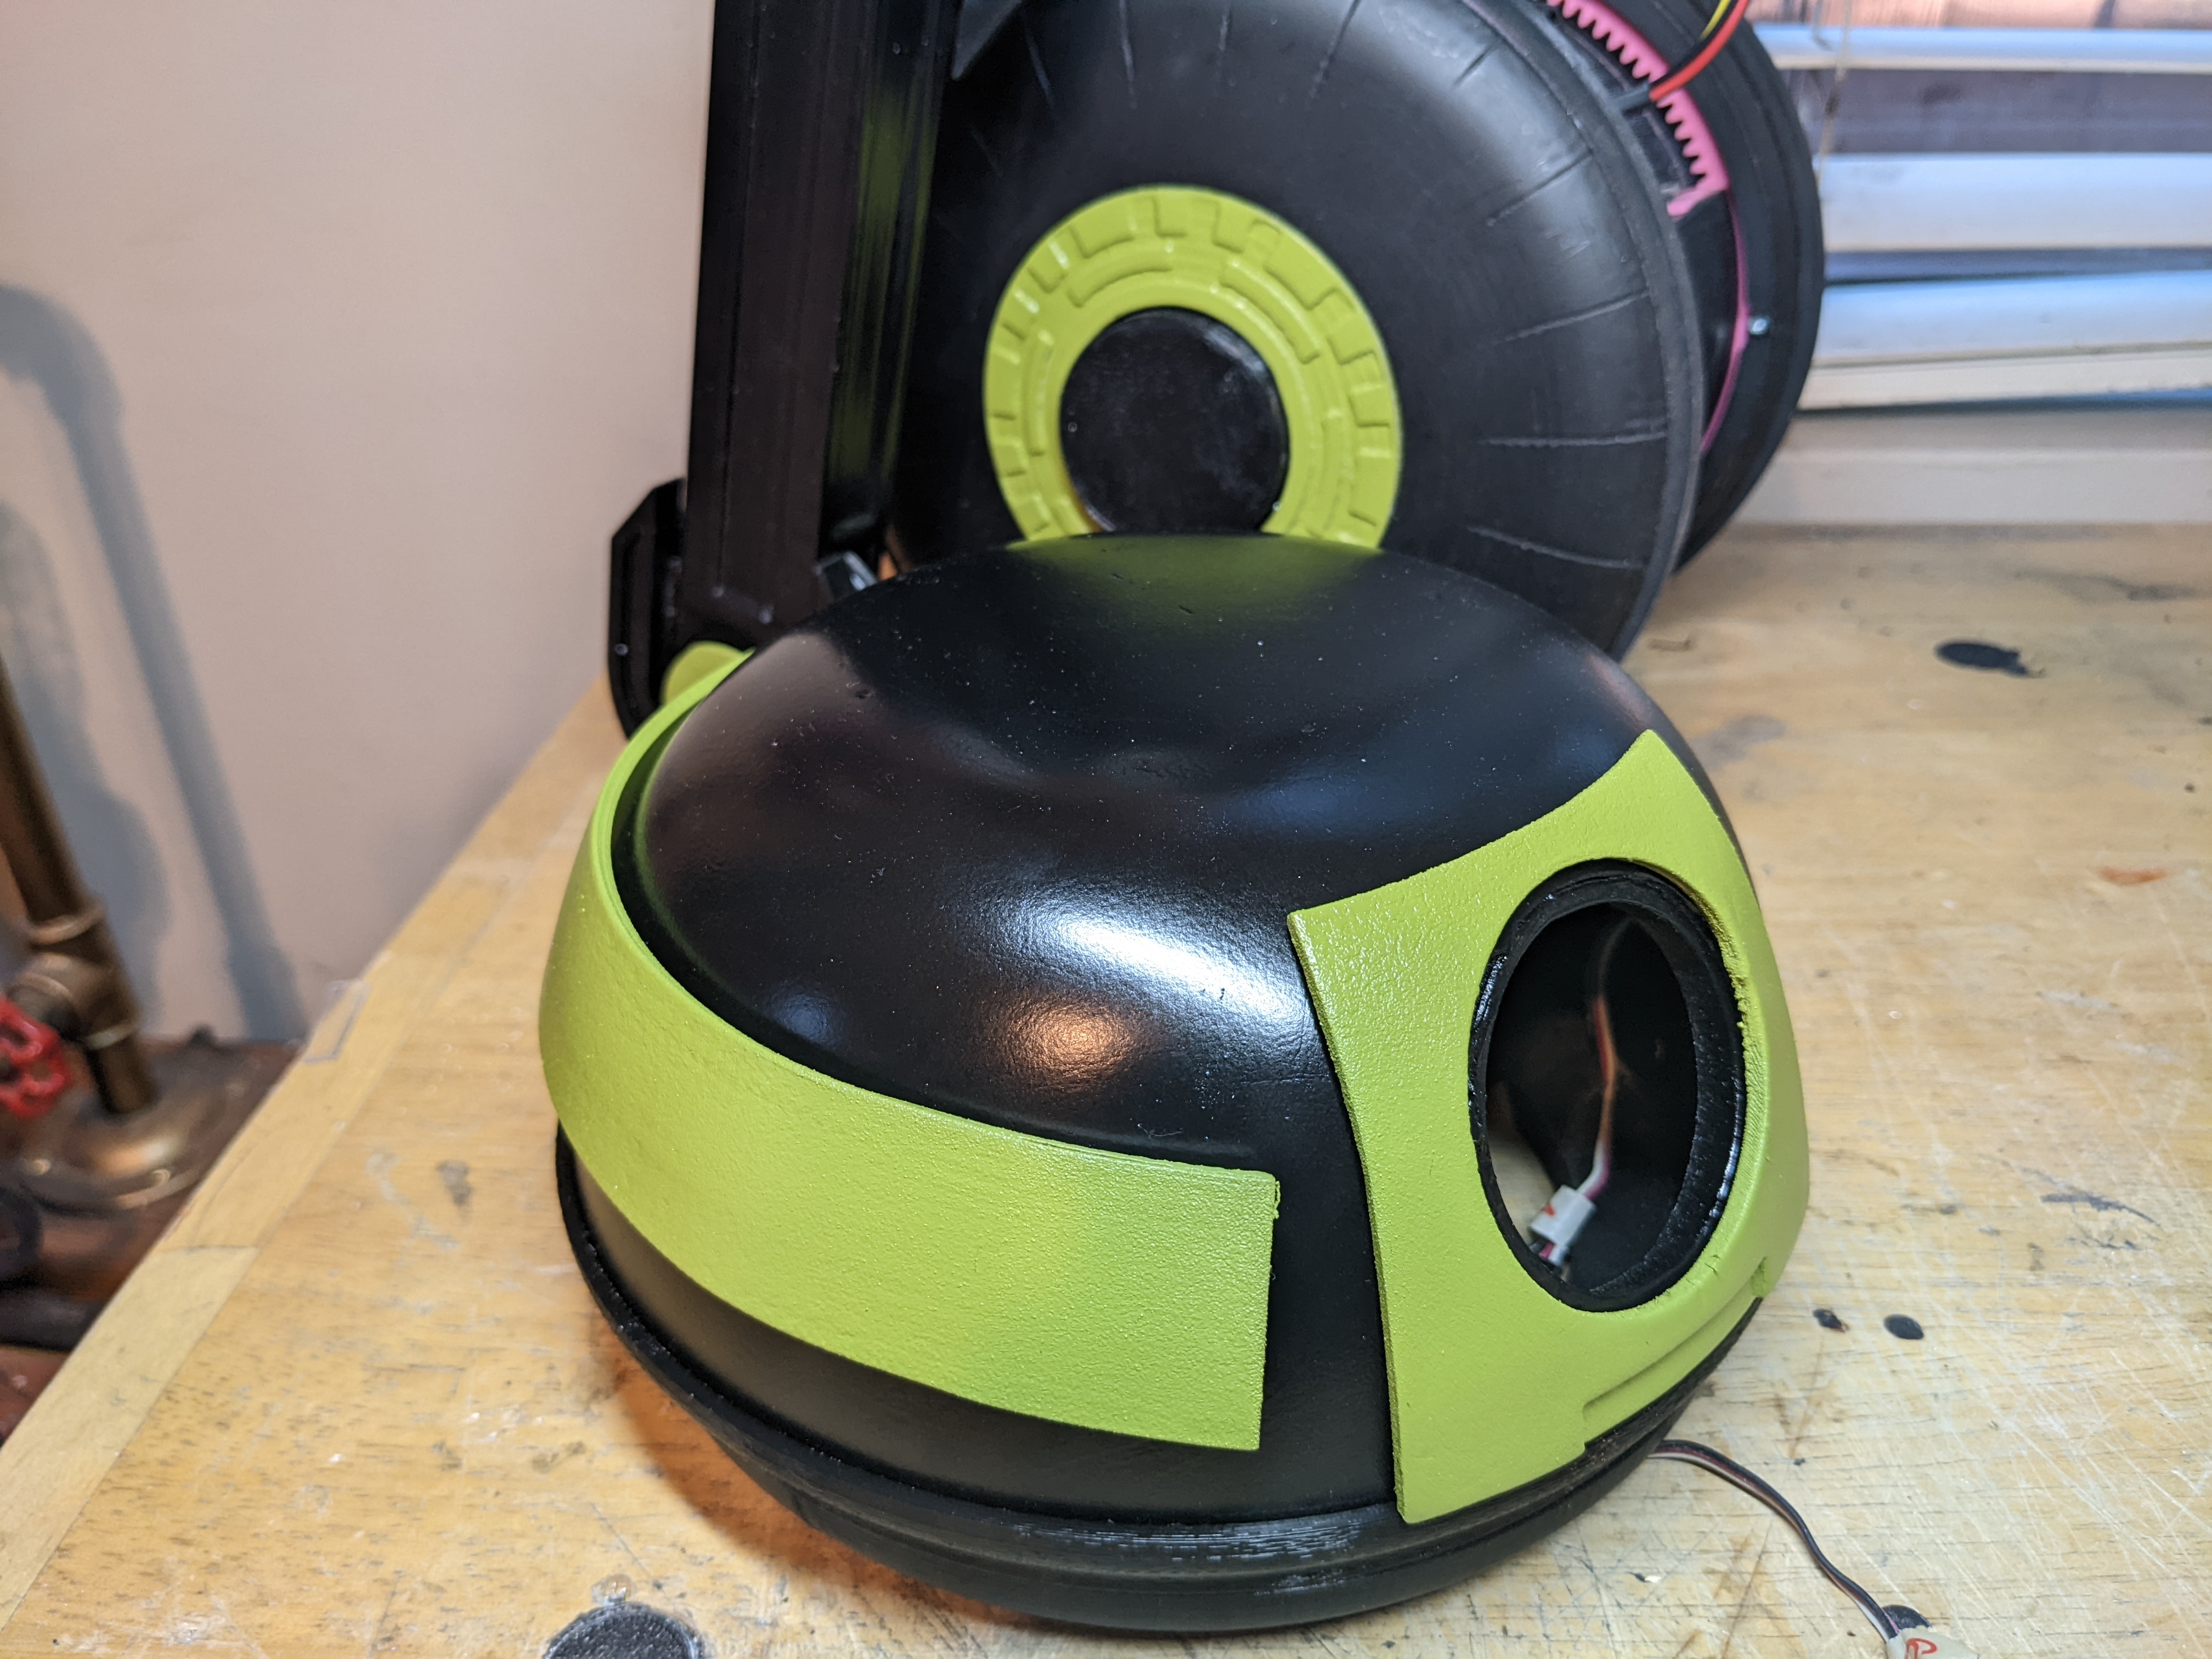
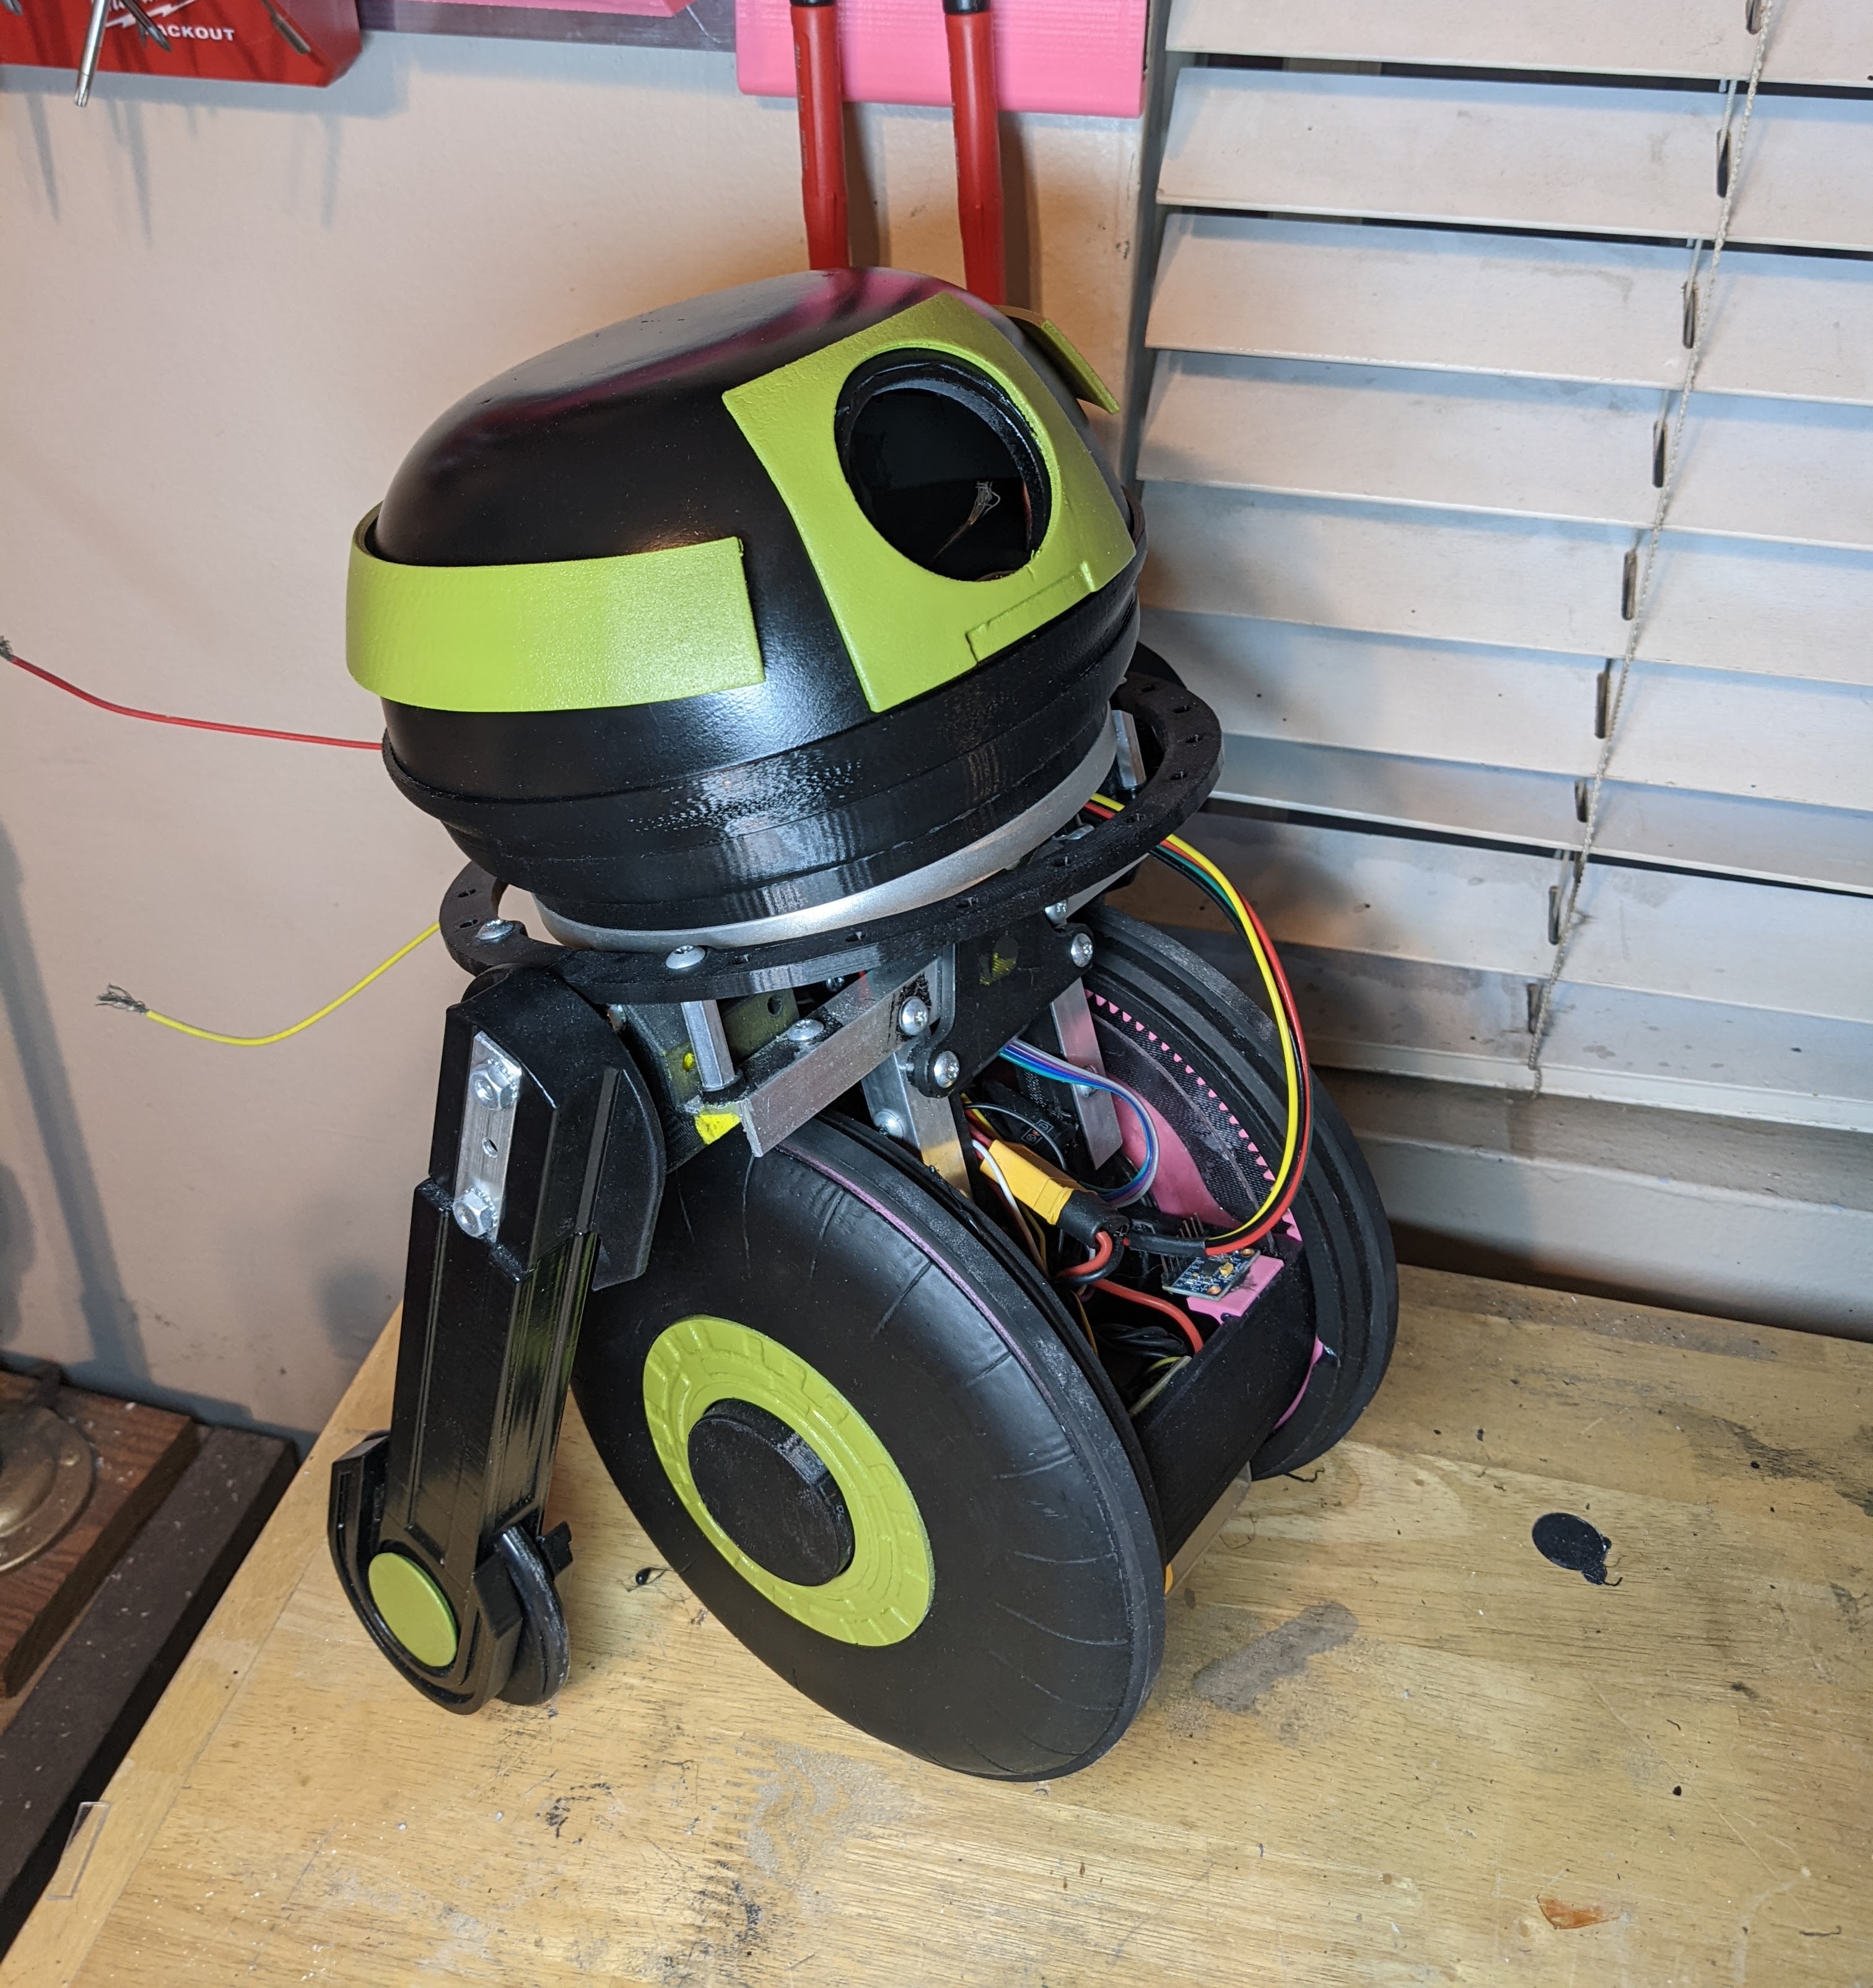
I finished painting the robot and the robot looks good!

Electronics
To get serial, power, and ground to the head I'm going to use a slip ring. The slip ring is mounted in the center of the stationary part of the lazy susan.
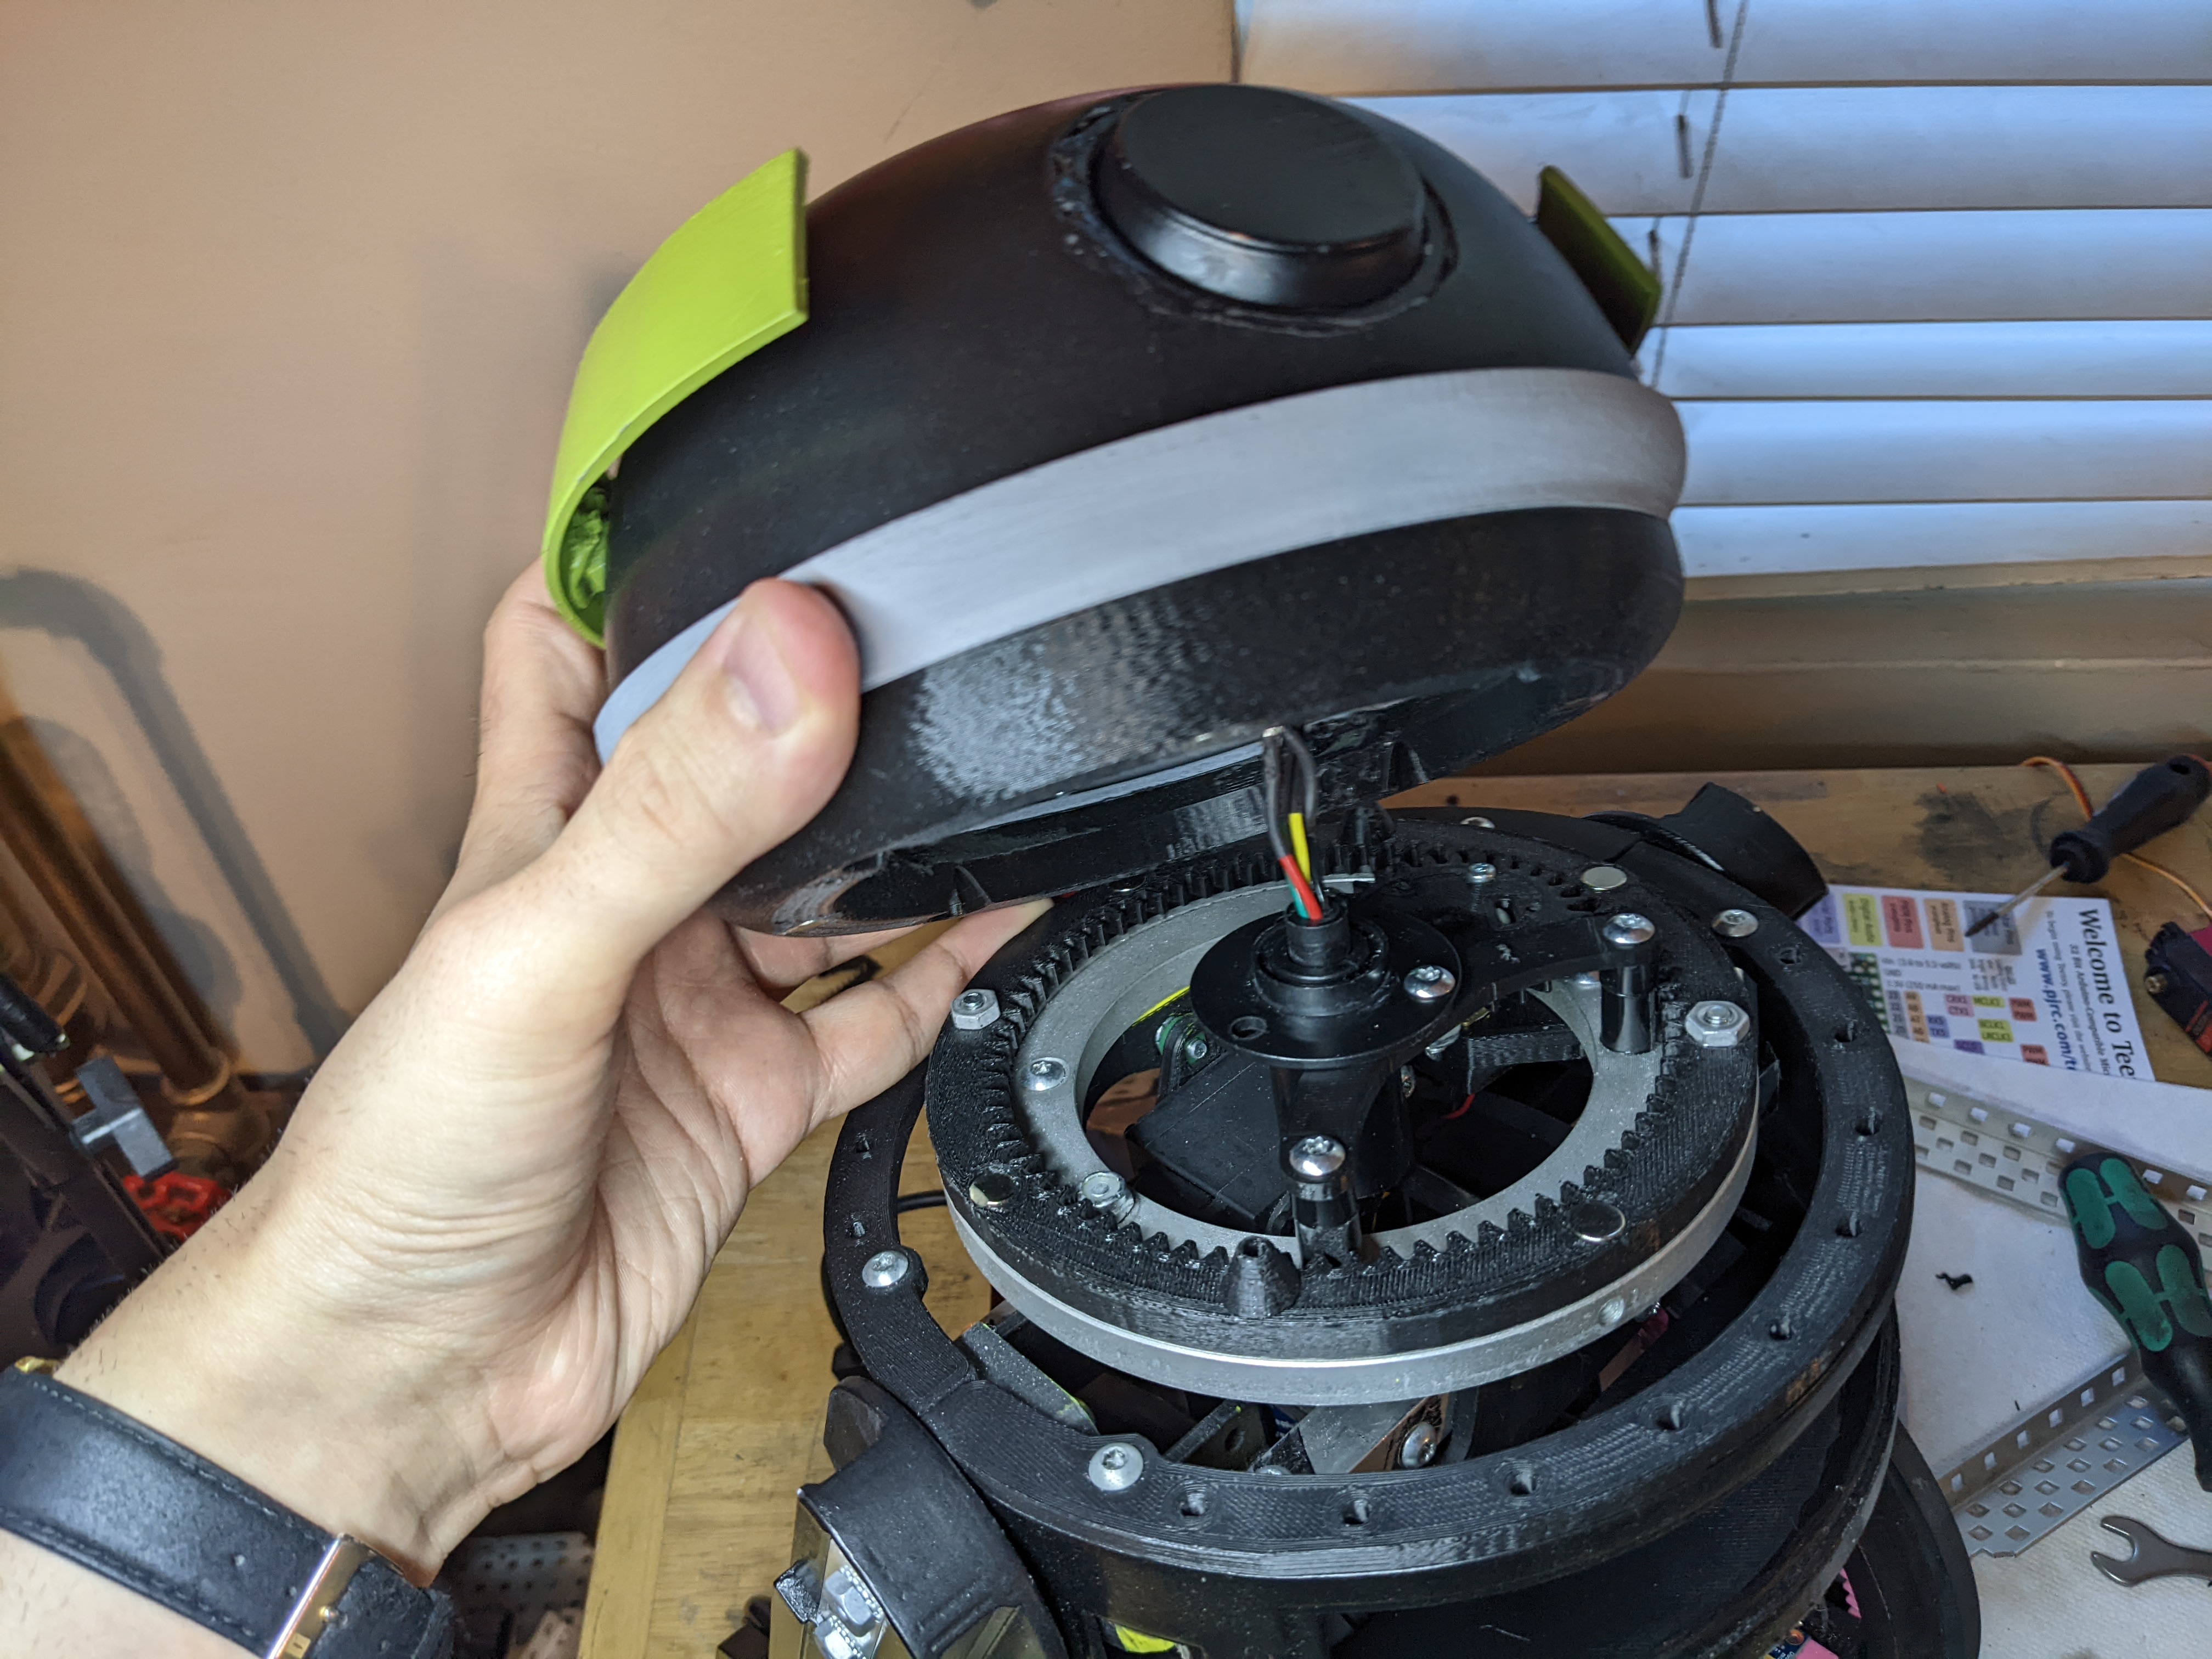
I wired everything up and started to get the head to work! I'm communicating with serial to the Teensy in the head and I'm able to control all of the servos in the head.
Eventually after testing some more, the robot stopped responding to anything. I figured out that I fried the Teensy in the head and the body. After asking Kiana Dumdumaya why this would happen, we looked through the specs of the Teensy and saw that it only supports 3.3v IO when I'm using 5v IO and downstepping a 4s lipo to 5v for the electronics. We decided to switch over to an Arduino Nano Every. I tried to get that working before the event but for some reason, I ended up frying the Arduino in the body too when I was testing. I didn't want to rush this and waste a bunch of money, so I decided to wait until I could work with Kiana to get all of the electronics working and redo everything with her. I'd go to the convention with a completed visual robot and incomplete electronics.
At Long Beach Comic Con 2023
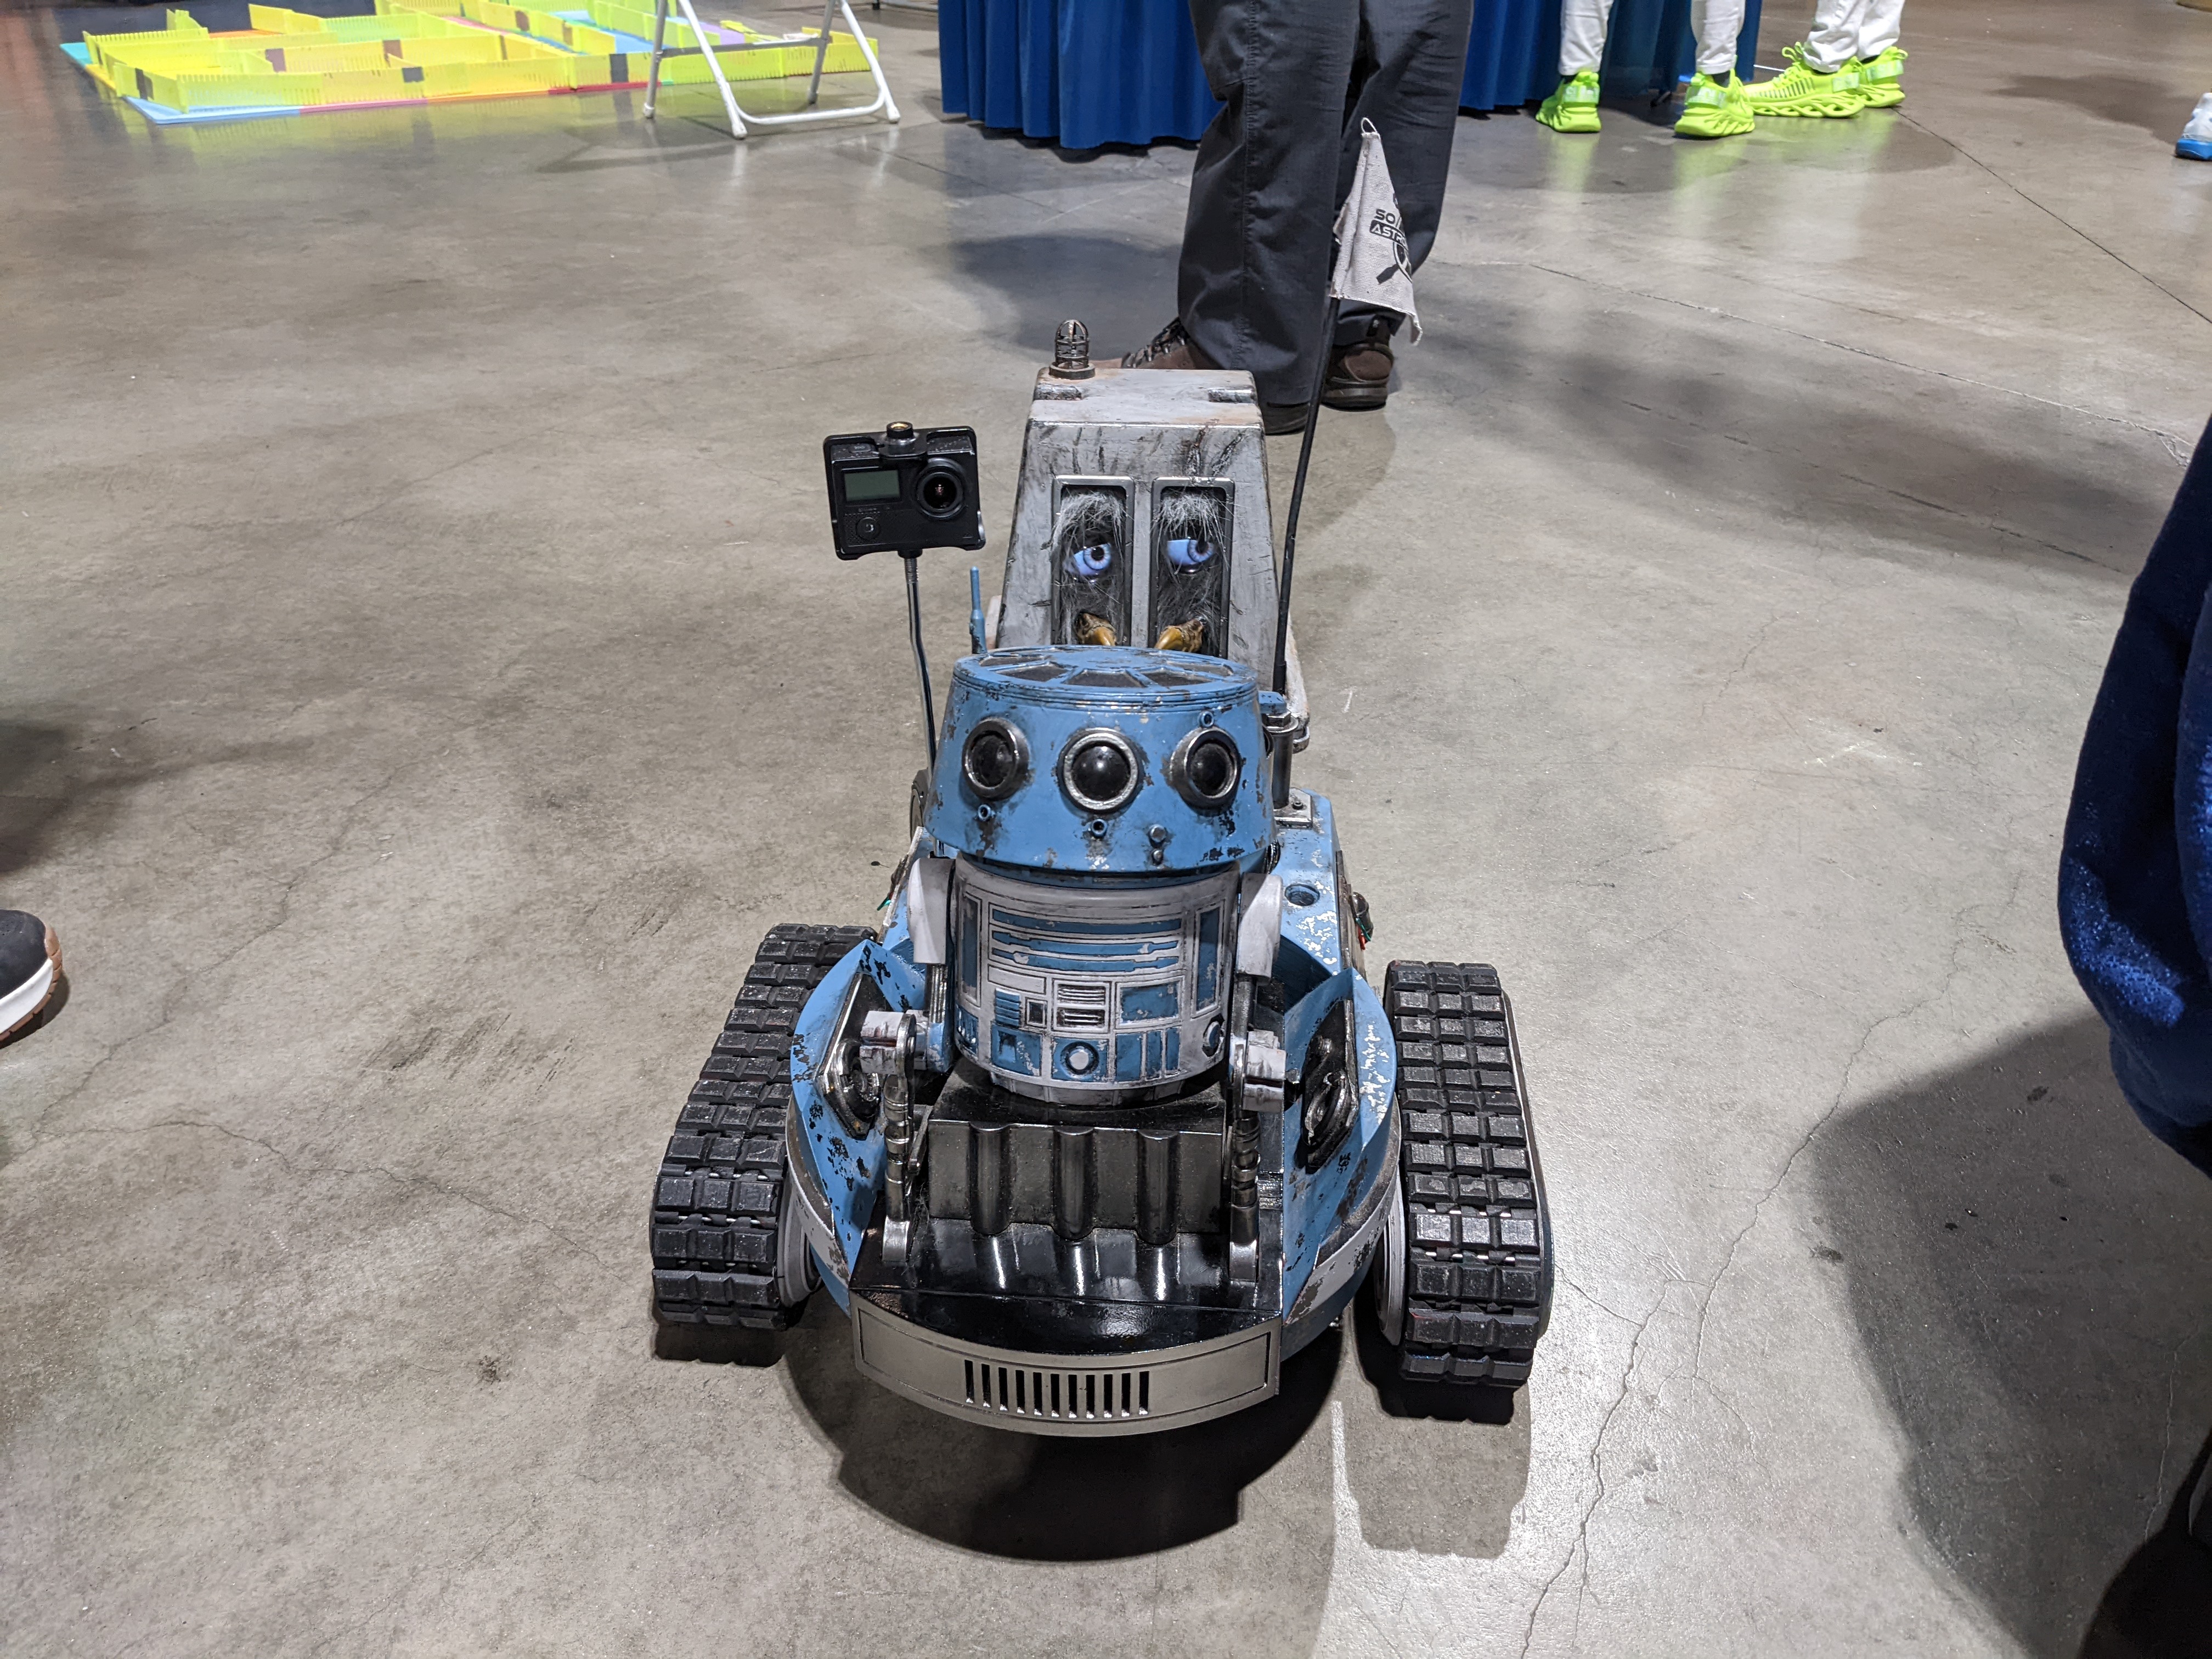
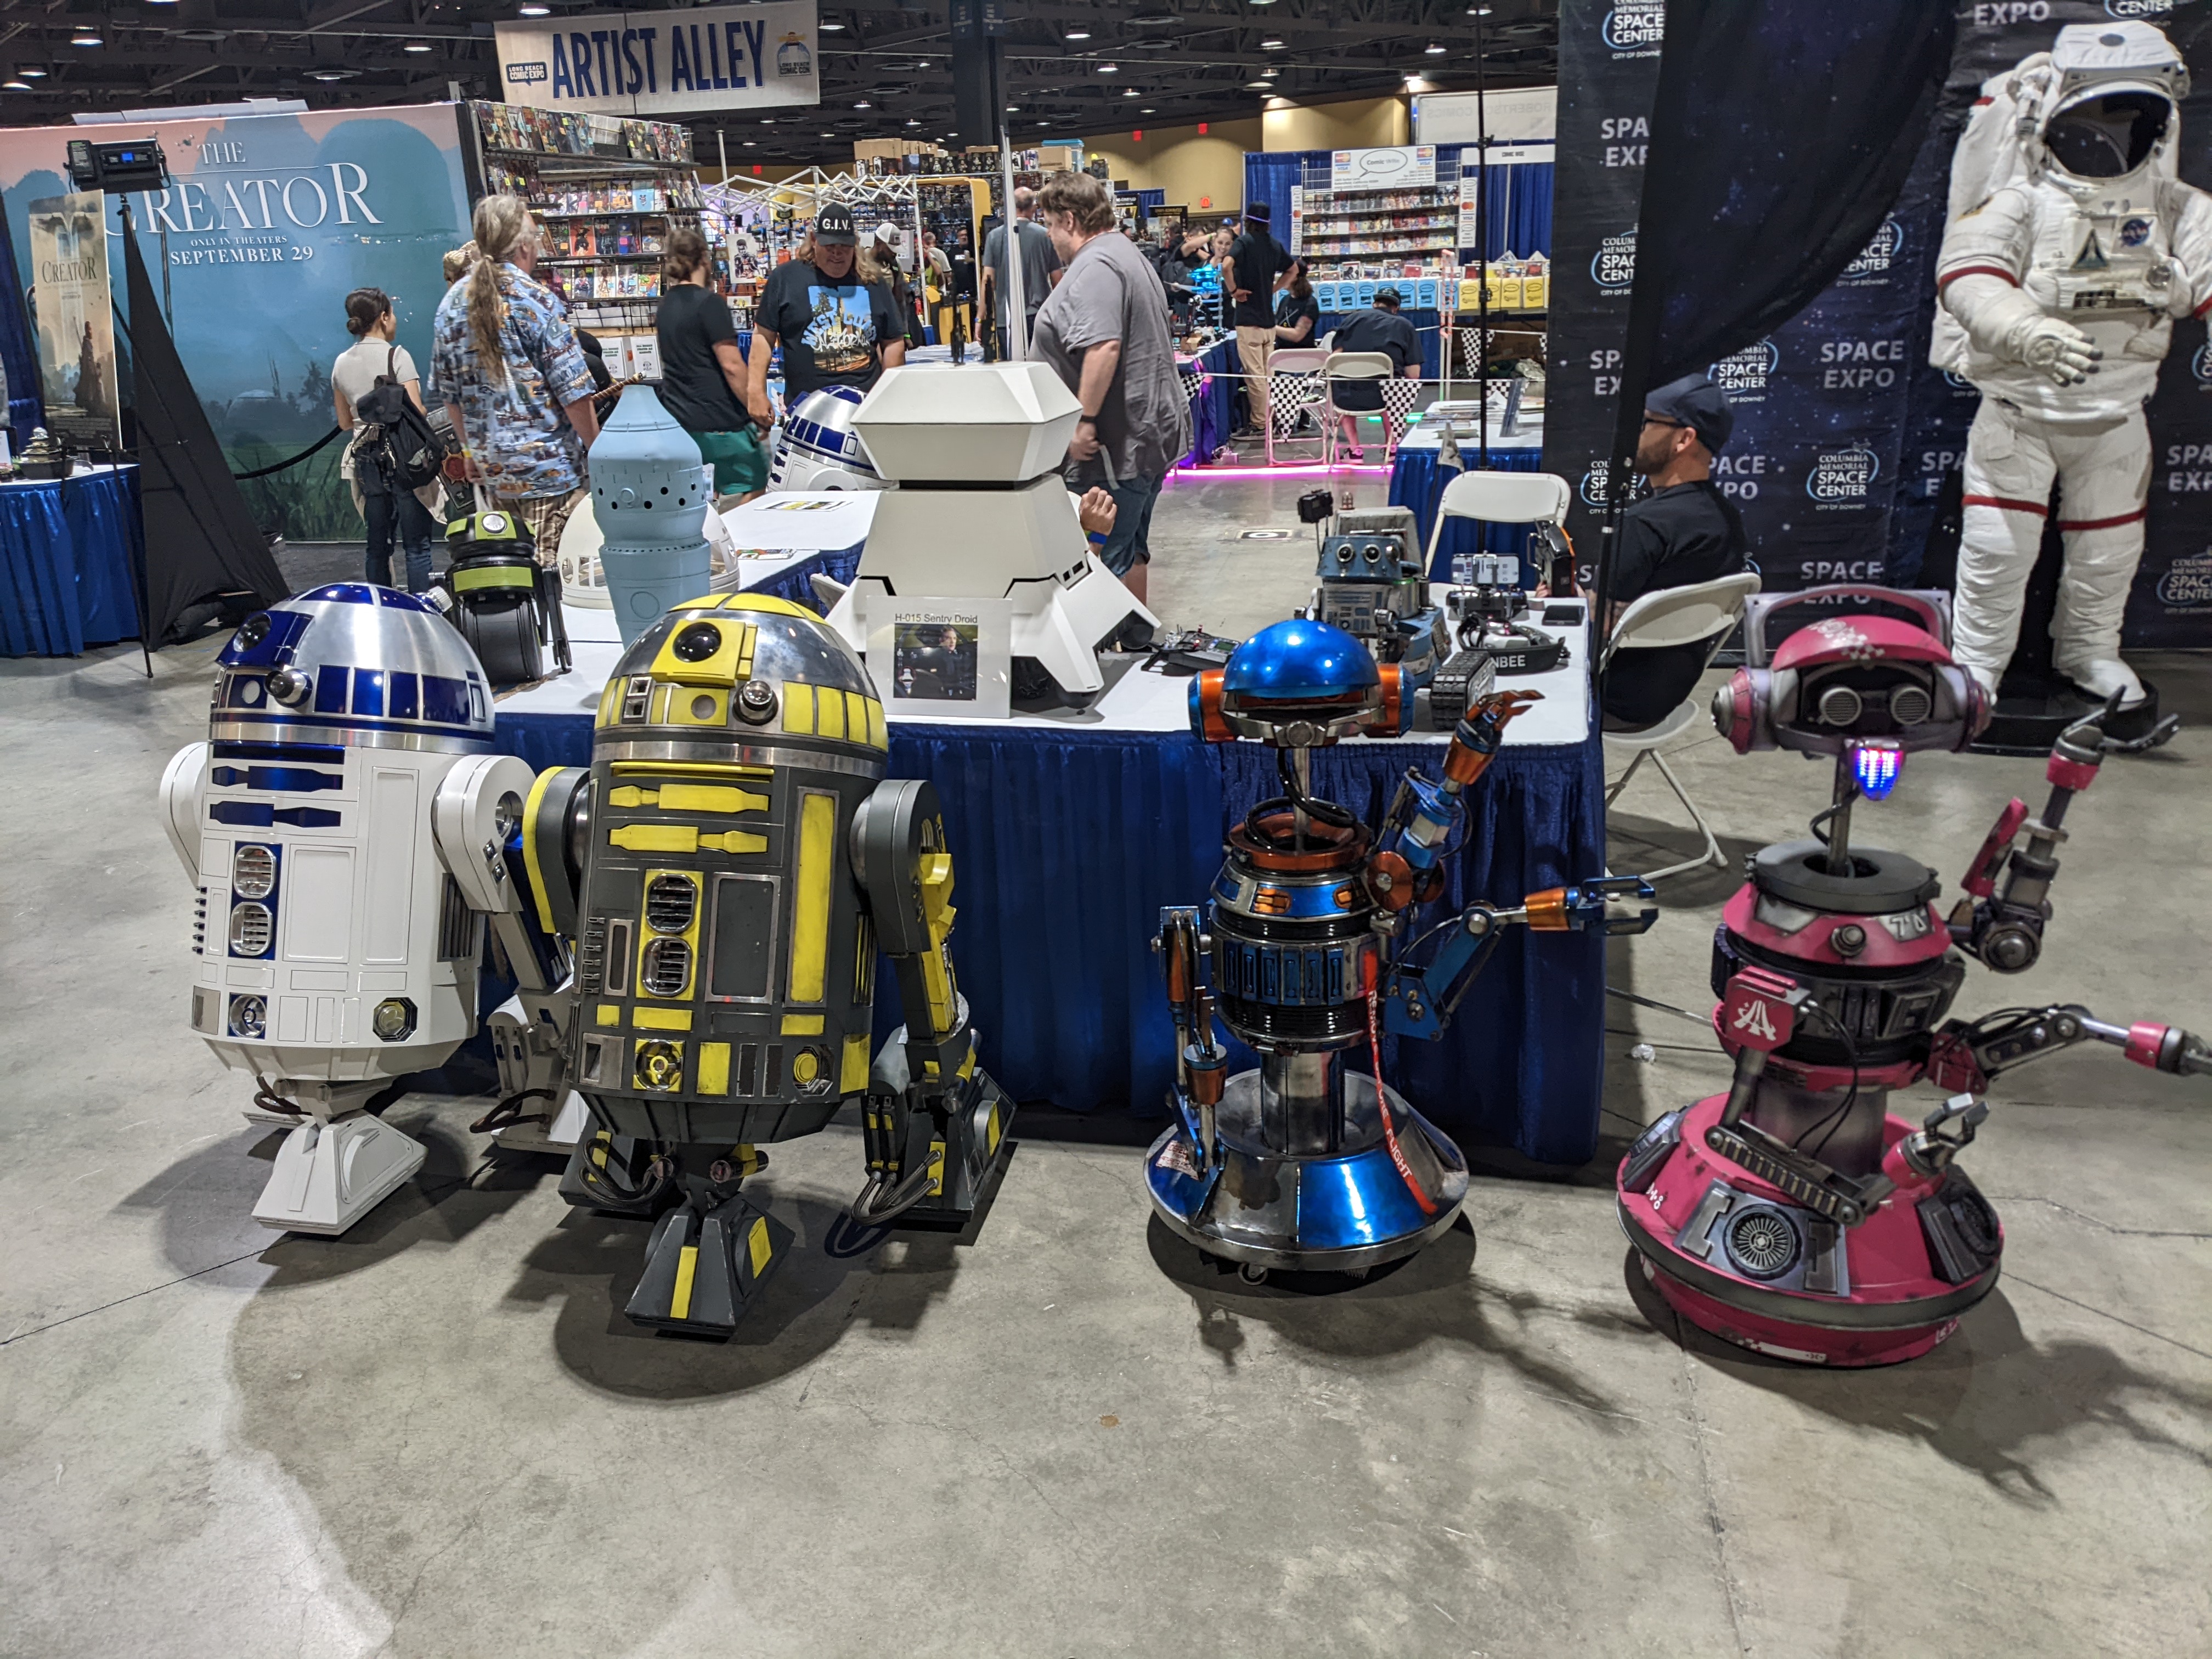
I learned an absolute ton at this event. I felt bad showing up with a robot that didn't work, but the amount of support and advice I received to get this robot working was significantly more than I had anticipated. I was so focused on talking to everyone that I didn't take as many pictures as I would have liked.


OC Maker Faire 2023
Goal: October 21, 2023
Plans
With everything I learned talking to the other droid builders at Long Beach Comic Con, I decided to sand back paint on every part and redo them. The highest priority for me was to go to the next con with the robot working. Here's my priority list:
- redoing the wiring, double check everything, adding speakers
- repaint everything
- practice traveling with the robot to make sure it works after travel
Redoing Wiring
I was pretty tired of breaking things and had help from Kiana Dumdumaya to make sure everything was being done correctly.
The first thing she did was make a Google Sheet with every component and connections between them, which I think is genius and super simple.

Kiana was much more methodical about testing everything than I had been. I would look up how to connect a component and immediately solder it together, and test as I went. Kiana made sure everything worked through a breadboard before making any connections and soldering after. This process made me realize that my frustration with electronics is just my lack of methodology as I have with software and hardware.
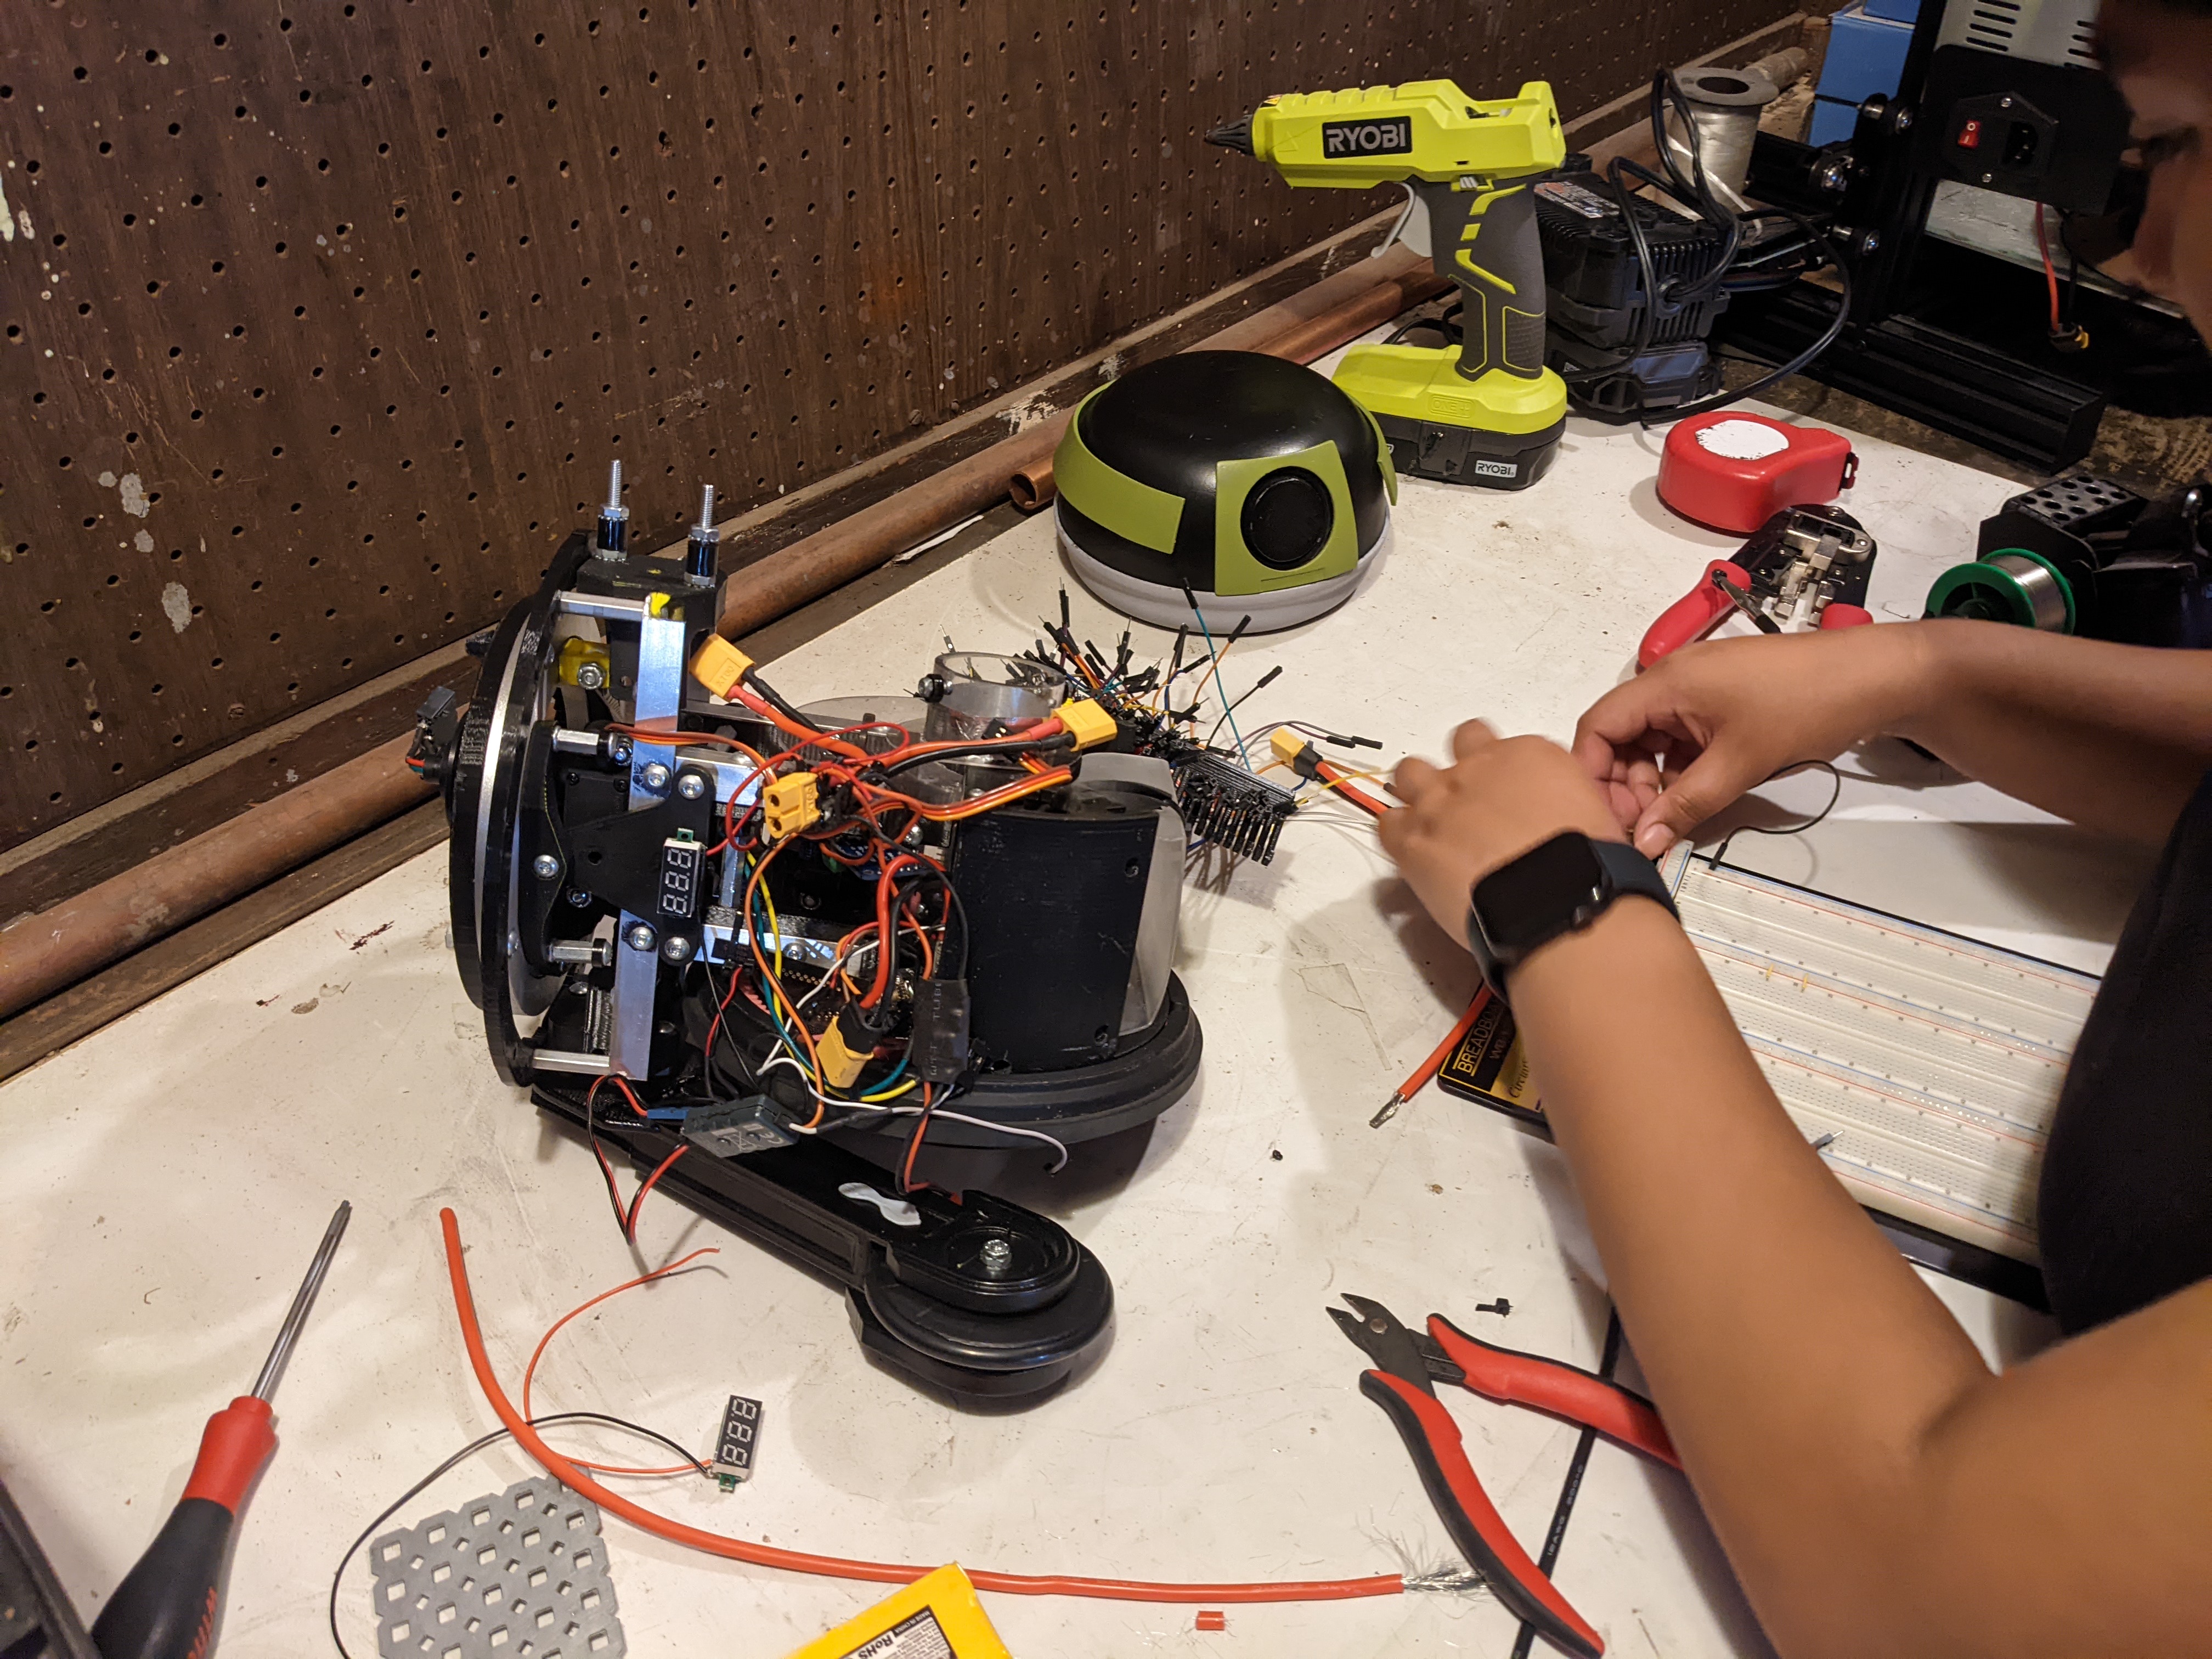
An improvement we wanted to make to the wiring was to use SBUS instead of PWM on the receiver. The receiver has 8 PWM pins, using them means we only have 8 channels from the transmitter to read and 8 pins on the Arduino get used. SBUS is a serial protocol that can contain all of the channels on the transmitter and would only take UART on the Arduino.
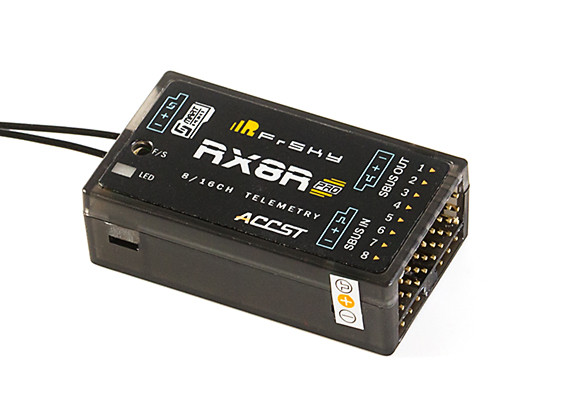
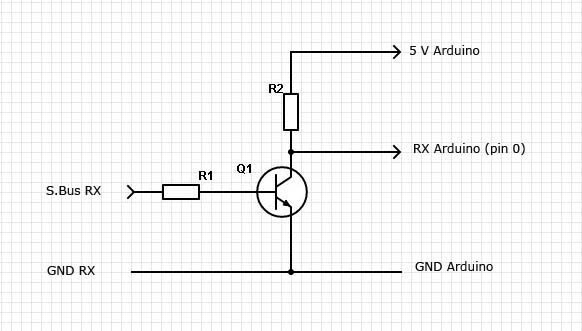
This required making a serial inverter so the Arduino could read it, but after that, everything worked seamlessly with an sbus library. We found this page which had a schematic for a serial inverter for SBUS.
I brought the robot to work to see if everything would work after packing it in the case and traveling with it. I had a hiccup where my joystick inputs weren't doing anything, but I figured this would have been a problem with the on/off switch as that's the only thing that would stop the joysticks from moving. I checked and a wire was unplugged from the Arduino, and everything worked after that!
I wanted to get speakers working for this event, but I couldn't get it to work in time. The audio quality was terrible from PWM on the Arduino, and there wasn't time to get a better solution. Audio will have to wait.
I tried getting the communication between body and head Arduino to work, but I had a few problems. The serial port on my Arduino was now being used for SBUS, and the software serial library made by Arduino wasn't working in my case and was causing the servos to stutter. Even with that, as I was testing somehow the Arduino in the head shorted, it got extremely hot and wasn't responsive to anything.
Repainting Everything
At Long Beach Comic-Con, I asked the other builders how they finished their 3D prints to not look printed. The suggestions were to:
- sand a lot before putting anything on, get rid of layer lines, and make it smooth
- use a filler, bondo spot putty, or filler primer
- sand the primer back to smooth everything out
- check if it needs another layer of primer/bondo and another sanding, repeat as needed
We also discussed how green isn't a Star Wars color. And after I was told the green looked like guacamole, I wasn't feeling it. So I decided to go to more of a yellow similar to the original reference drawing.
I experimented on a small decorative piece on the leg, and focusing on step 1 to avoid a "garbage in, garbage out" scenario worked amazing. Green is before, yellow is after.
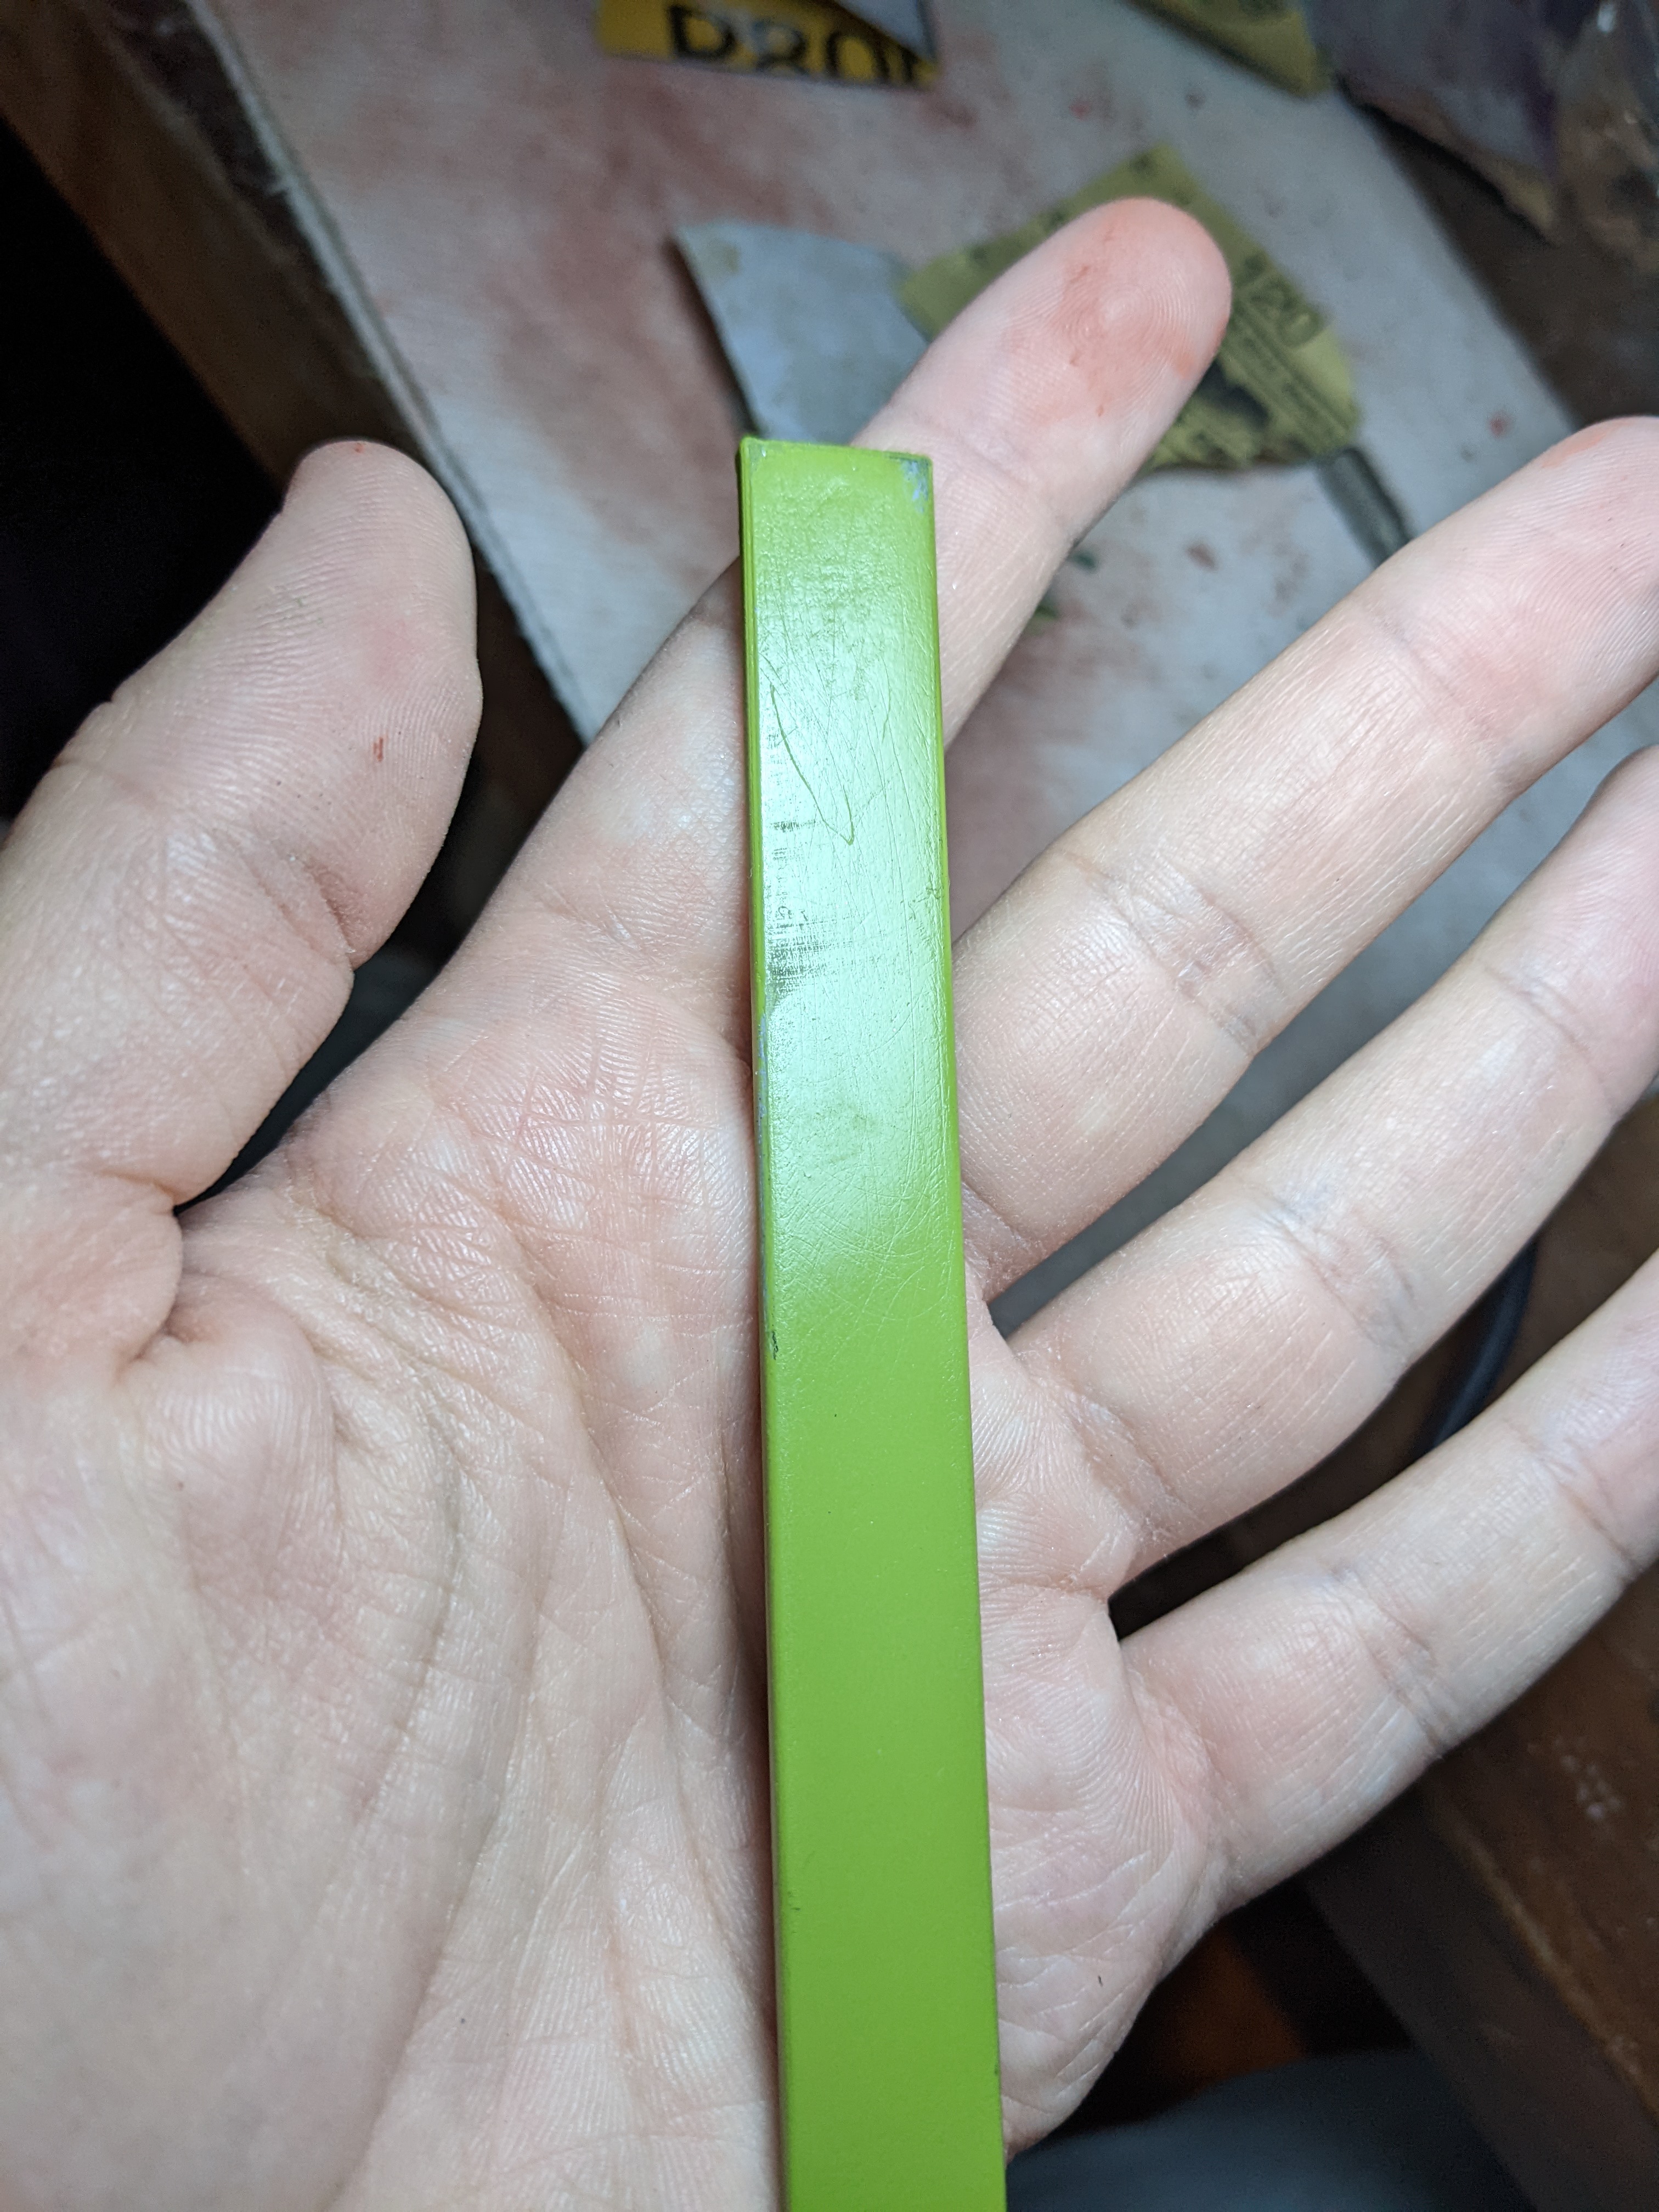
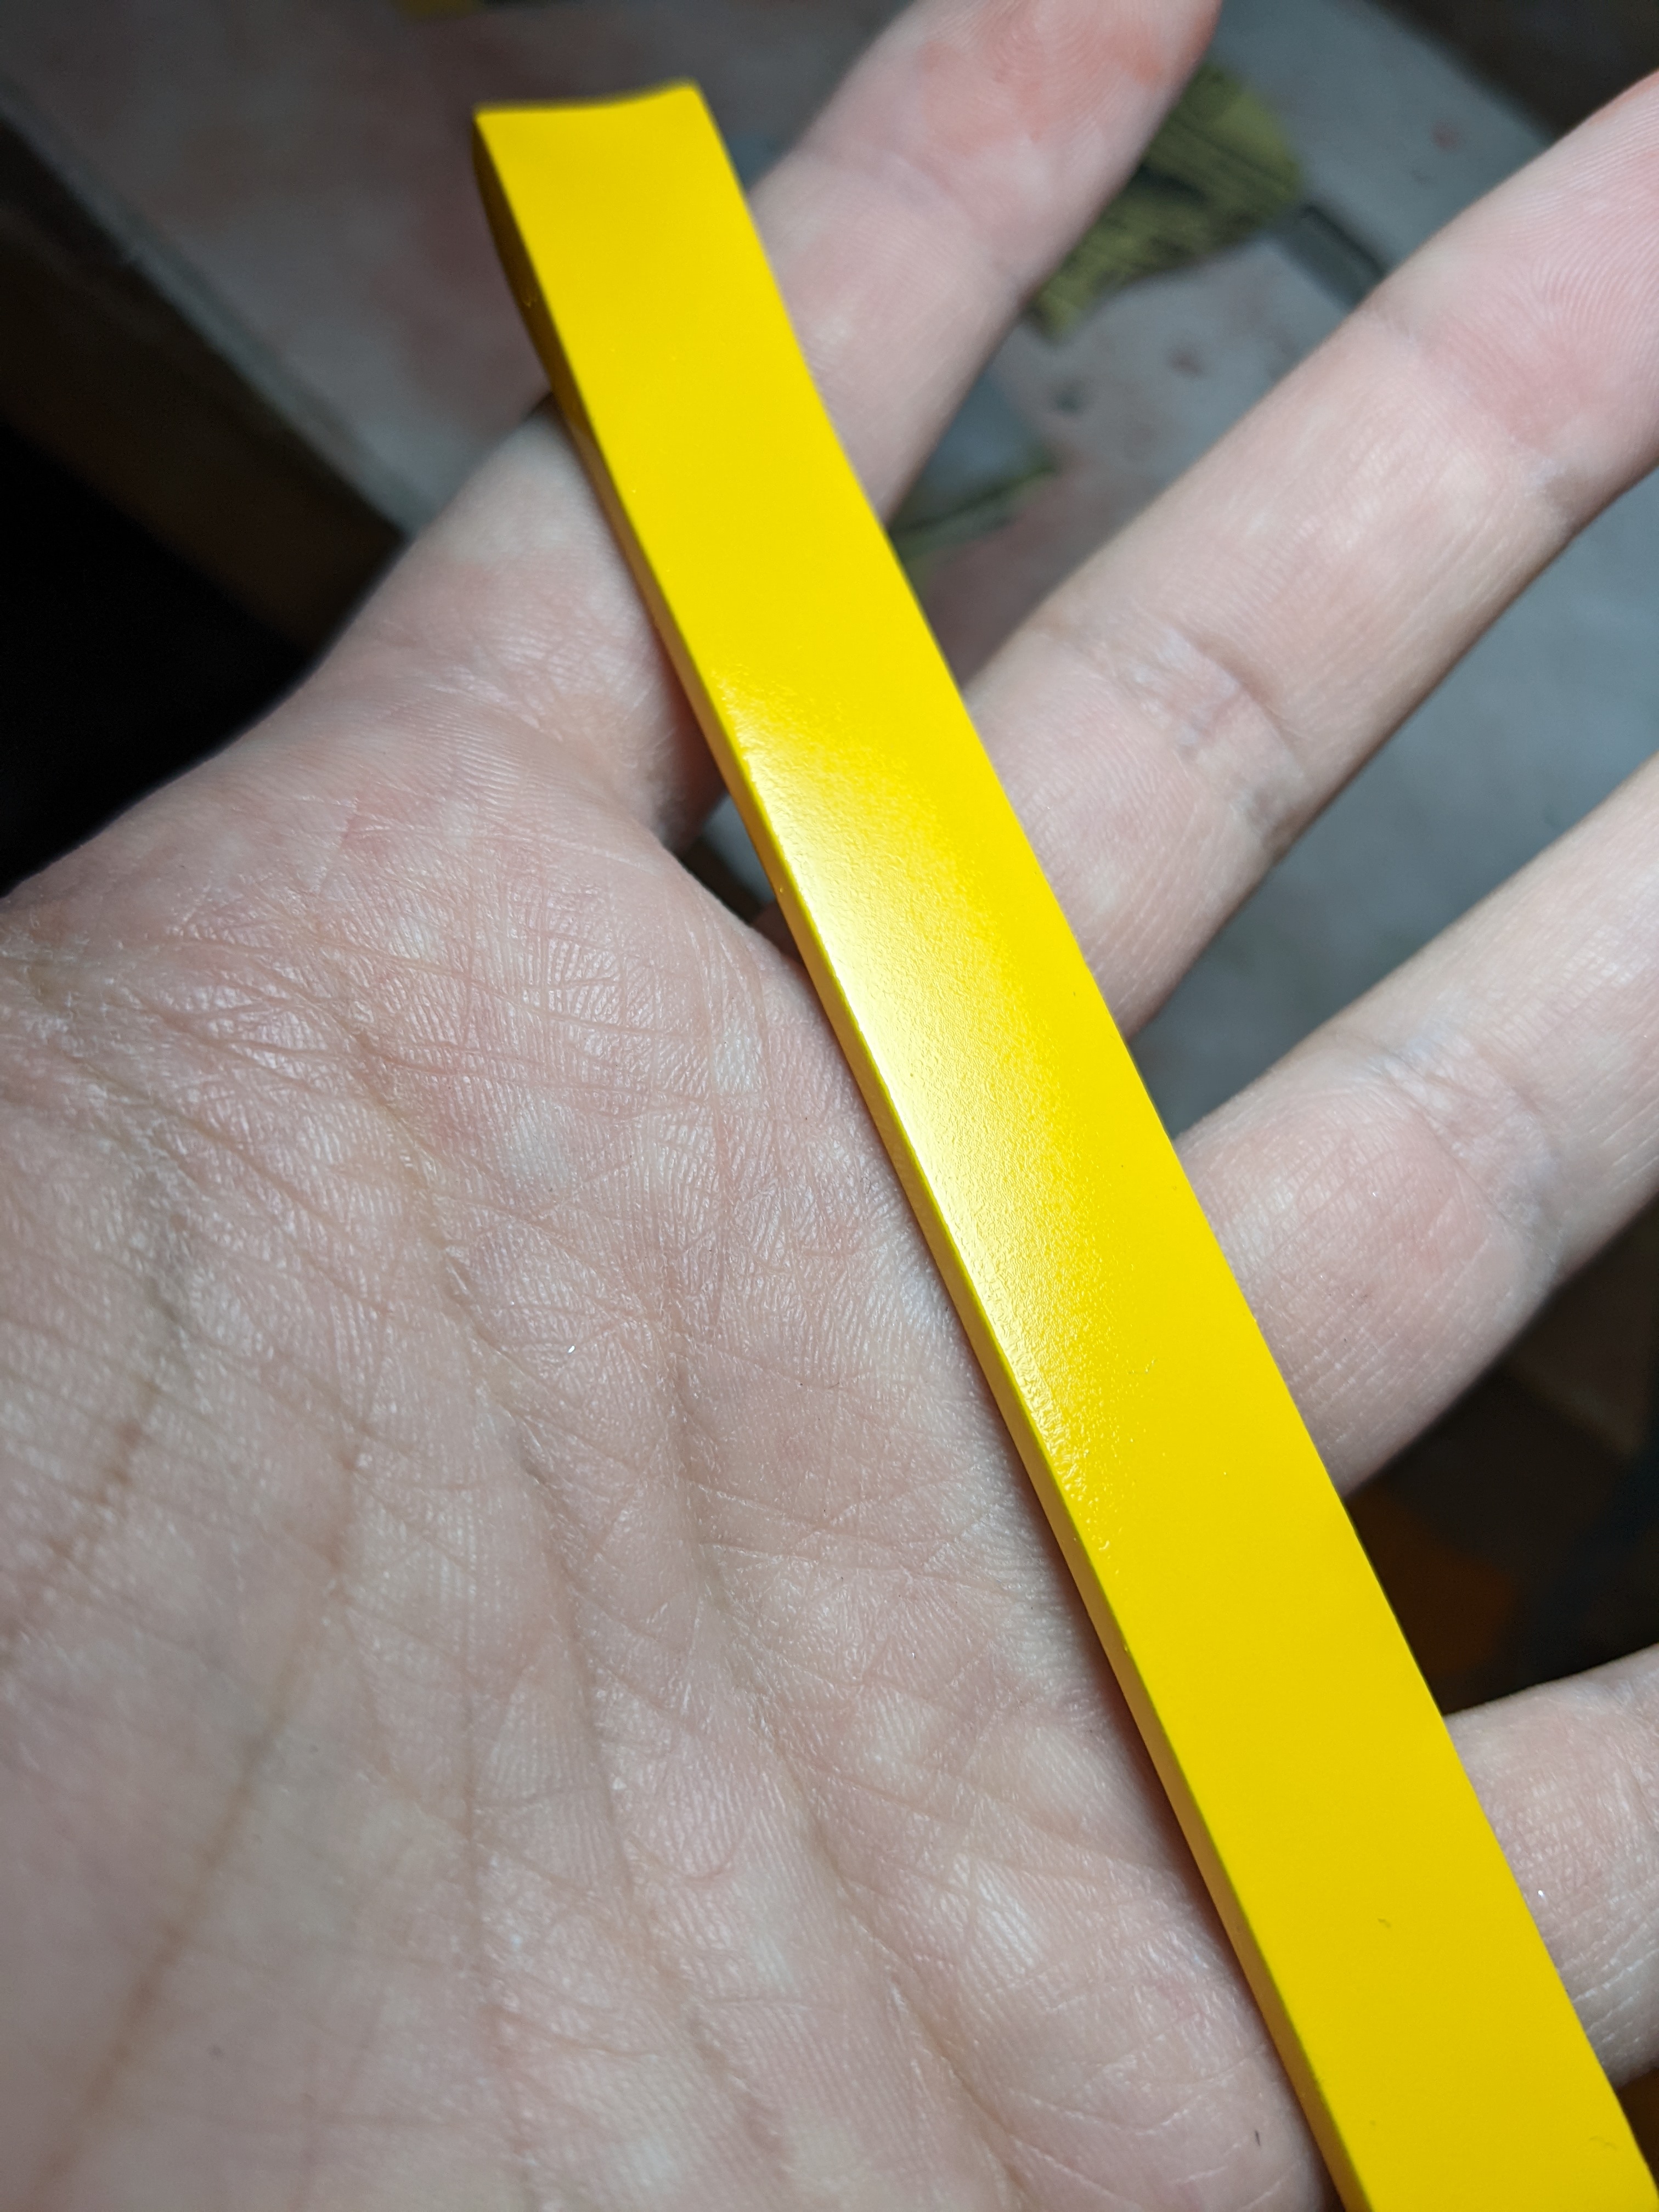
With the amount I was going to be painting, I wanted a better solution to doing everything outside. I built a ventilated spray paint booth, which I also have a project page on.
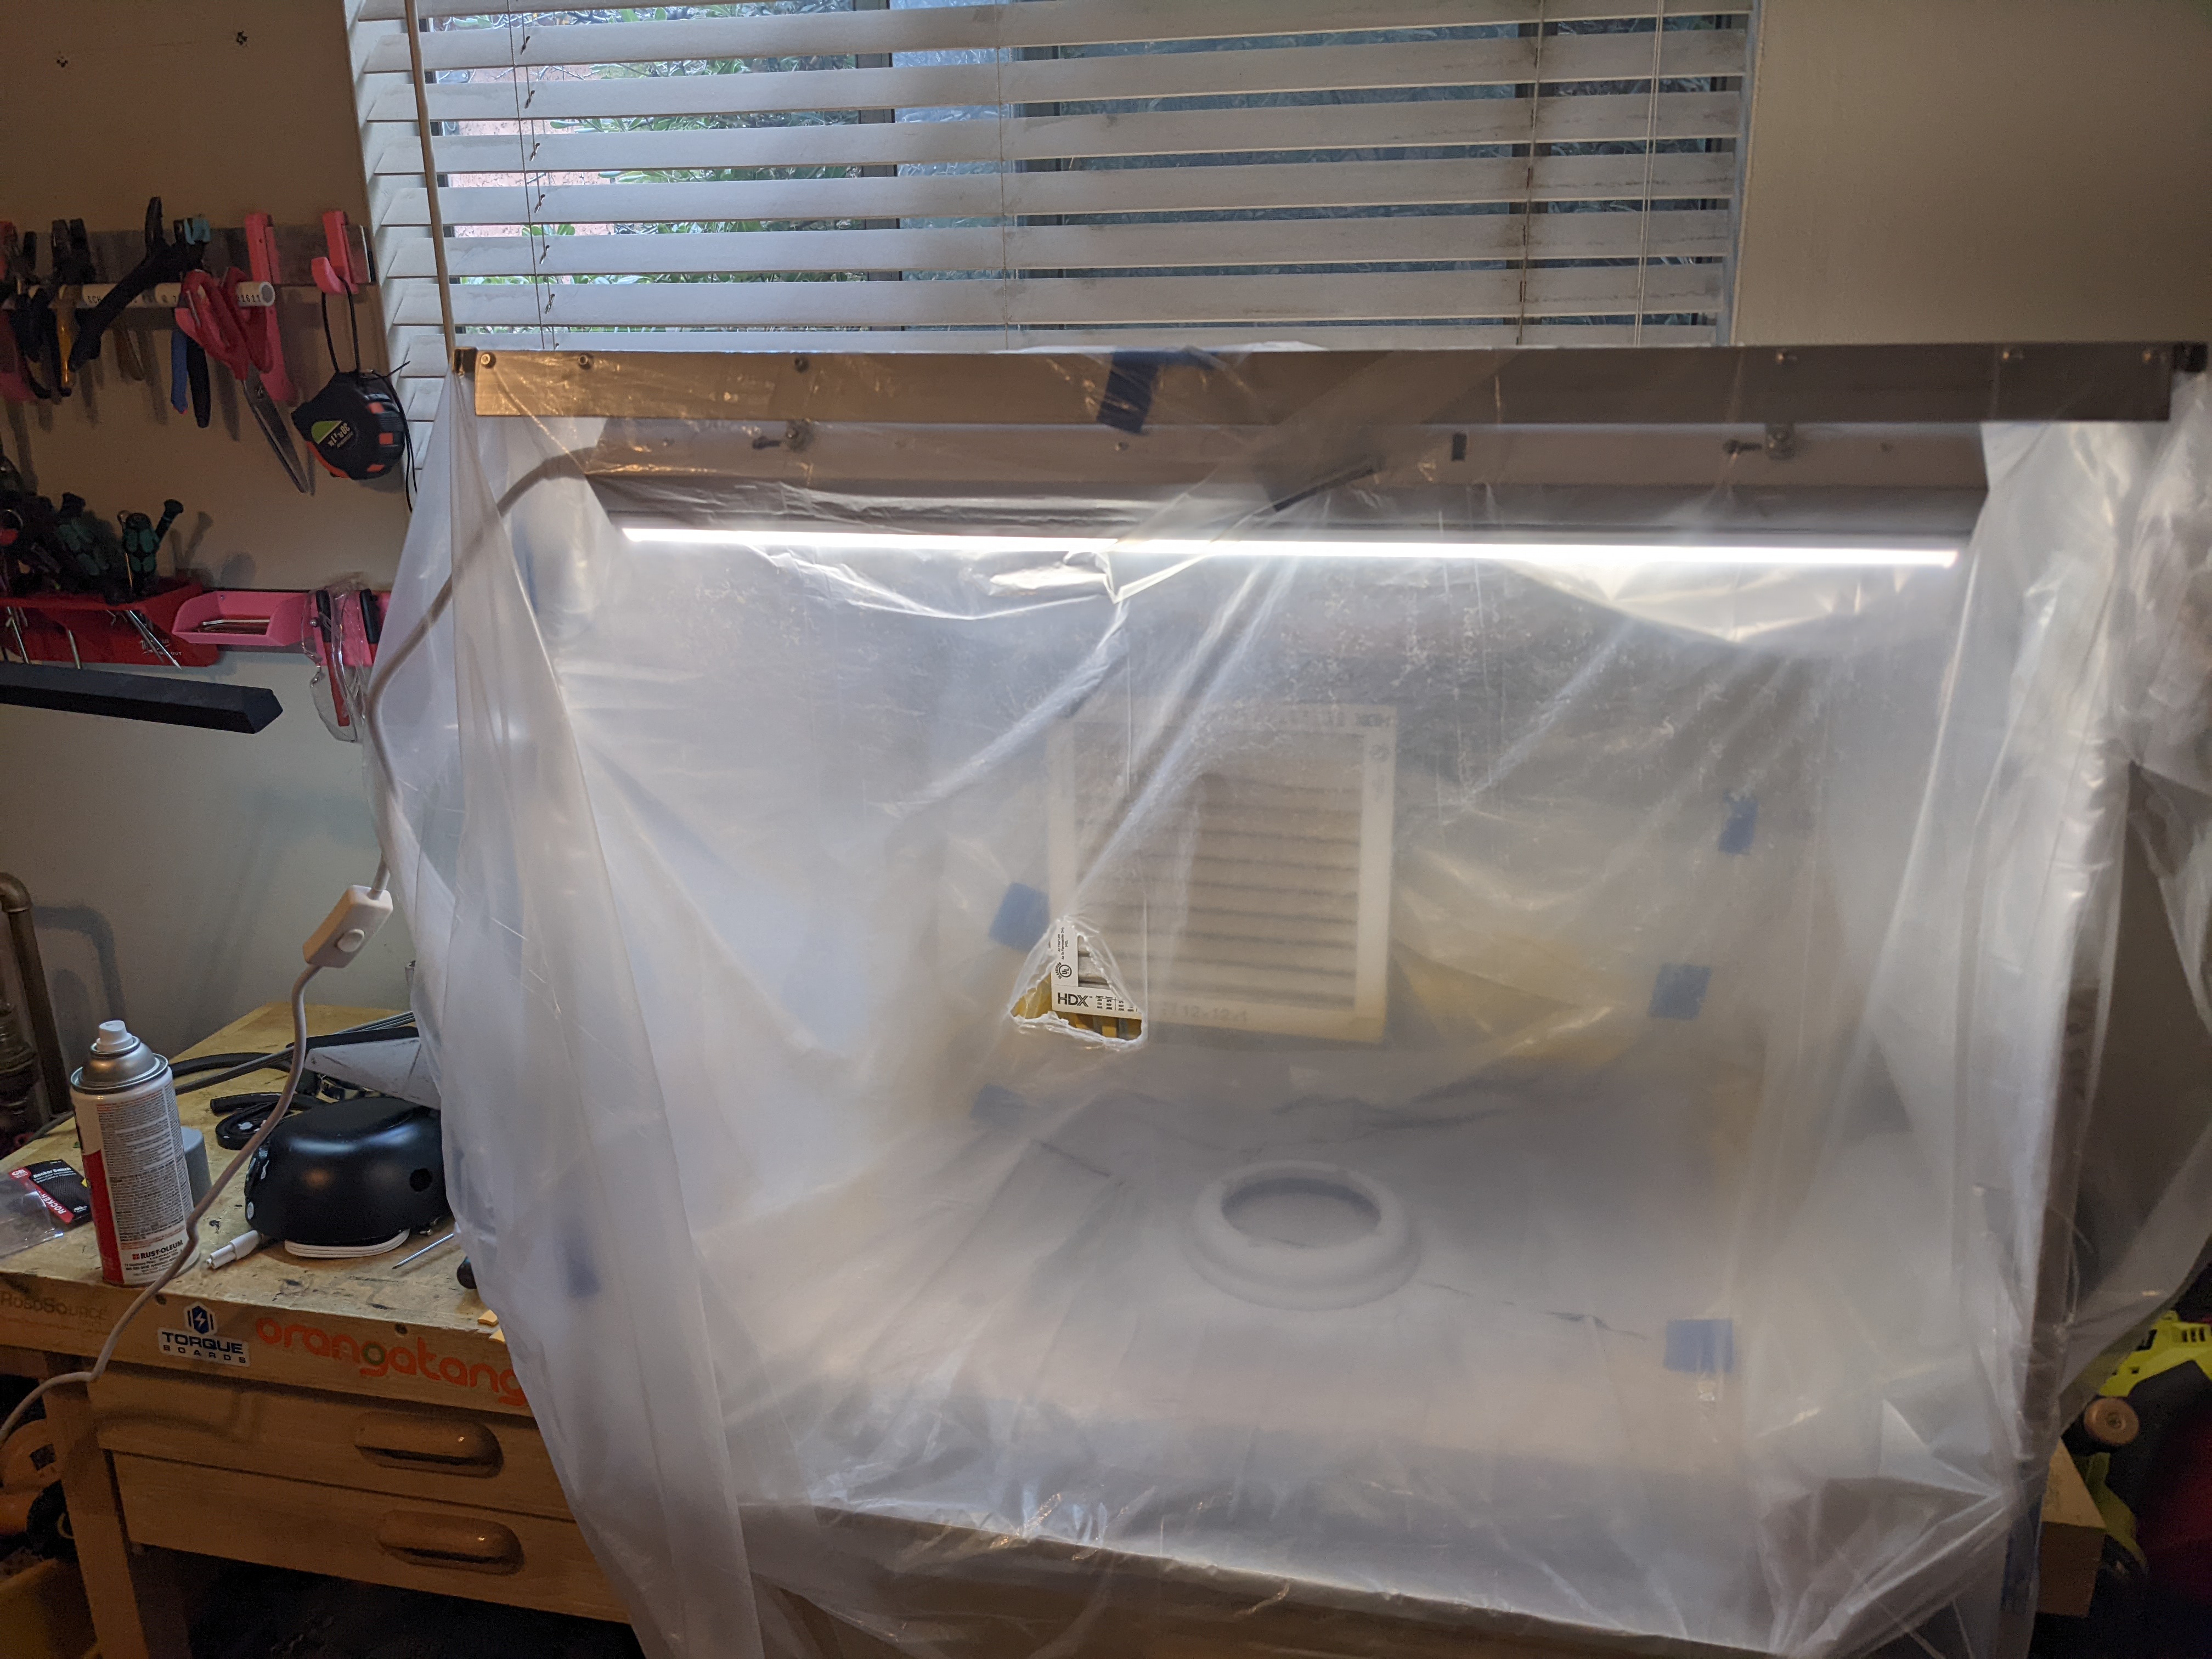
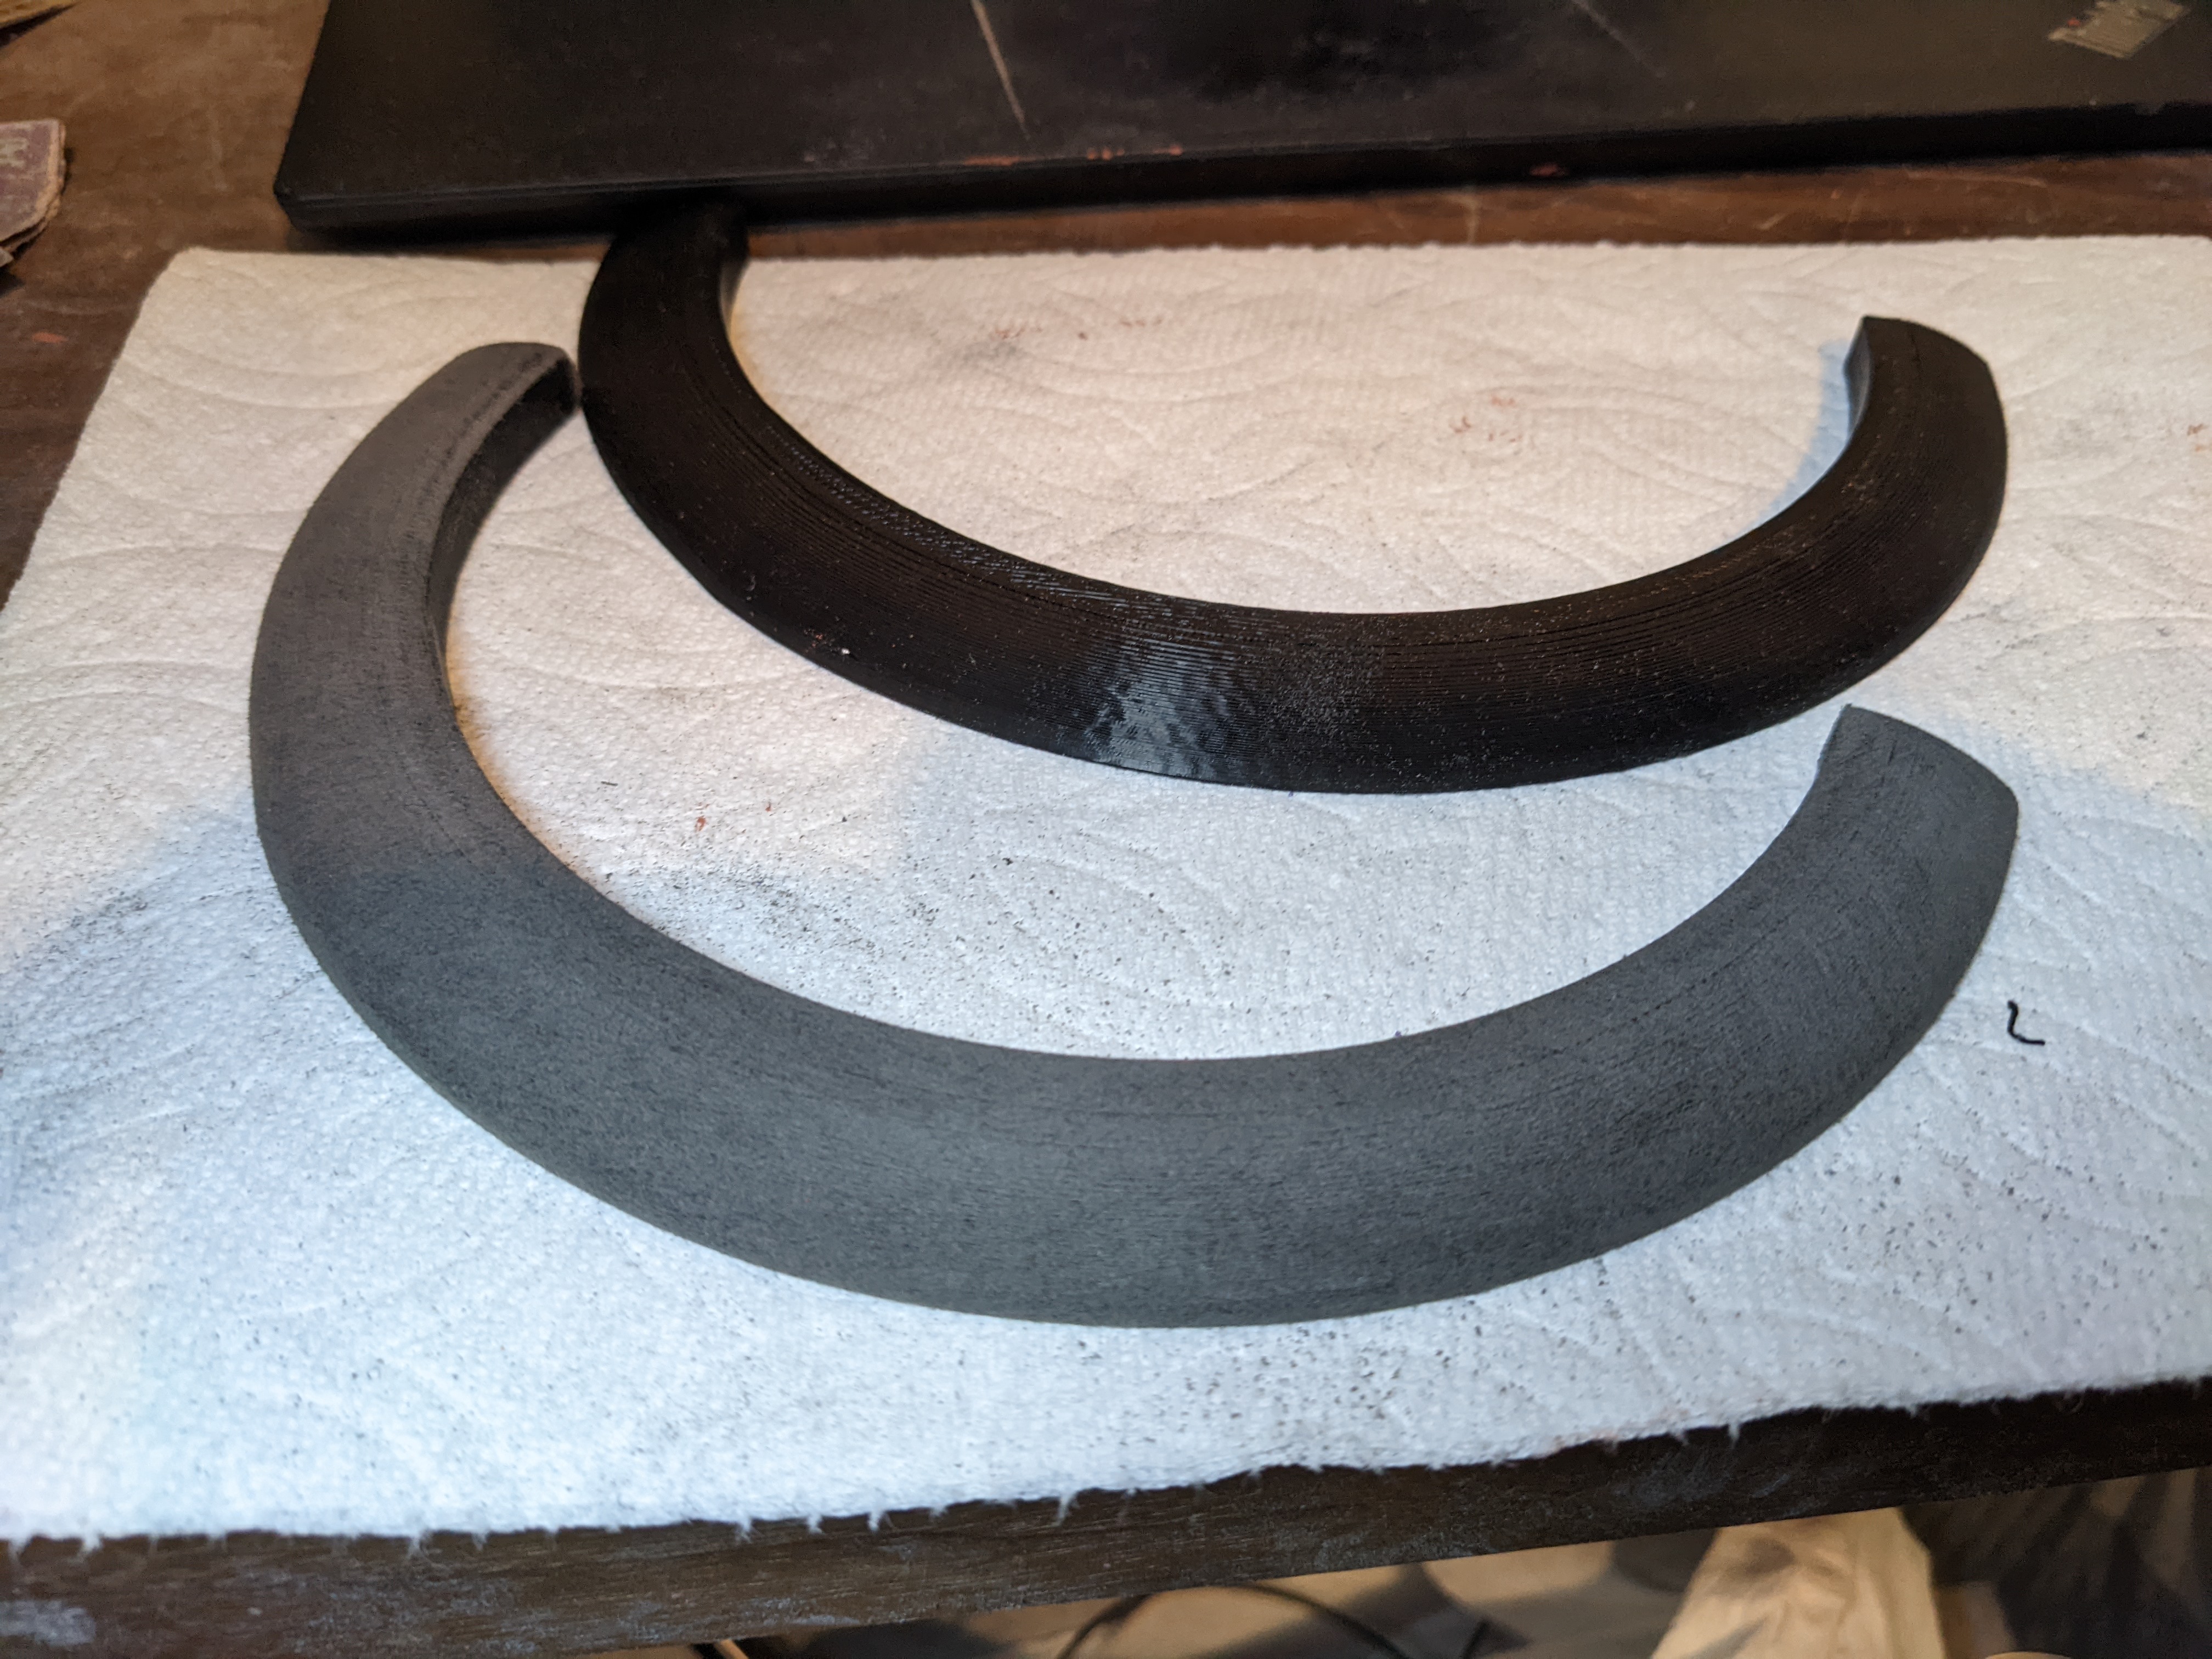
I started this for some of the larger parts to get the worst of it over with, sanding takes forever. After realizing how important the initial first step is, I paid more attention to it. After sanding I'd fill holes with bondo and sand it back. I'd also mix bondo and acetone to get a consistency of thick paint so I could cover large areas. Doing this meant I needed to repeat the filler primer step much less.
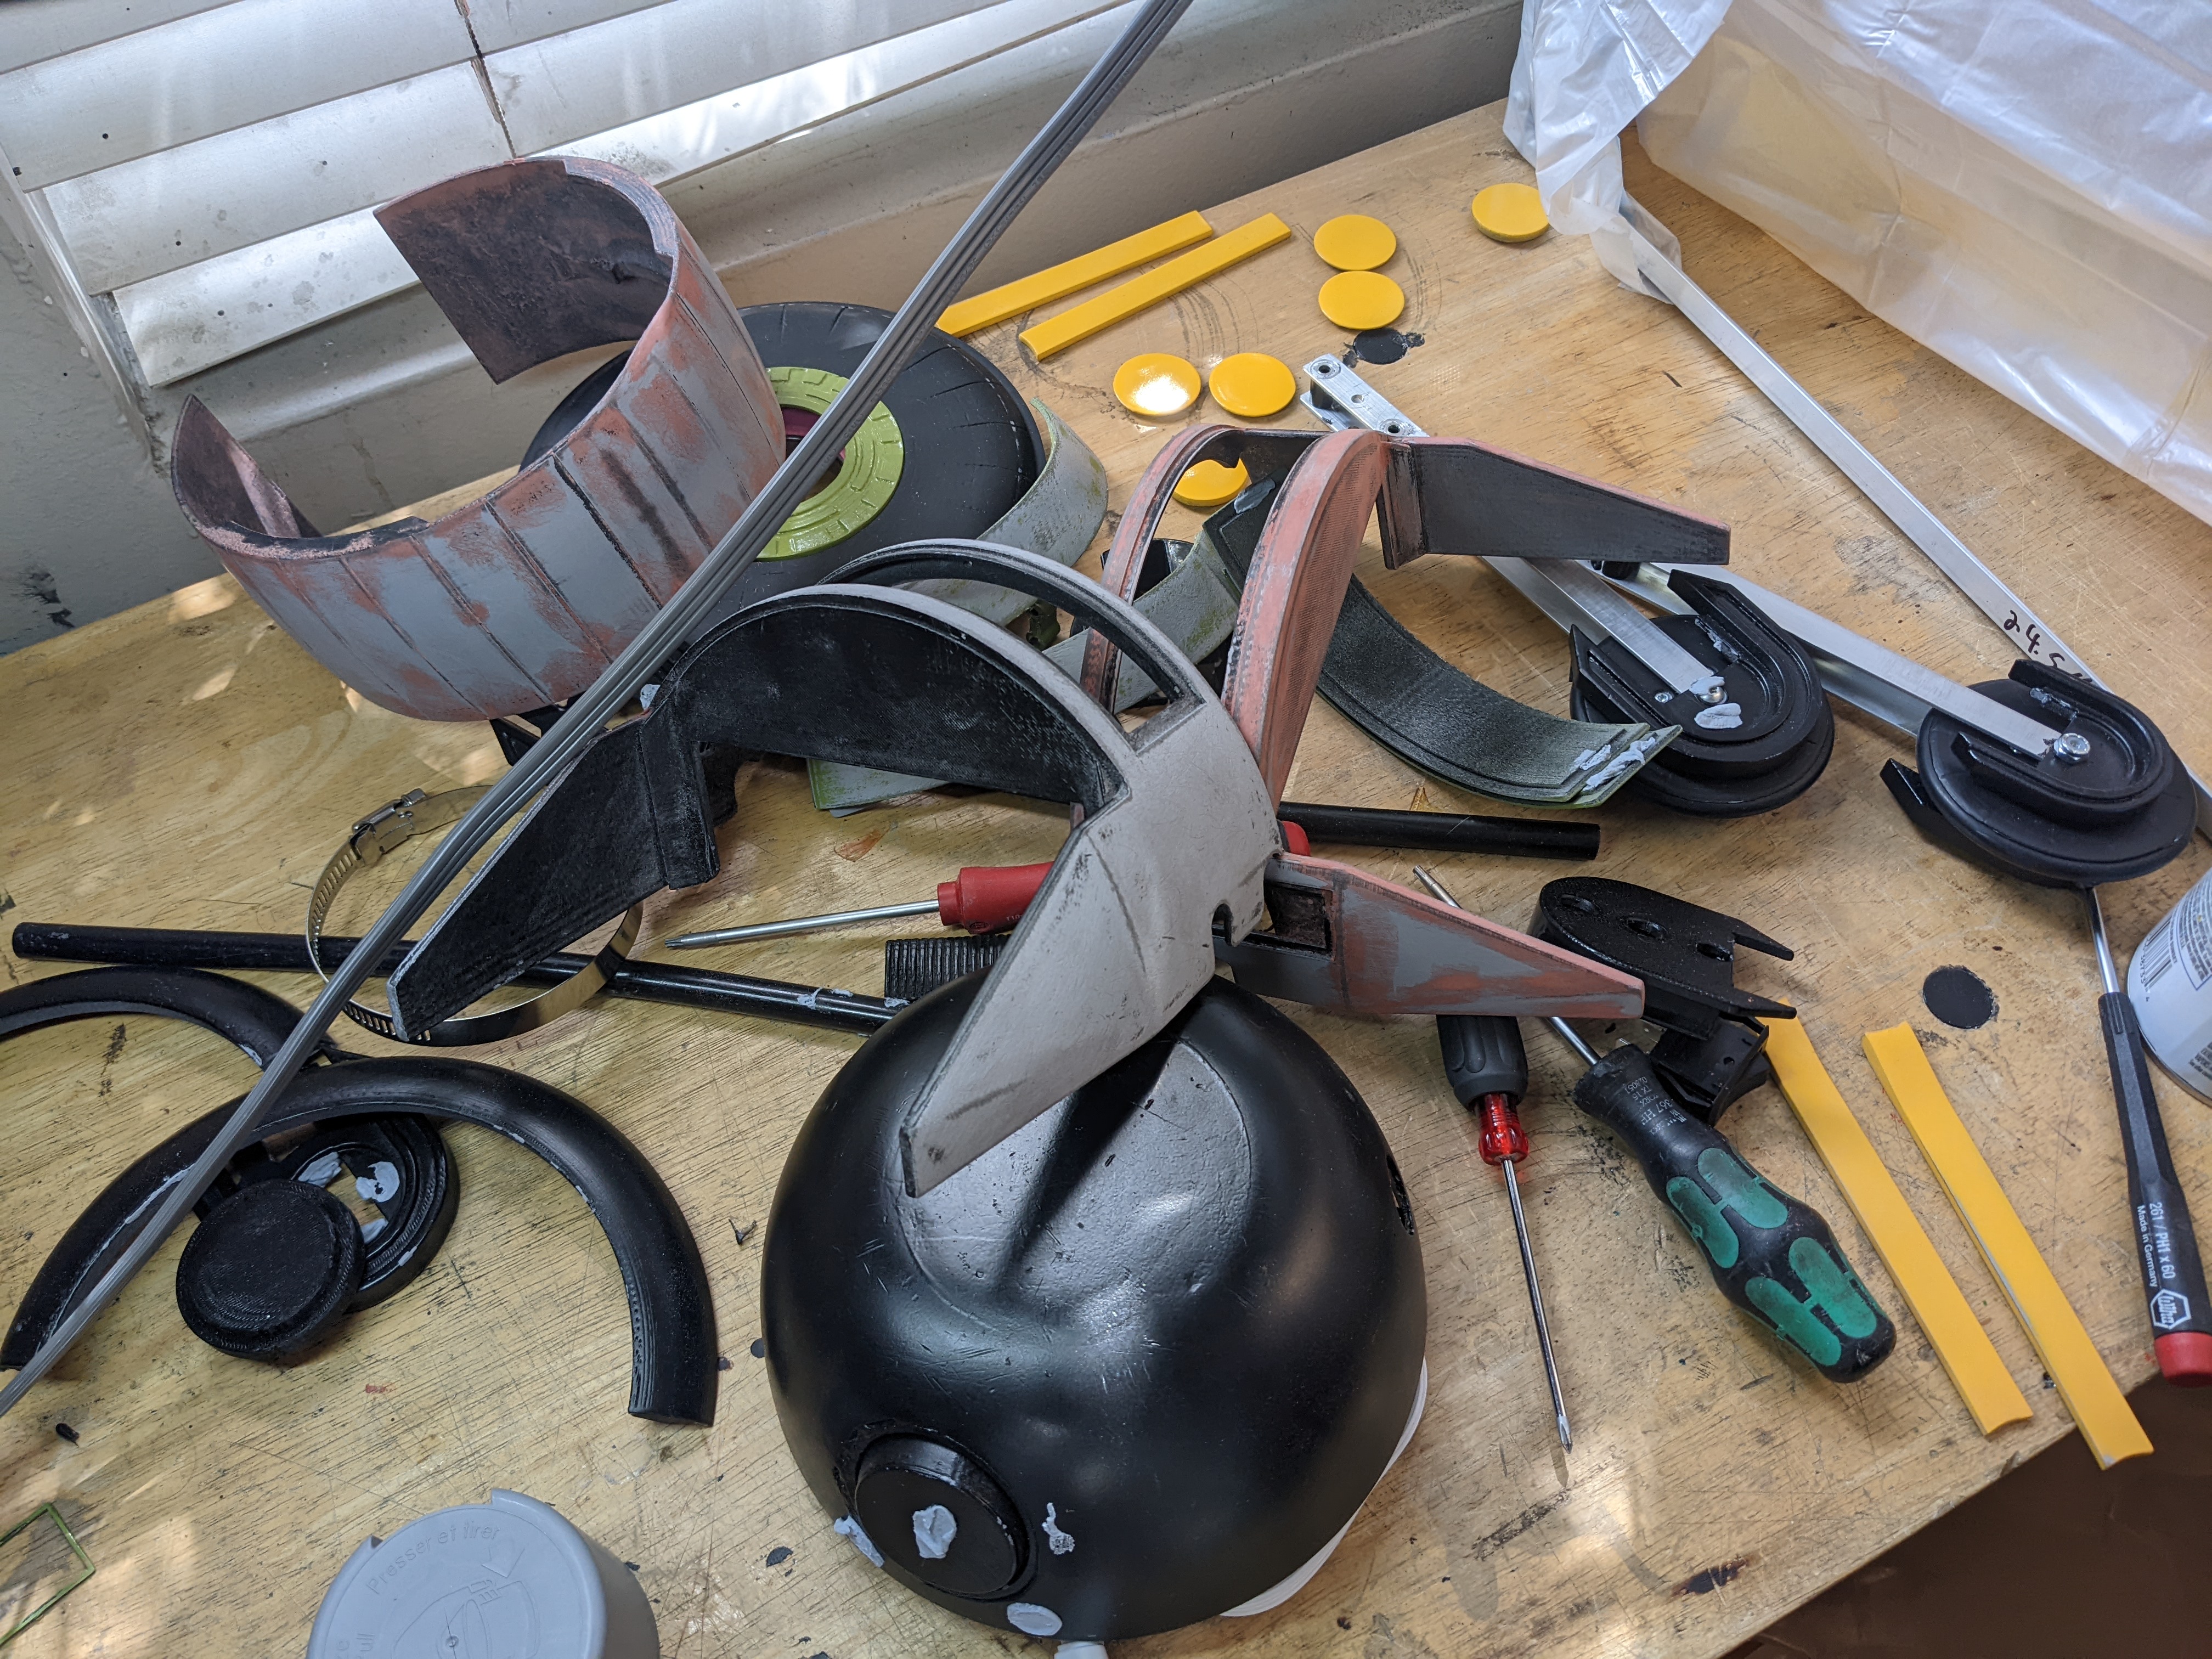
The finish I could get was much better now.

Testing and Fixes
Because of how overkill the motors are for this project, I needed to implement a slew rate to the drive. The goal of this is to ramp up the power being sent to the motor. If I tell the motors to go 30%, they should ramp up to that 30%.
This in itself is pretty simple. I take the speed that was set to the motor, check if it's bigger or smaller than what we currently have, and add or subtract a constant to that number. This loop iterates every 10ms and now we have a slew.
// Slew the drive motors to avoid changes in motion that are too large
double l_target = 0.0, r_target = 0.0;
double l_current = 0.0, r_current = 0.0;
const double MAX = 2;
void drive_set(double l, double r) {
  if (drive_switch_enabled()) {
    l_target = r_target = r_current = l_current = 0.0;
    drive_set_raw(l_target, r_target);
    return;
  }
  l_target = l;
  r_target = r;

  double max = fmax(fabs(l_target), fabs(r_target));
  double l_add = MAX, r_add = MAX;
  if (fabs(l_target) > fabs(r_target)) {
    l_add = MAX;
    r_add = MAX;
  } else if (fabs(l_target) < fabs(r_target)) {
    l_add = MAX;
    r_add = MAX;
  }

  if (l_current > l_target)
    l_current -= l_add;
  else if (l_current < l_target)
    l_current += l_add;

  if (r_current > r_target)
    r_current -= r_add;
  else if (r_current < r_target)
    r_current += r_add;

  drive_set_raw(l_current, r_current);
}
A problem that I noticed after driving with this code is driving in arcs felt wrong. If I drove in an arc, where the left side would go at 30 power and the right side at 15, both sides would increase at the same rate until the slower side hit 15. So the robot would drive forward and then turn, even though I never told it to go forward.
I solved this by scaling the slower side down by the ratio of slower side / faster side with this code and everything felt significantly better.
  double max = fmax(fabs(l_target), fabs(r_target));
  double min = fmin(fabs(l_target), fabs(r_target));
  double l_add = MAX, r_add = MAX;
  if (fabs(l_target) > fabs(r_target)) {
    l_add = MAX;
    r_add = MAX * (min / max);
  } else if (fabs(l_target) < fabs(r_target)) {
    l_add = MAX * (min / max);
    r_add = MAX;
  }
I wanted to change the sensitivity of the joysticks, so I added the same joystick curve I've been using on my VEX robots which I explain here.
But the drive still felt strange. It can't point turn nicely because it has 4 wheels that don't slide well. There is some code in FRC called curvature drive which is single-stick arcade but makes the robot feel like a typical RC car. One axis is forward / backward, and the other axis controls "the angle the front wheels are facing" but in code. With the implementation I'm using I can't point turn anymore, but I couldn't before anyway so that doesn't bother me.
  // Curvature Drive from
  // https://github.com/OkapiLib/OkapiLib/blob/54995fd390aaf4d4949a516a76580c50b394912f/src/api/chassis/model/skidSteerModel.cpp#L140-L169
  double scale = max_speed;
  double forward = (joystick_curve_fwd(joystick_channel(LEFT_Y), curve_fwd)) / 127.0;
  double curve = (joystick_curve_turn(joystick_channel(LEFT_X), curve_turn)) / 127.0;

  double left_speed = forward + fabs(forward) * curve;
  double right_speed = forward - fabs(forward) * curve;

  // normalizes output
  double faster_side = fmax(fabs(left_speed), fabs(right_speed));
  if (faster_side > 1.0) {
    left_speed /= faster_side;
    right_speed /= faster_side;
  }

  left_speed = left_speed * scale;
  right_speed = right_speed * scale;
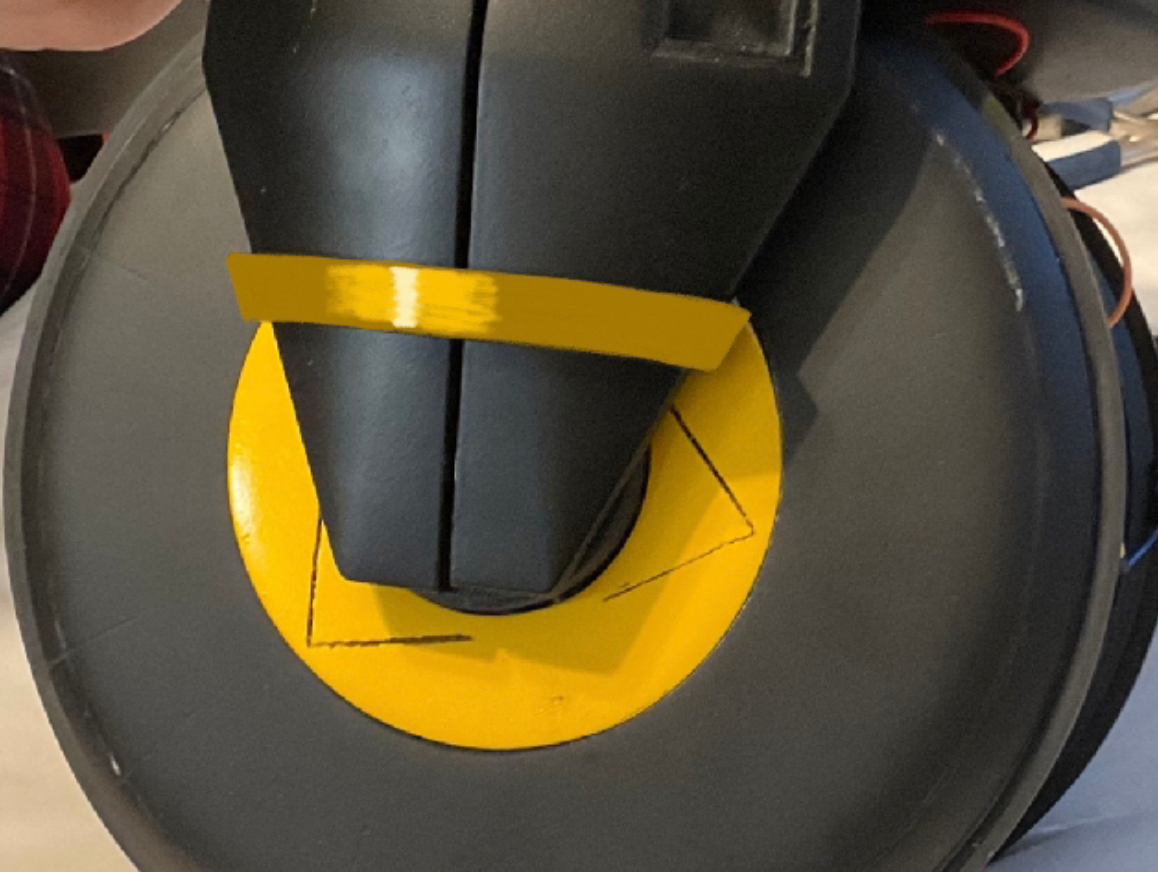
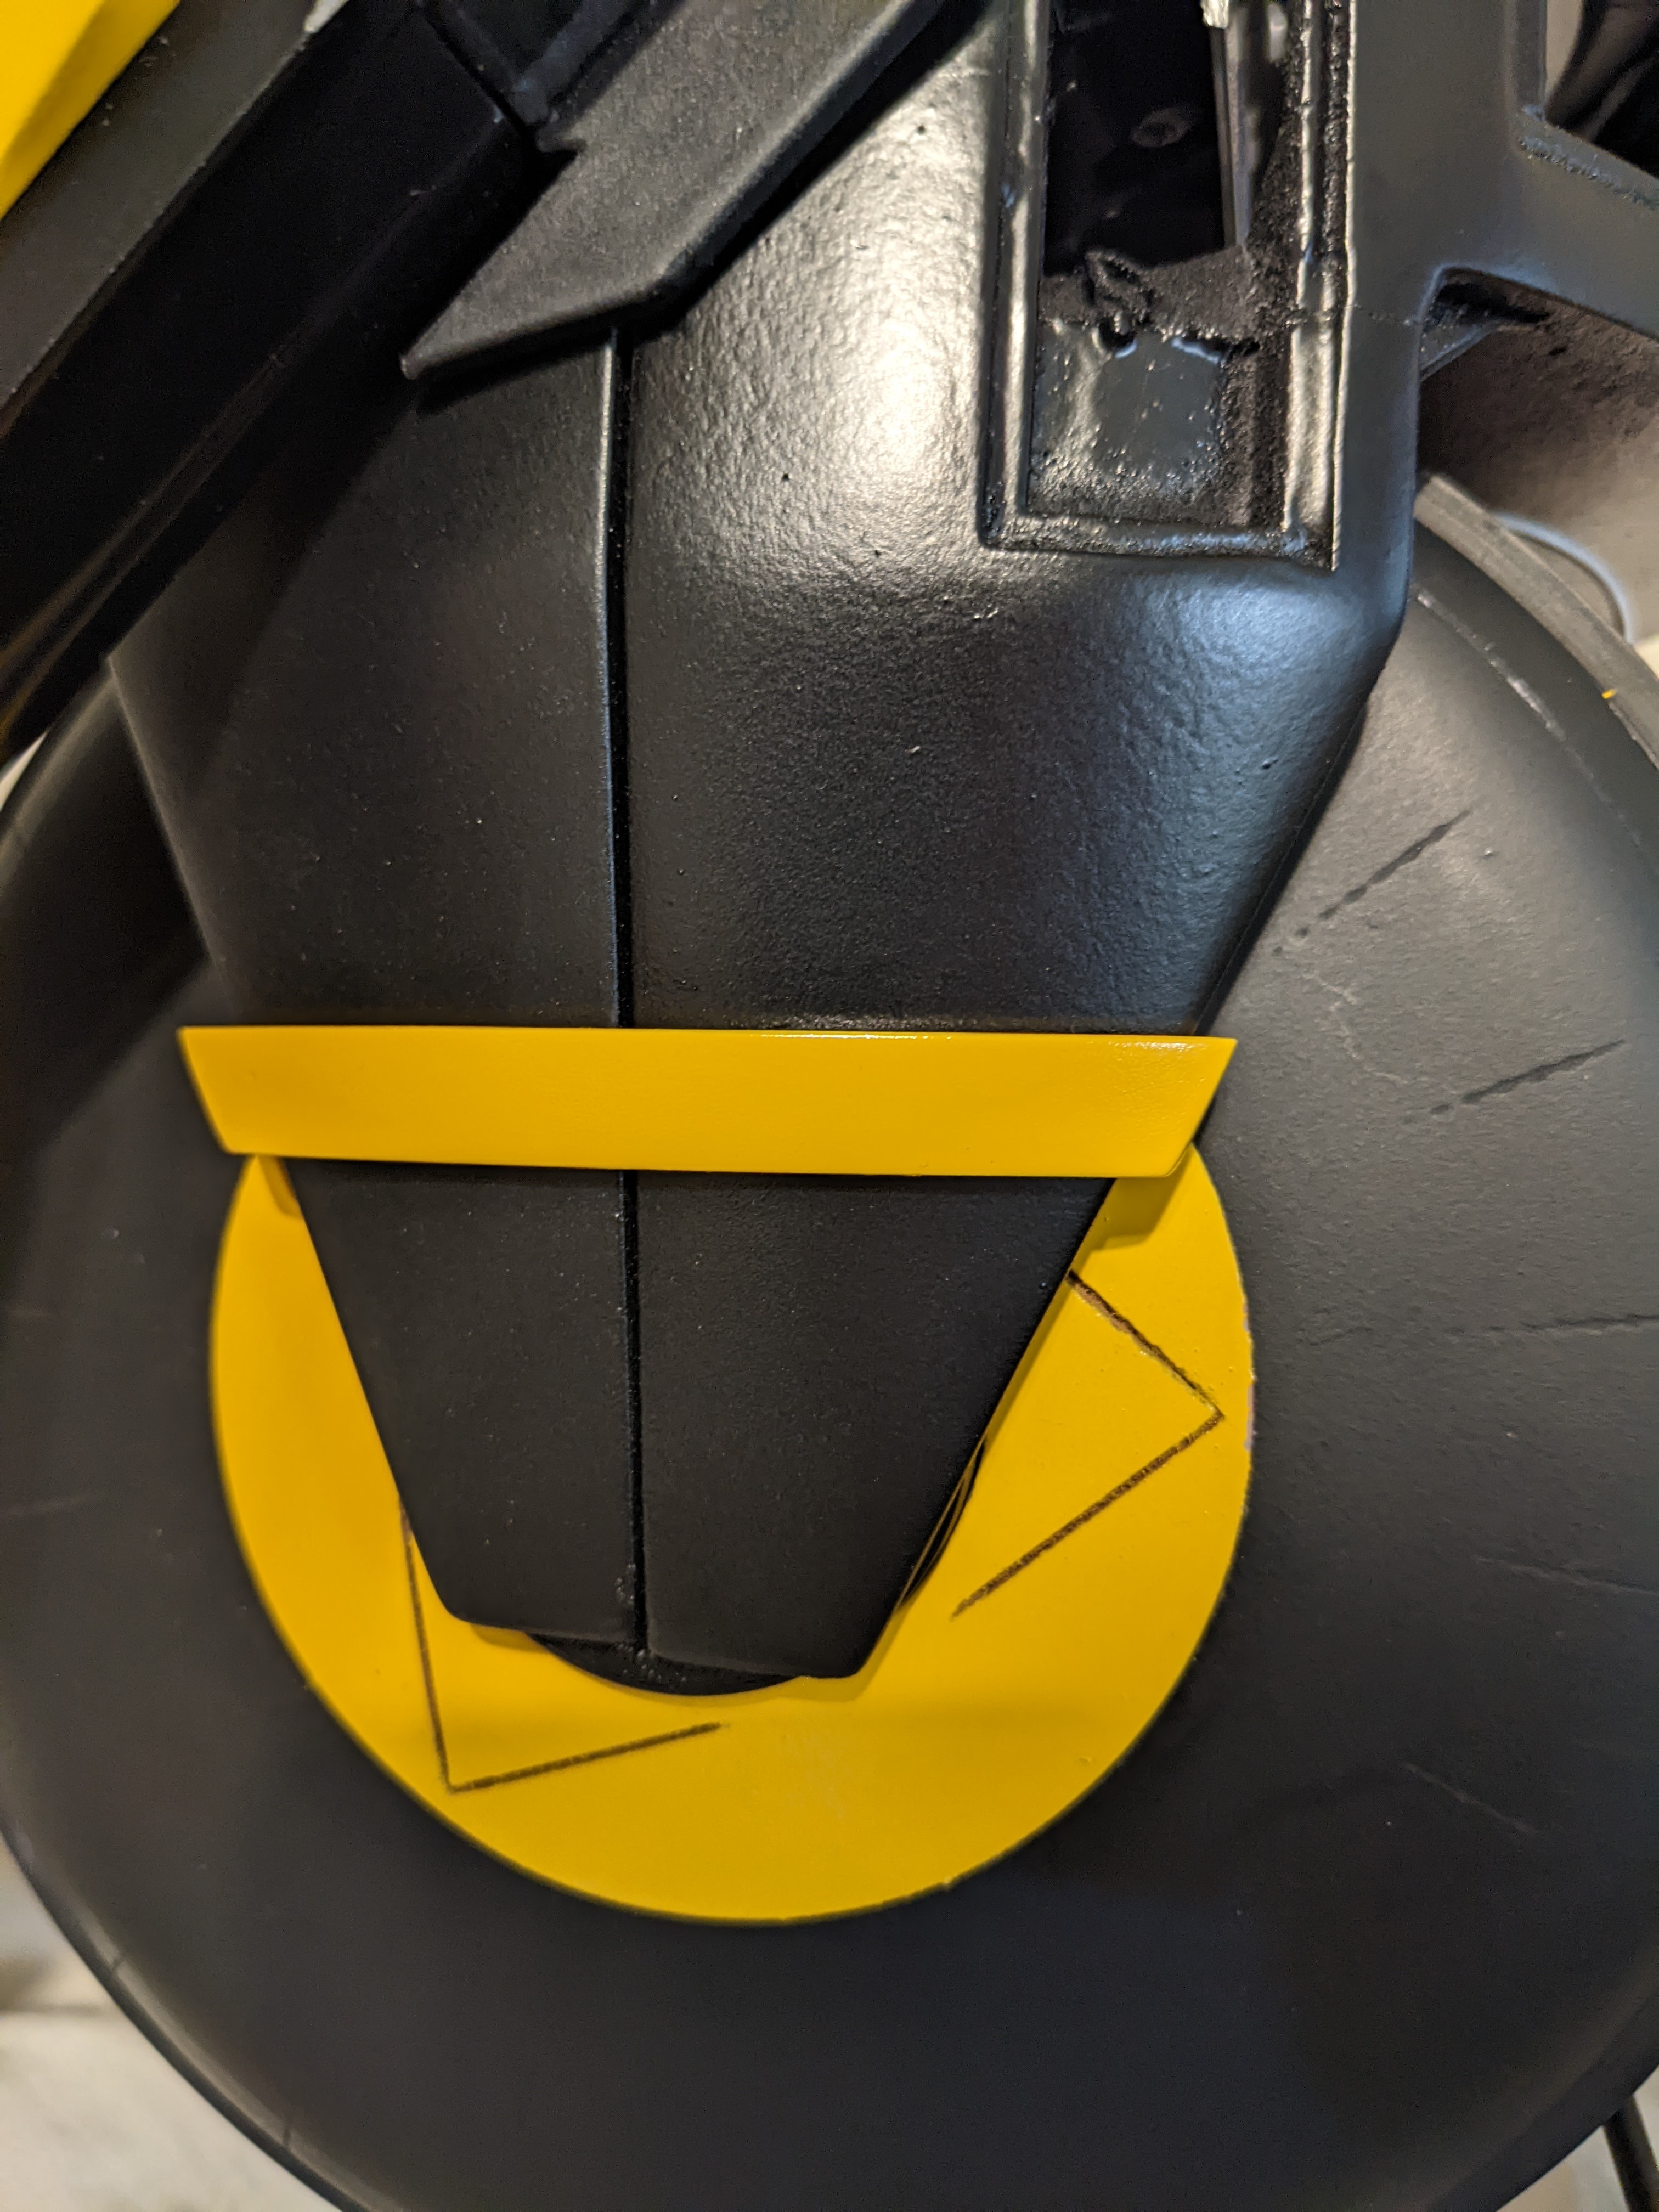
There is a seam between both halves of the body and this always bothered me. I was going to try to make a strip that goes up along the seam so it's covered by something that looks like an intentional vertical line.
Kiana suggested instead of that to just have something that wraps around the body and squeezes it all together. I was skeptical because of the strange geometry of that part of the body, but after she drew this image I felt like it was worth it.
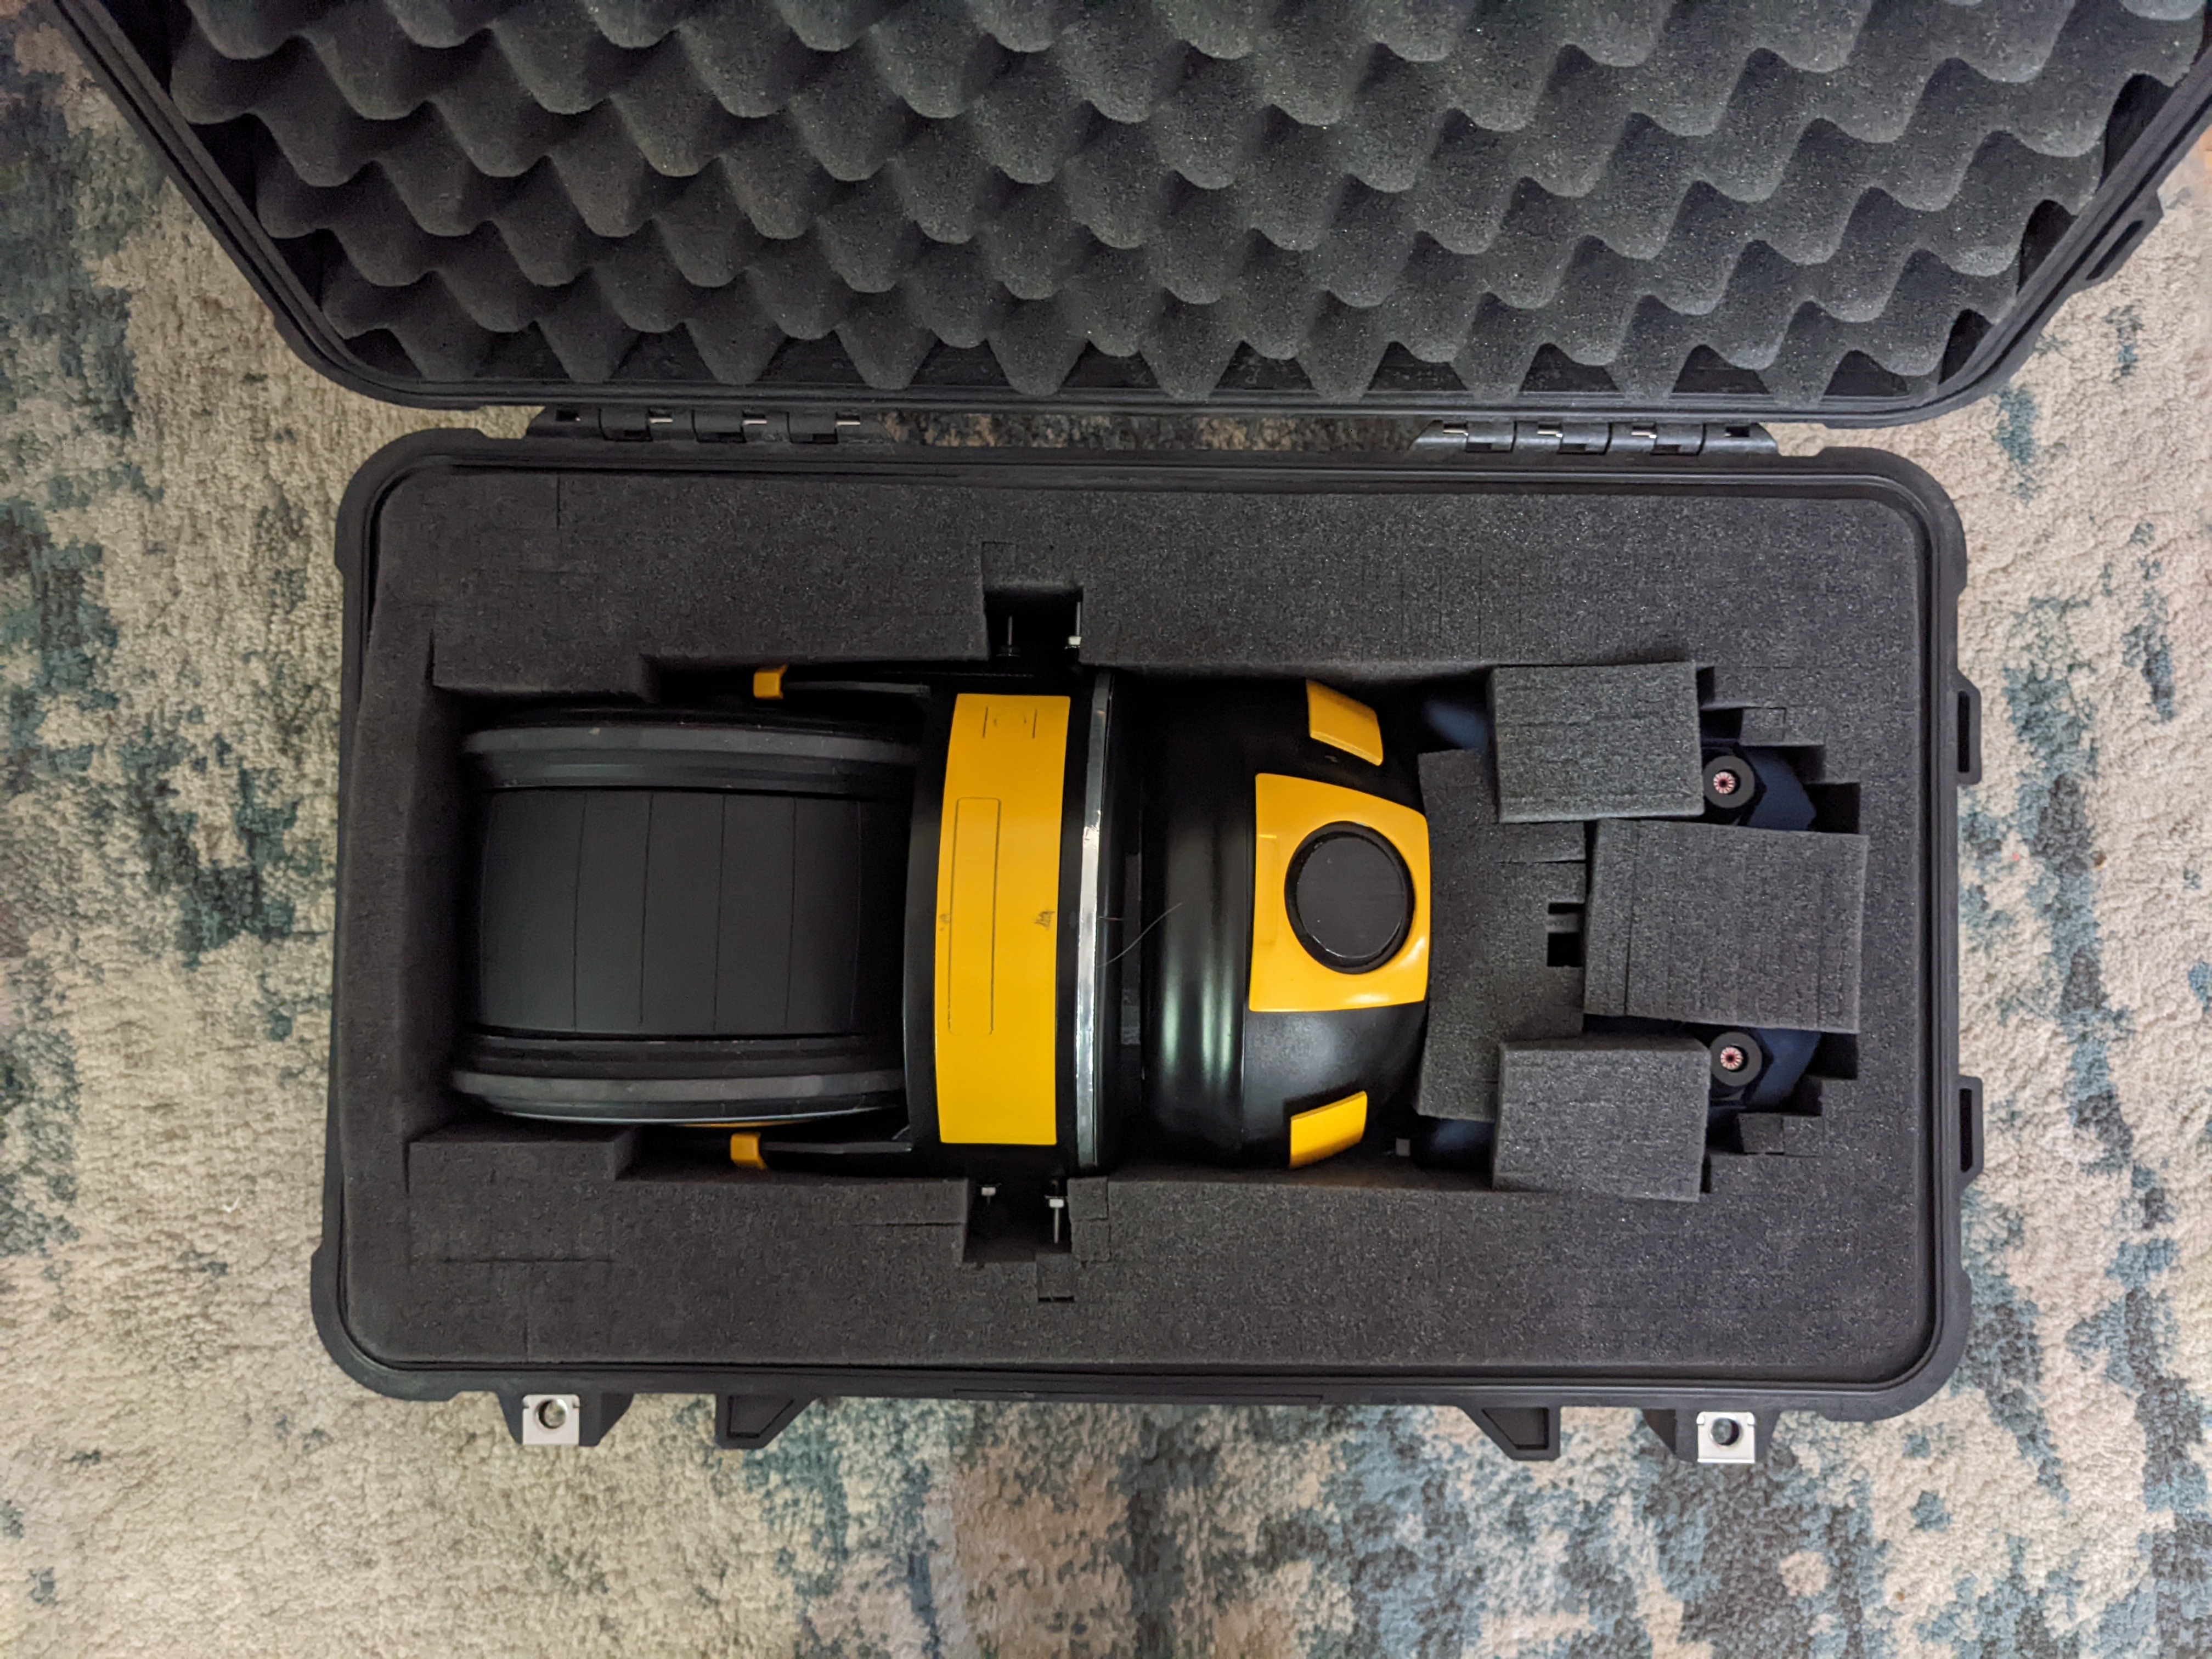
I finished up the pelican case and added spots for the batteries and the controller.


I wanted to bring it to work again to make sure everything was still working, and good thing I did. I was having a strange issue where the switch wasn't working again, but this time everything seemed like it was plugged in. At this point there had been 2 problems with the switch, so after work, I reprogrammed the switch to be on the controller instead. I brought it back to work the next day and everything was working perfectly. I added safety so that when the switch goes from disabled to enabled, nothing turns on for 3 seconds.
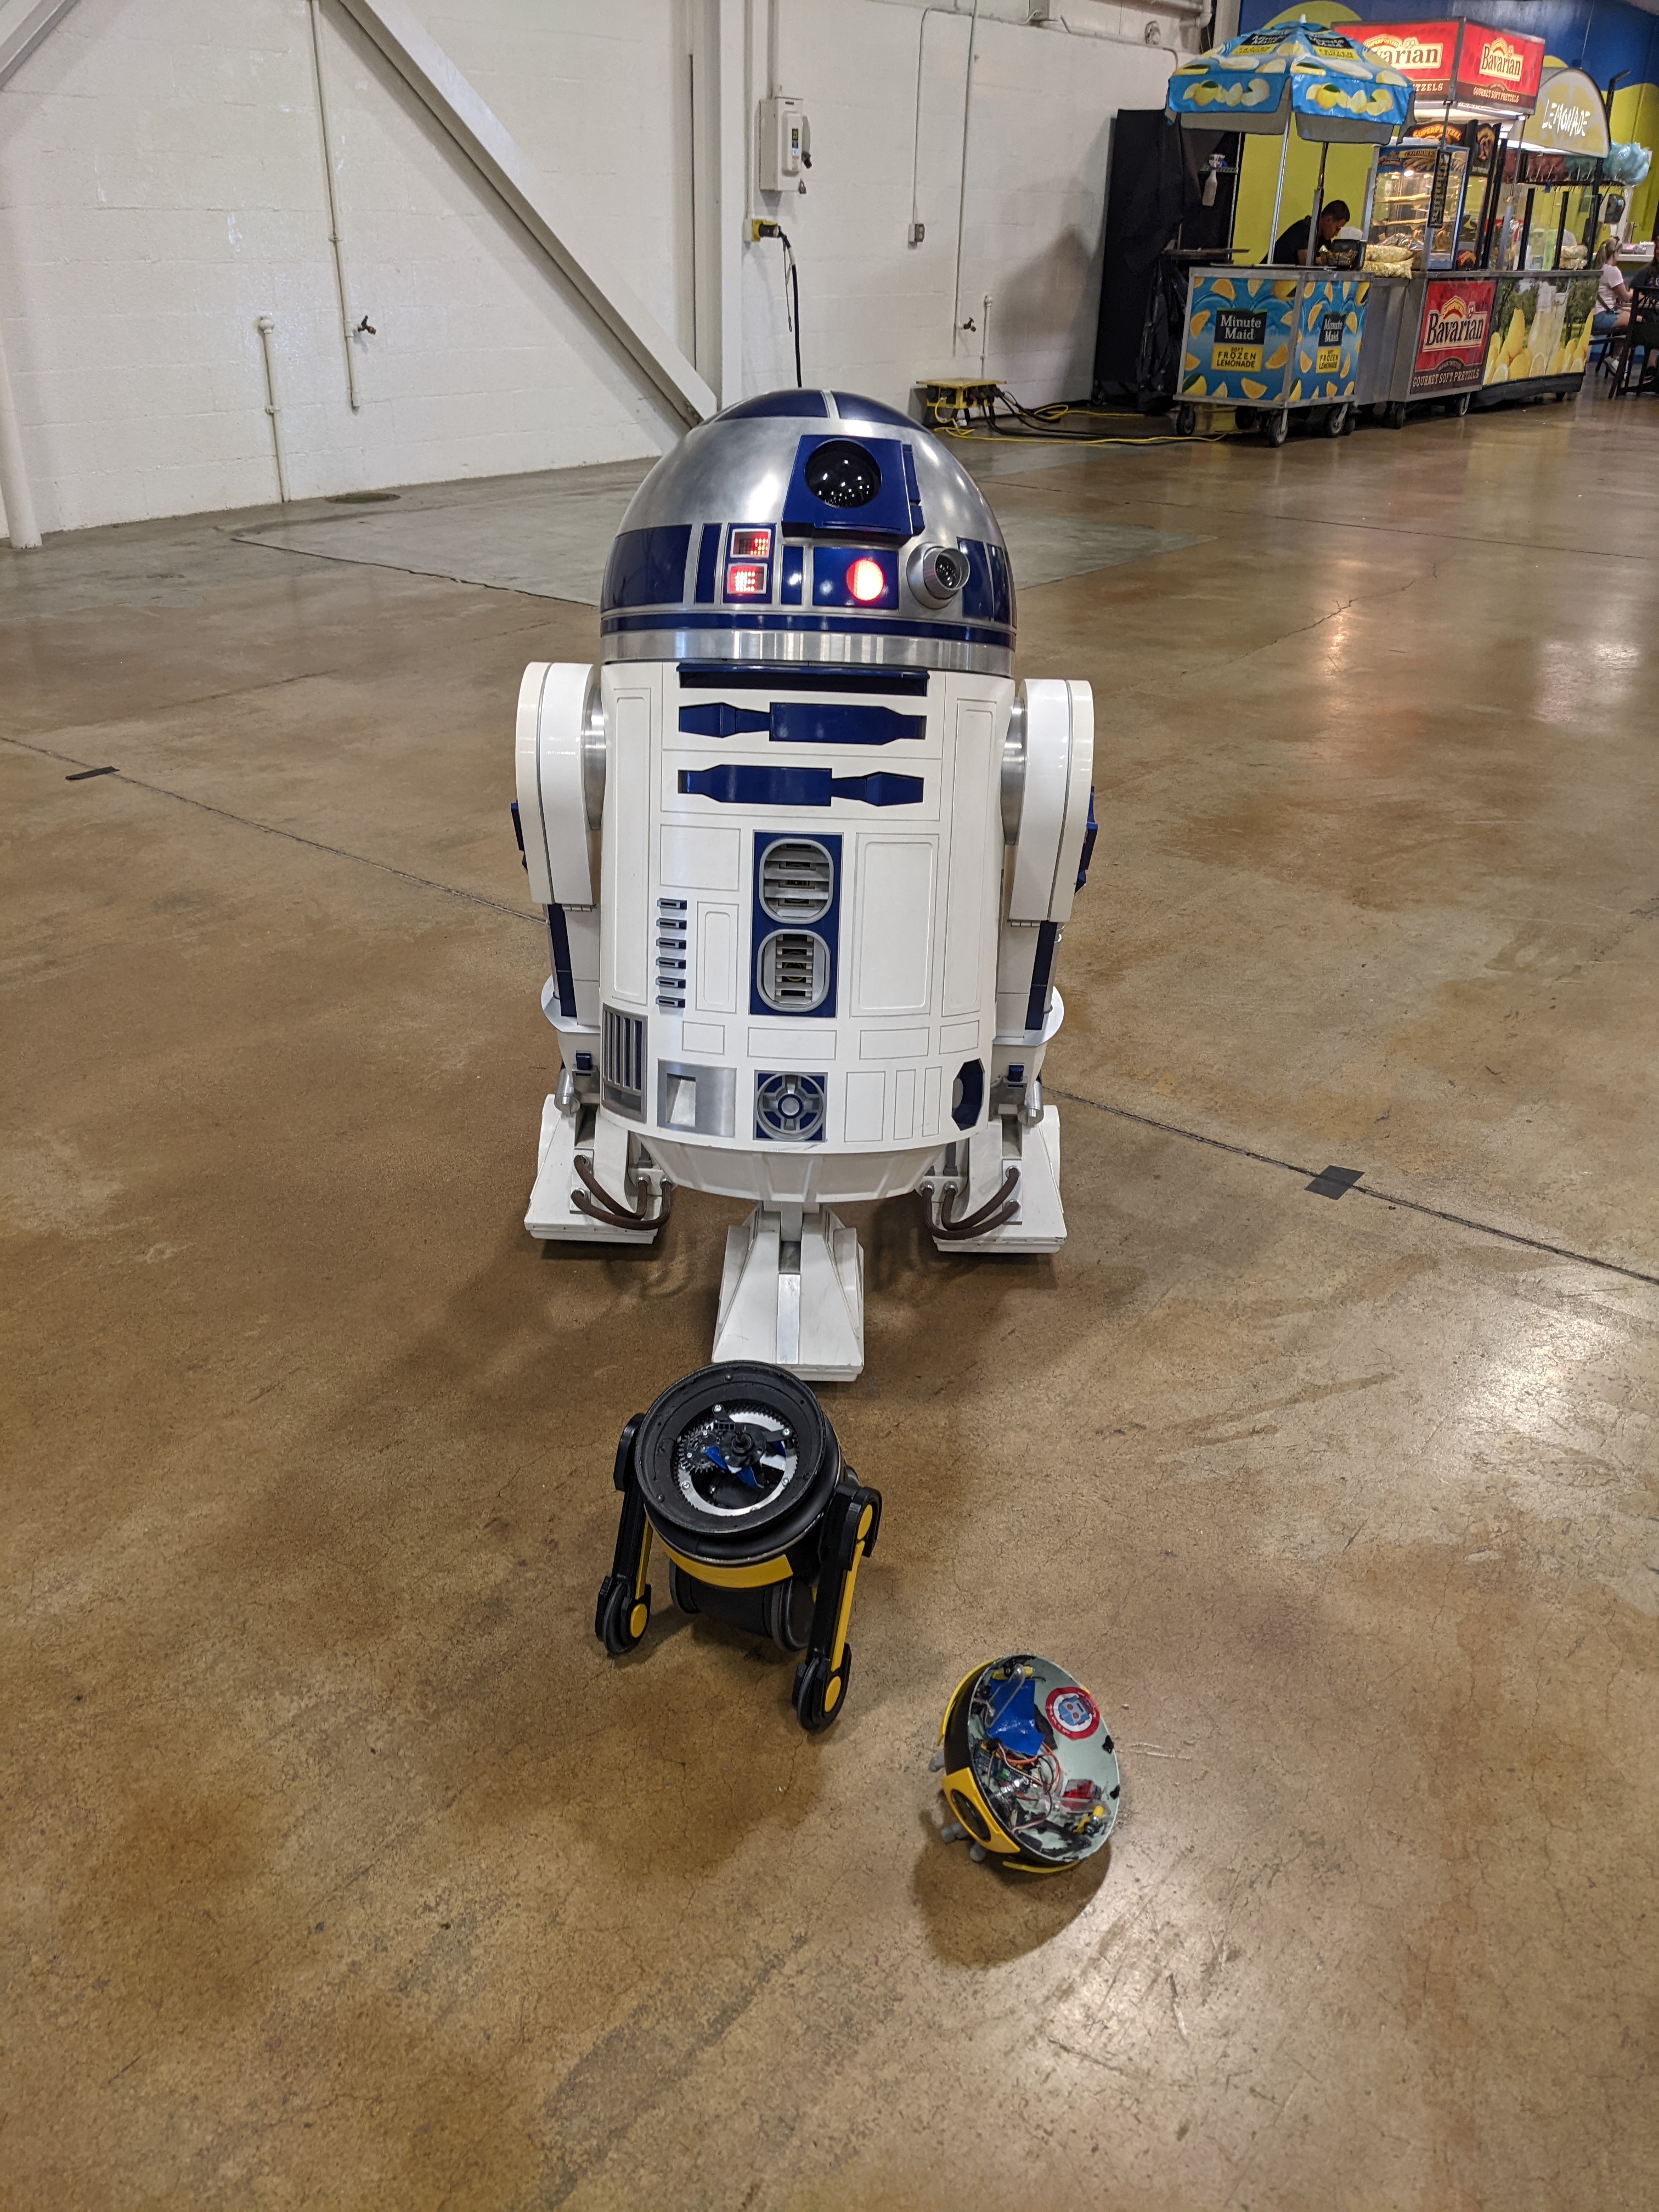
At OC Maker Faire 2023

LA Comic Con 2023
Goal: December 2-3, 2023
Plans
There is a lot I'd like to change to the robot, but I can only give it so much time. This is the priority list for changes I'd like to make, and we'll get to as many as we can:
- use gyros in the controller to decide when the controller is set down and disable the robot if it's set down for too long
- fix the anything that broke after it drove off of a table
- wire the head servos to the body
- stop controller "activity warning" and brushless ESC's beeping when left alone for too long
- redo the entire head tilt for a delta linkage
- change ring gear for a wheel that's sprung into a track for longevity when kids try to spin the head
- speakers
Controller AFK Shutoff
I want the robot to turn itself off when I set the controller down, but only sometimes. When the eye/eyebrows are fully done, I'd like to be able to leave the robot on and let everything animate on its own.
There is a switch on the controller to disable all head movement, and there's a switch on the controller to disable the drive. If the drive is left on I want the robot to disable when I set the controller down. But if the drive is off, nothing should turn off when I set the controller down.
I don't want the robot to turn off while I'm using the joysticks, even if the robot is completely still. Currently, I only check if the joysticks have been used recently and allow this function to run when they haven't, but I need to add every input on the controller to that list. So only after no input has been touched for X amount of time will we start checking for the controller being set down.
Then we check the position over time (velocity) of the controller to see if it's sitting. If it is, a timer starts, and after that amount of time has passed the robot will shut off.
This needs a little less sensitivity to moving. Currently, if the controller is on a table and someone walks nearby the controller thinks it's moving.
  // Disable drive if the controller is set down for a certain amount of time
  if (controller_switch_output & !are_joysticks_running()) {
    // Current values
    int cur_x = joystick_channel(GYRO_X);
    int cur_y = joystick_channel(GYRO_Y);

    // Figure out the velocity of the controller
    int x = cur_x - last_x;
    int y = cur_y - last_y;

    last_x = cur_x;
    last_y = cur_y;

    // If X and Y velocity are 0, and either X or Y isn't currently at 0 degrees, start the timer
    if (x == 0 && y == 0 && (cur_x != 0 || cur_y != 0))
      afk_timer += 20;
    else
      afk_timer = 0;

  } else {
    afk_timer = 0;
  }

  // Once the timer has reached 2000, disable everything on the robot
  if (afk_timer >= 2000) {
    controller_switch_timer = false;
    startup_switch_output = false;
    last_switch_state = true;
    controller_switch_timer = 0;
    afk_timer = 0;
    return;
  }
I did this by adding a buffer to the velocity of the code above, where if it's less than 1 it'll treat it like 0.
    // Give wiggle room for noise
    x = abs(x) <= 1 ? 0 : x;
    y = abs(y) <= 1 ? 0 : y;
The data from the gyro seemed noisy when I would move quickly still, so I added an SMA filter to the gyro readings. This was extremely sensitive before, and now all works as I expect it to.
  // SMA filter for the gyros in the controller
  if (gyro_x_vector.size() >= gyro_x_vector.max_size())
    gyro_x_vector.remove(0);

  if (gyro_y_vector.size() >= gyro_y_vector.max_size())
    gyro_y_vector.remove(0);

  gyro_x_vector.push_back(joystick_channel_raw(GYRO_X));
  gyro_y_vector.push_back(joystick_channel_raw(GYRO_Y));

  // int xx = 0, yy = 0;
  int max = gyro_x_vector.size();
  for (int i = 0; i < max; i++) {
    gyro_x_output += gyro_x_vector[i];
    gyro_y_output += gyro_y_vector[i];
  }
  gyro_x_output /= max;
  gyro_y_output /= max;
Fixing the Fall
First, everything comes apart...
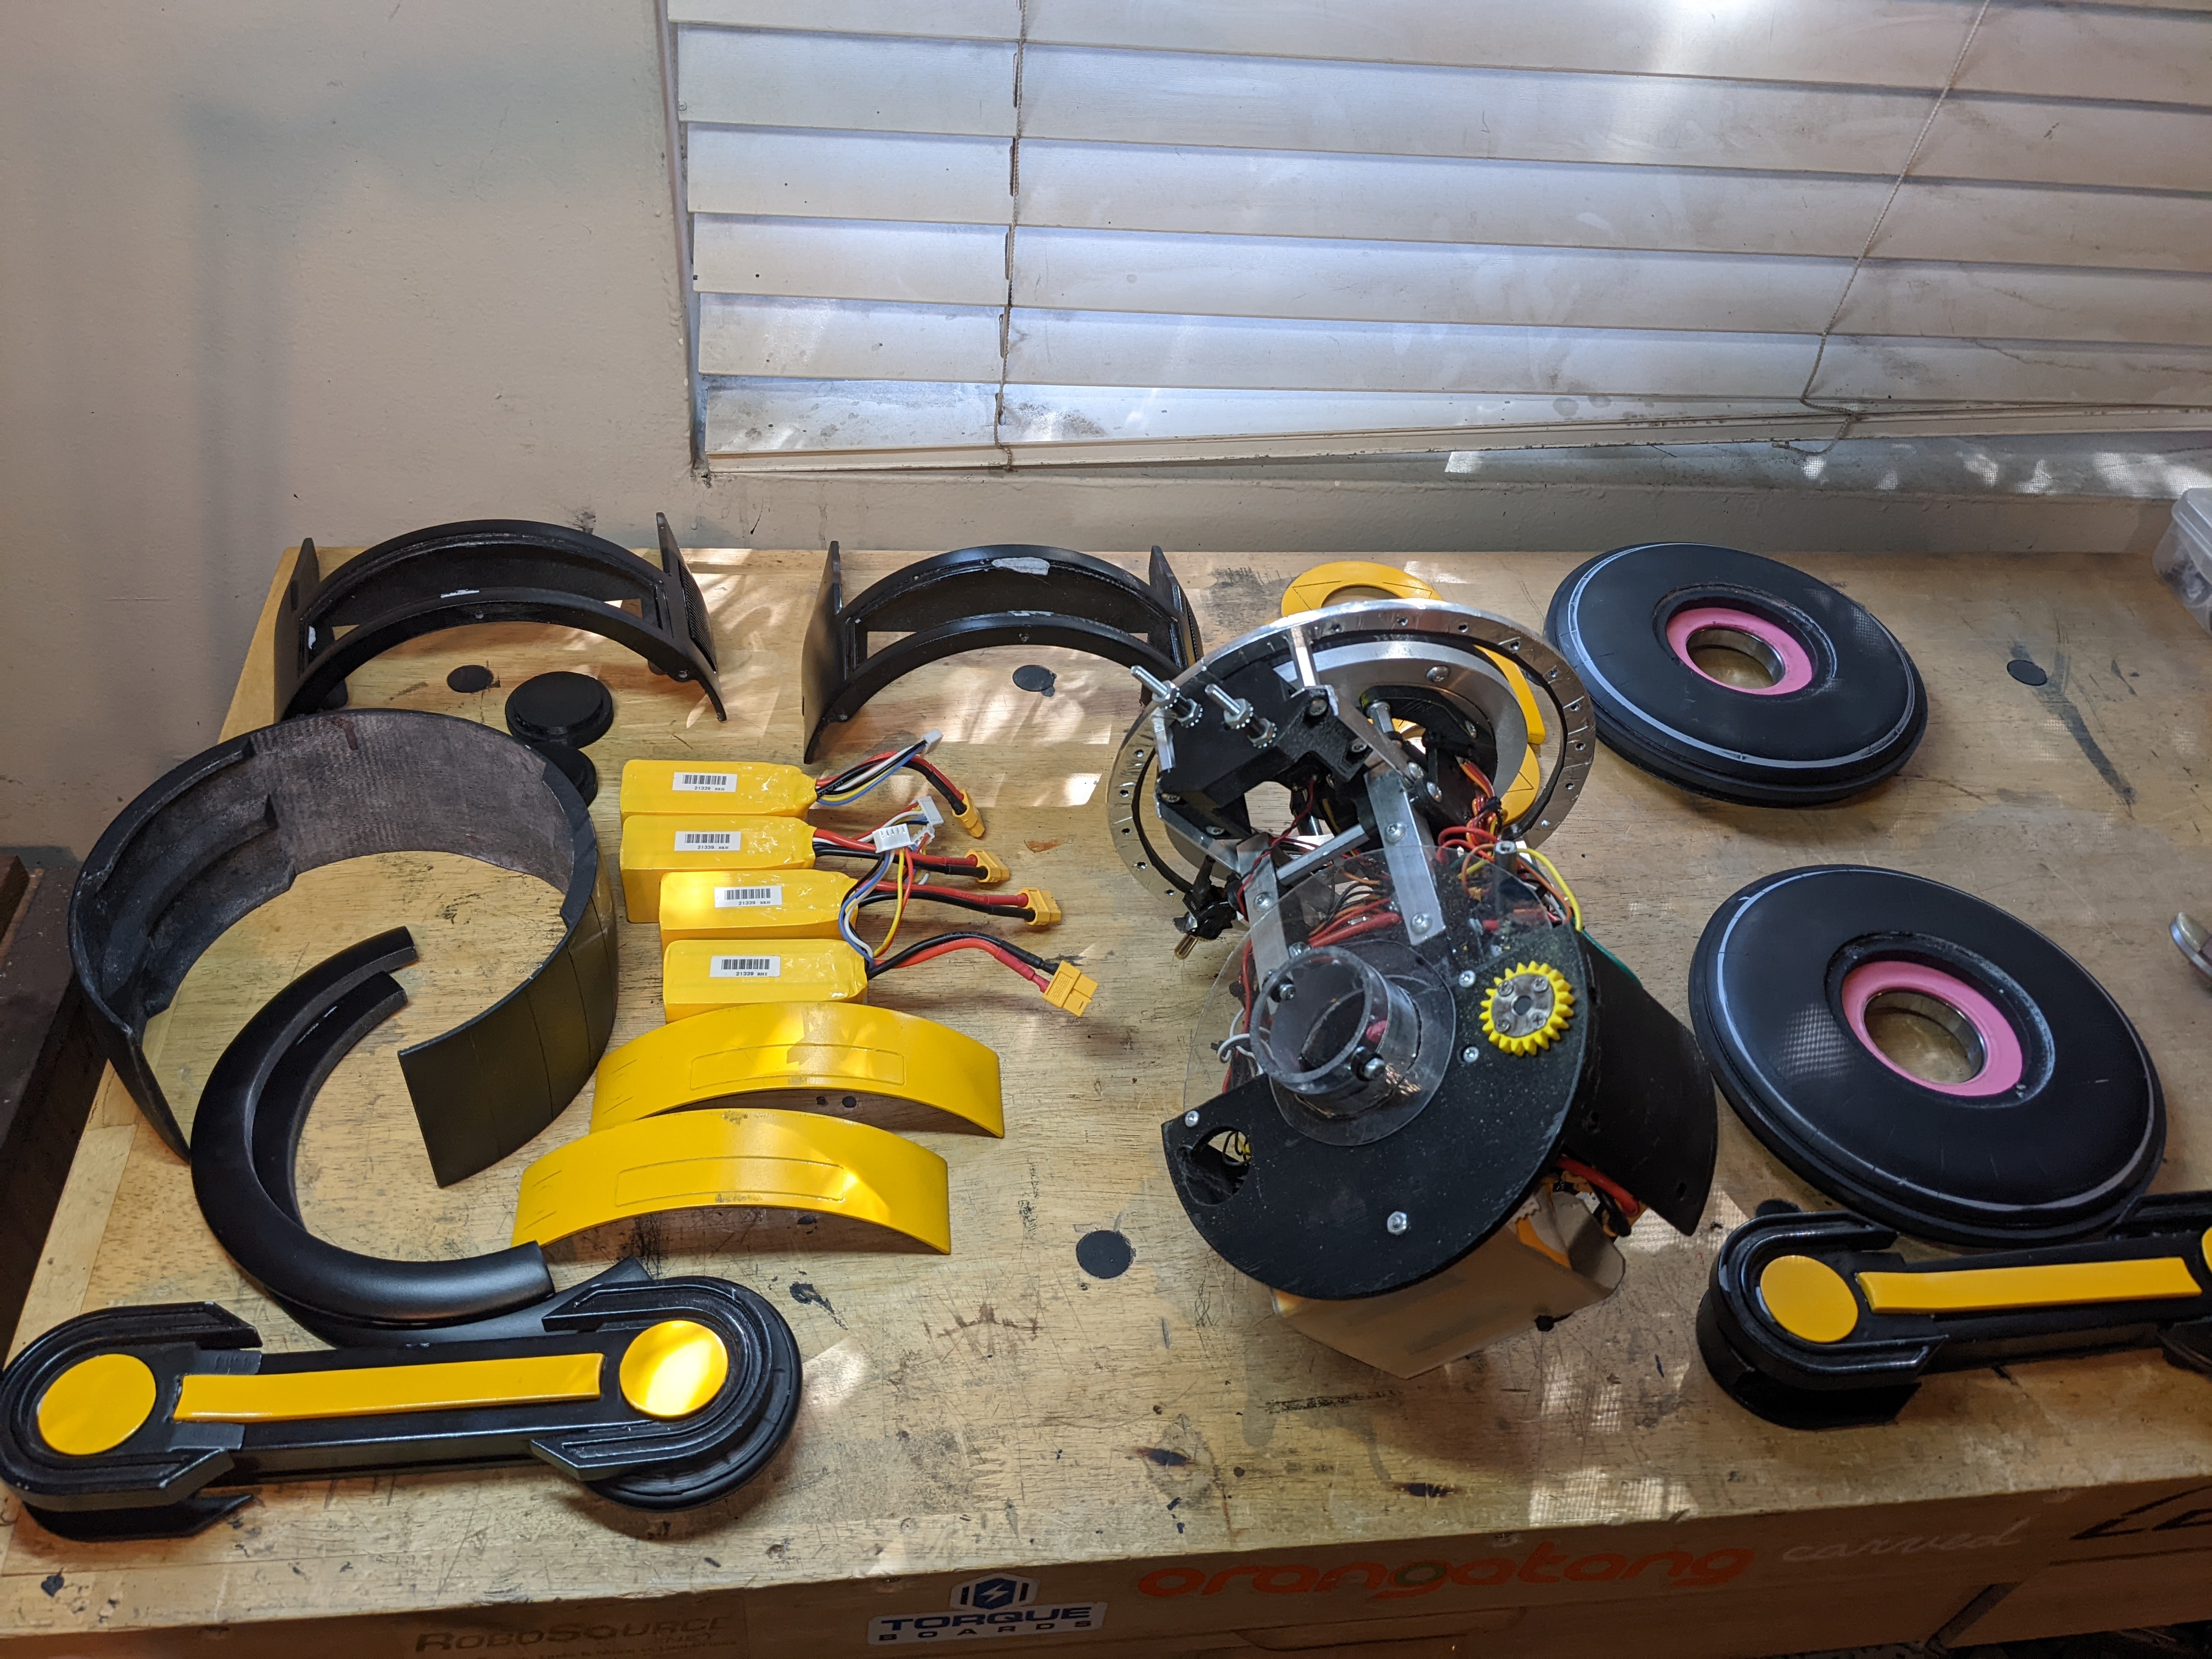
All of the damage went to the head. A lot of mechanical parts that were hot glued on have fallen off, and some paint is chipped all around the eye.
I'm starting by hot-gluing everything back into place. It's a pretty gross process, it isn't leading to consistency between both eyebrows which are meant to be the same. The eye is a mess too- I saw another builder use springs instead of wire so nothing breaks when it's hit, and that's something I'd like to use.
After fixing everything mechanically it's shown me how unhappy I am with the construction of the head. After this event, I need to find a better solution to my problems with it. Maybe it's 3D printing a new head, or it's just making entire subsystems that are printed and get hot glued in, instead of relying on hot glue to index everything inside the head. Who could have guessed that would be inconsistent?
Some paint scratched too. I have two options for repairing scratches, I can either repaint it and continuously try to keep it perfect, or I can repair it and over time this will gain natural weathering. I'm going to fix it over time. The front yellow plate fell off during the fall and the eye took a big scratch, exposing bondo spot putty that was used to fill some gaps.
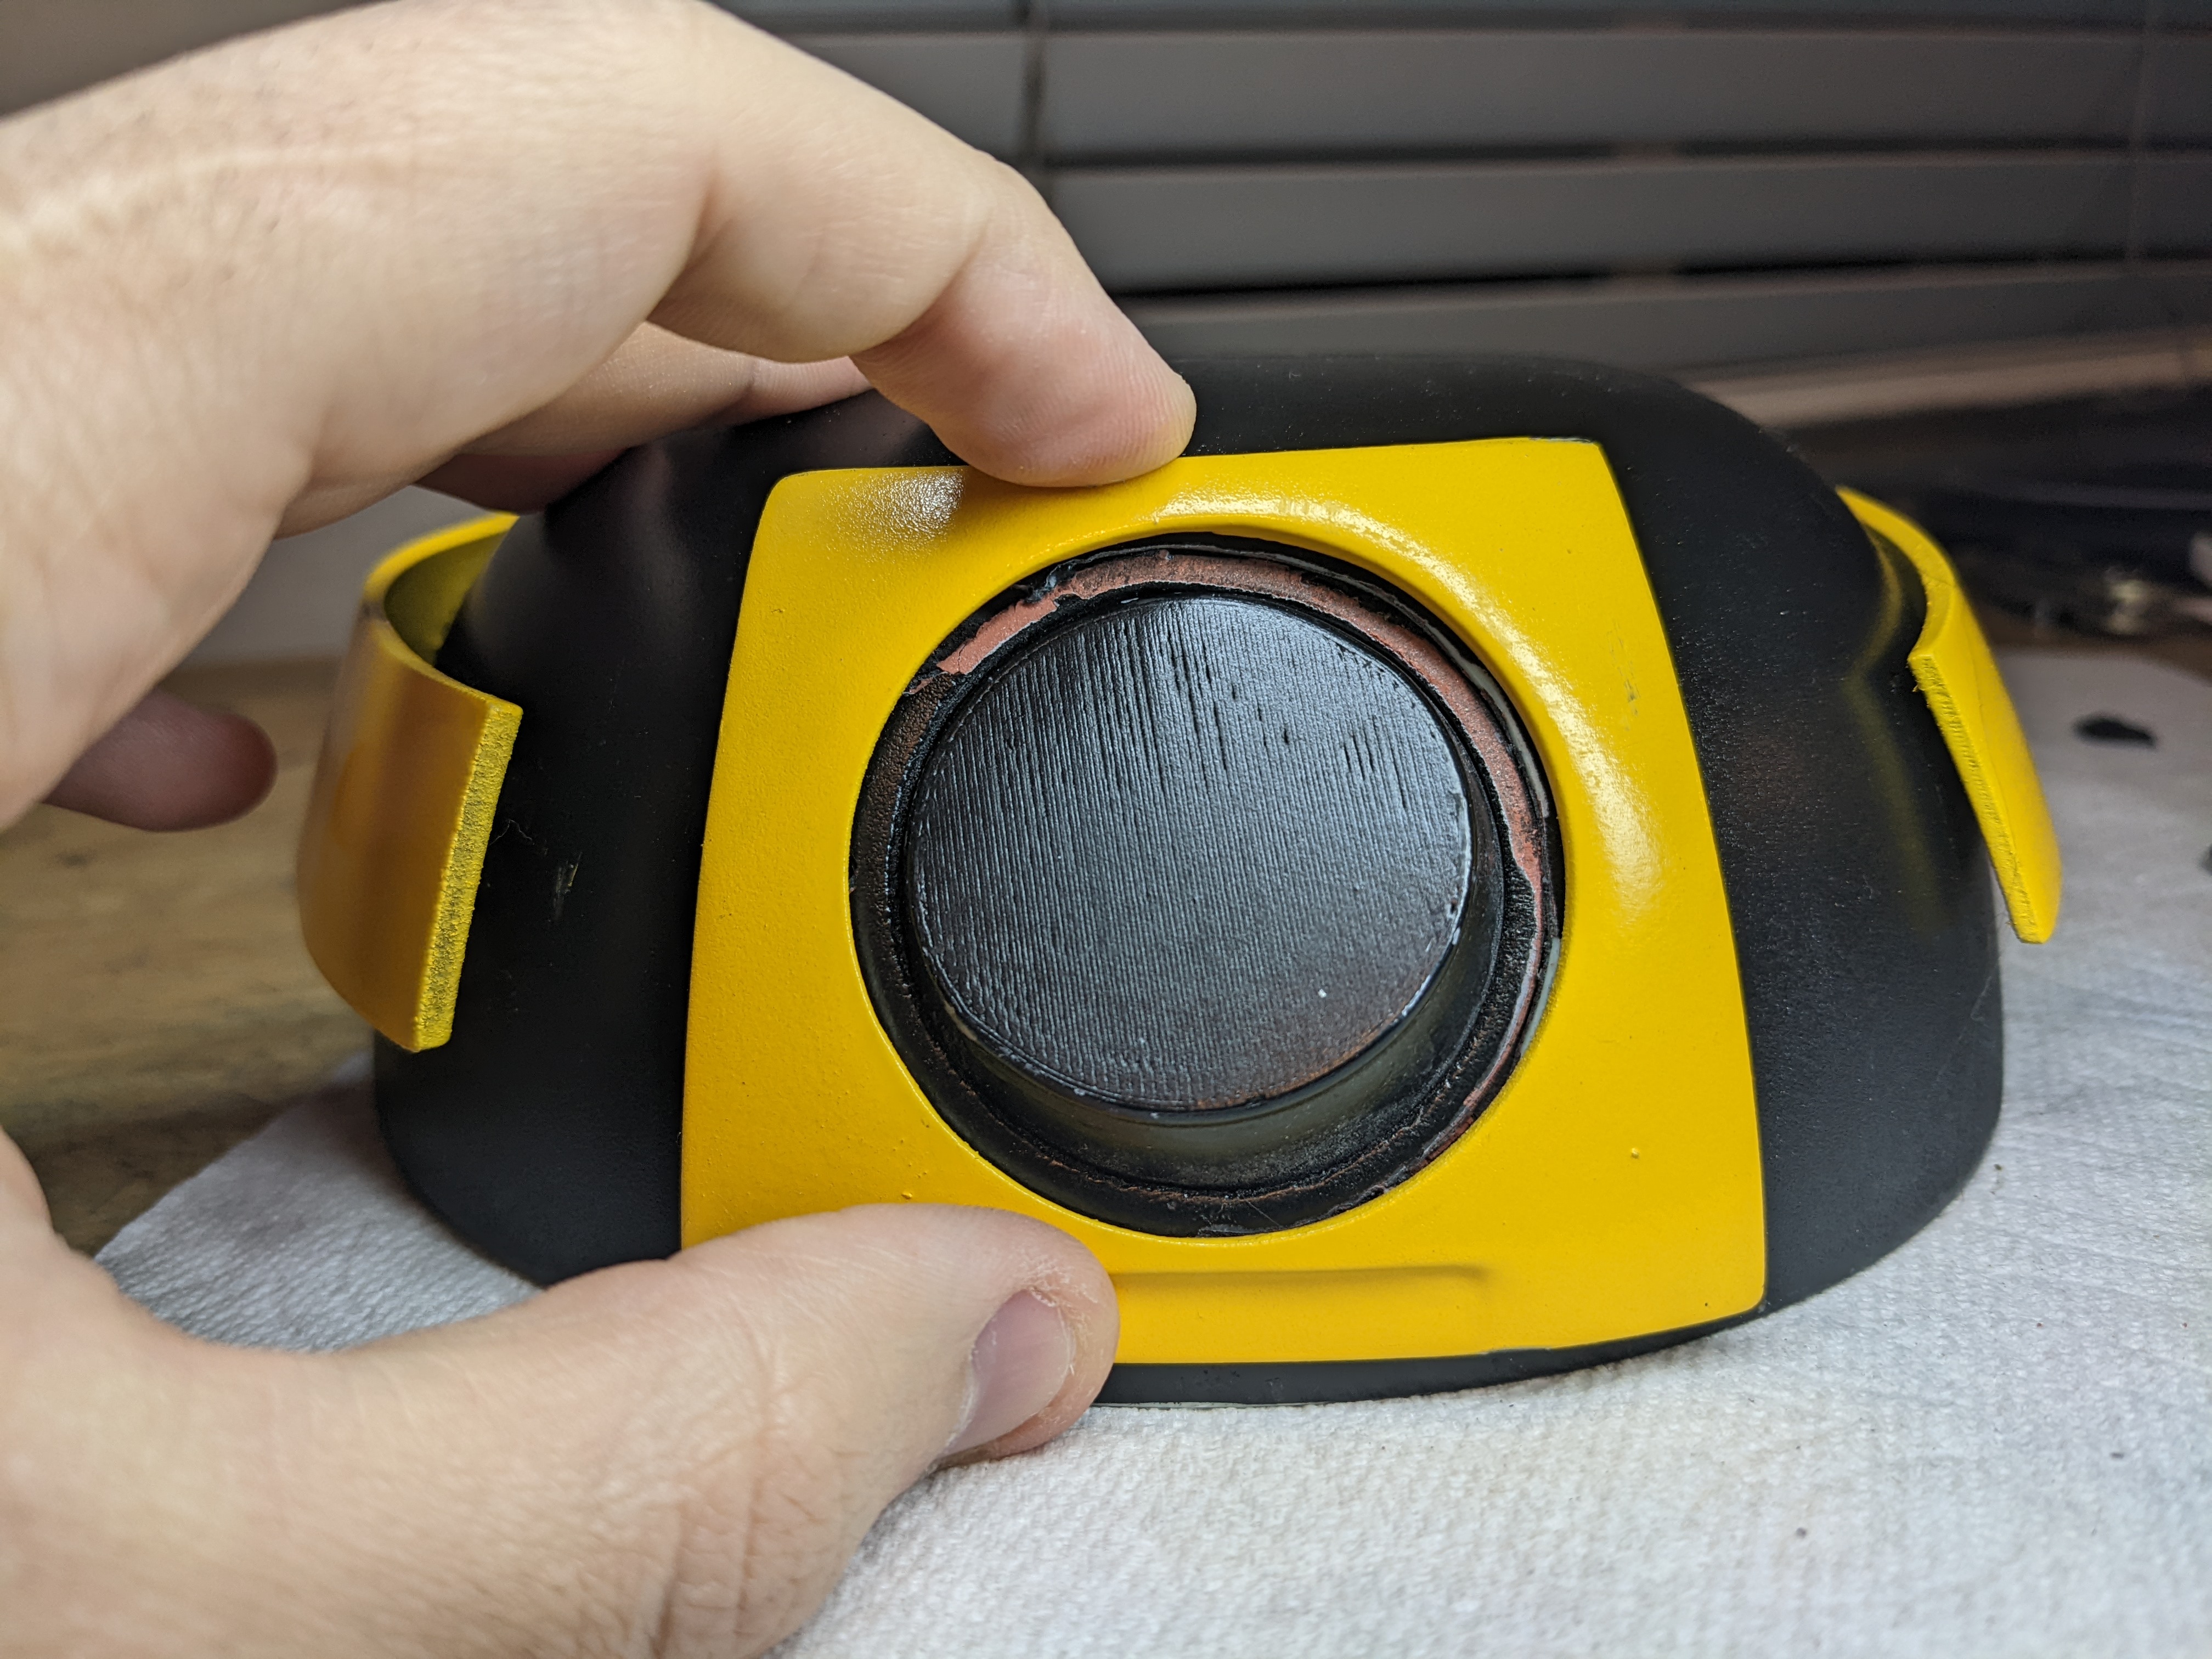
The color isn't an exact match, but it's hard to tell that my black acrylic paint was more matte than the rest of the head because the yellow part acts as a barrier.
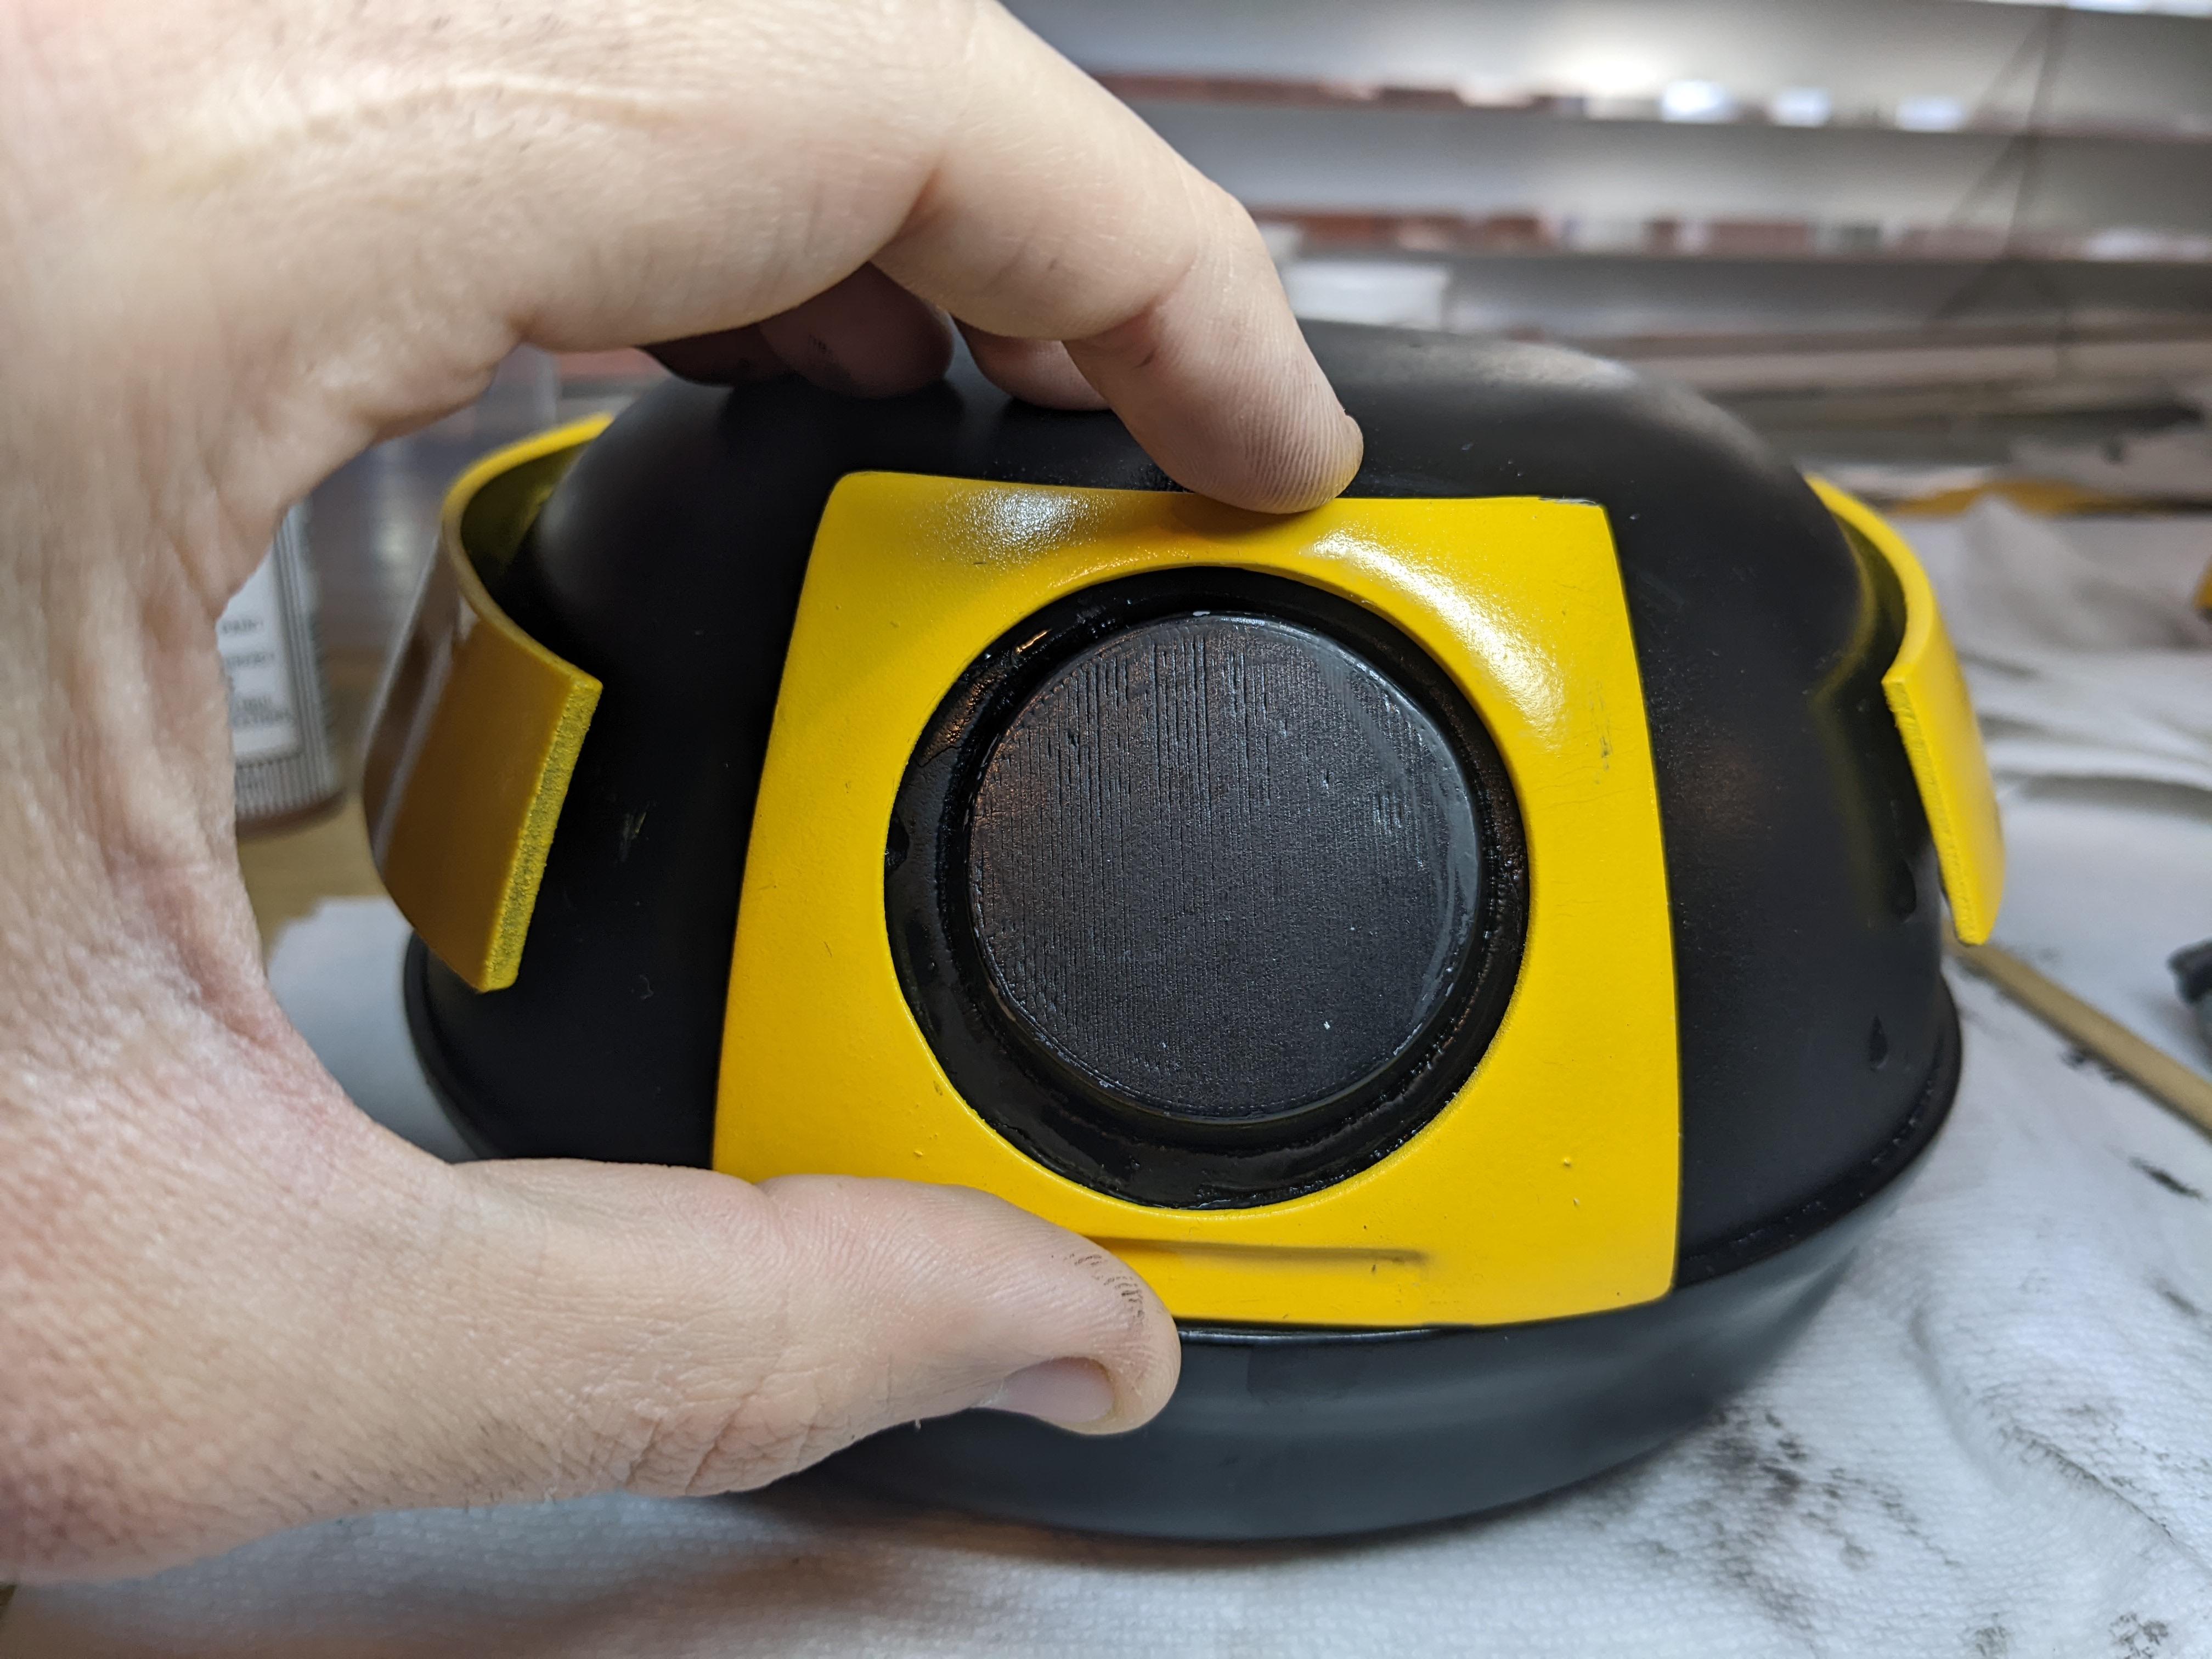
The body cracked a little at some weaker points in the design. There isn't much scratched on the body though.
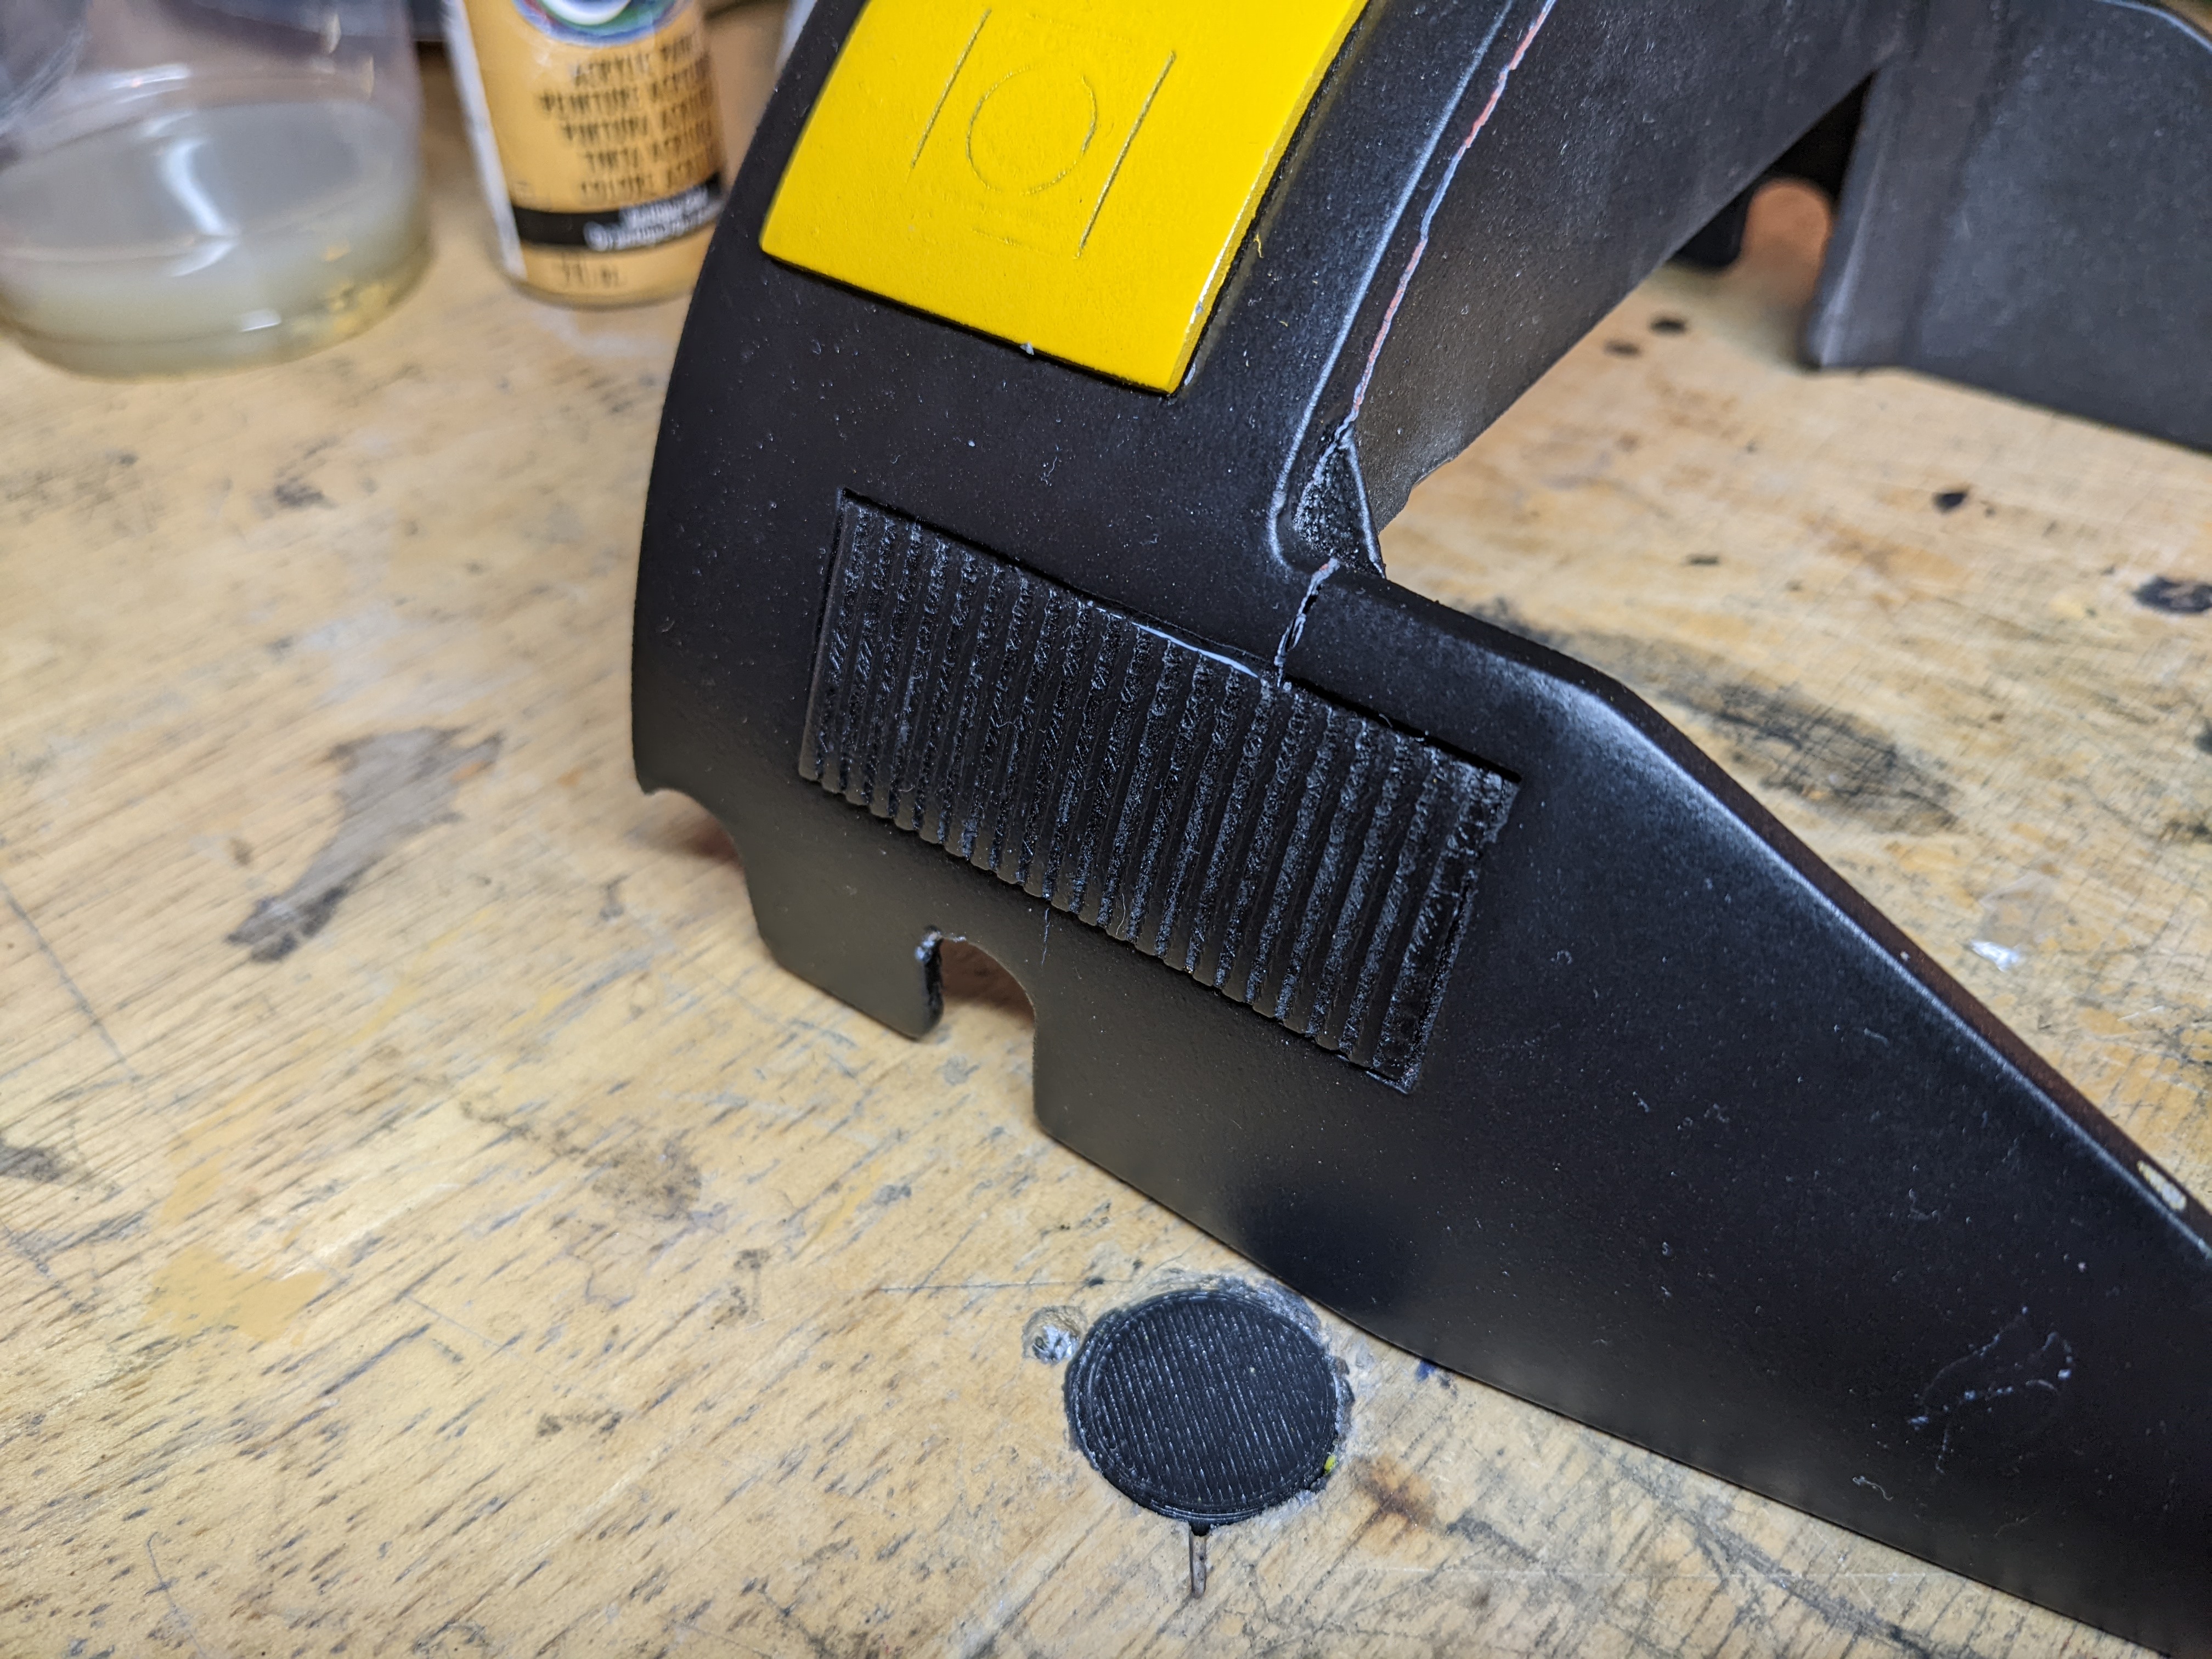
I filled the parts that did scratch with some yellow paint and filled the vent with a lighter gray on the inside and gold around. I like the idea of yellow exposing itself when the black scratches.

Wiring Head Servos to the Body
I tried to find a place to plug the servos into the servo board but the pins on the servo board are completely inaccessible. The opposite side of the blue board needs to be reached.
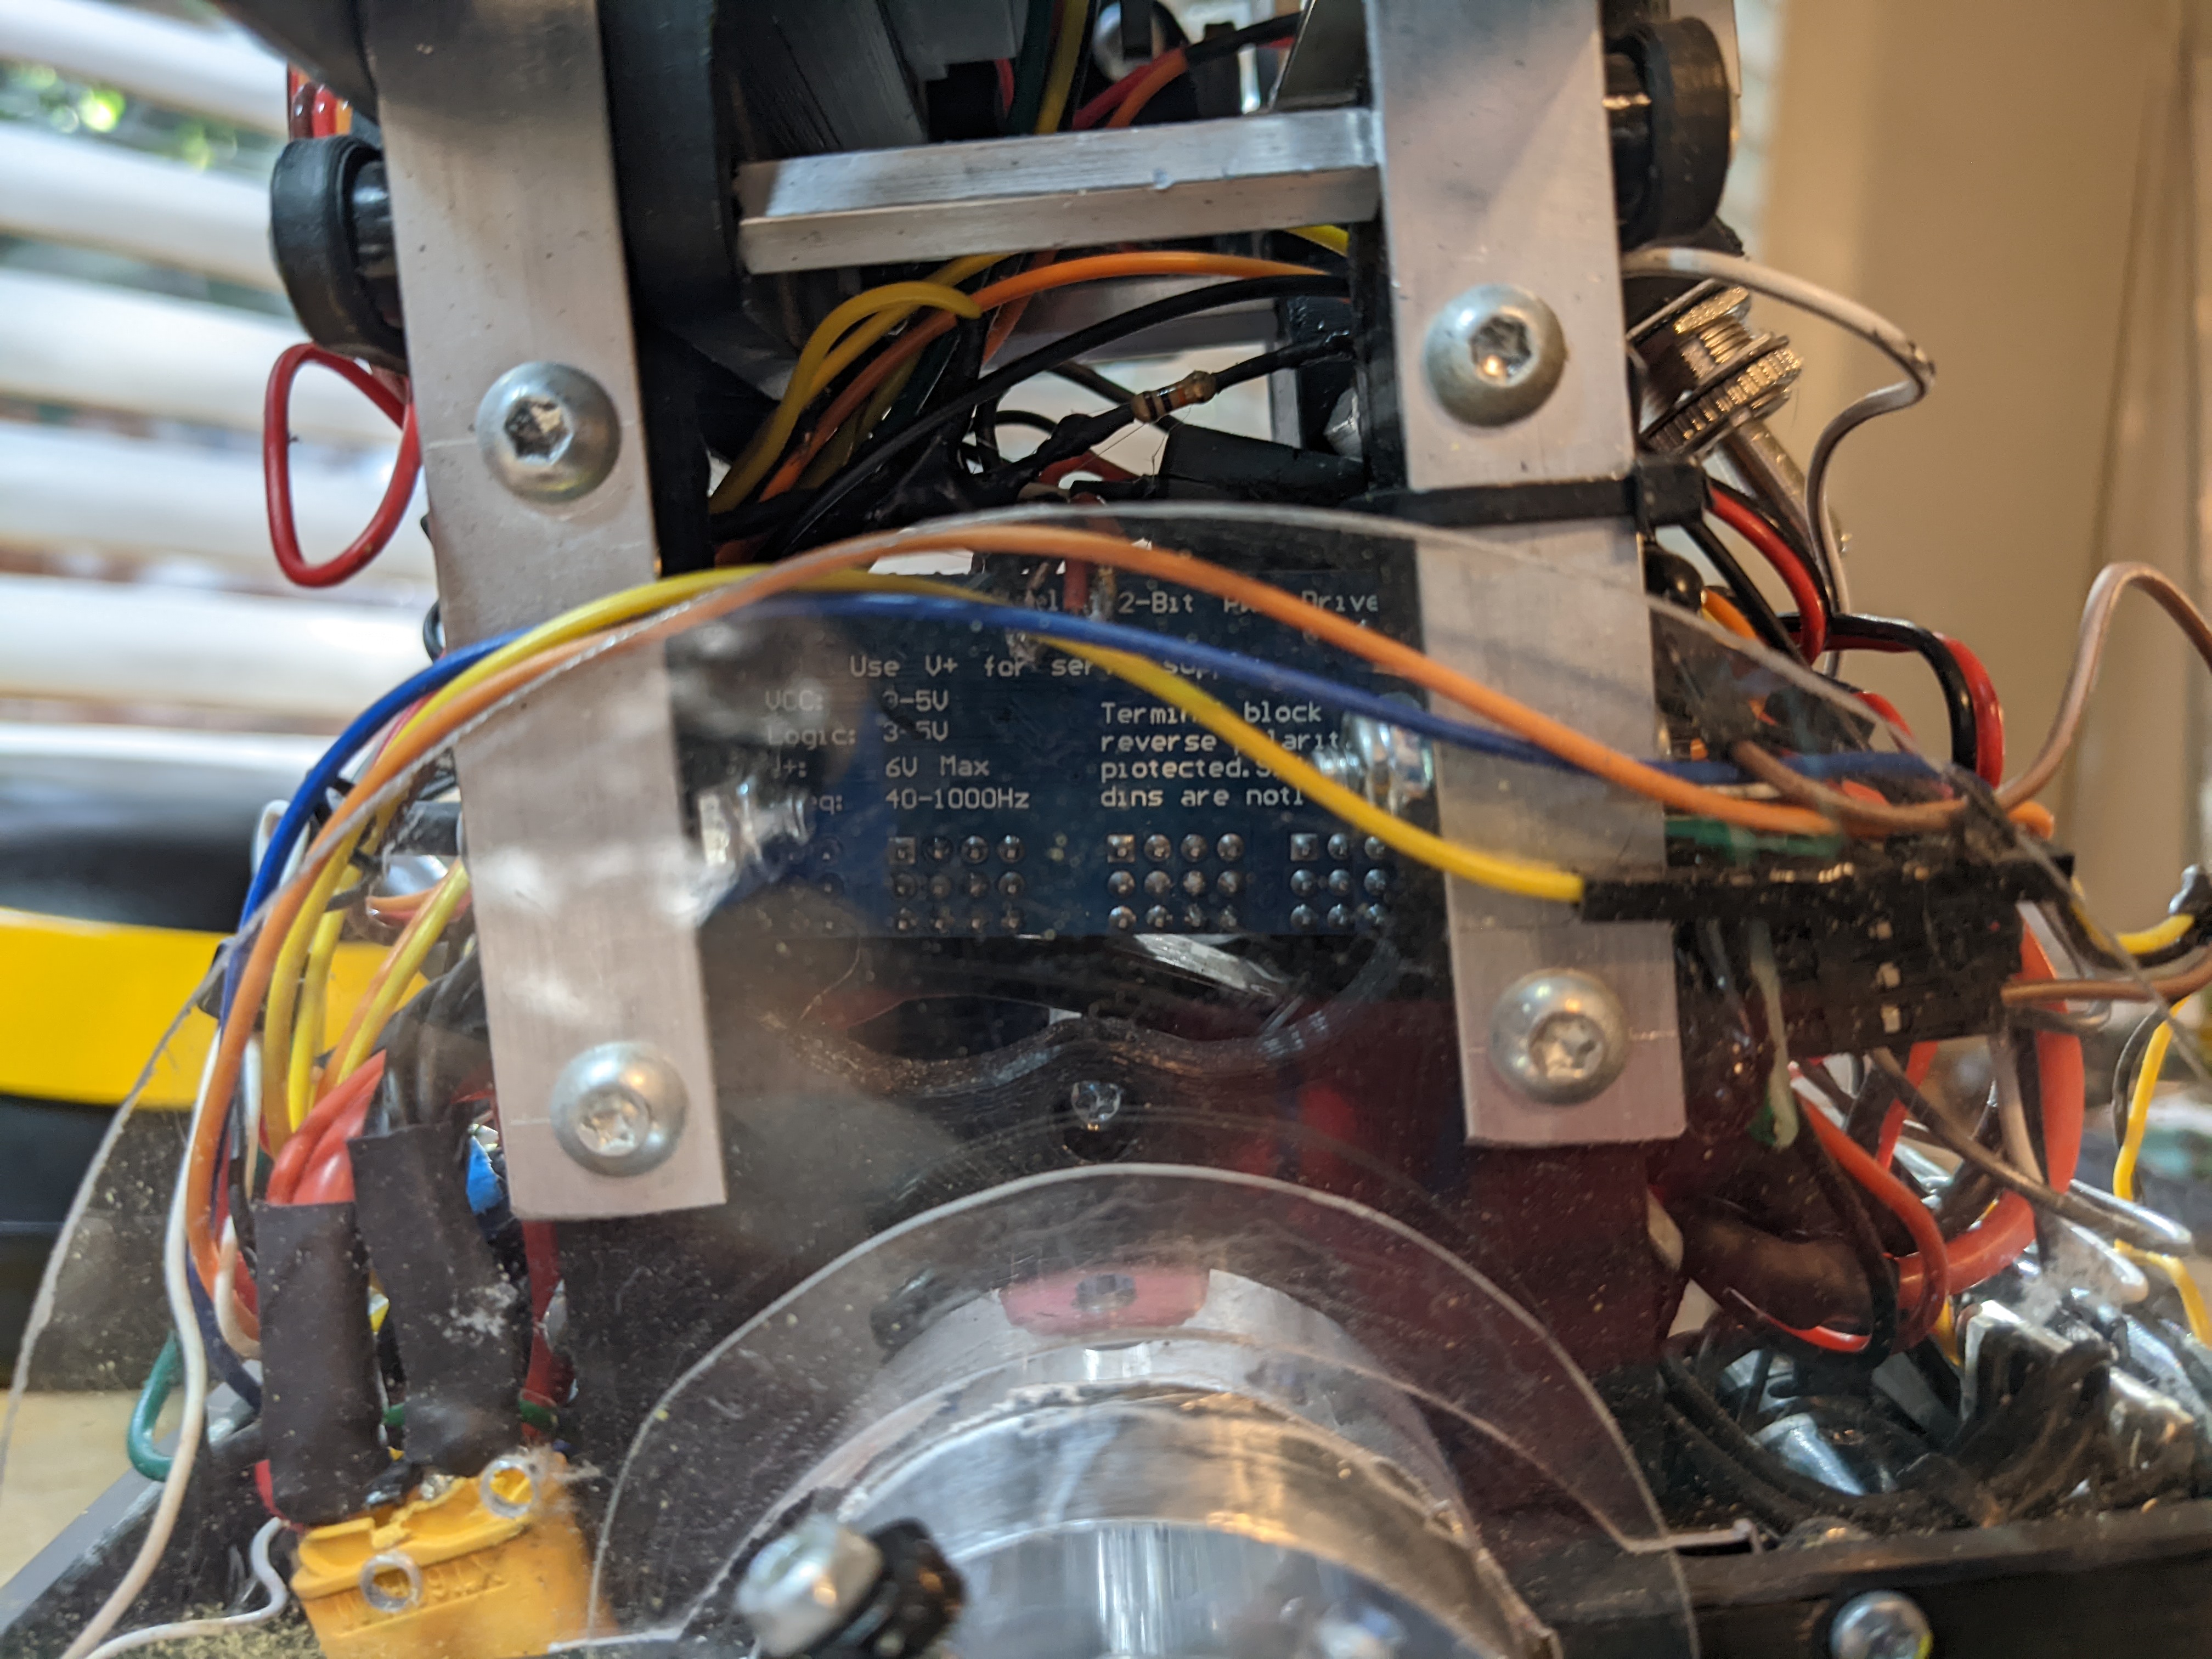
Where this looks from the other side.
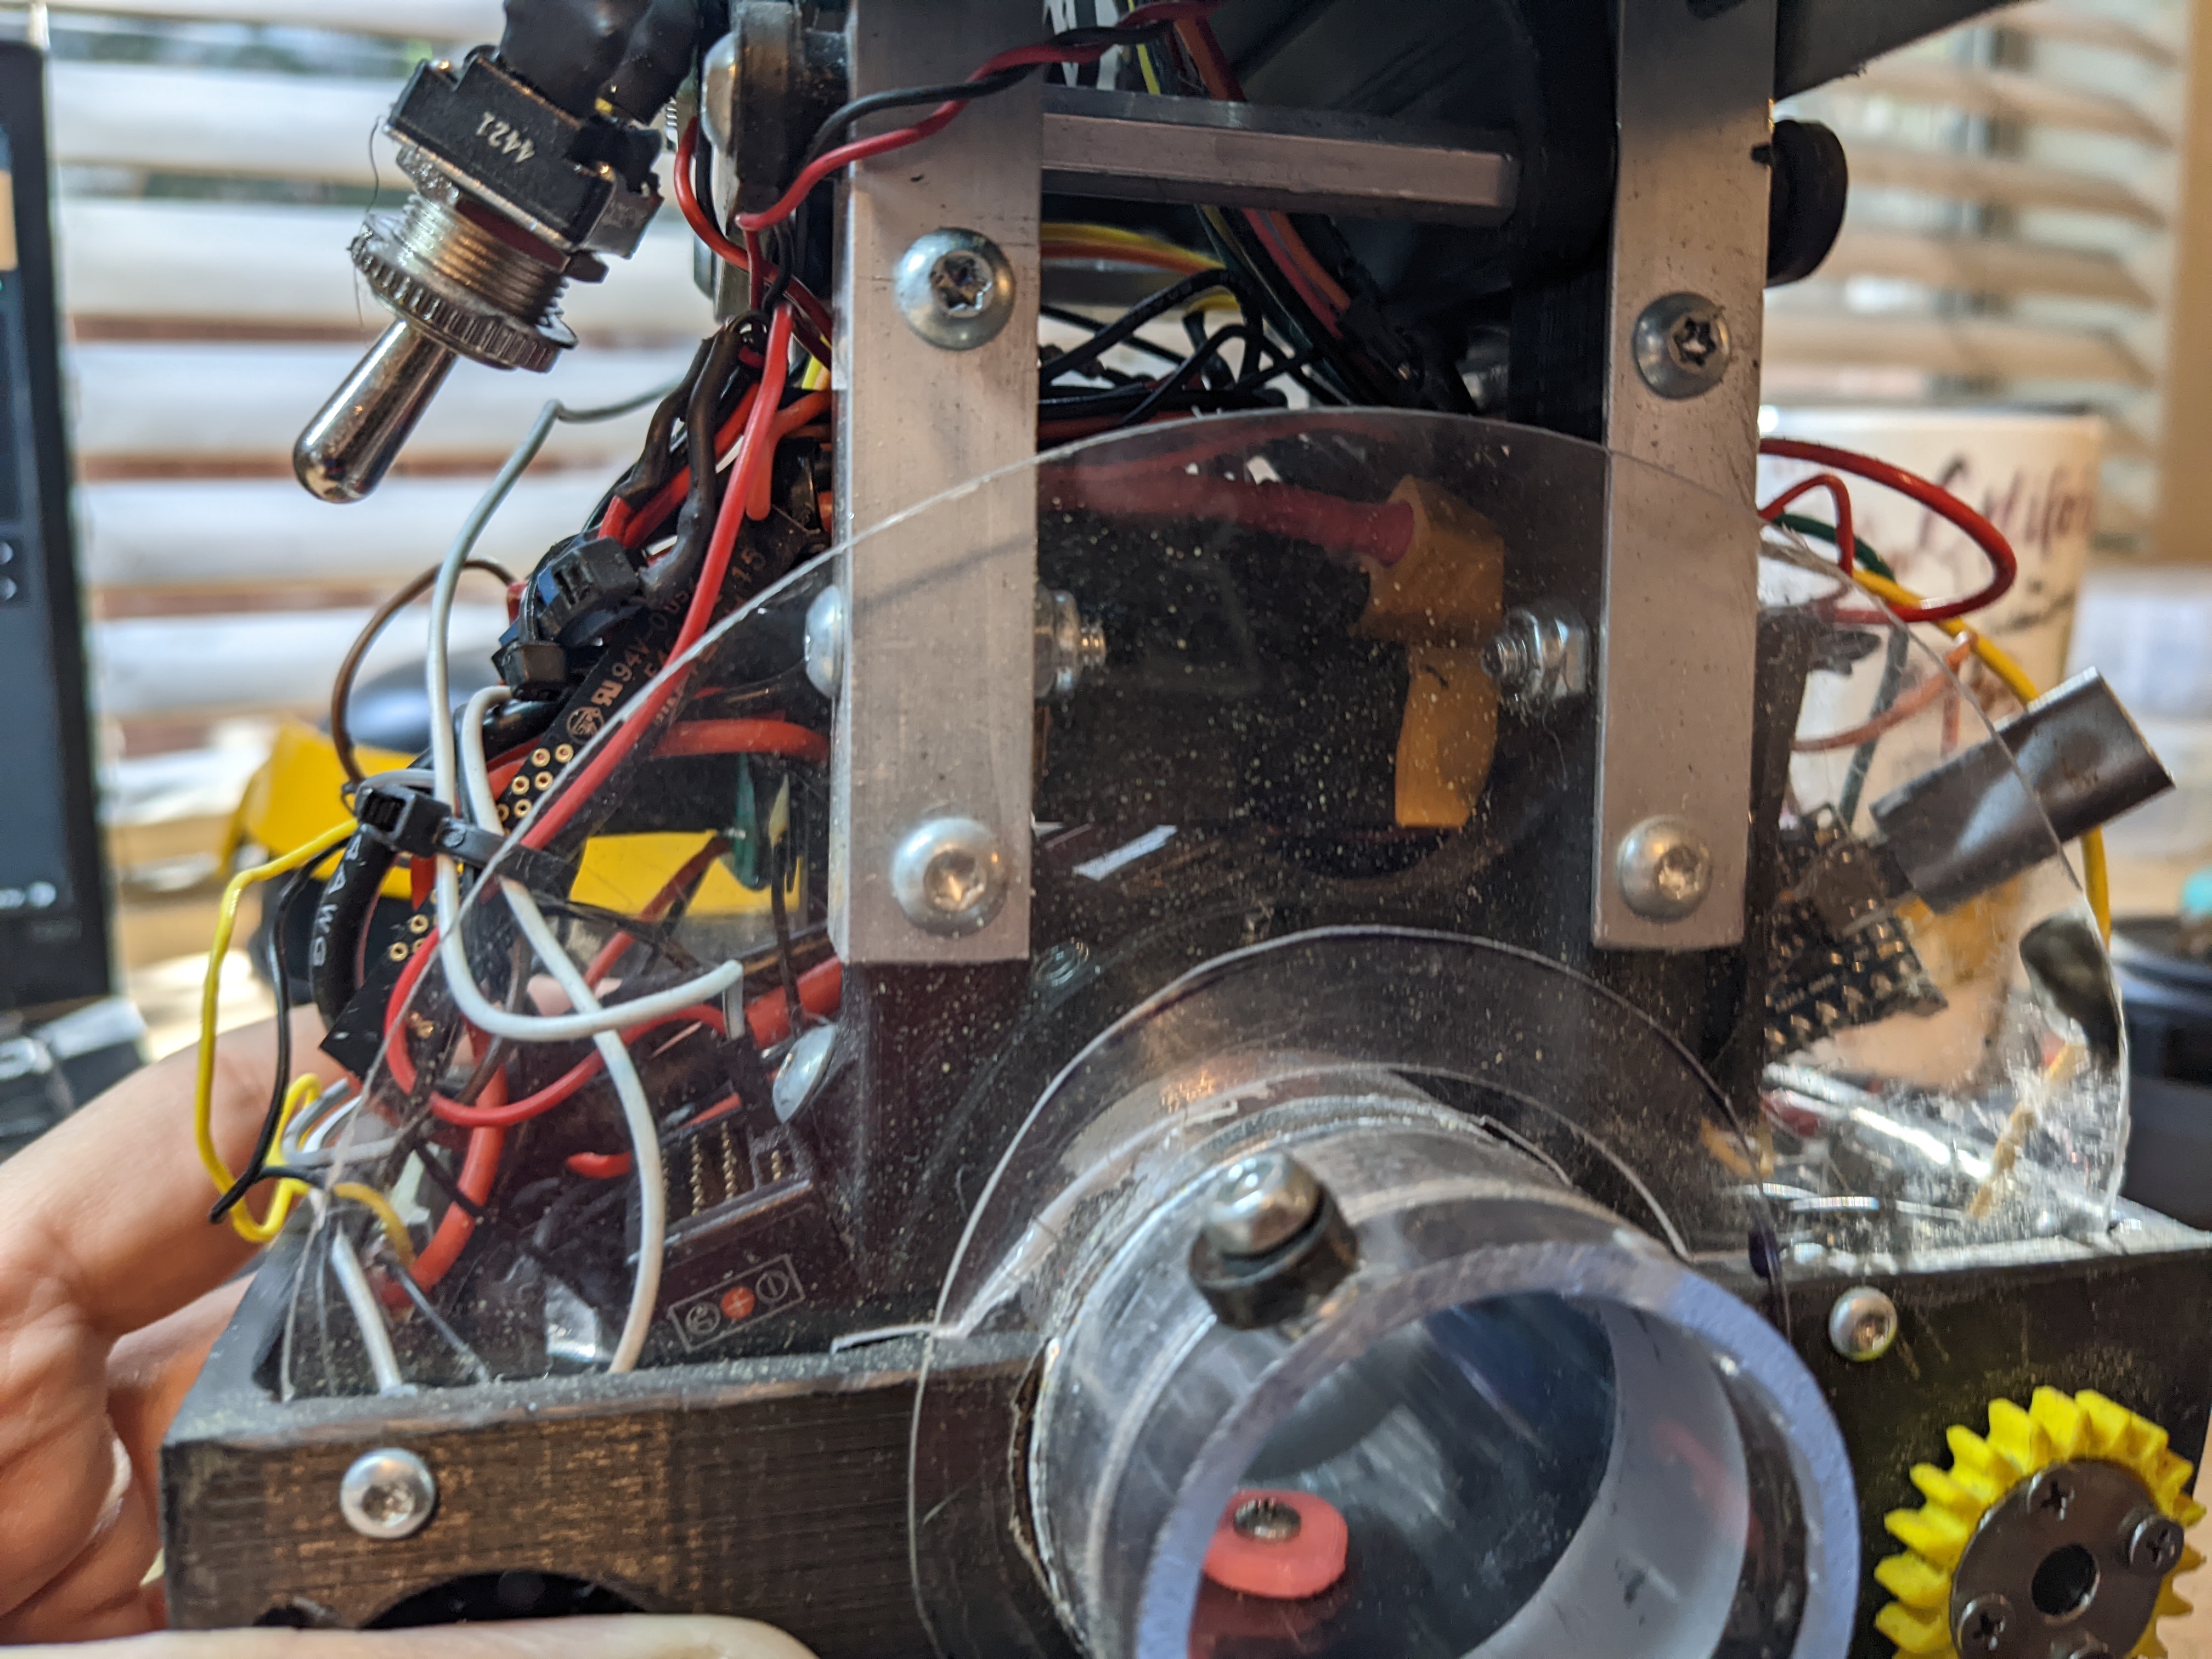
The only solution I could come up with was to remove the servo board, desolder some pins, and flip them to the other side, which worked out. Now to add wires the polycarbonate just has to be removed.
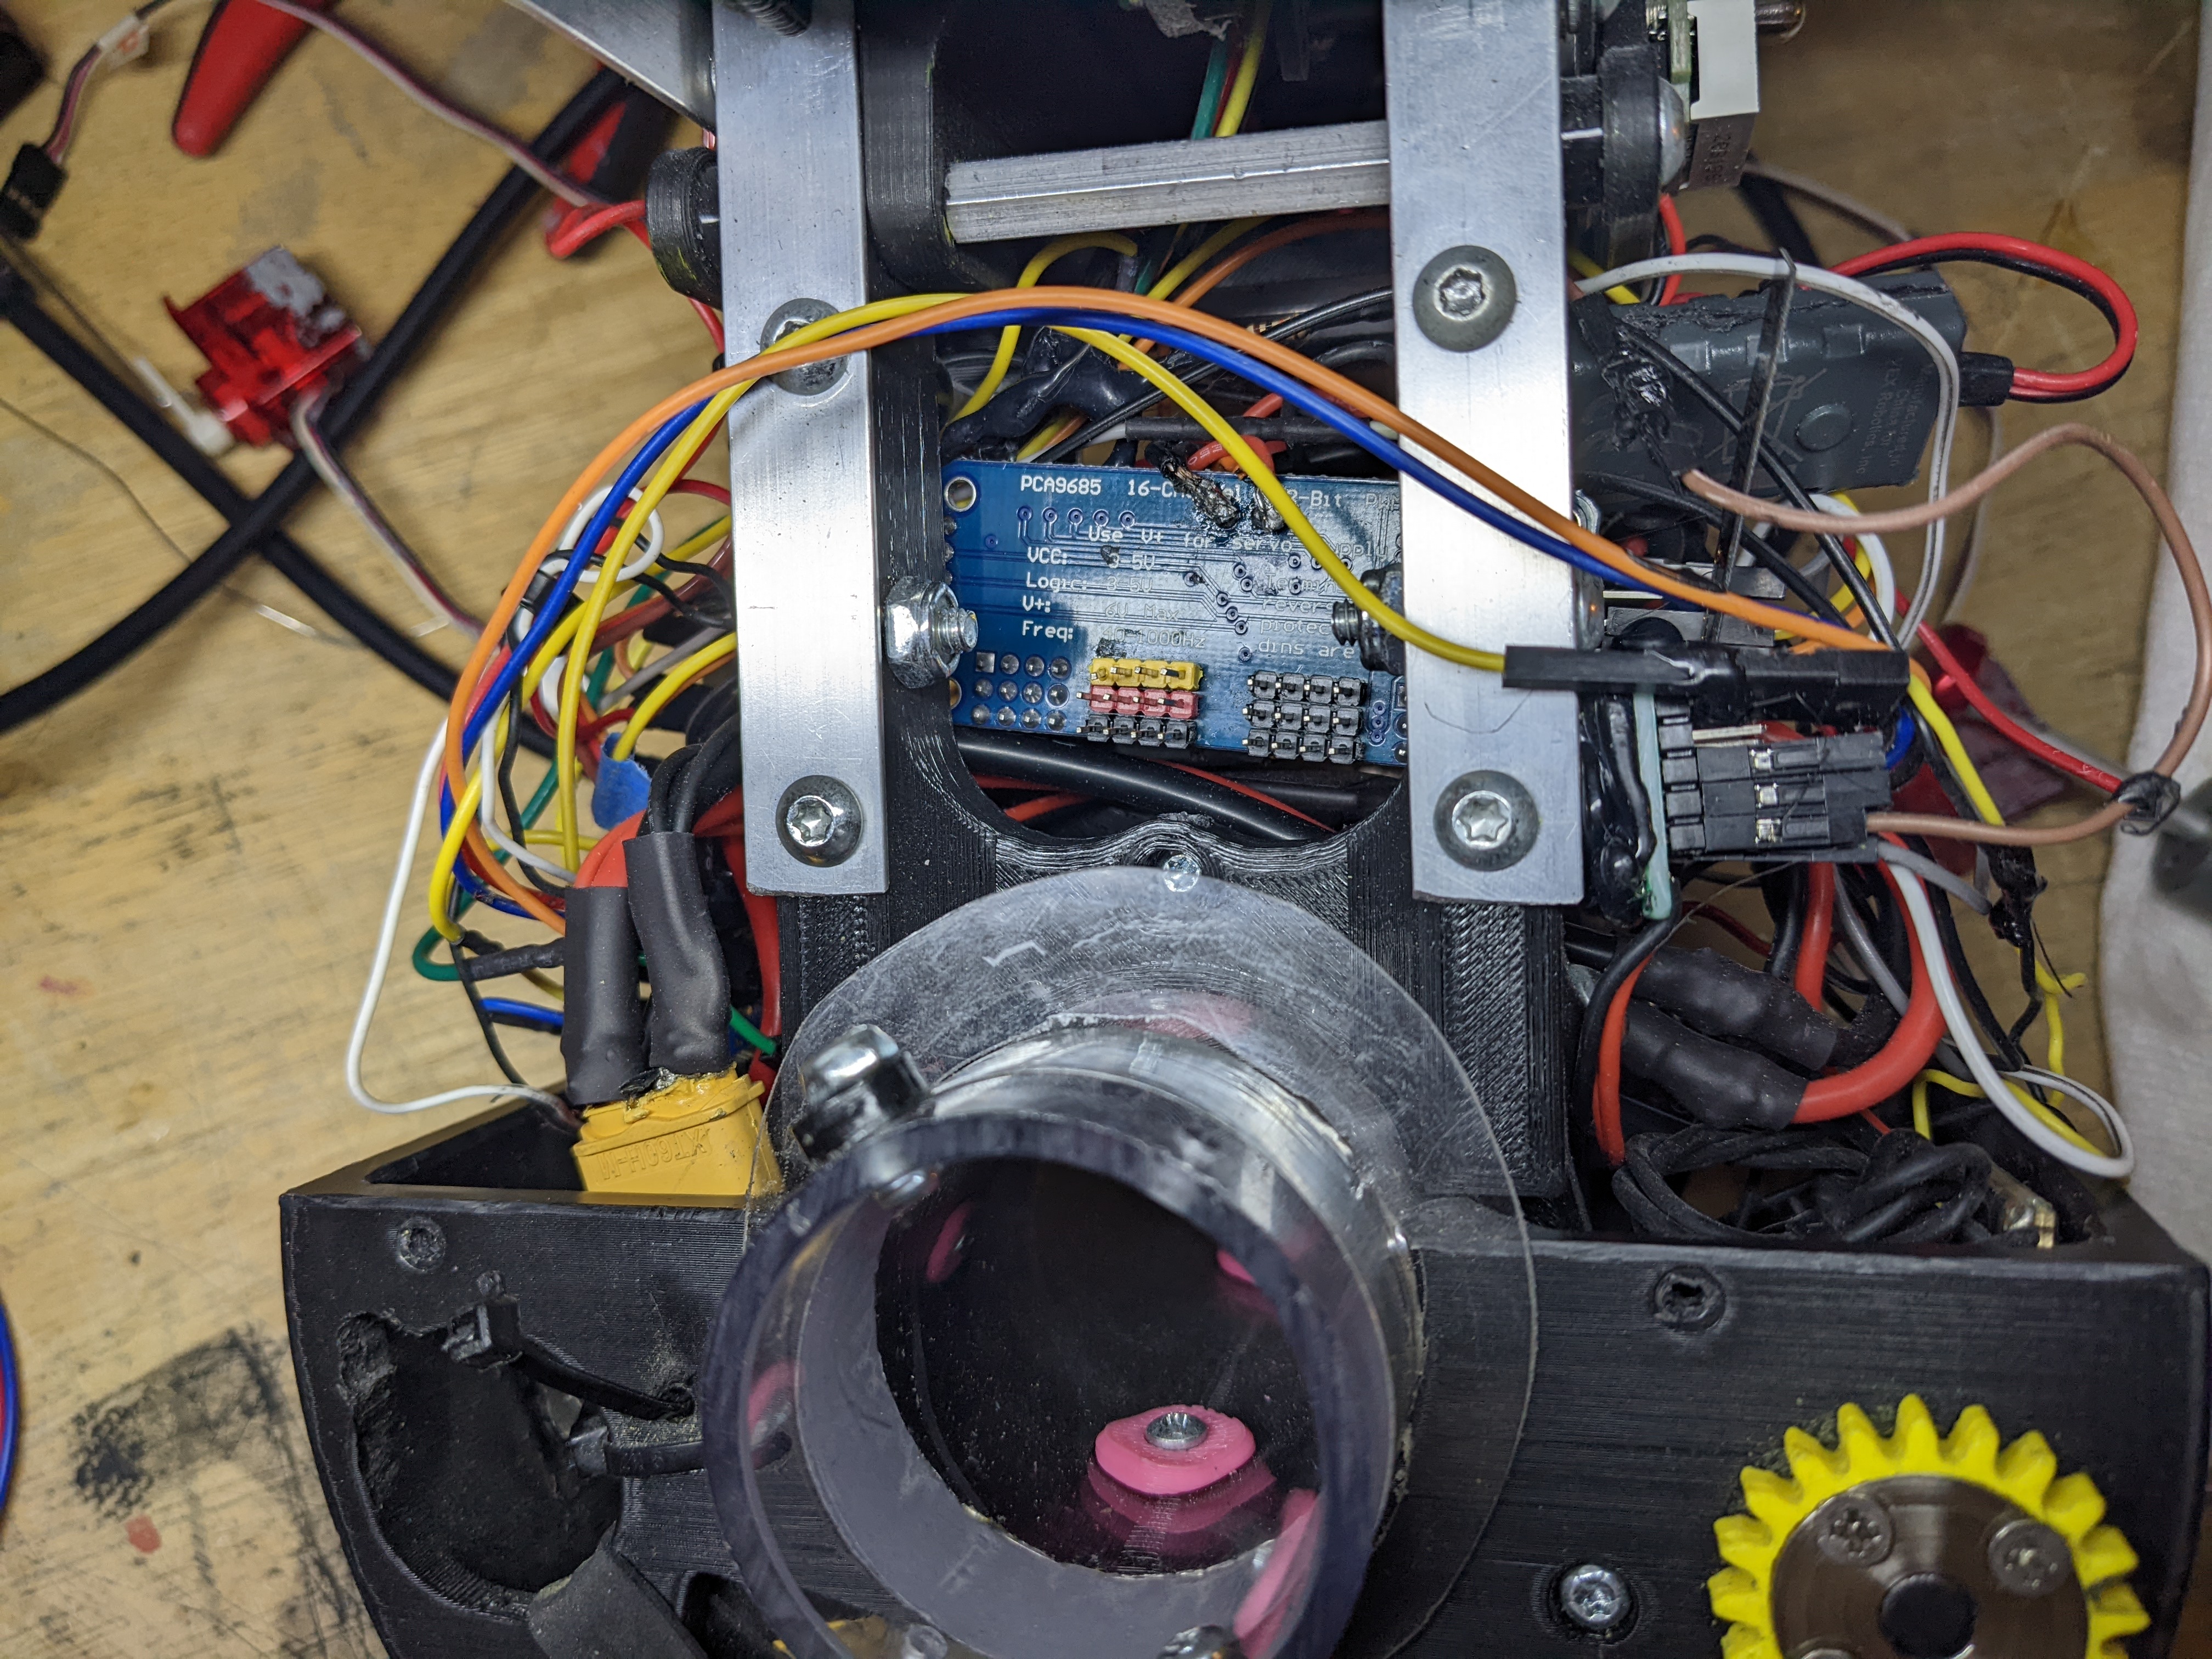
Then it's just wiring everything together and labeling all the wires.

At LA Comic Con 2023
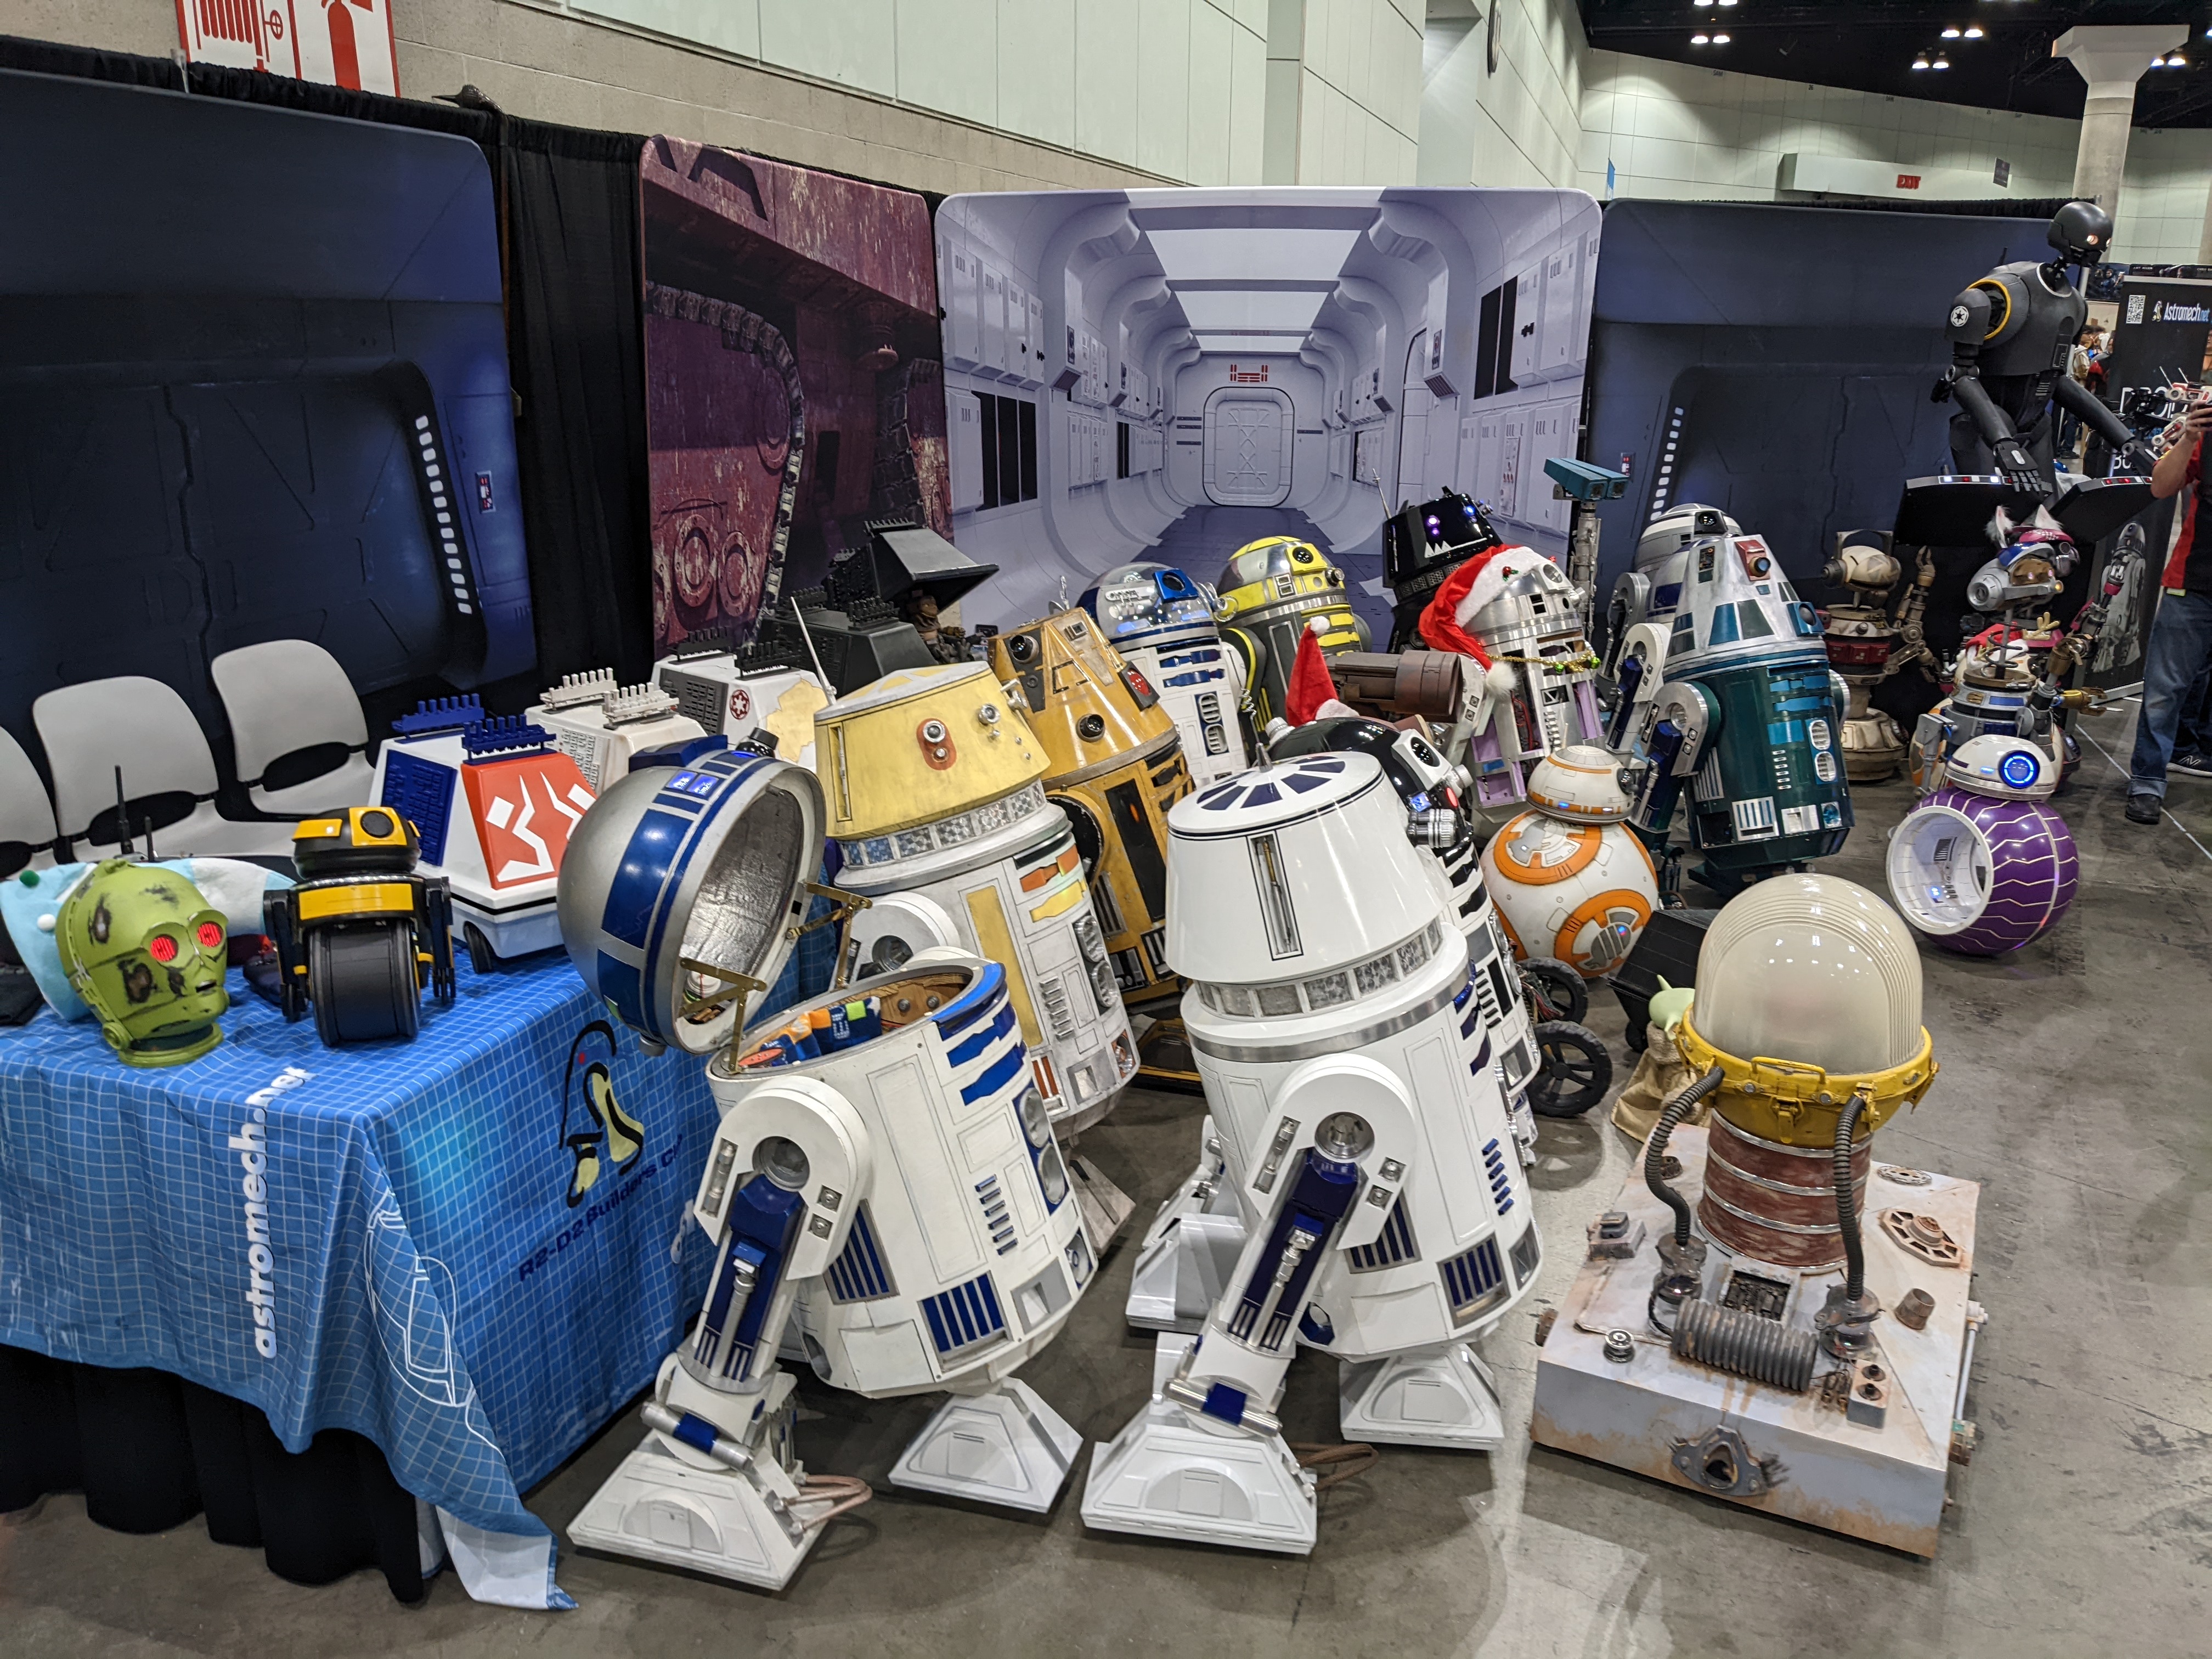

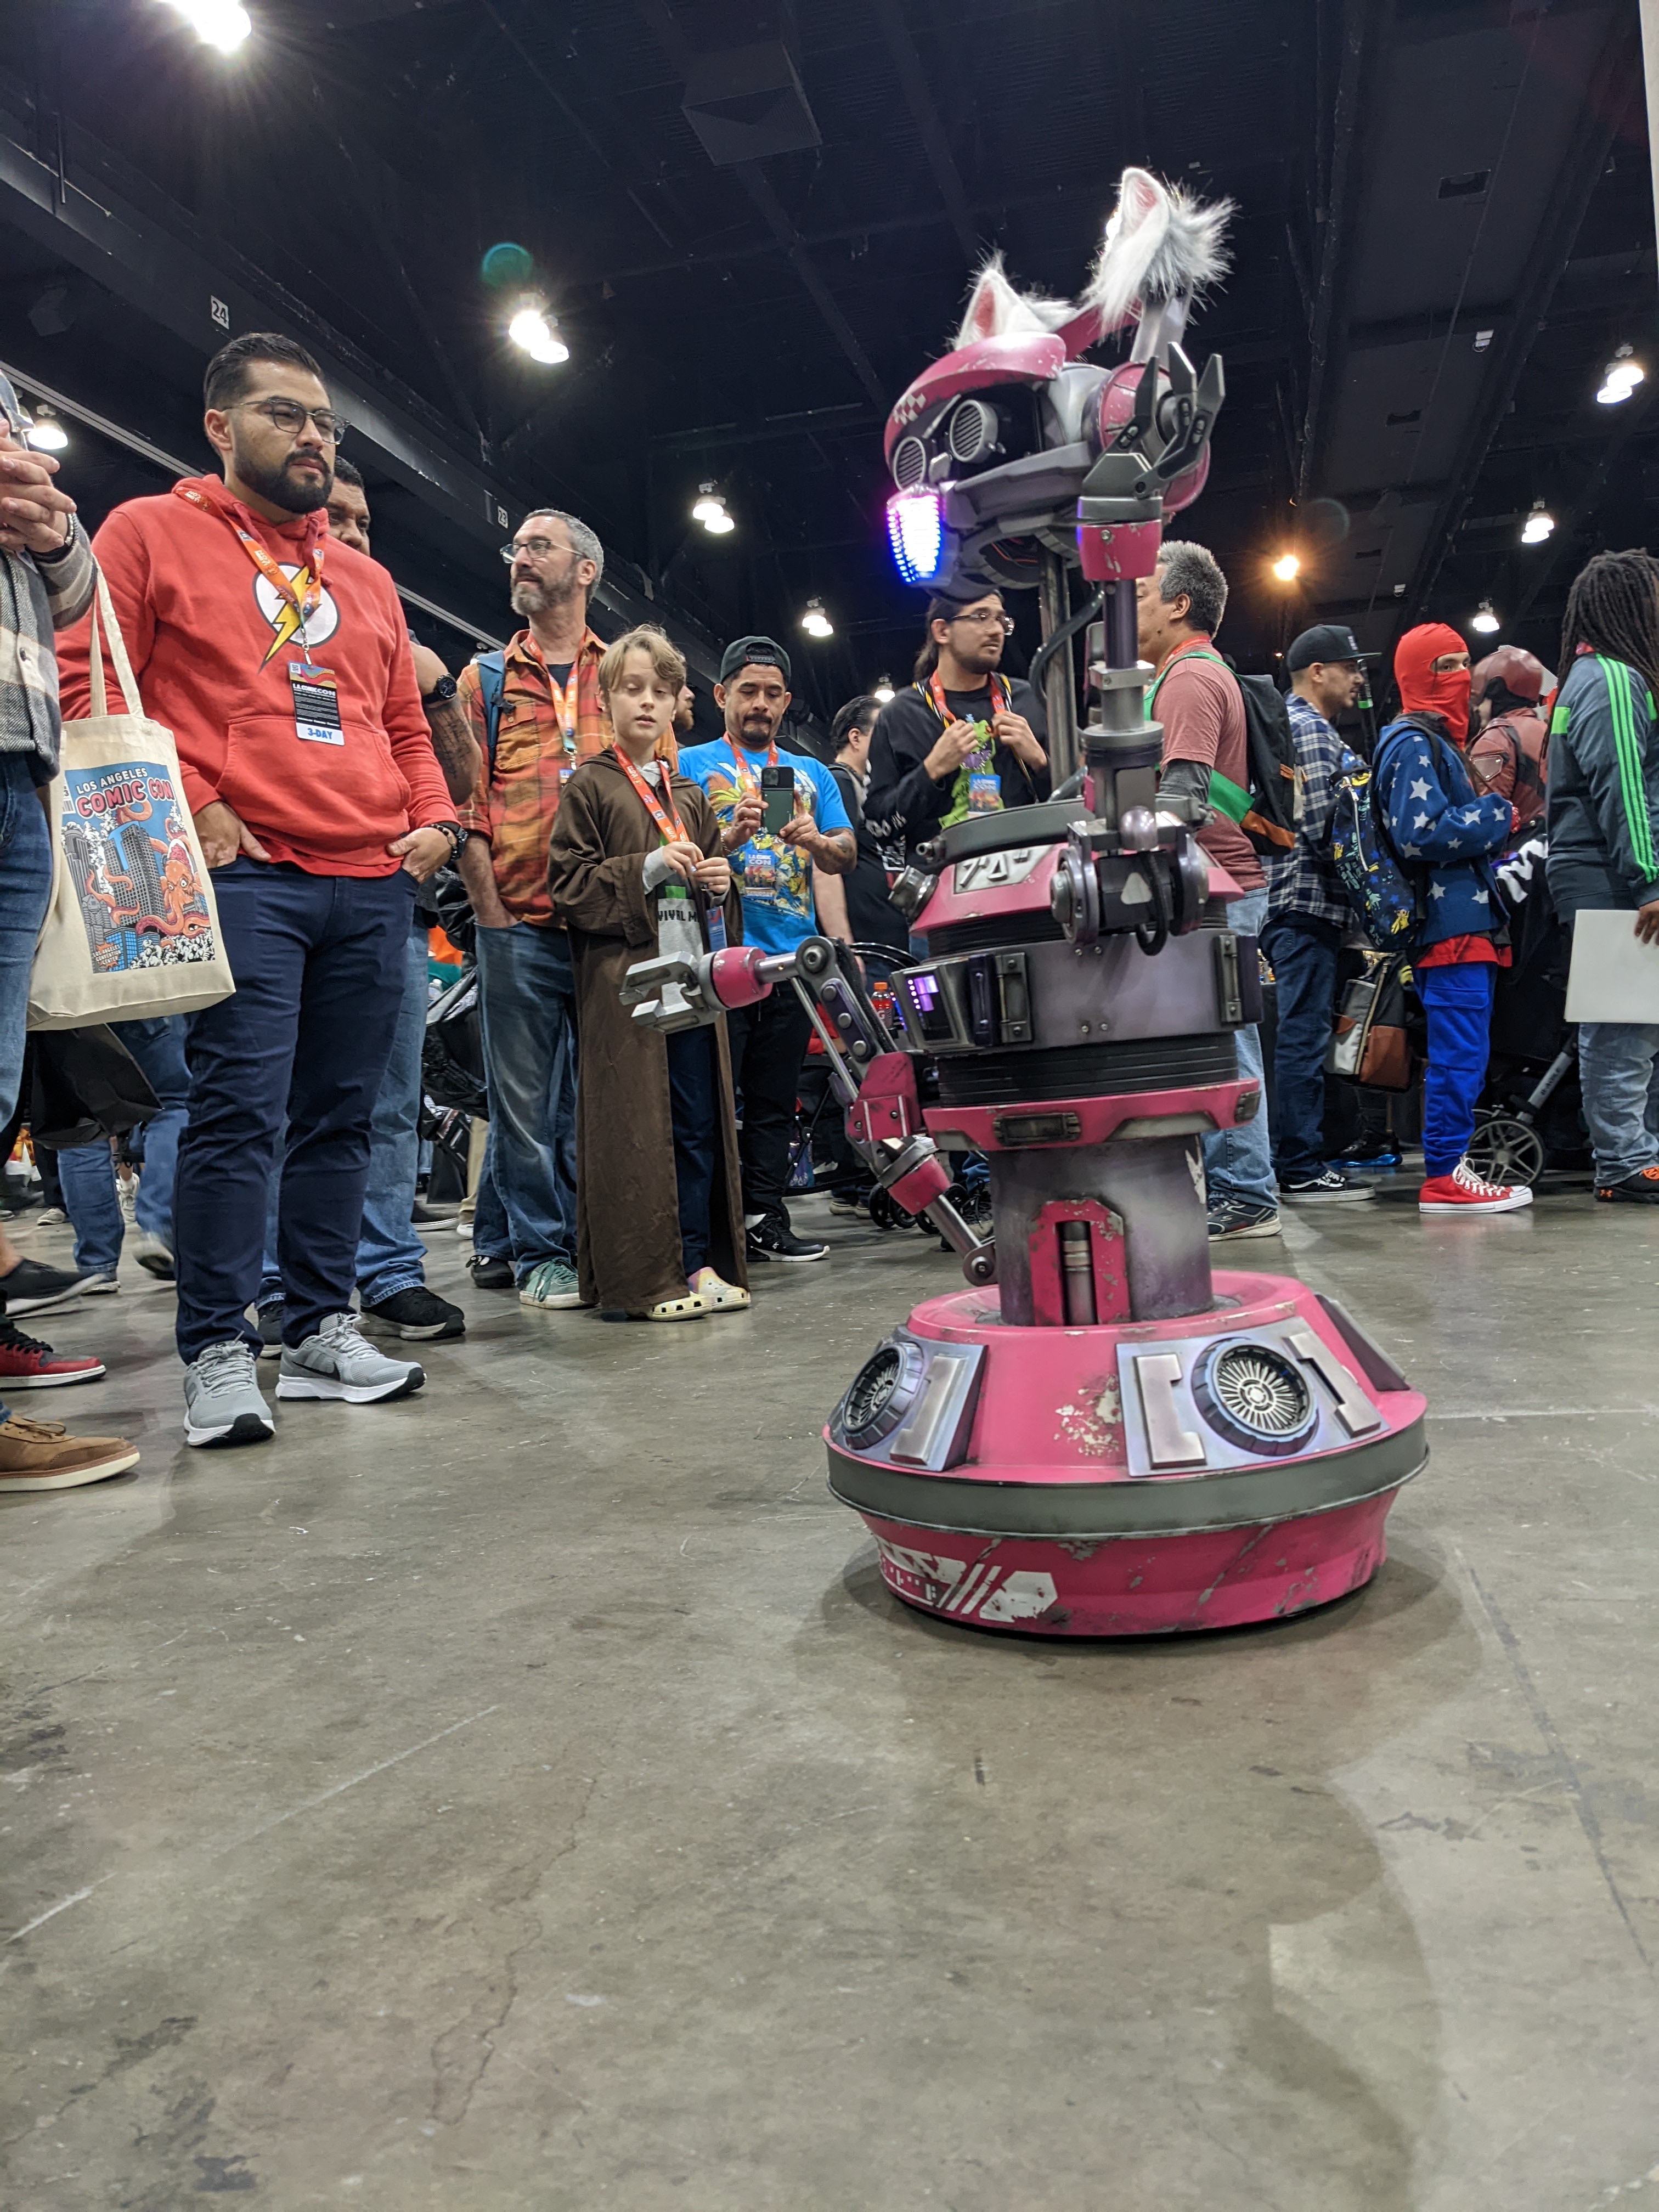


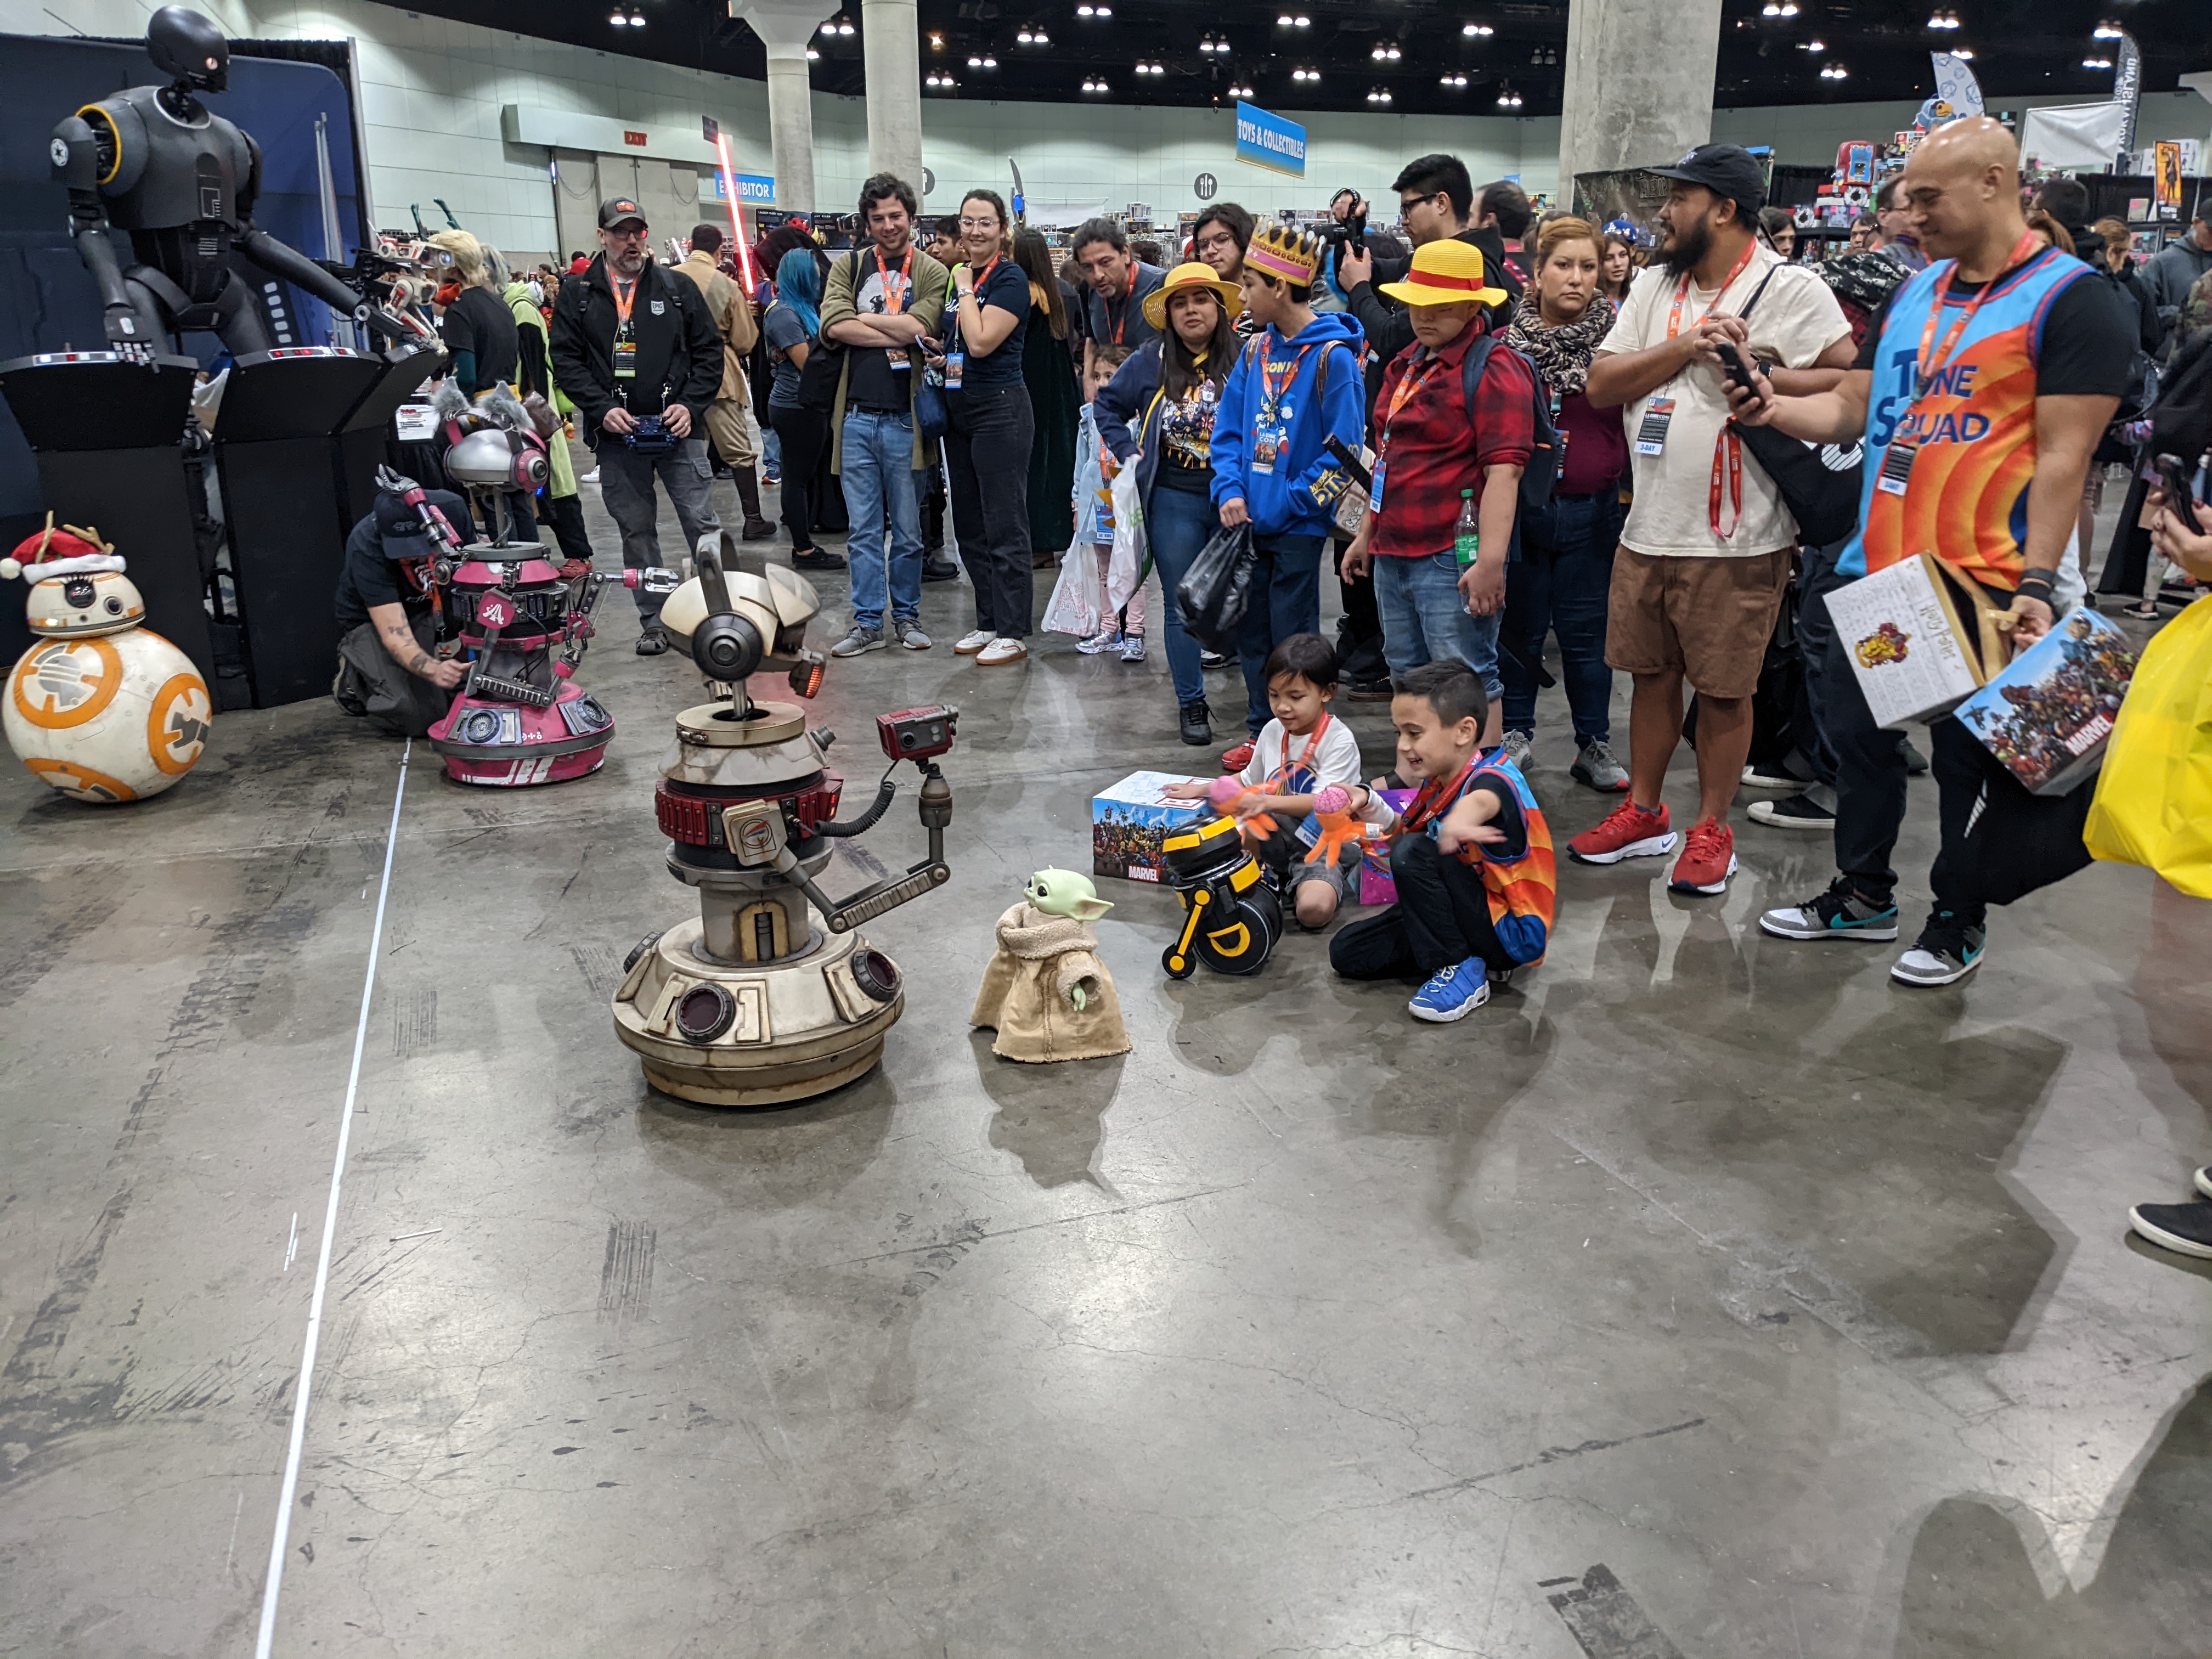


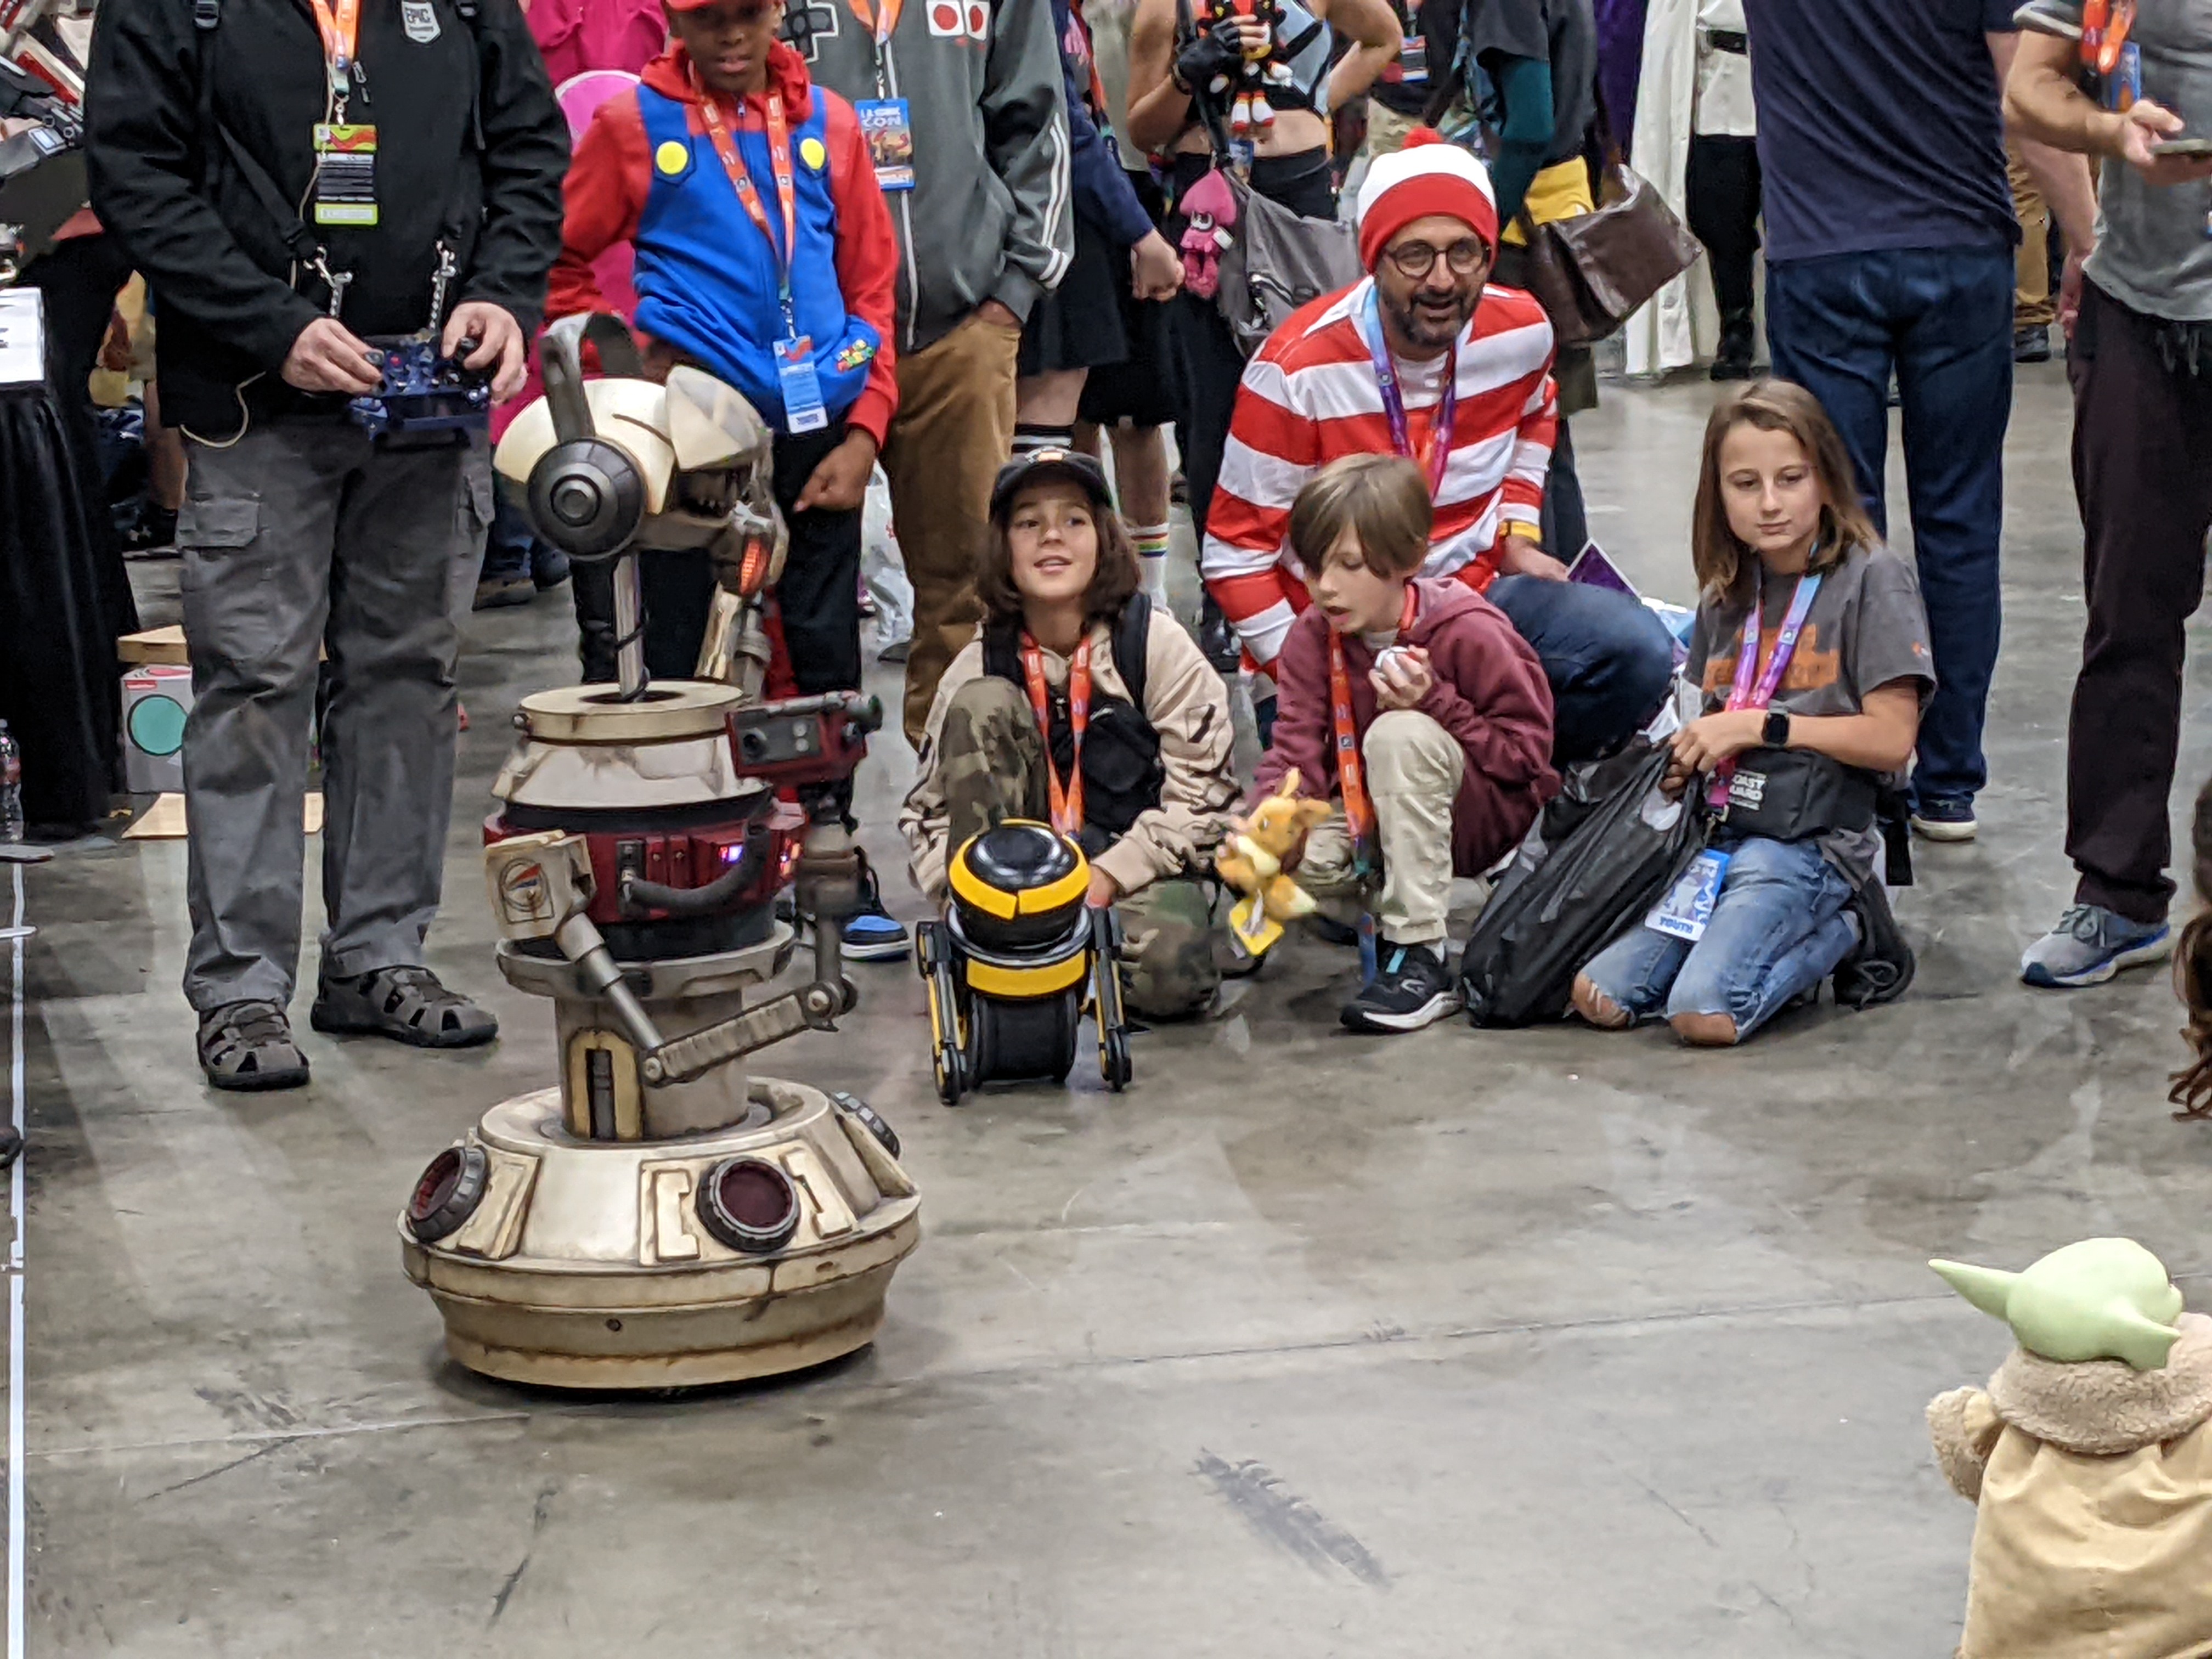
DD-3 to the English Channel Islands!
Goal: May 3-13, 2024
The Trip
I'm going to see some family in not new Jersey and I'd like to bring DD-3 to show some family members and little cousins. This past couple of months have been my busiest at work so I'll be bringing him as-is from LACC.
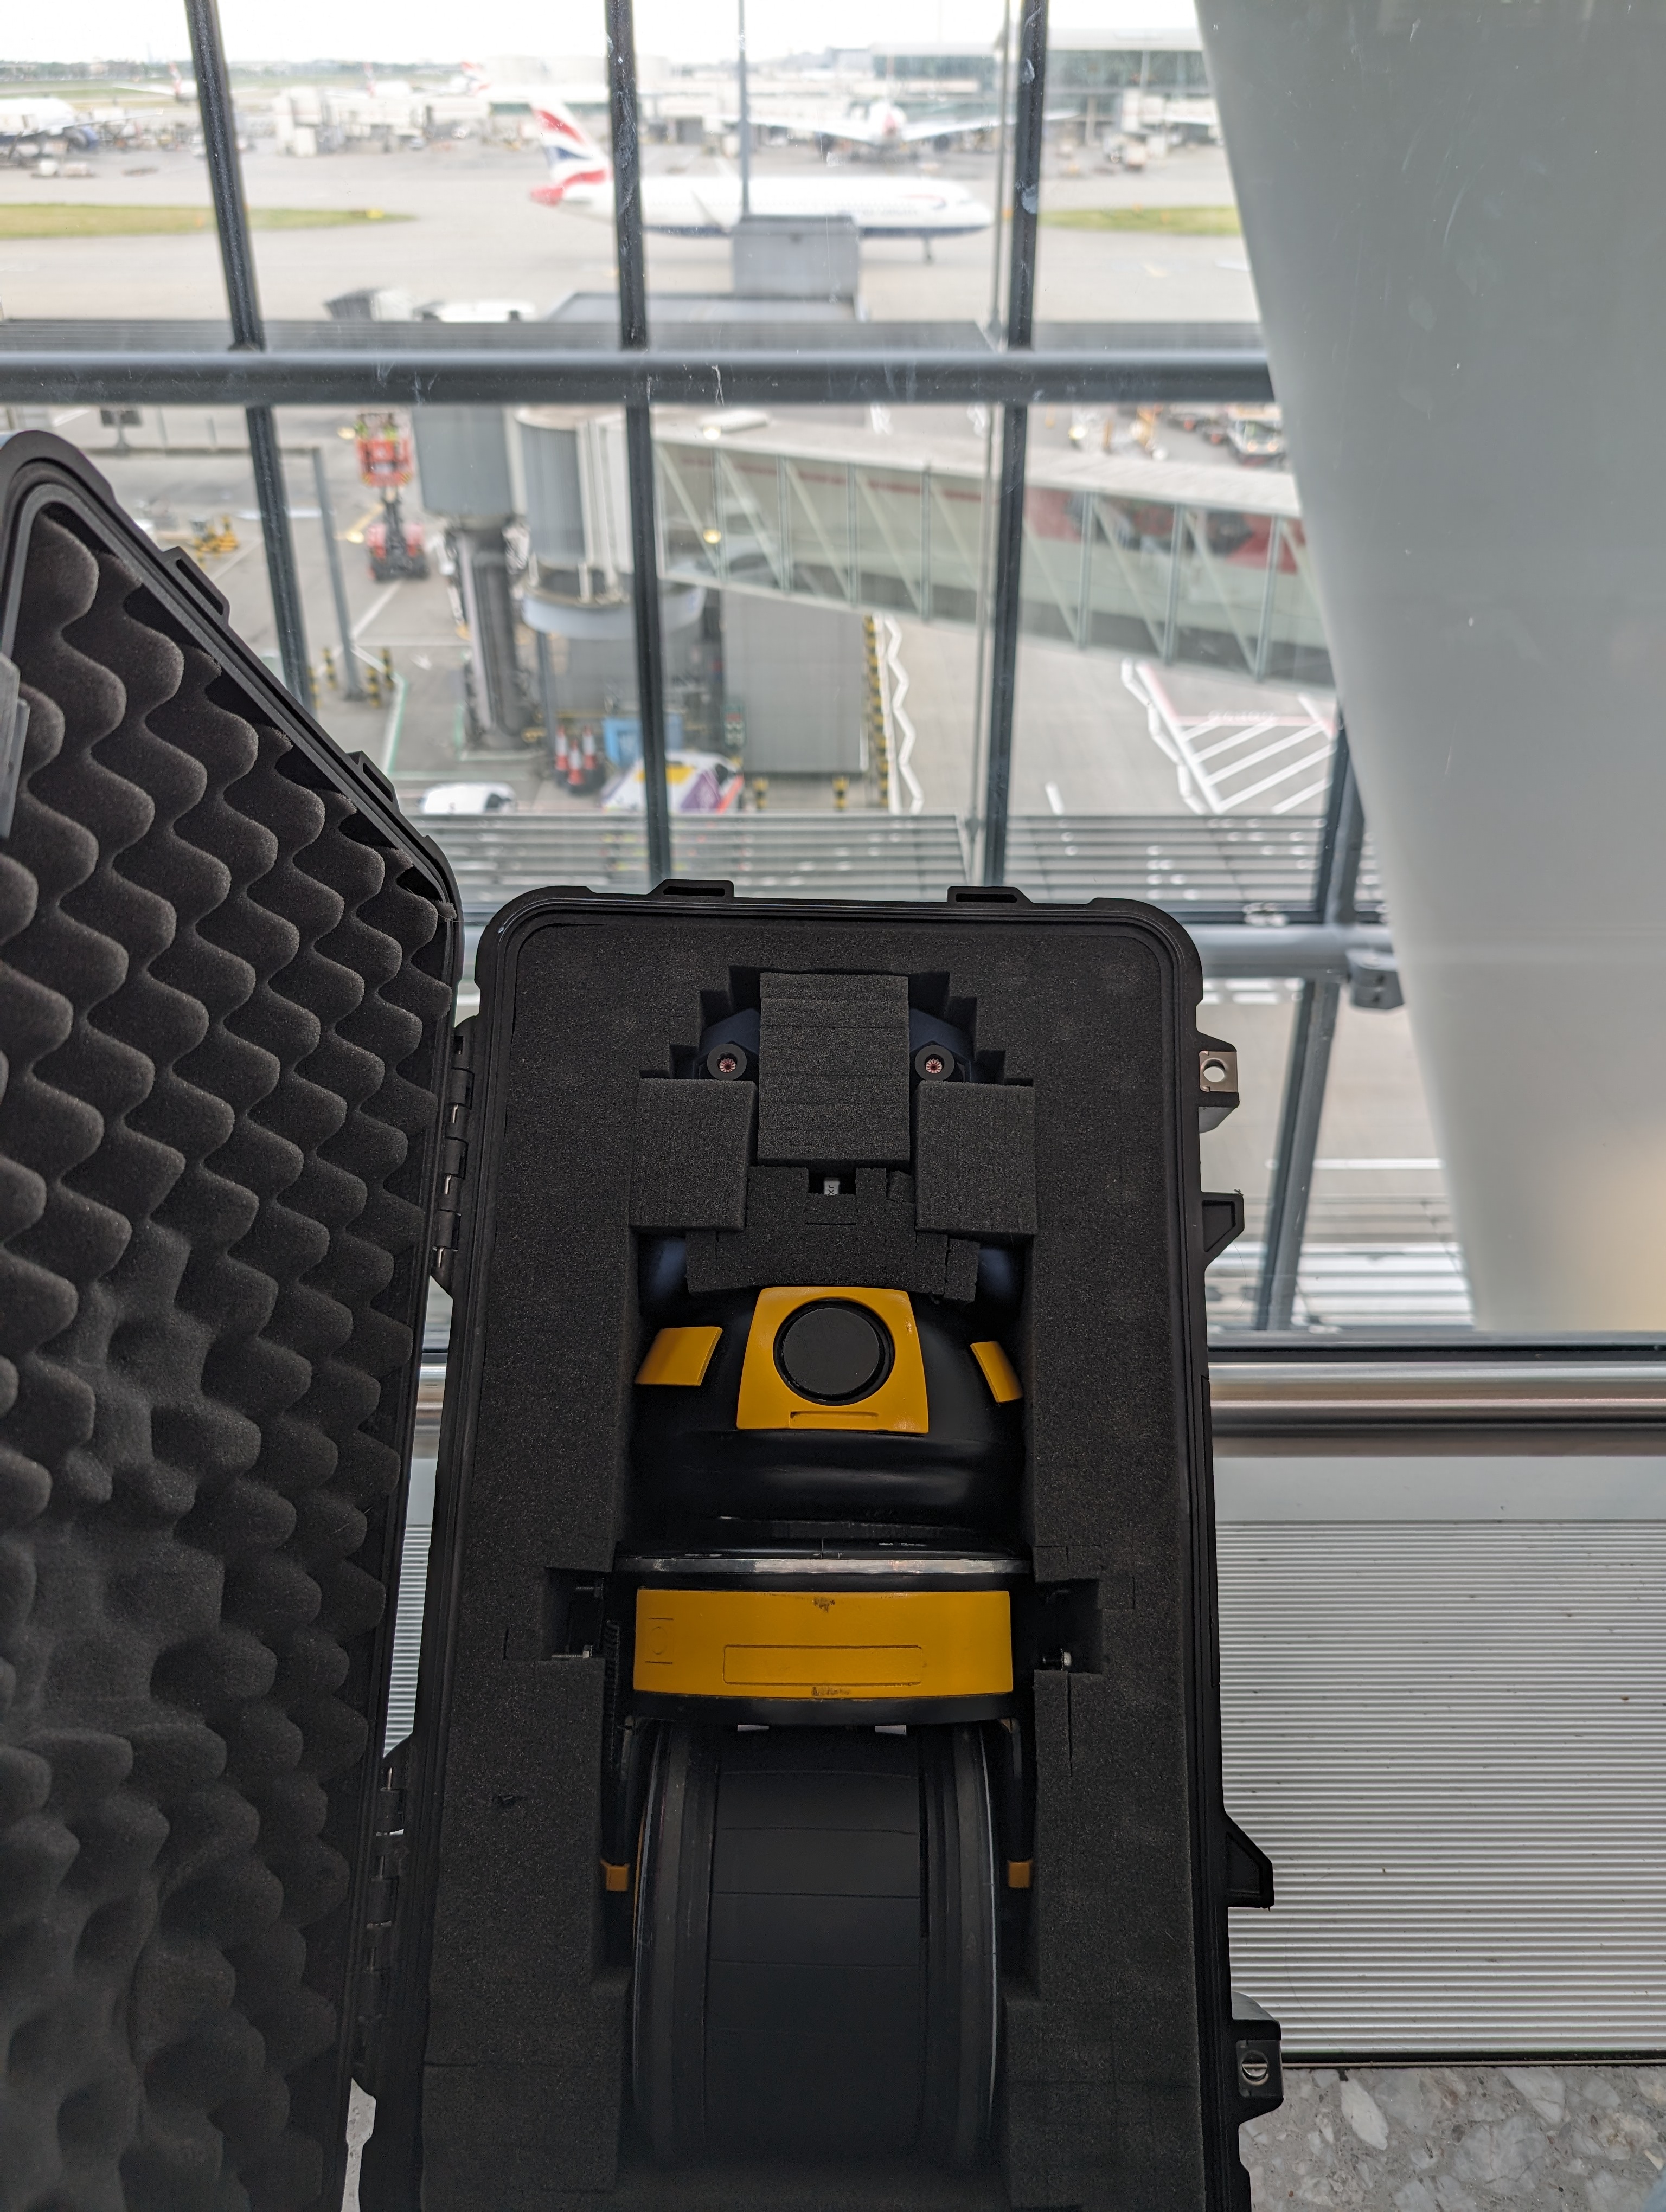
DD-3 all packed up in Heathrow :D
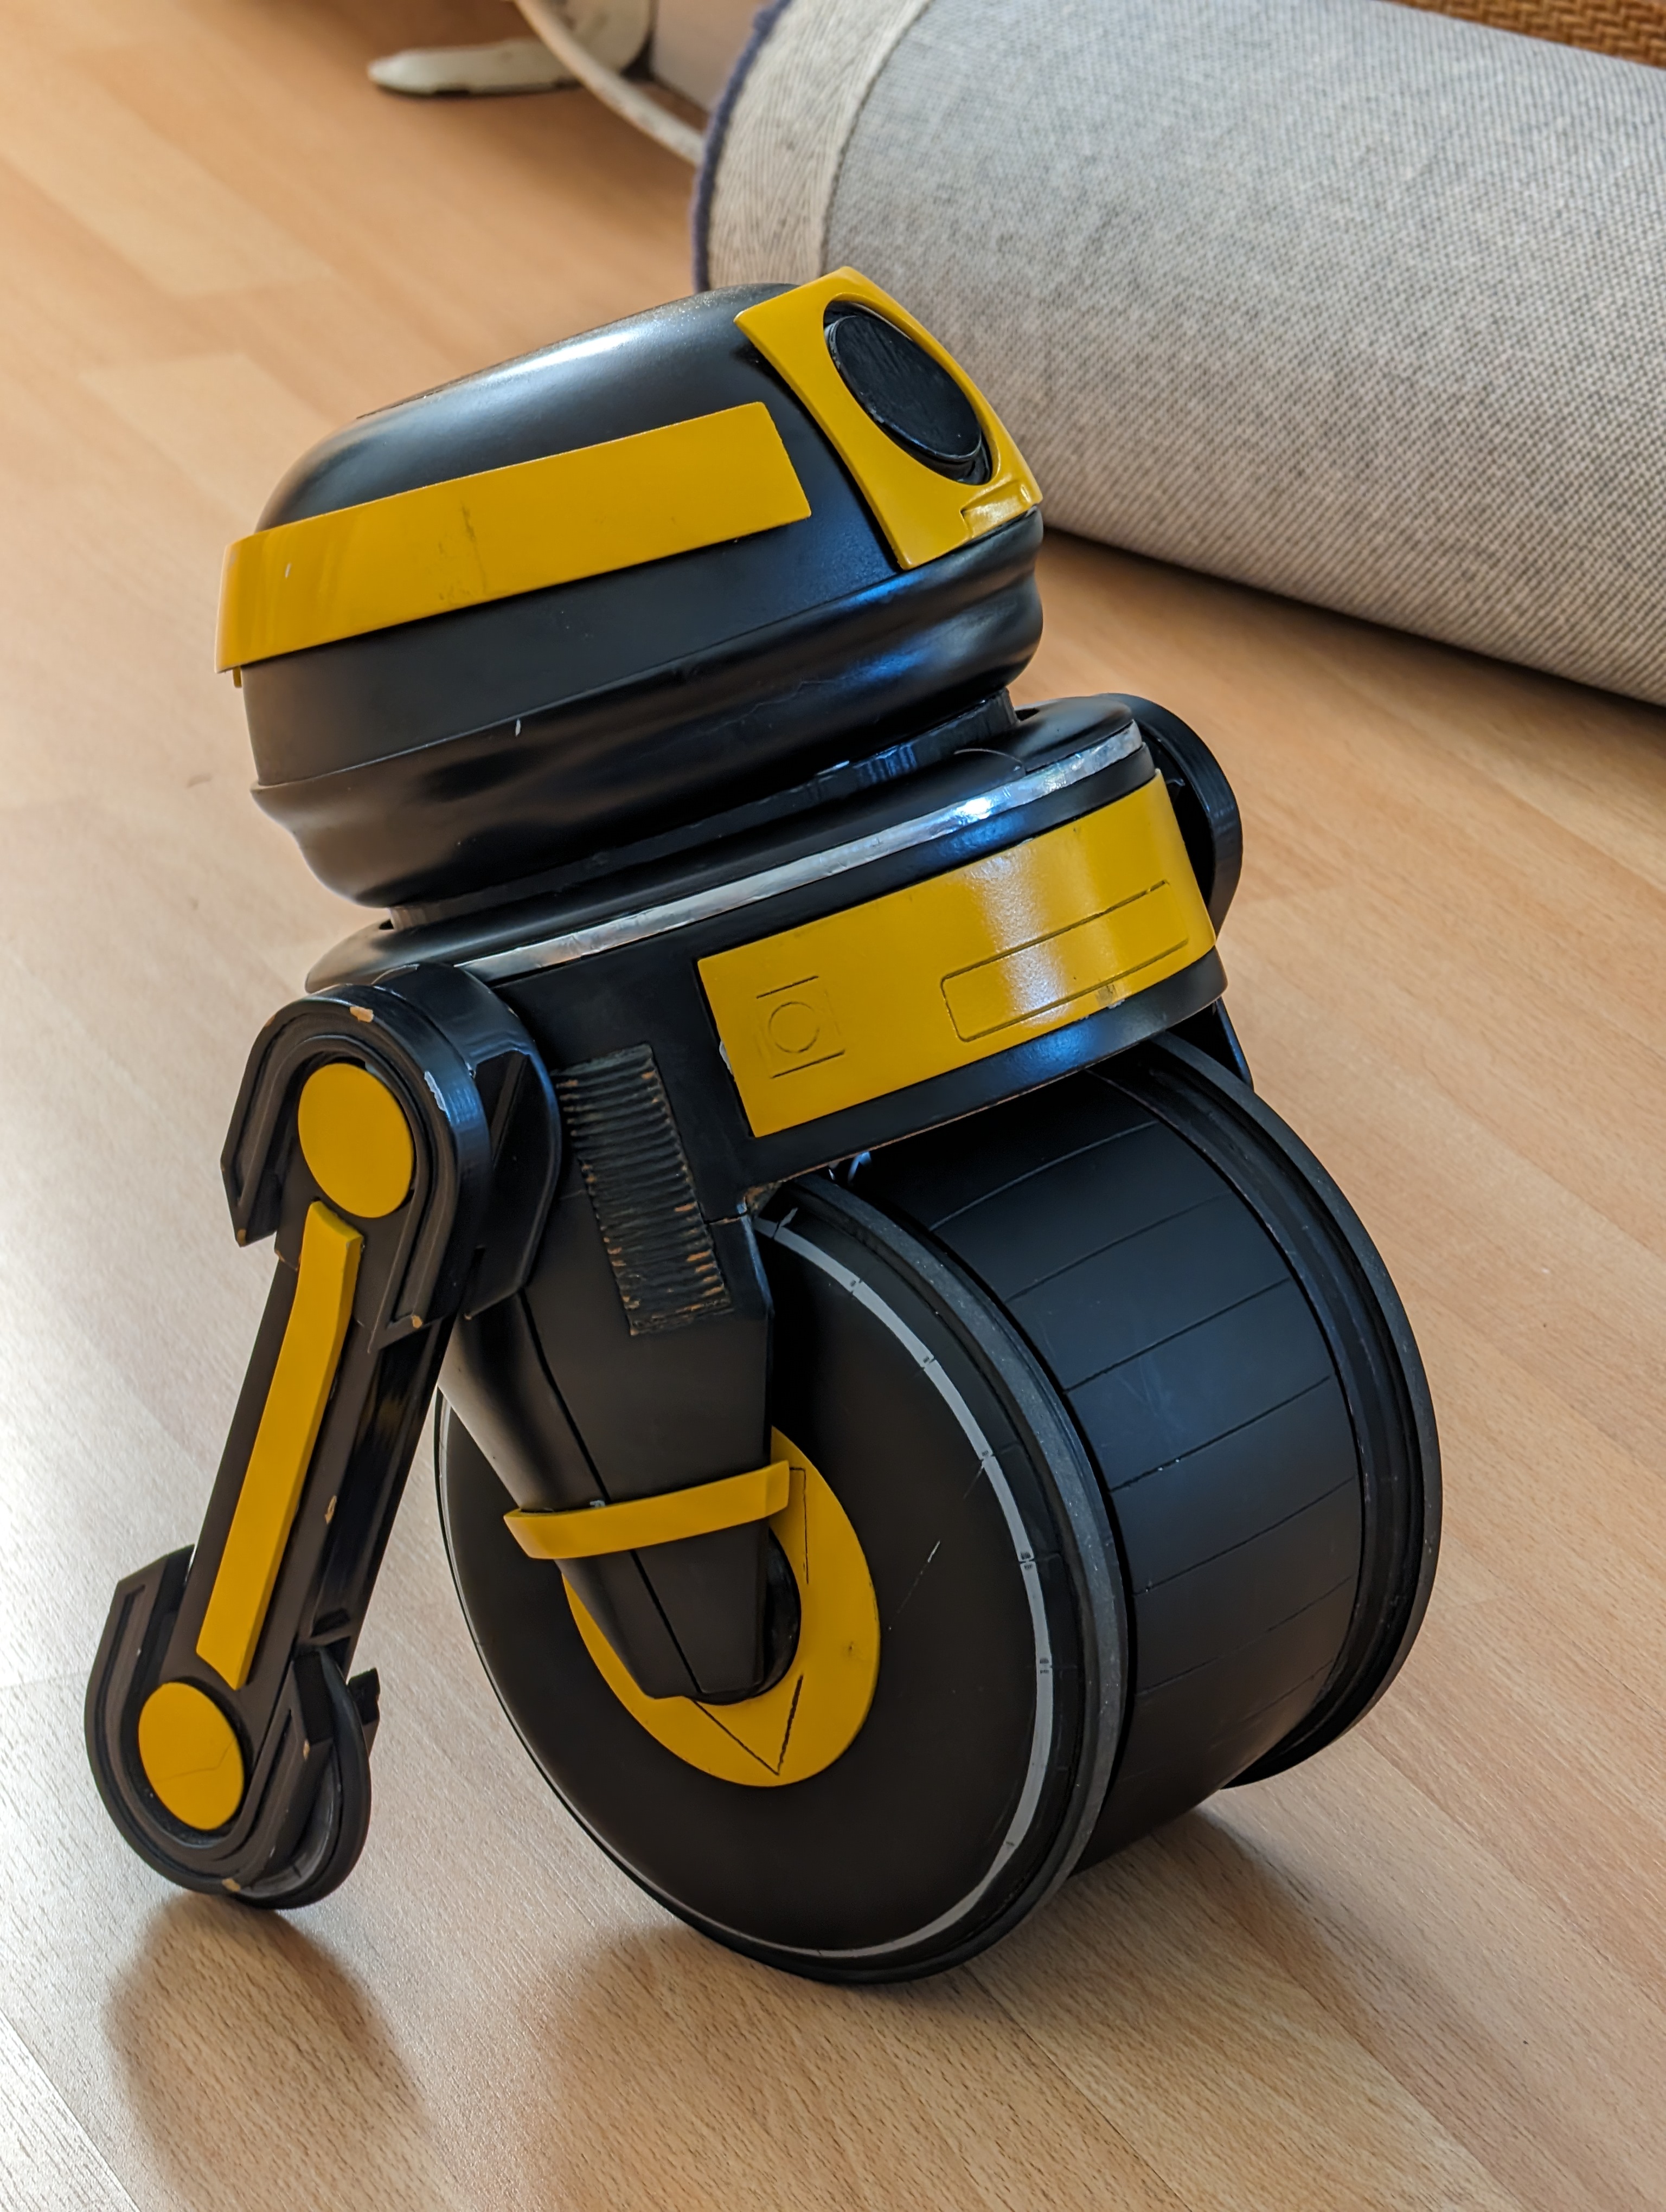
We learned that DD-3 is dog repellent.
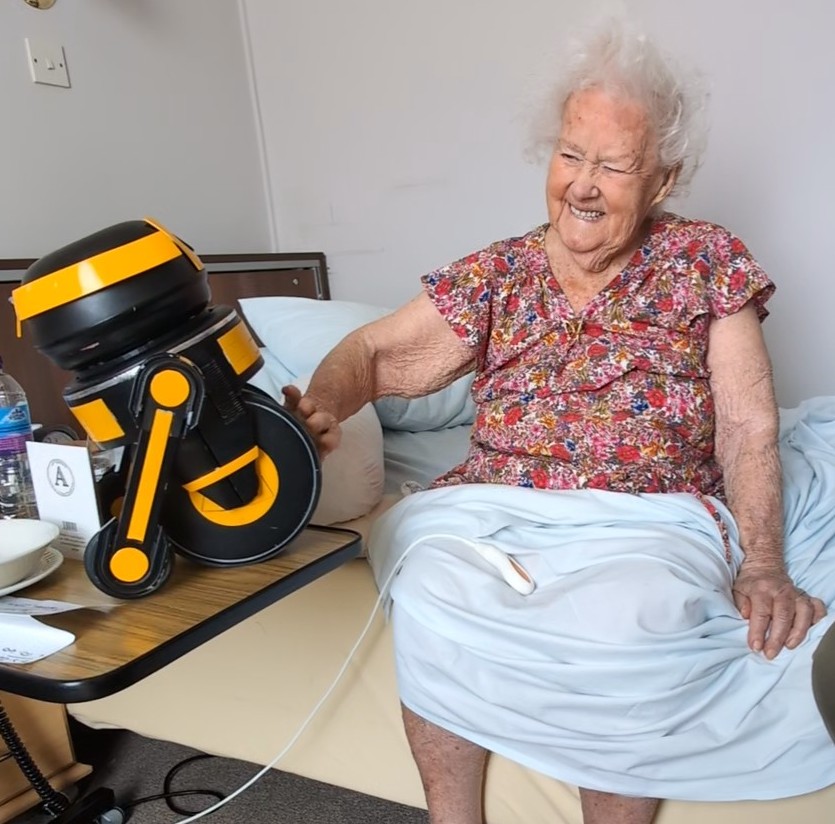
I brought DD-3 to my great grandma, who told DD-3 that he "needs a better name than some letters and numbers" and promptly renamed him David. He is David now.
R2LA
Goal: July 29, 2024
Plans
I'd like to completely redesign the head entirely. As I mentioned previously, indexing anything on a bowl has proven challenging. I can design it all to be 3D printed and have some hole pattern on the inside so I can design mounts for servos, speakers, etc. I can make the actual shell that you look at as independent panels, and that will help add detail and break up the perfectly smooth surface that the bowl has currently.
To give the head more expression I'd like to change the head tilt to a delta linkage as shown in the video below.
With the current setup, the head tilt is locked to the body of the droid. So if the droid is looking sideways, the tilt becomes a nod. This always bothered me and can be solved with the delta linkage. Head tilt should always tilt the head relative to the head. A sensor (probably a potentiometer) will need to be added to the head rotation so I can interpret all of the inputs and move the servos accordingly.
The ring gear should be changed out for a wheel that gets spring loaded into the head. This will keep the robot safe from kids pulling on it or other unexpected cases. Also with head spin, this should be faster!
And of course, the robot eventually needs speakers and LEDs!
My priorities for the next event are:
- complete new head
- delta linkage
- faster head spin/spring-loaded wheel
- LEDs/sound
New Head Design
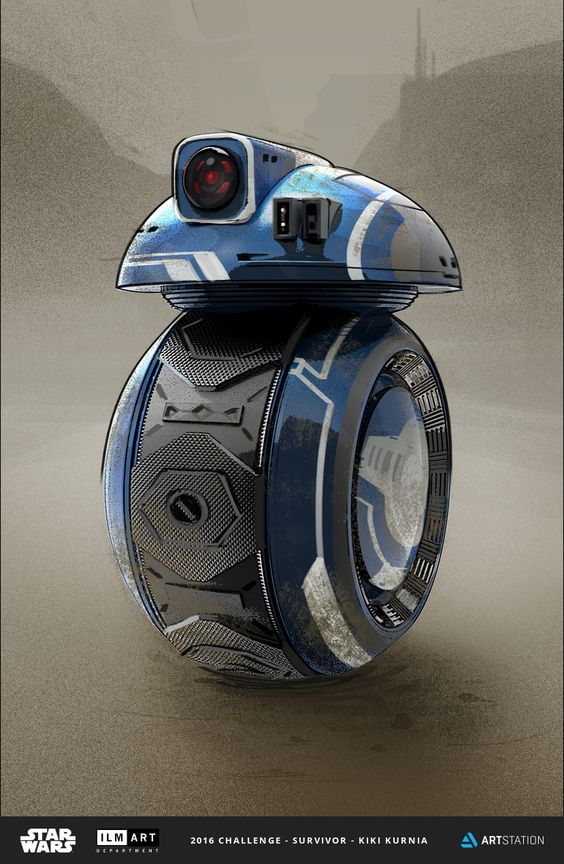
Looking through my photos I found this image from when I initially transitioned the robot from D-O to DD-3, and the head is SO CUTE! The square extrusion gives so much, and the curvature of the head being less bowl-like is nice. This is my inspiration for the new head.
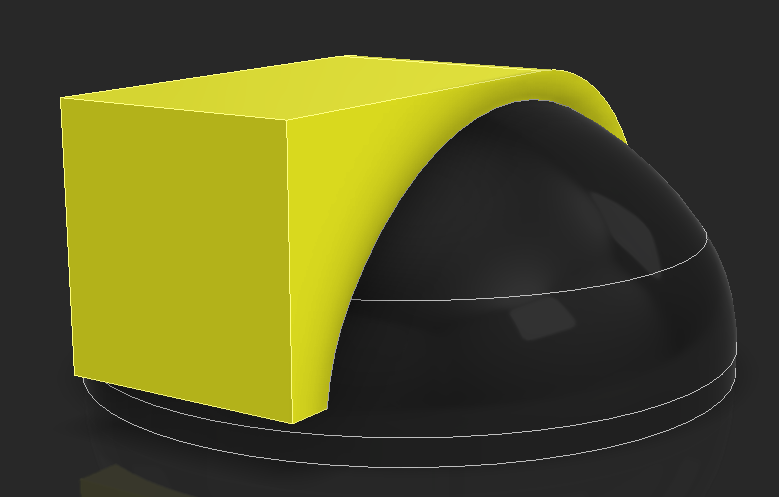
Because this is so aesthetically driven, I started with super rough extrusions without any functionality/assembly/manufacturability in mind. In my first attempt at the new head, I made the square the same size as the old eye and this made the proportions feel insane.
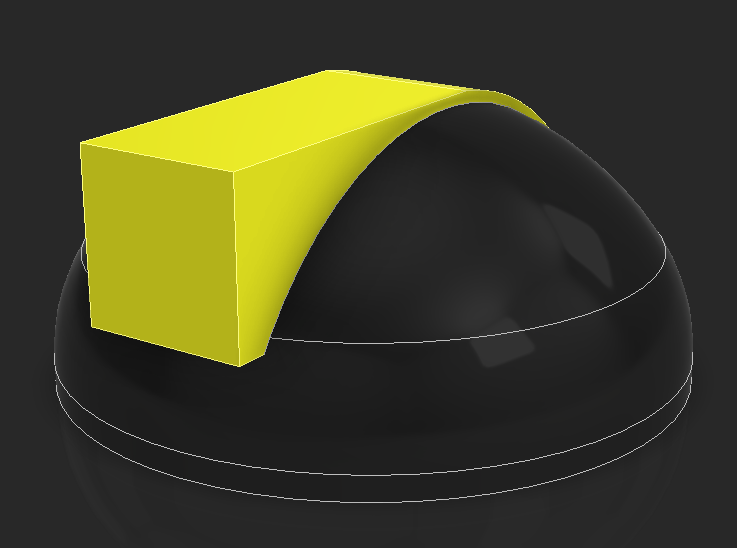
Dialing it back a lot, we got there eventually.
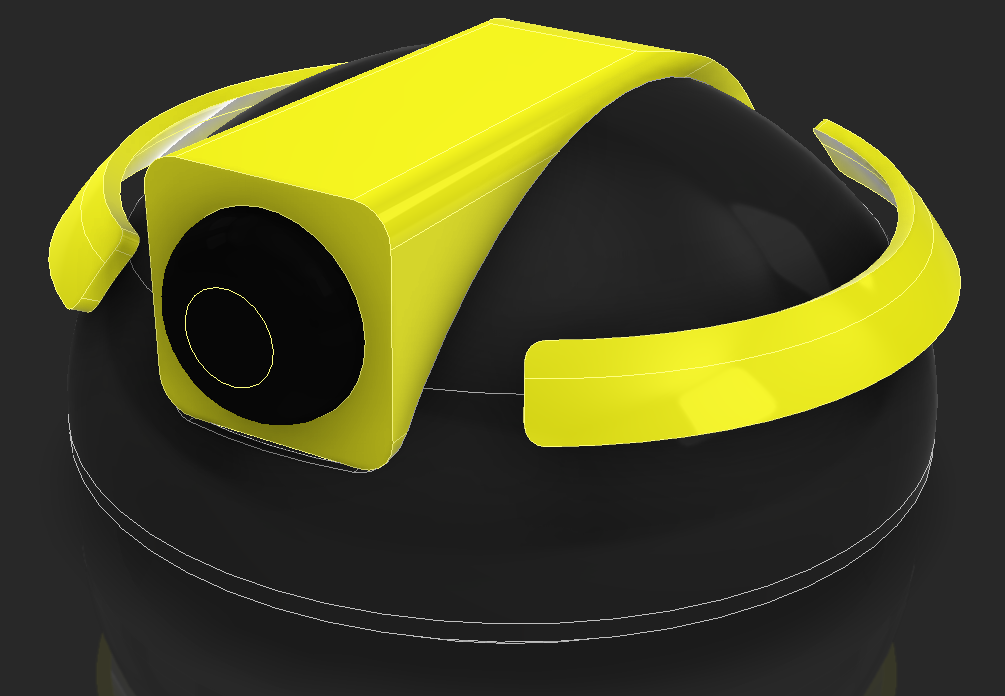
Roughing out the eye and eyebrows put me here. I like the way this looks,
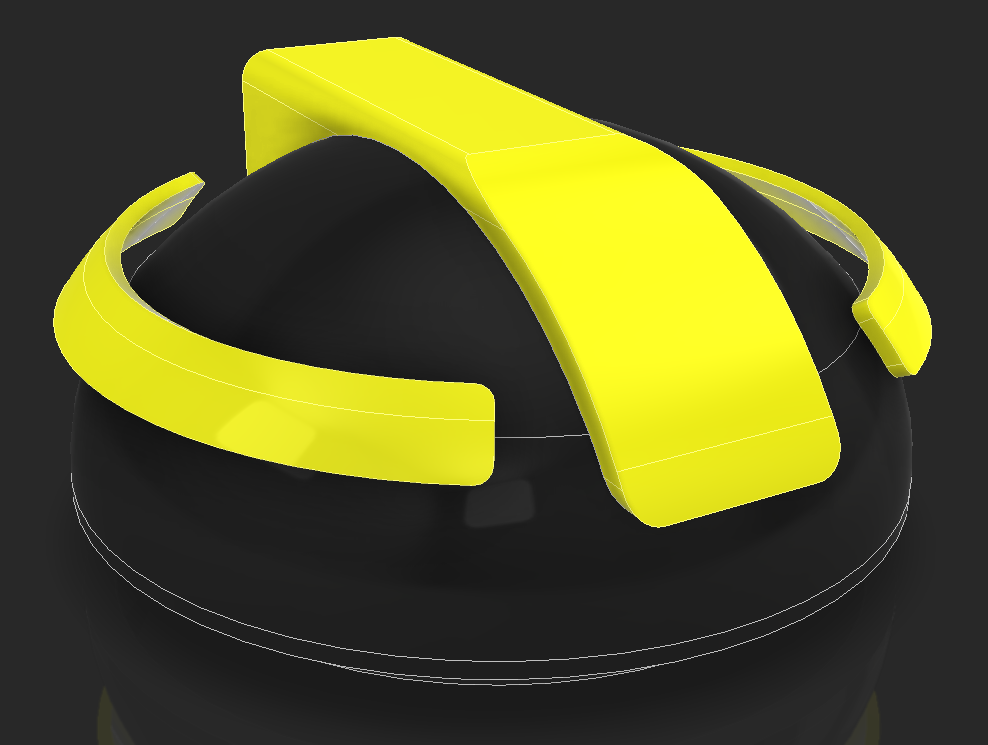
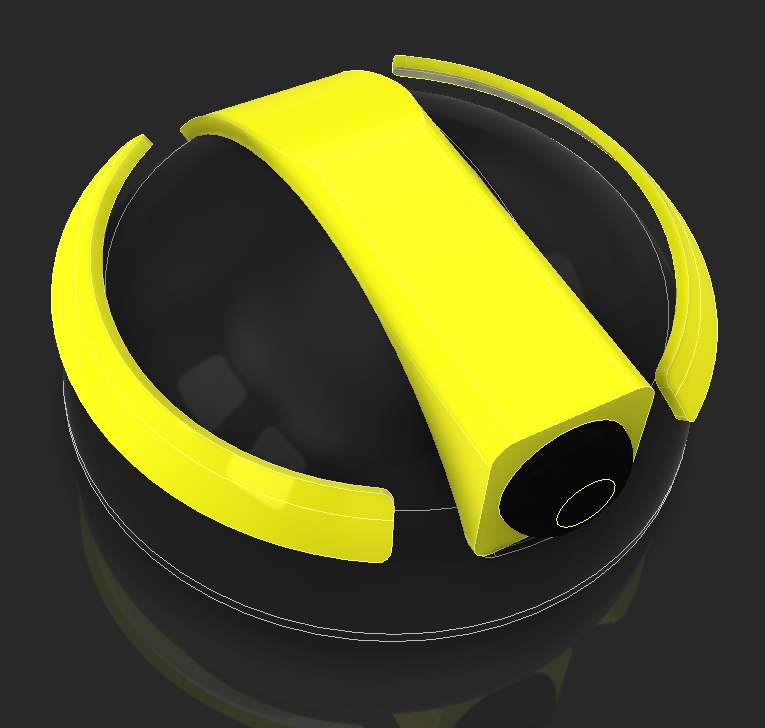
A big problem I was fighting with the old head was space. Not space for stuff to go in the head, but space for my hands and tools to go in to assemble it all. Now that I'm designing everything from scratch I can fix this.
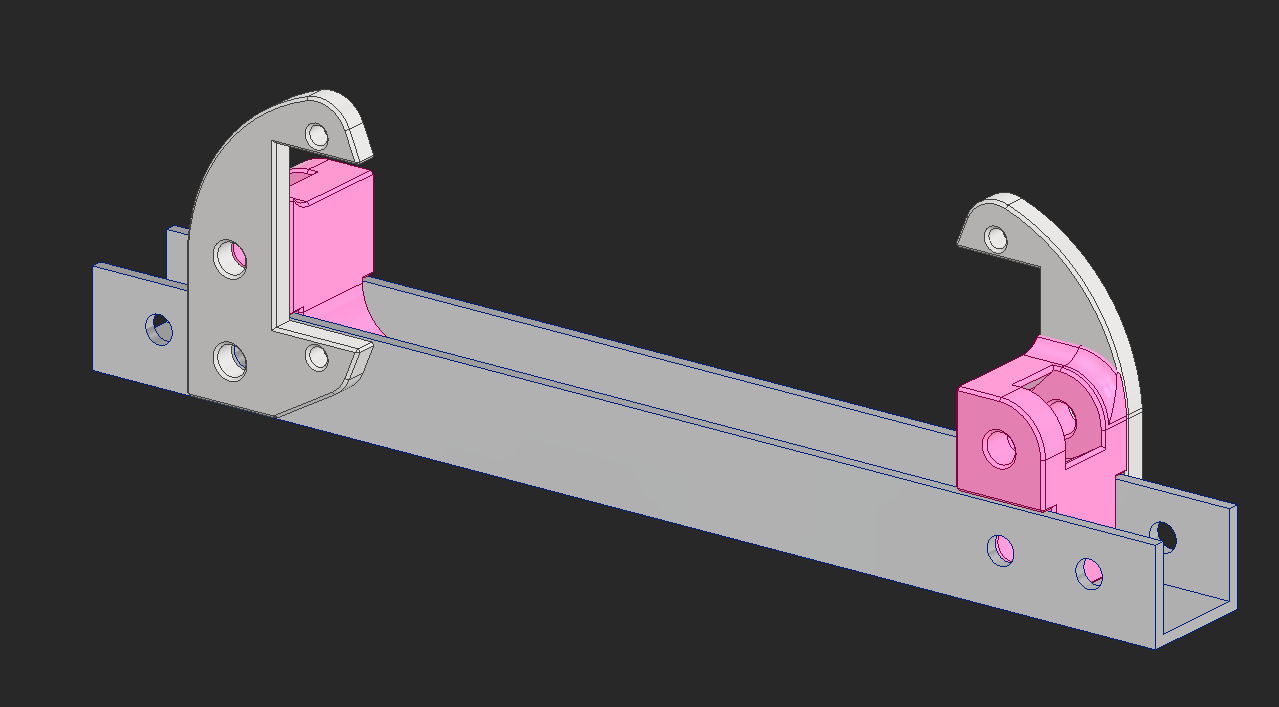
For the eyebrow mounts, I want it assemble it all outside of the head, place it all in, and just secure the assembly down. I decided to do this with an aluminum U-channel that runs across the width of the head. This allows me to assemble everything outside of the head and lets me change stuff without reprinting the dome.
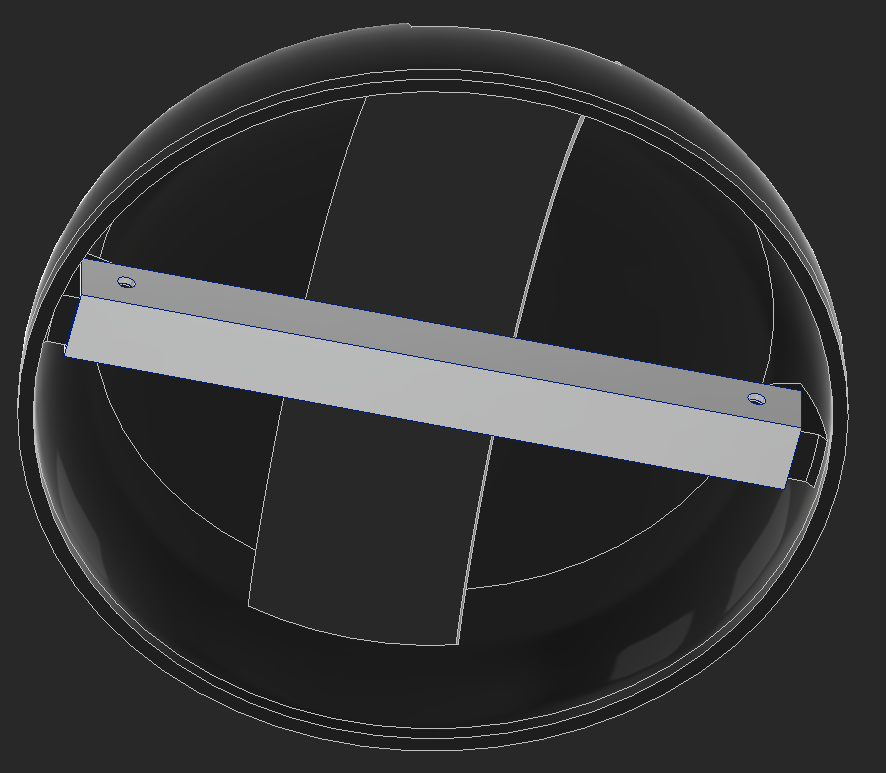
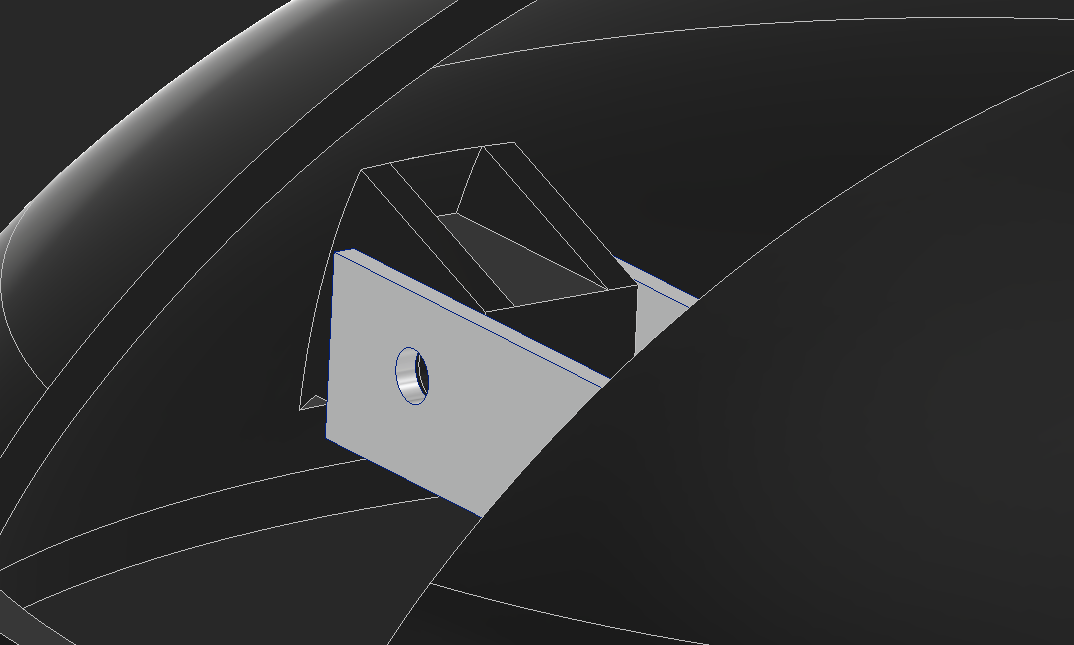
I don't want the pivot arm for the eyebrow permanently attached to the eyebrow. I want the ability to change it later without reprinting and painting parts.
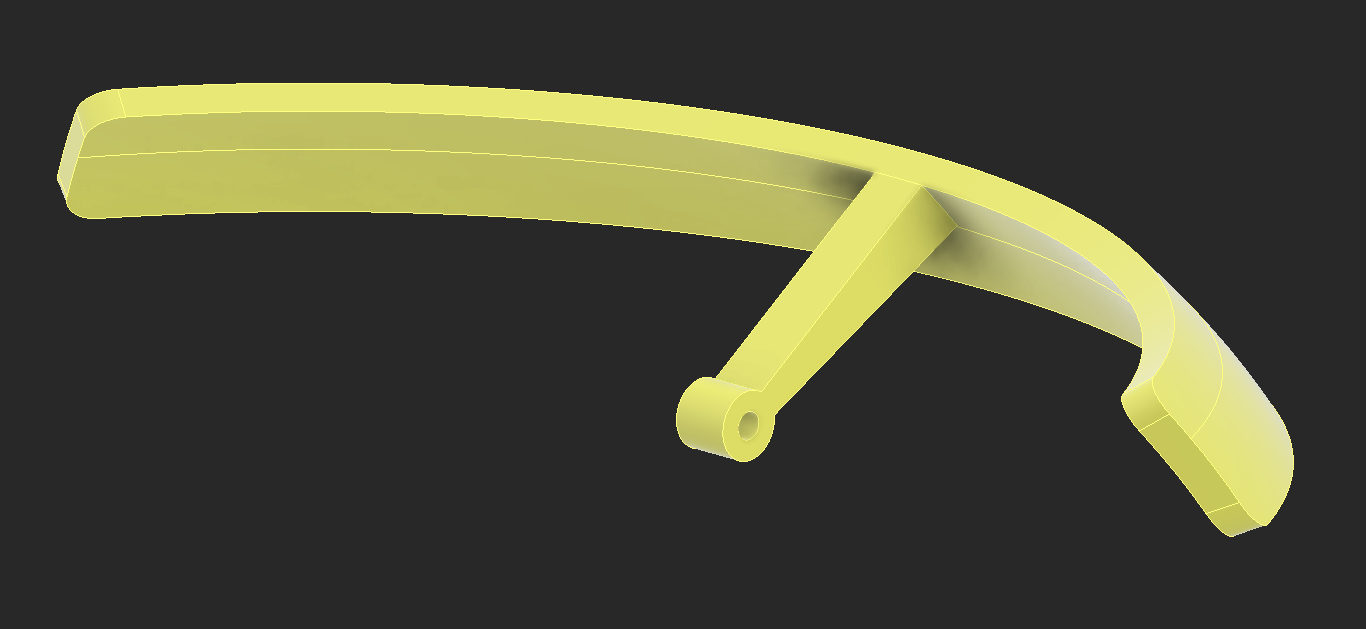
These will be held together with magnets. Grub screws will sit in the linkage to align the eyebrow with the linkage. This also protects the robot from curious kids pulling on things.
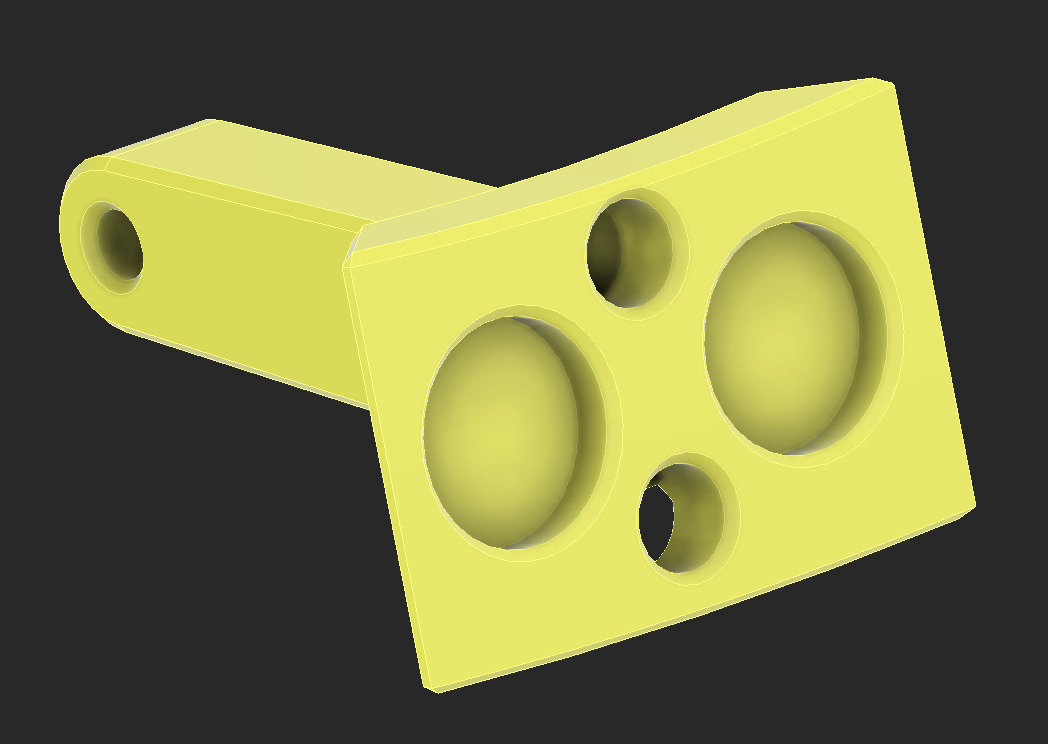
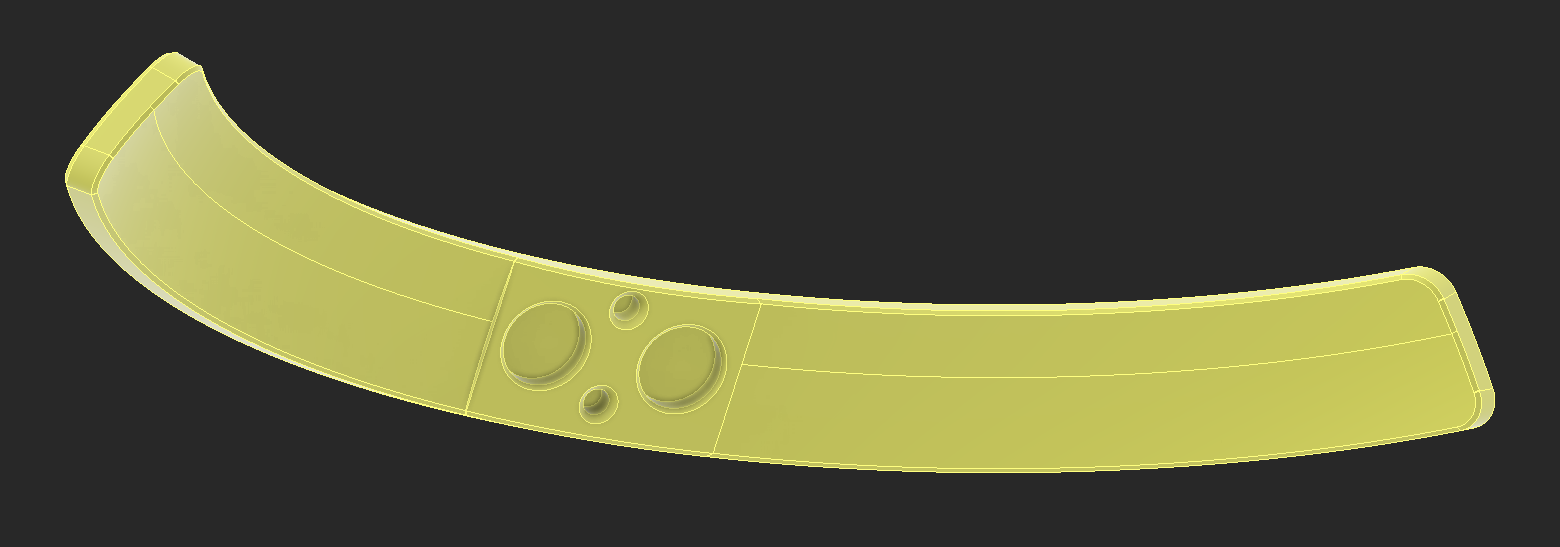
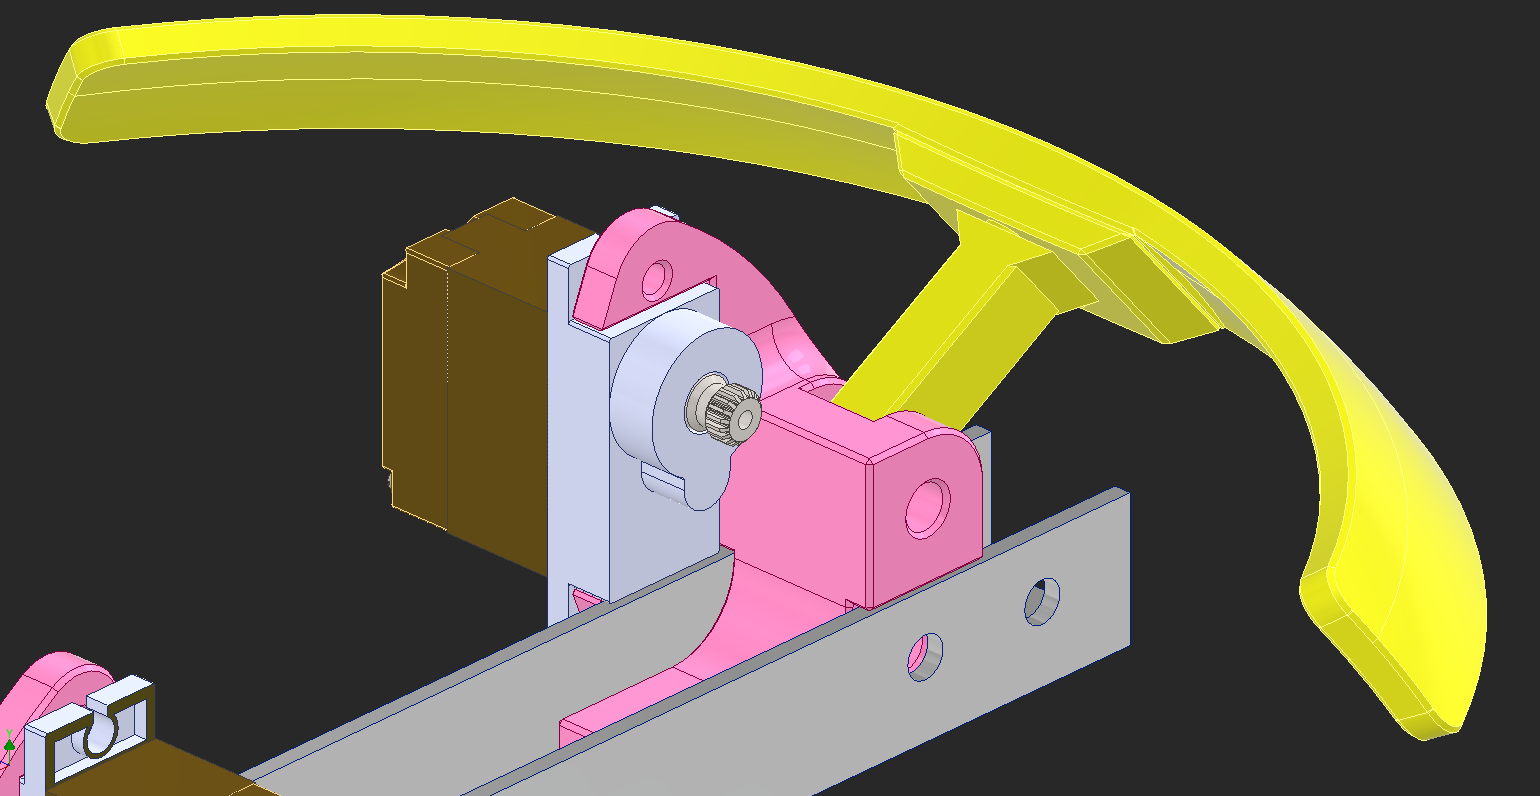
A little gusset will go inside the U-channel to mount the servo and eyebrow pivot. This mount had upper and lower hardstops for the eyebrow so it can't overextend and damage any of the paint on the dome.
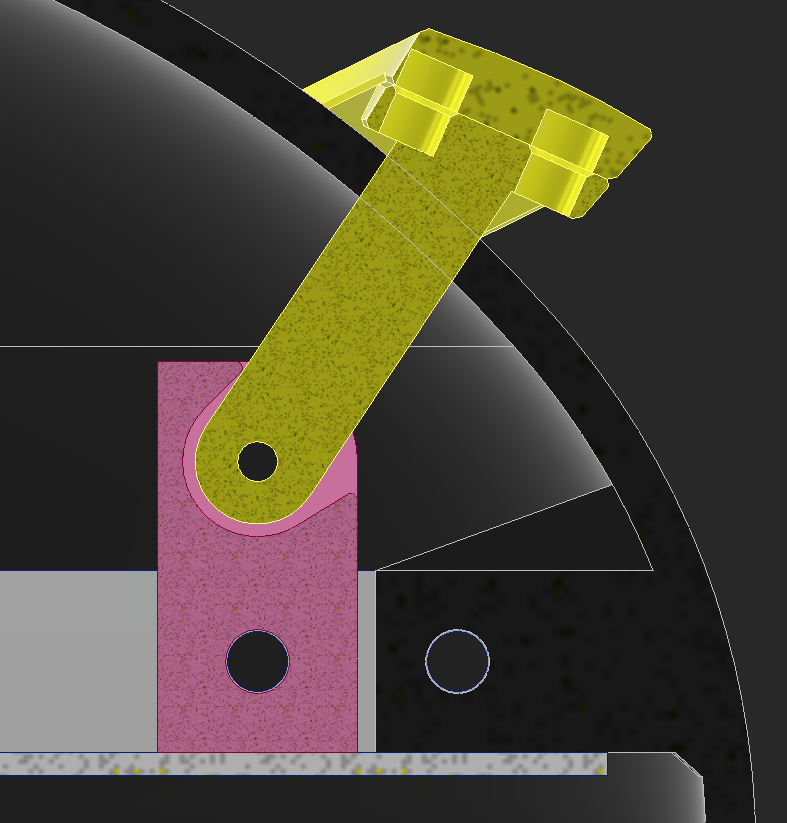
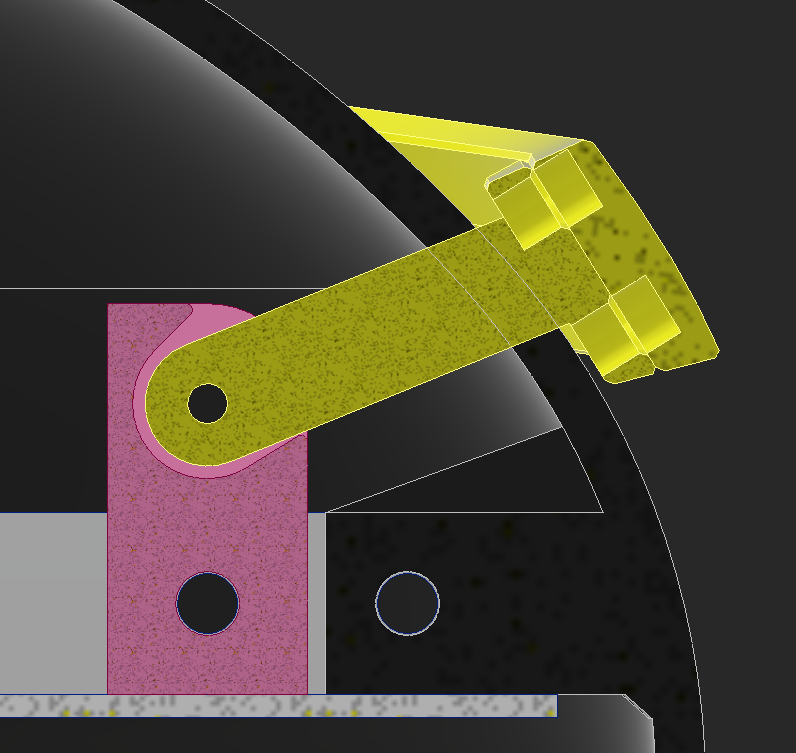
The servo will attach right next to this and get screwed in through the aluminum channel as well.
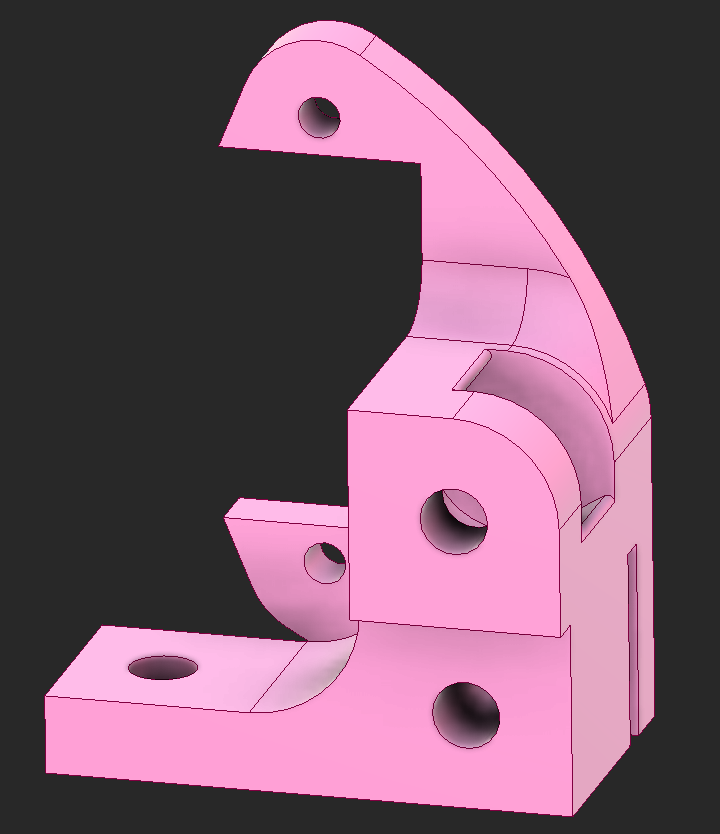
I printed this part and broke it while removing the support material... I had to print it in a less than ideal orientation and it made this part very weak.
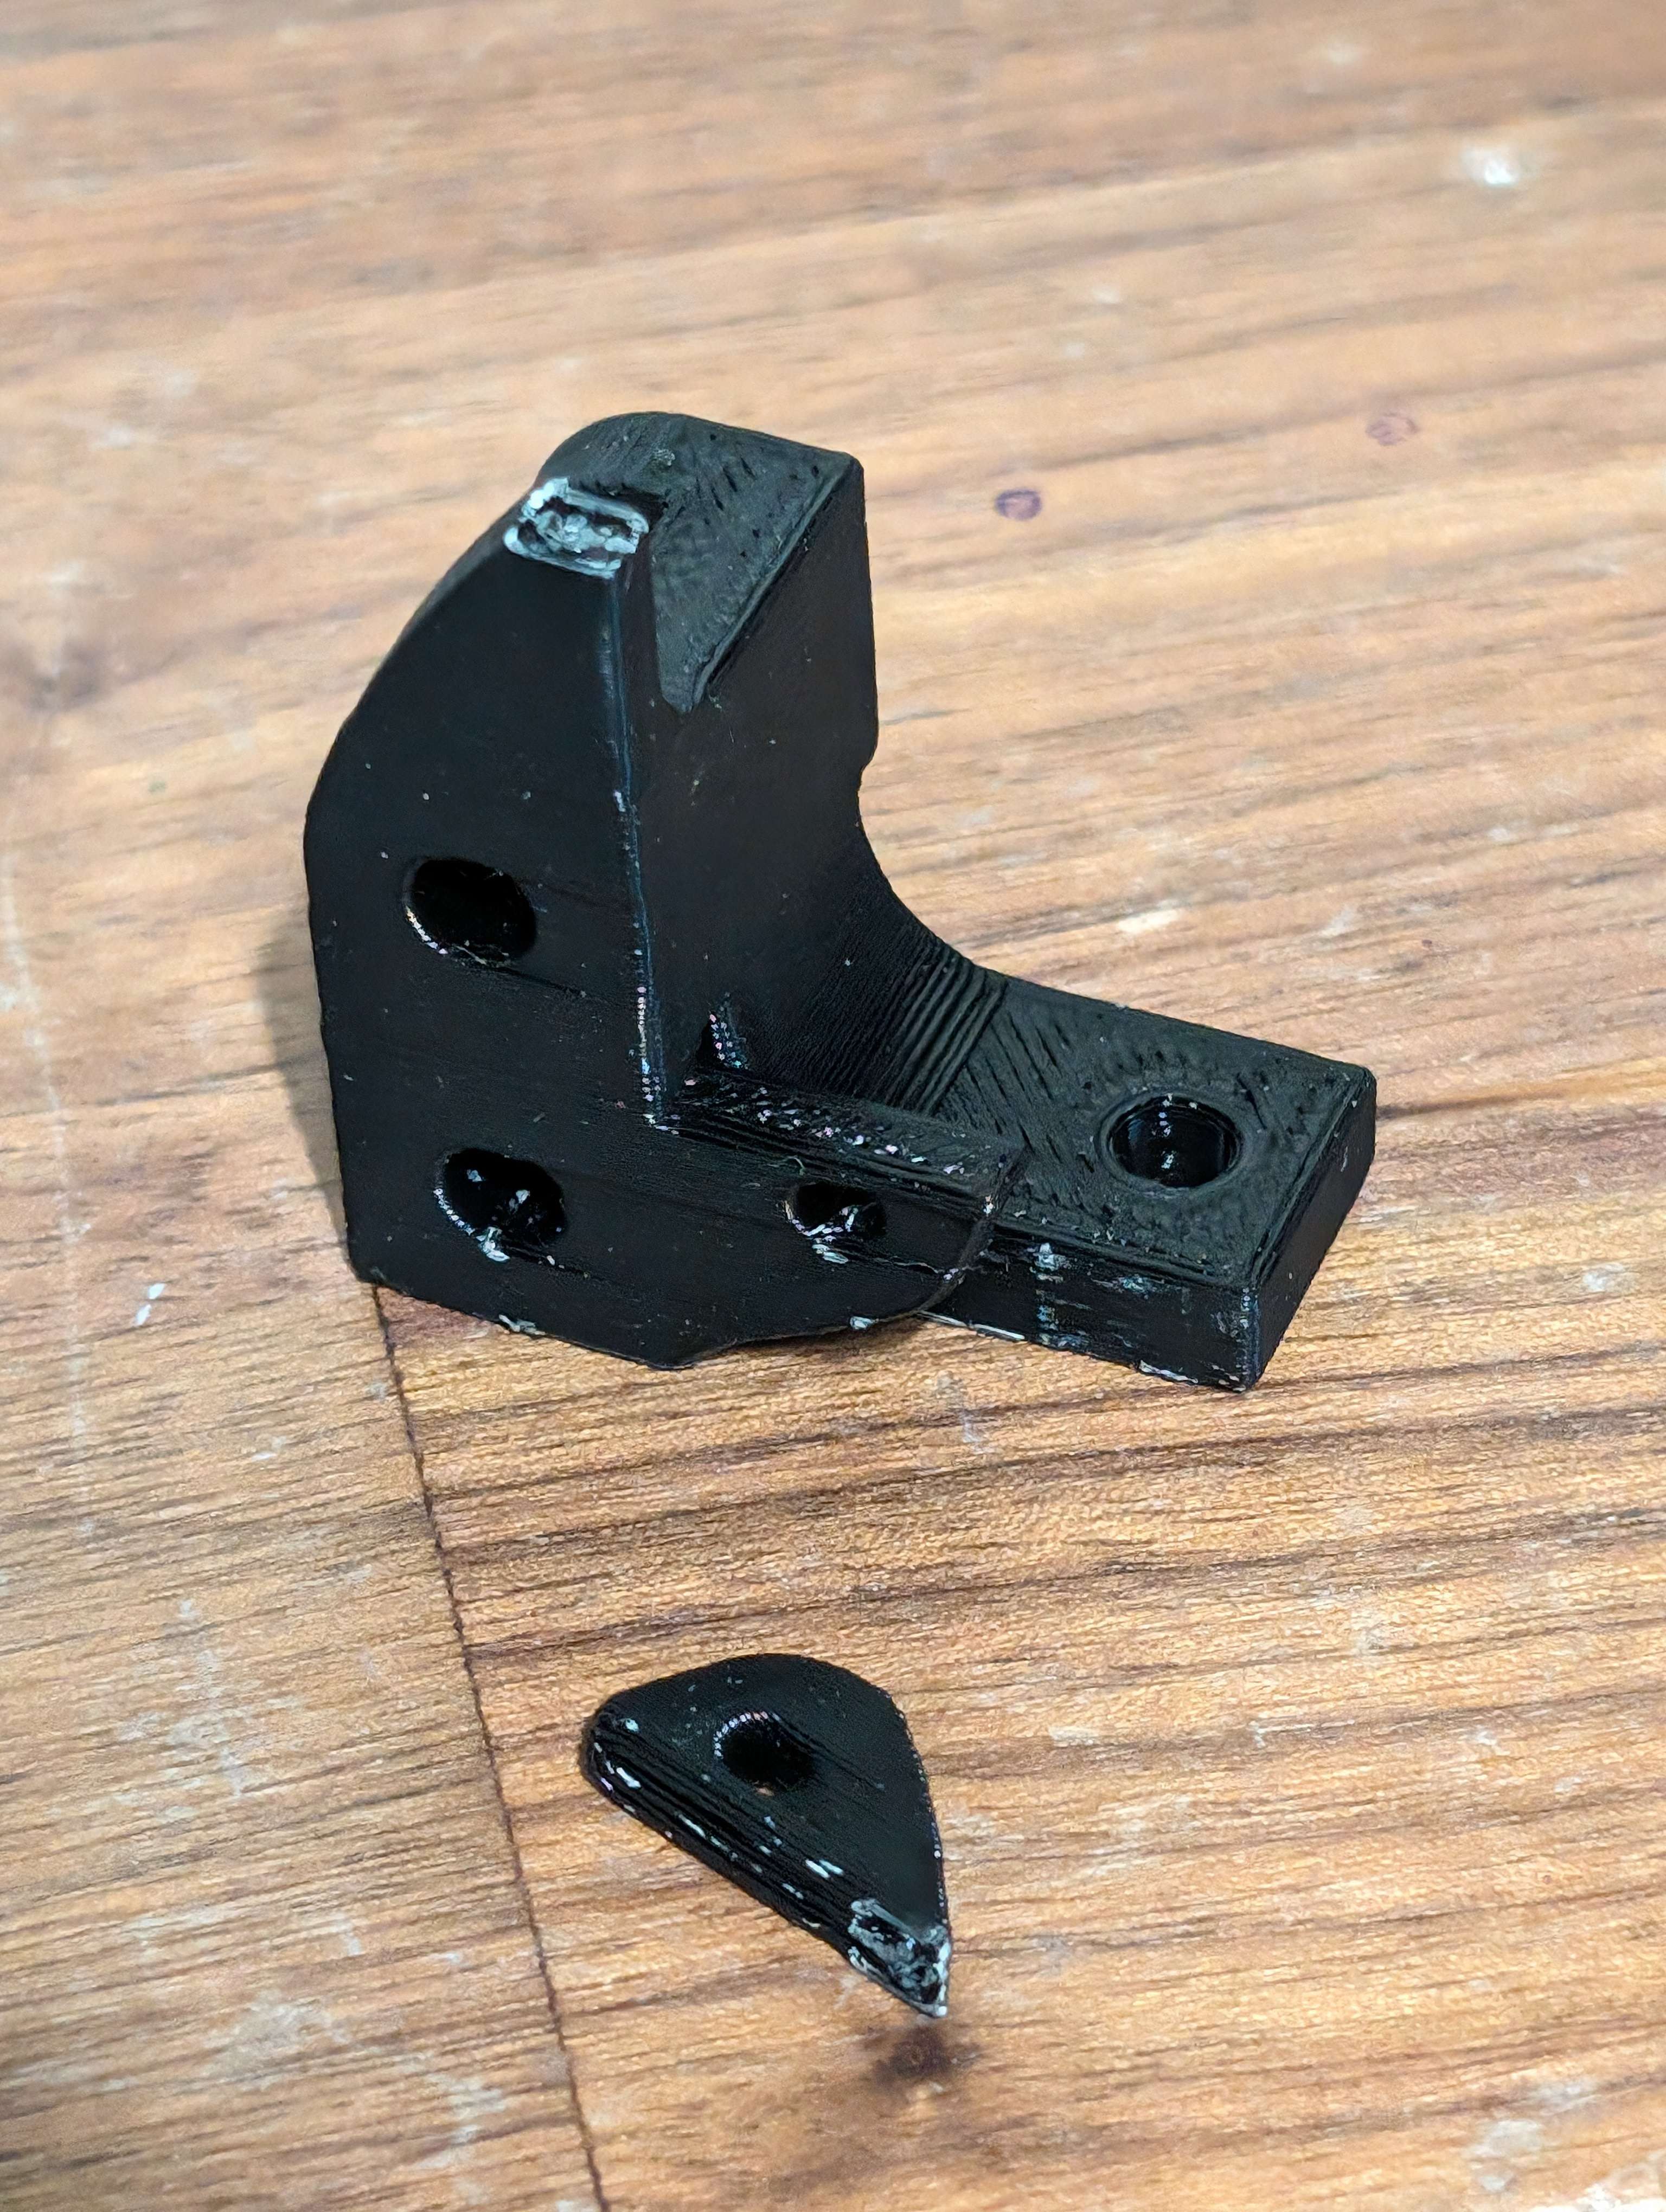
Luckily the solution was just separating the servo mount from the eyebrow linkage mount, and when it gets screwed together it'll all be together like normal.
After making cutouts in the dome for the linkage to move, I realized that this entire thing isn't assemblable outside of the head. The magnet plate cannot fit through the slot.
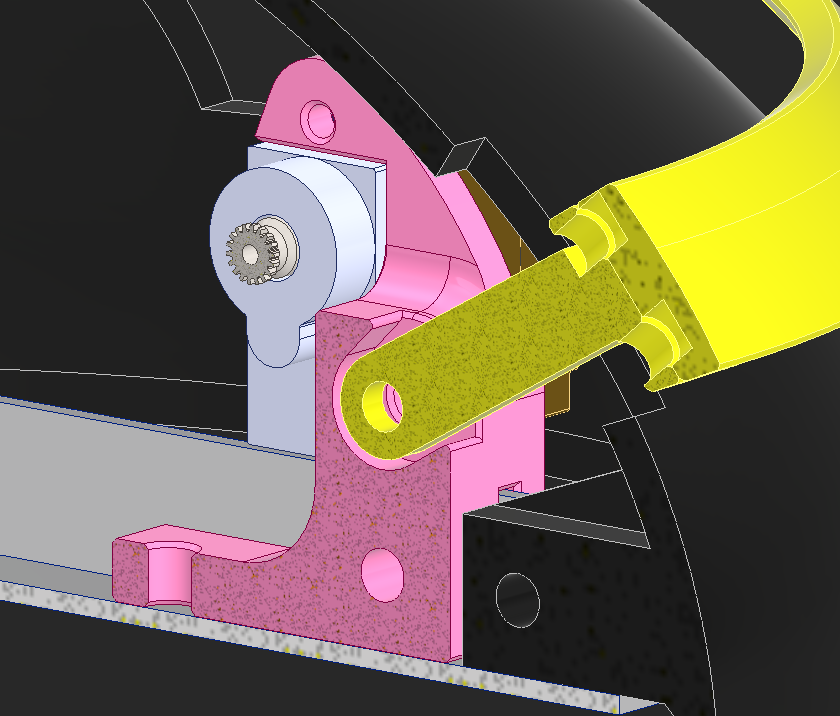
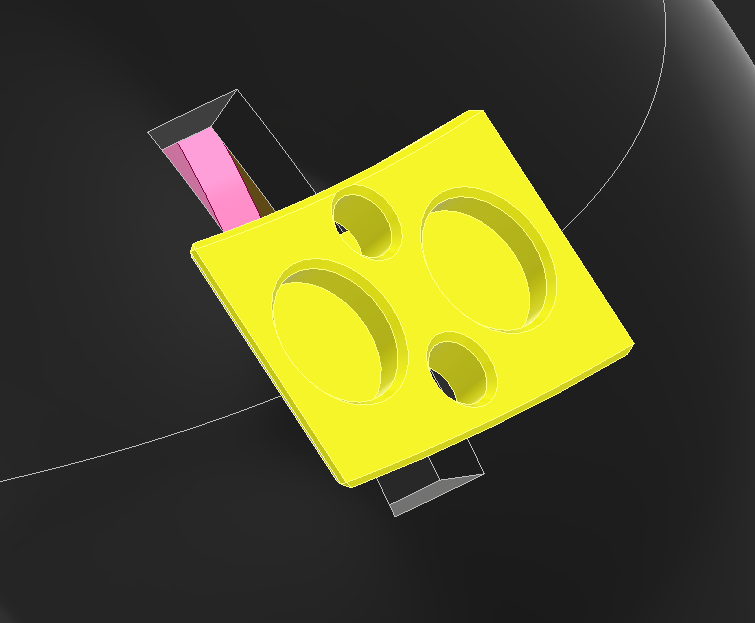
I spent about 2 hours trying a couple of solutions; different magnets, splines, making everything smaller, making these 3 pieces. Ultimately I figured out that all I need is a through hole in the dome so I can screw this on easily. The real goal is easy assembly, not assembly outside of the head.
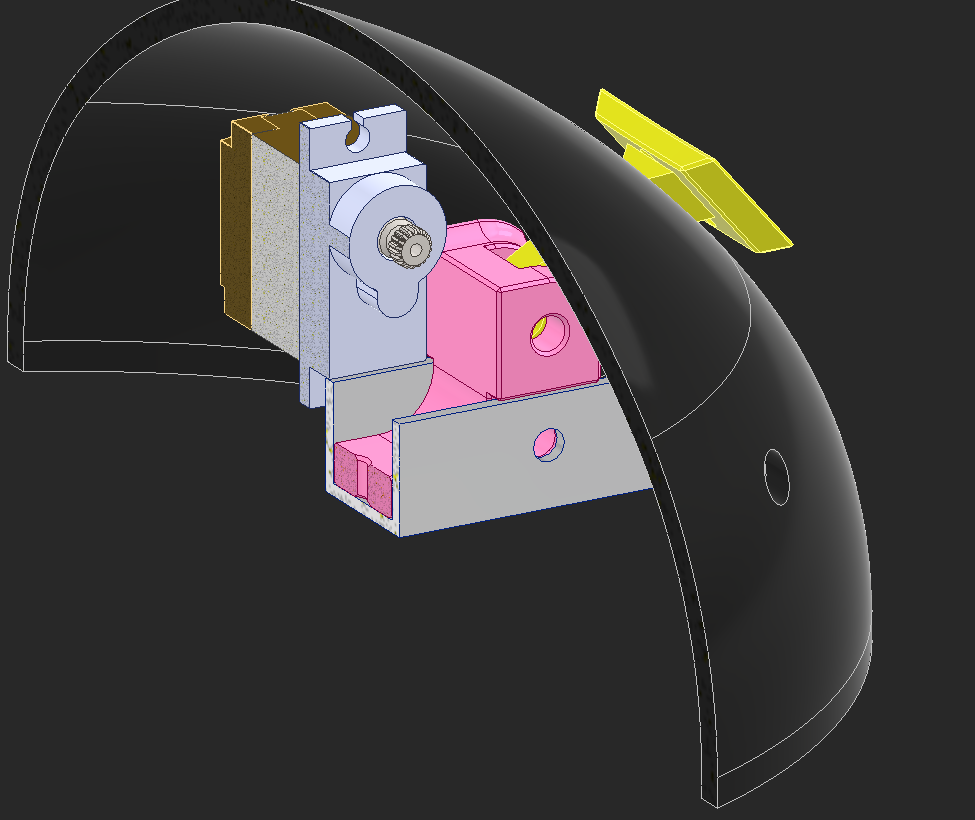
To make my life easier later, I made the center position of the servo the center position of the eyebrow. The ridges in the floating link give space for the servo horn.
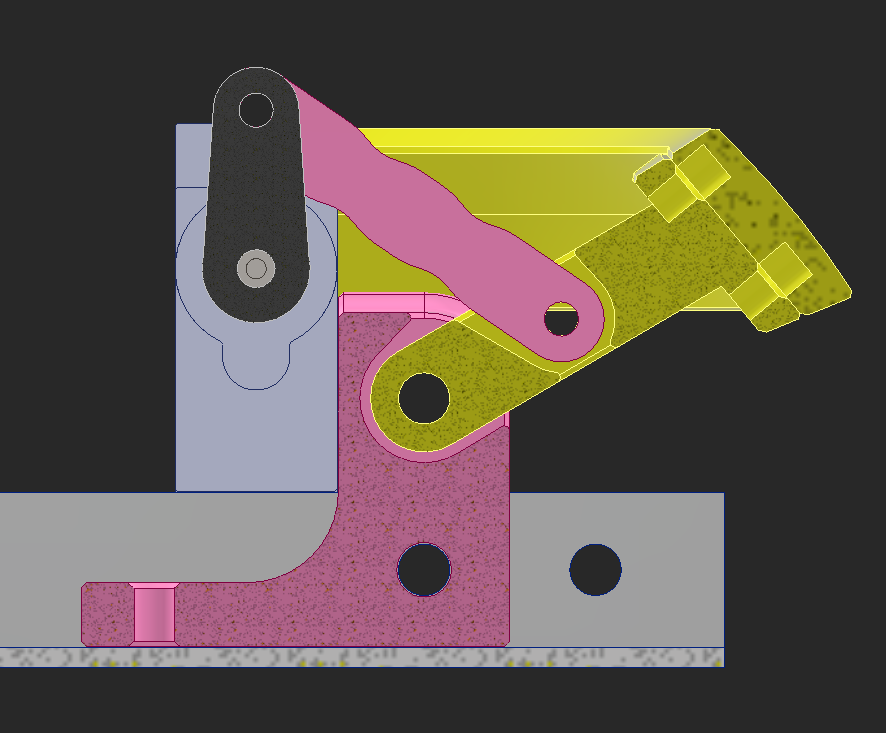
And with that, the eyebrow mechanics (should be) all good for printing and testing!
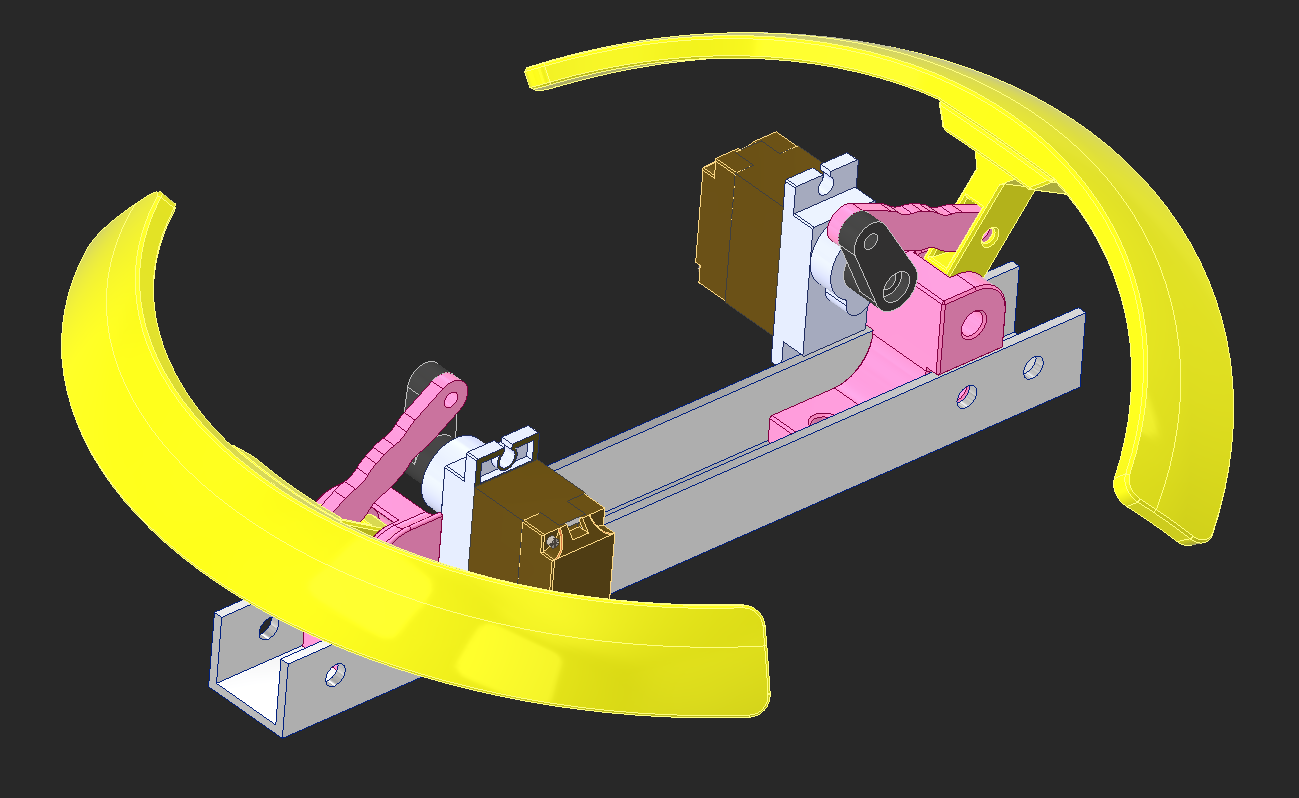
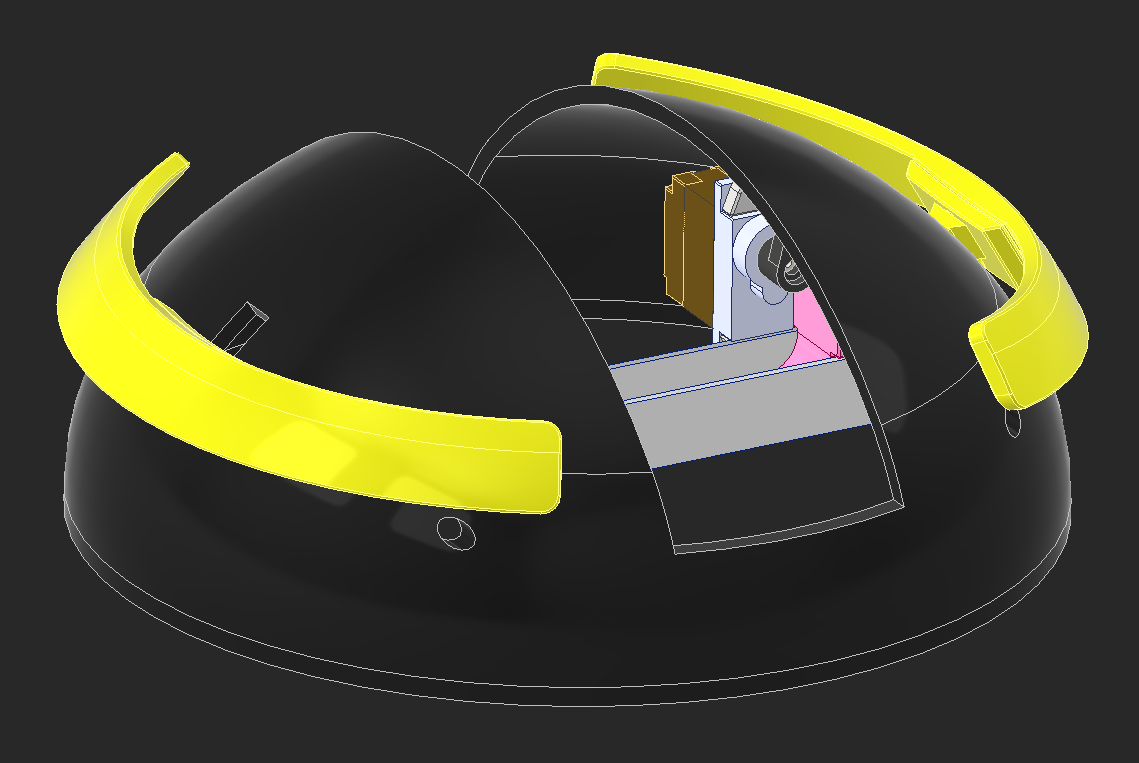
Now for the eye mount. I started with another roughed-out version of how I want the exterior of it to look. I'll work backward on this file and figure out how all of the mechanics will work.
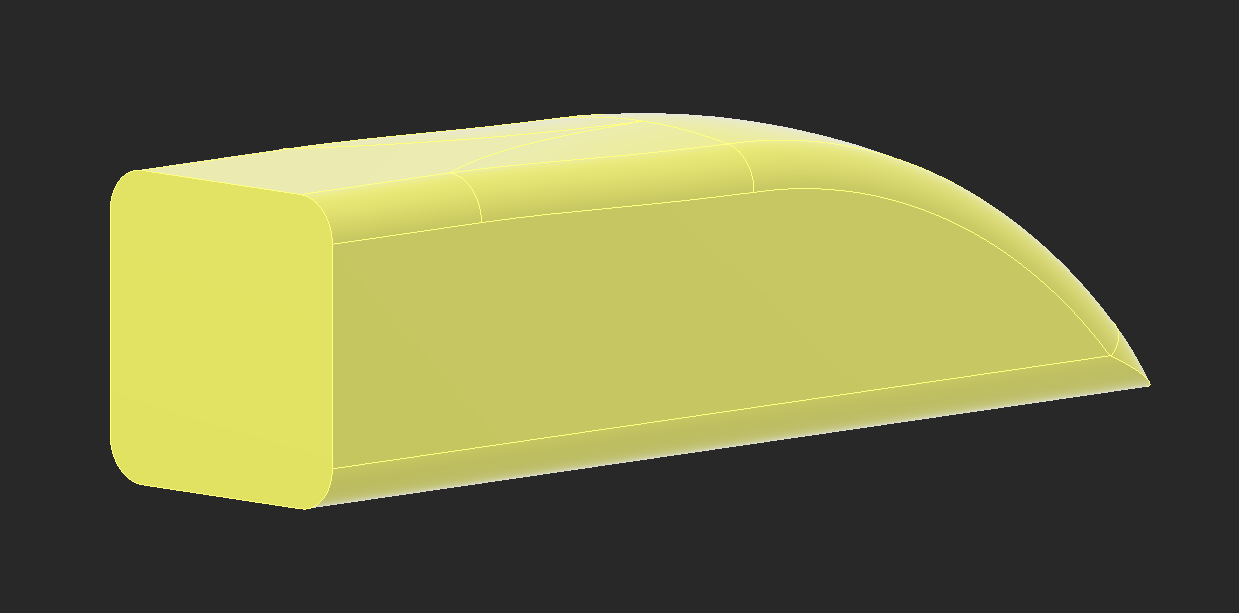
Hollowing out the center allowed me to add flanges to the bottom of this so I can screw it onto the head.
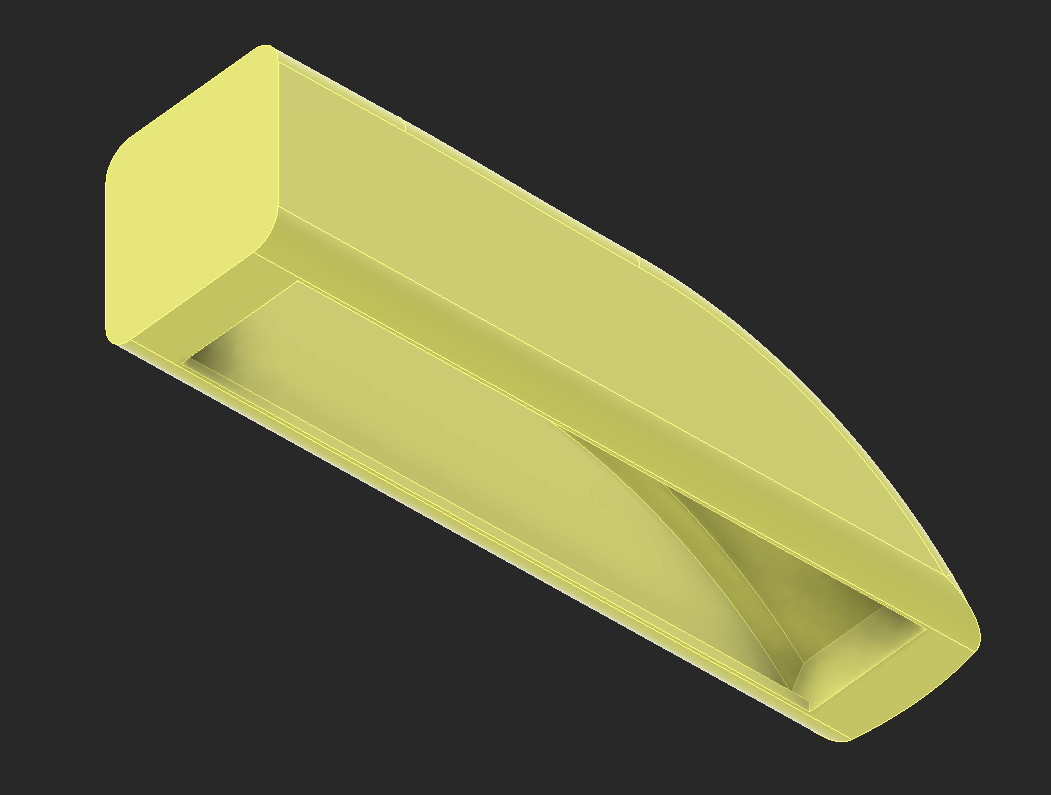
Looking at this on the head, I realized that the amount of material not seen is massive, and it takes up a ton of space inside the part. I can cut out a huge portion of the part and it'll be visually identical.
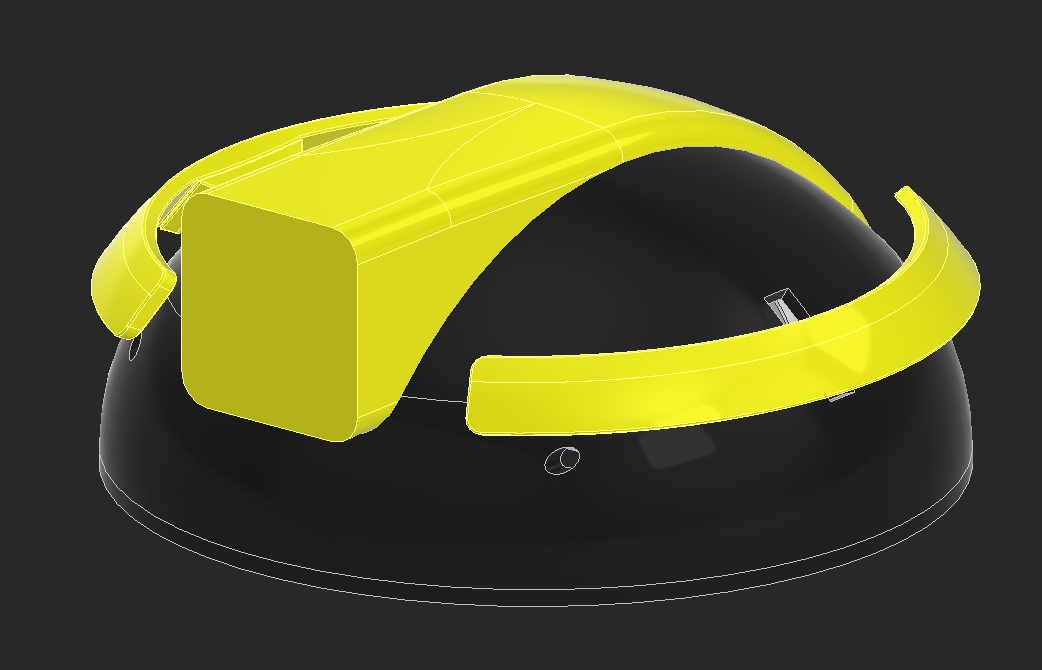
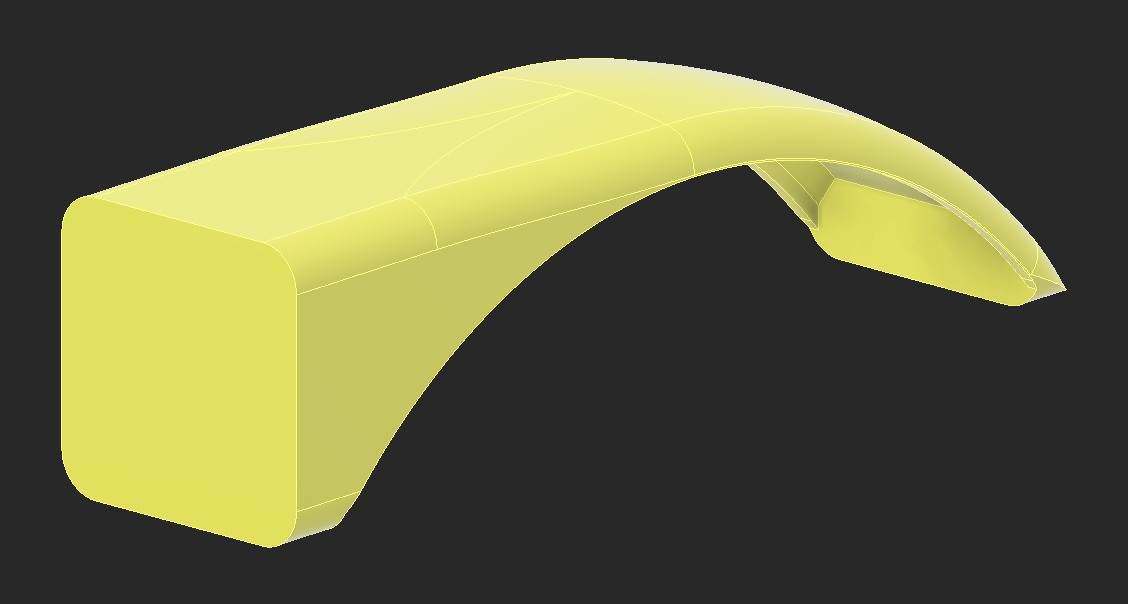
After some thinking, I decided that for now, the eye will be static. I ordered some 40mm empty Christmas ornaments and later I can make it move around or add lights to the inside.
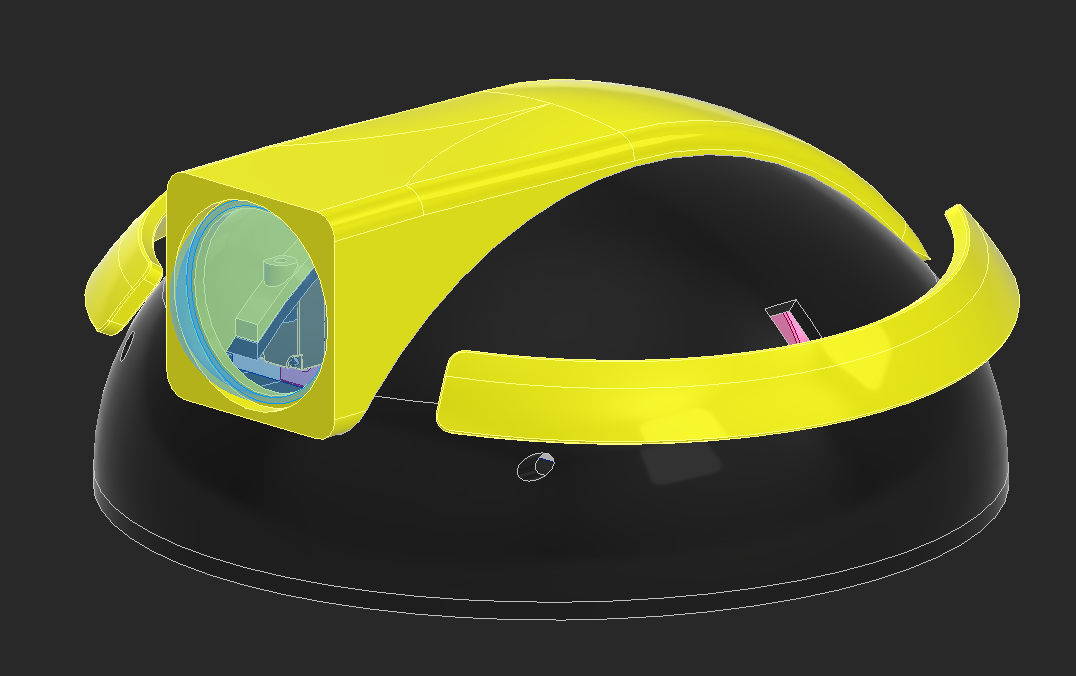
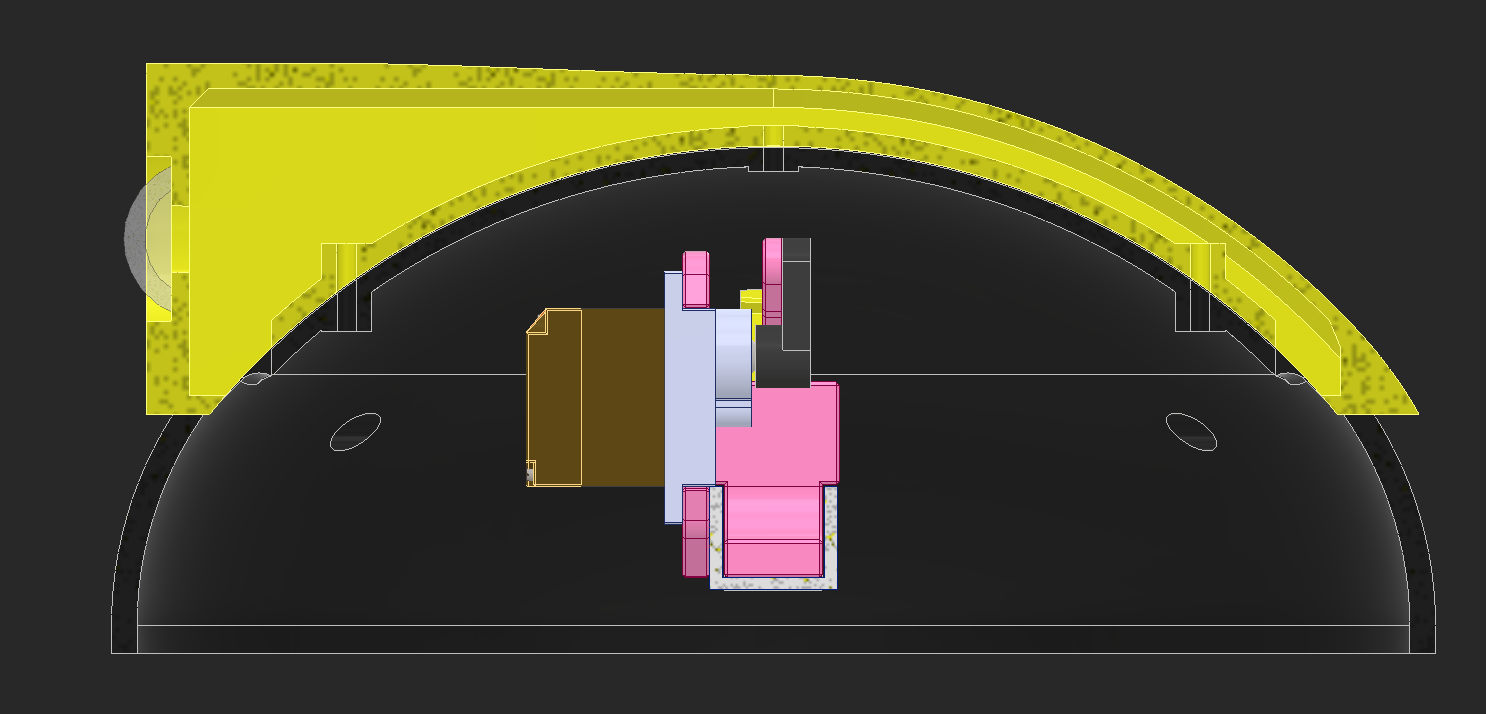
The final part of the design is the integration between the head and the lazy susan. This part is extremely simple because the hole pattern for this has already been tested with the previous head, so all I have to do is change the integration to the head.
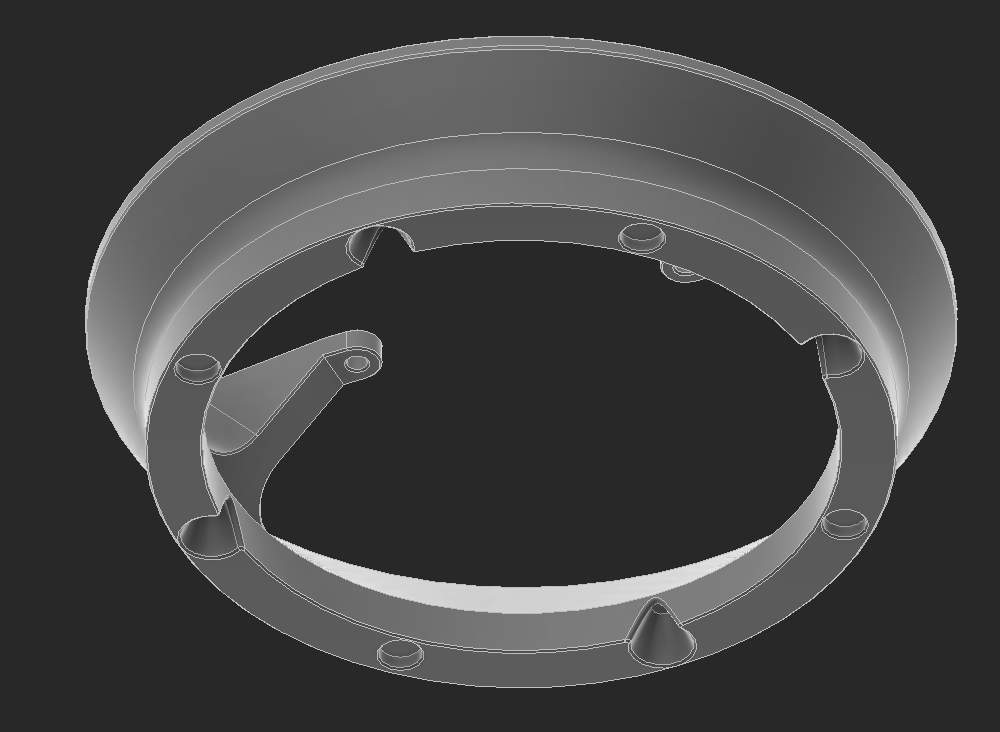
This gets screwed onto the aluminum through the servo mount holes. This should make everything easy to assemble, and the bowl will slide on top of this after everything is together.
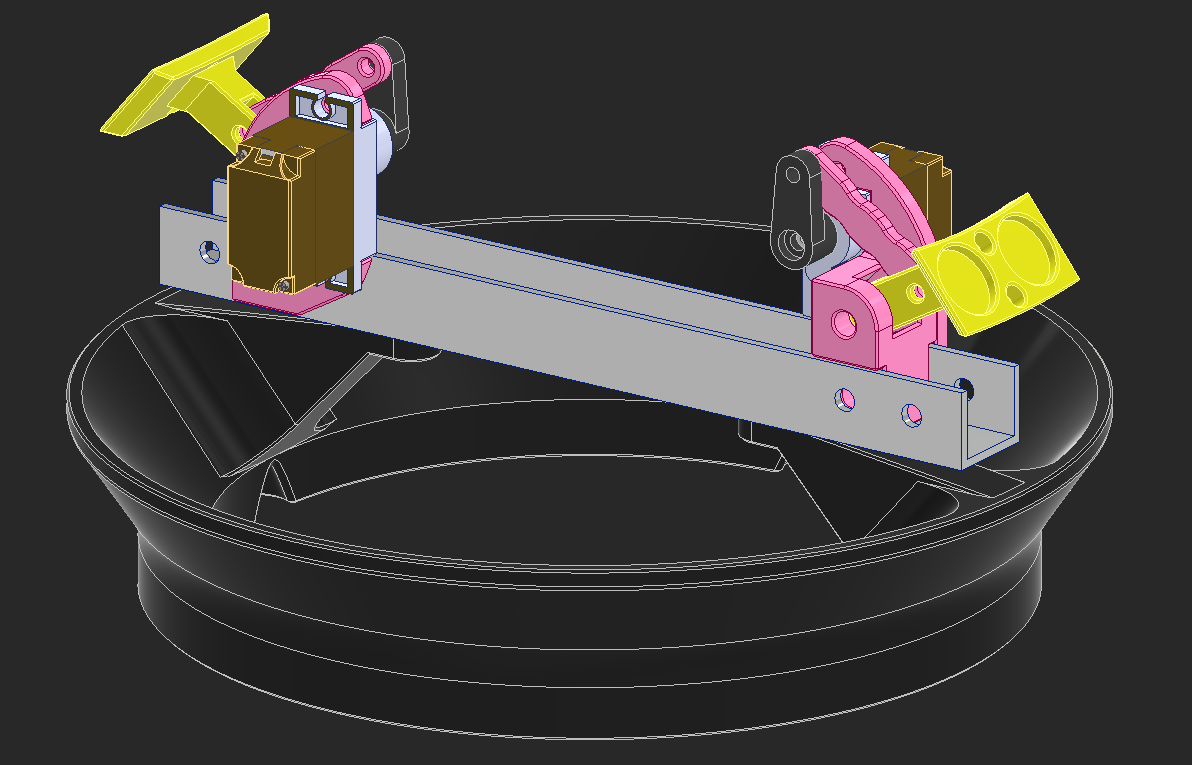
Nice picture of the (hopefully) completed CAD :D
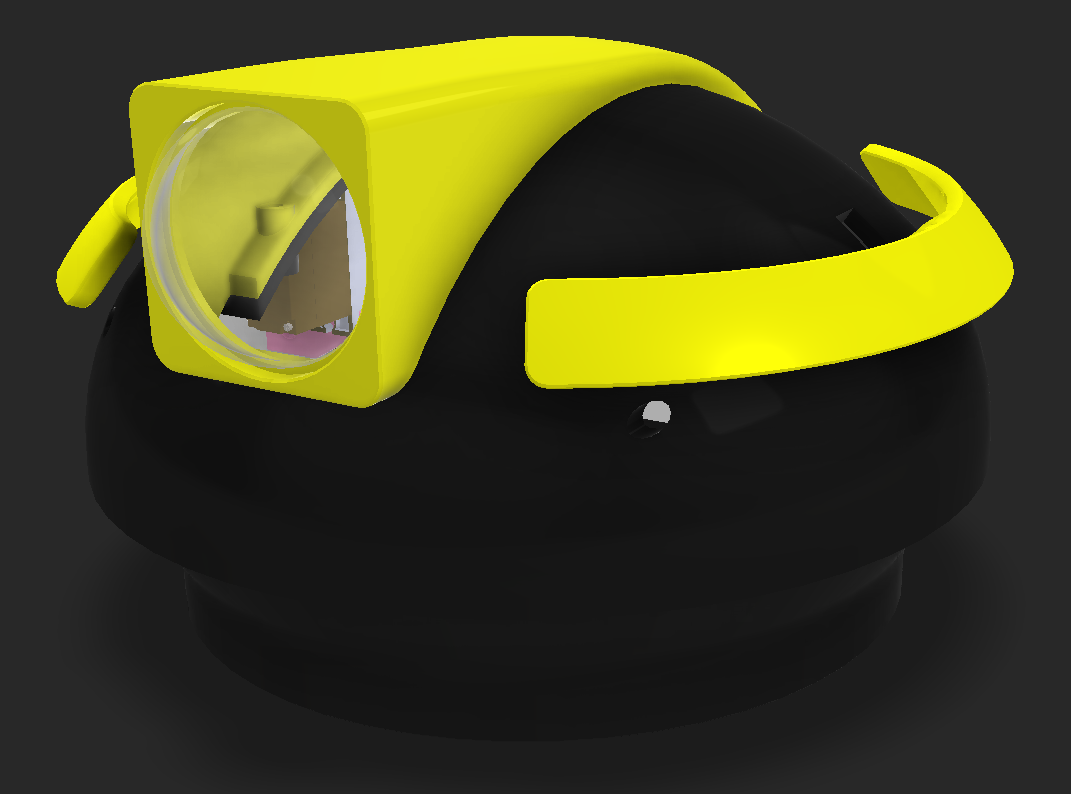
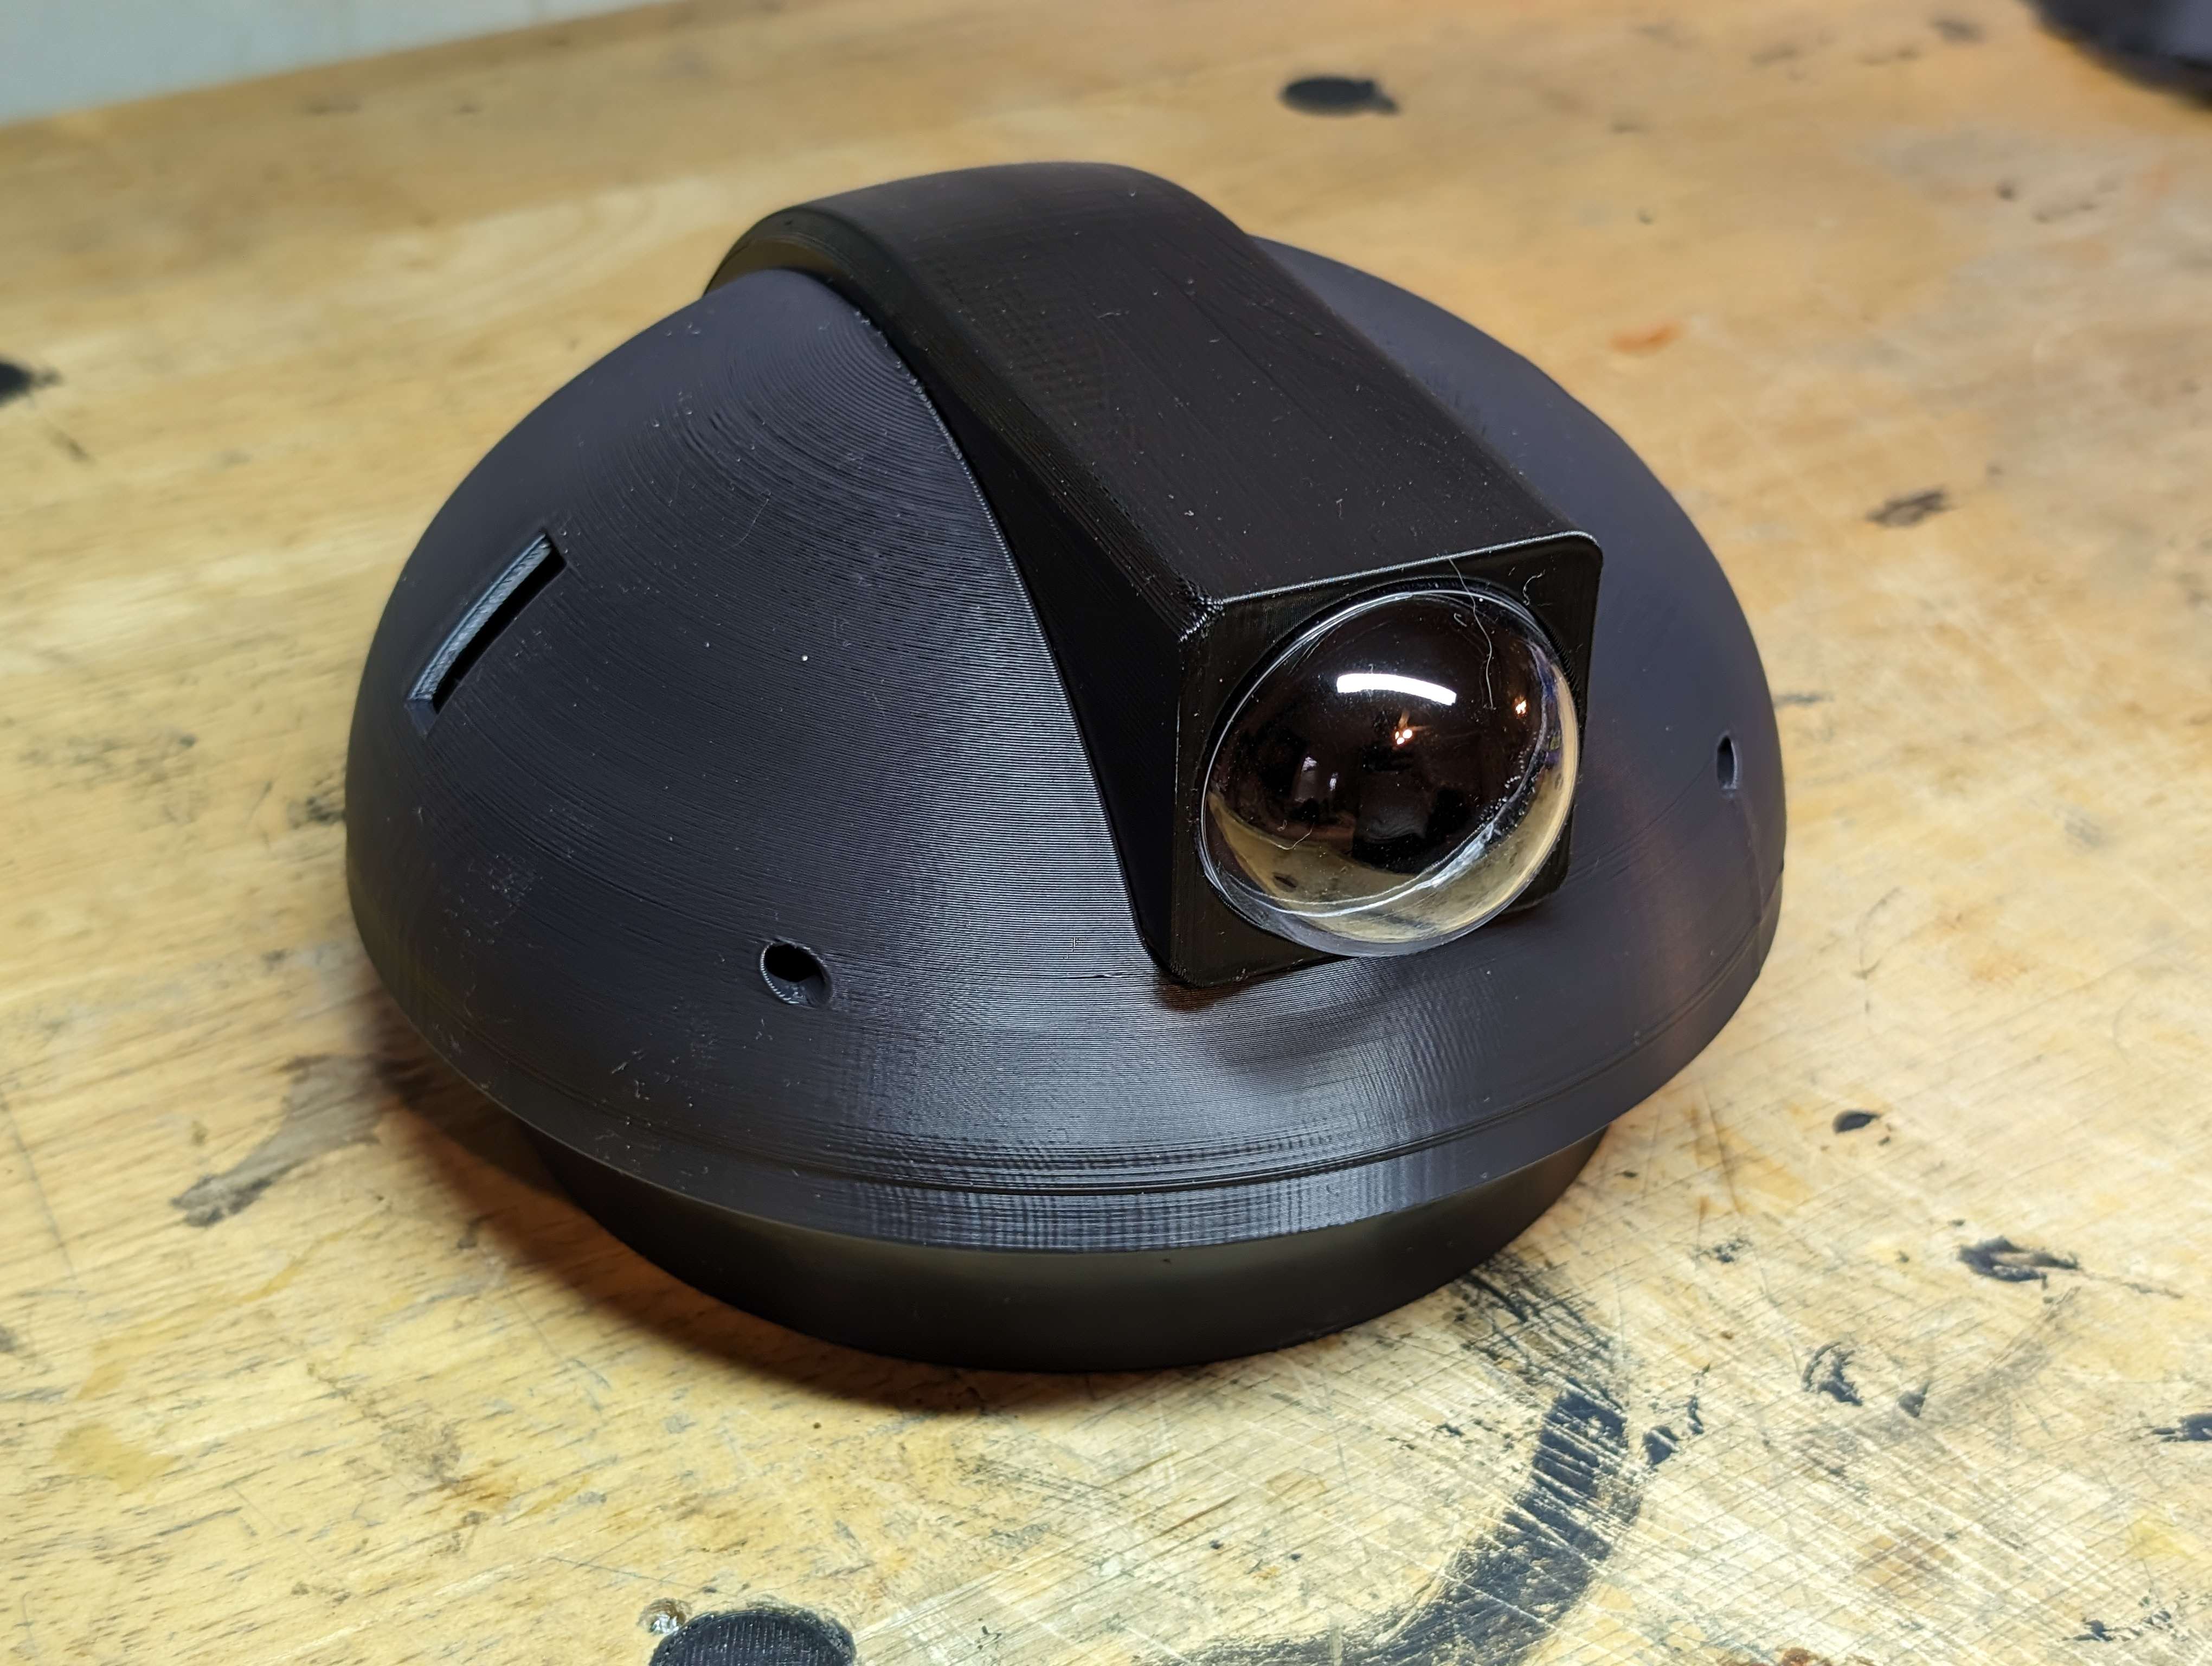
I printed the dome, integration between the head and the lazy susan, and the eye mount. Everything seems to fit together nicely!
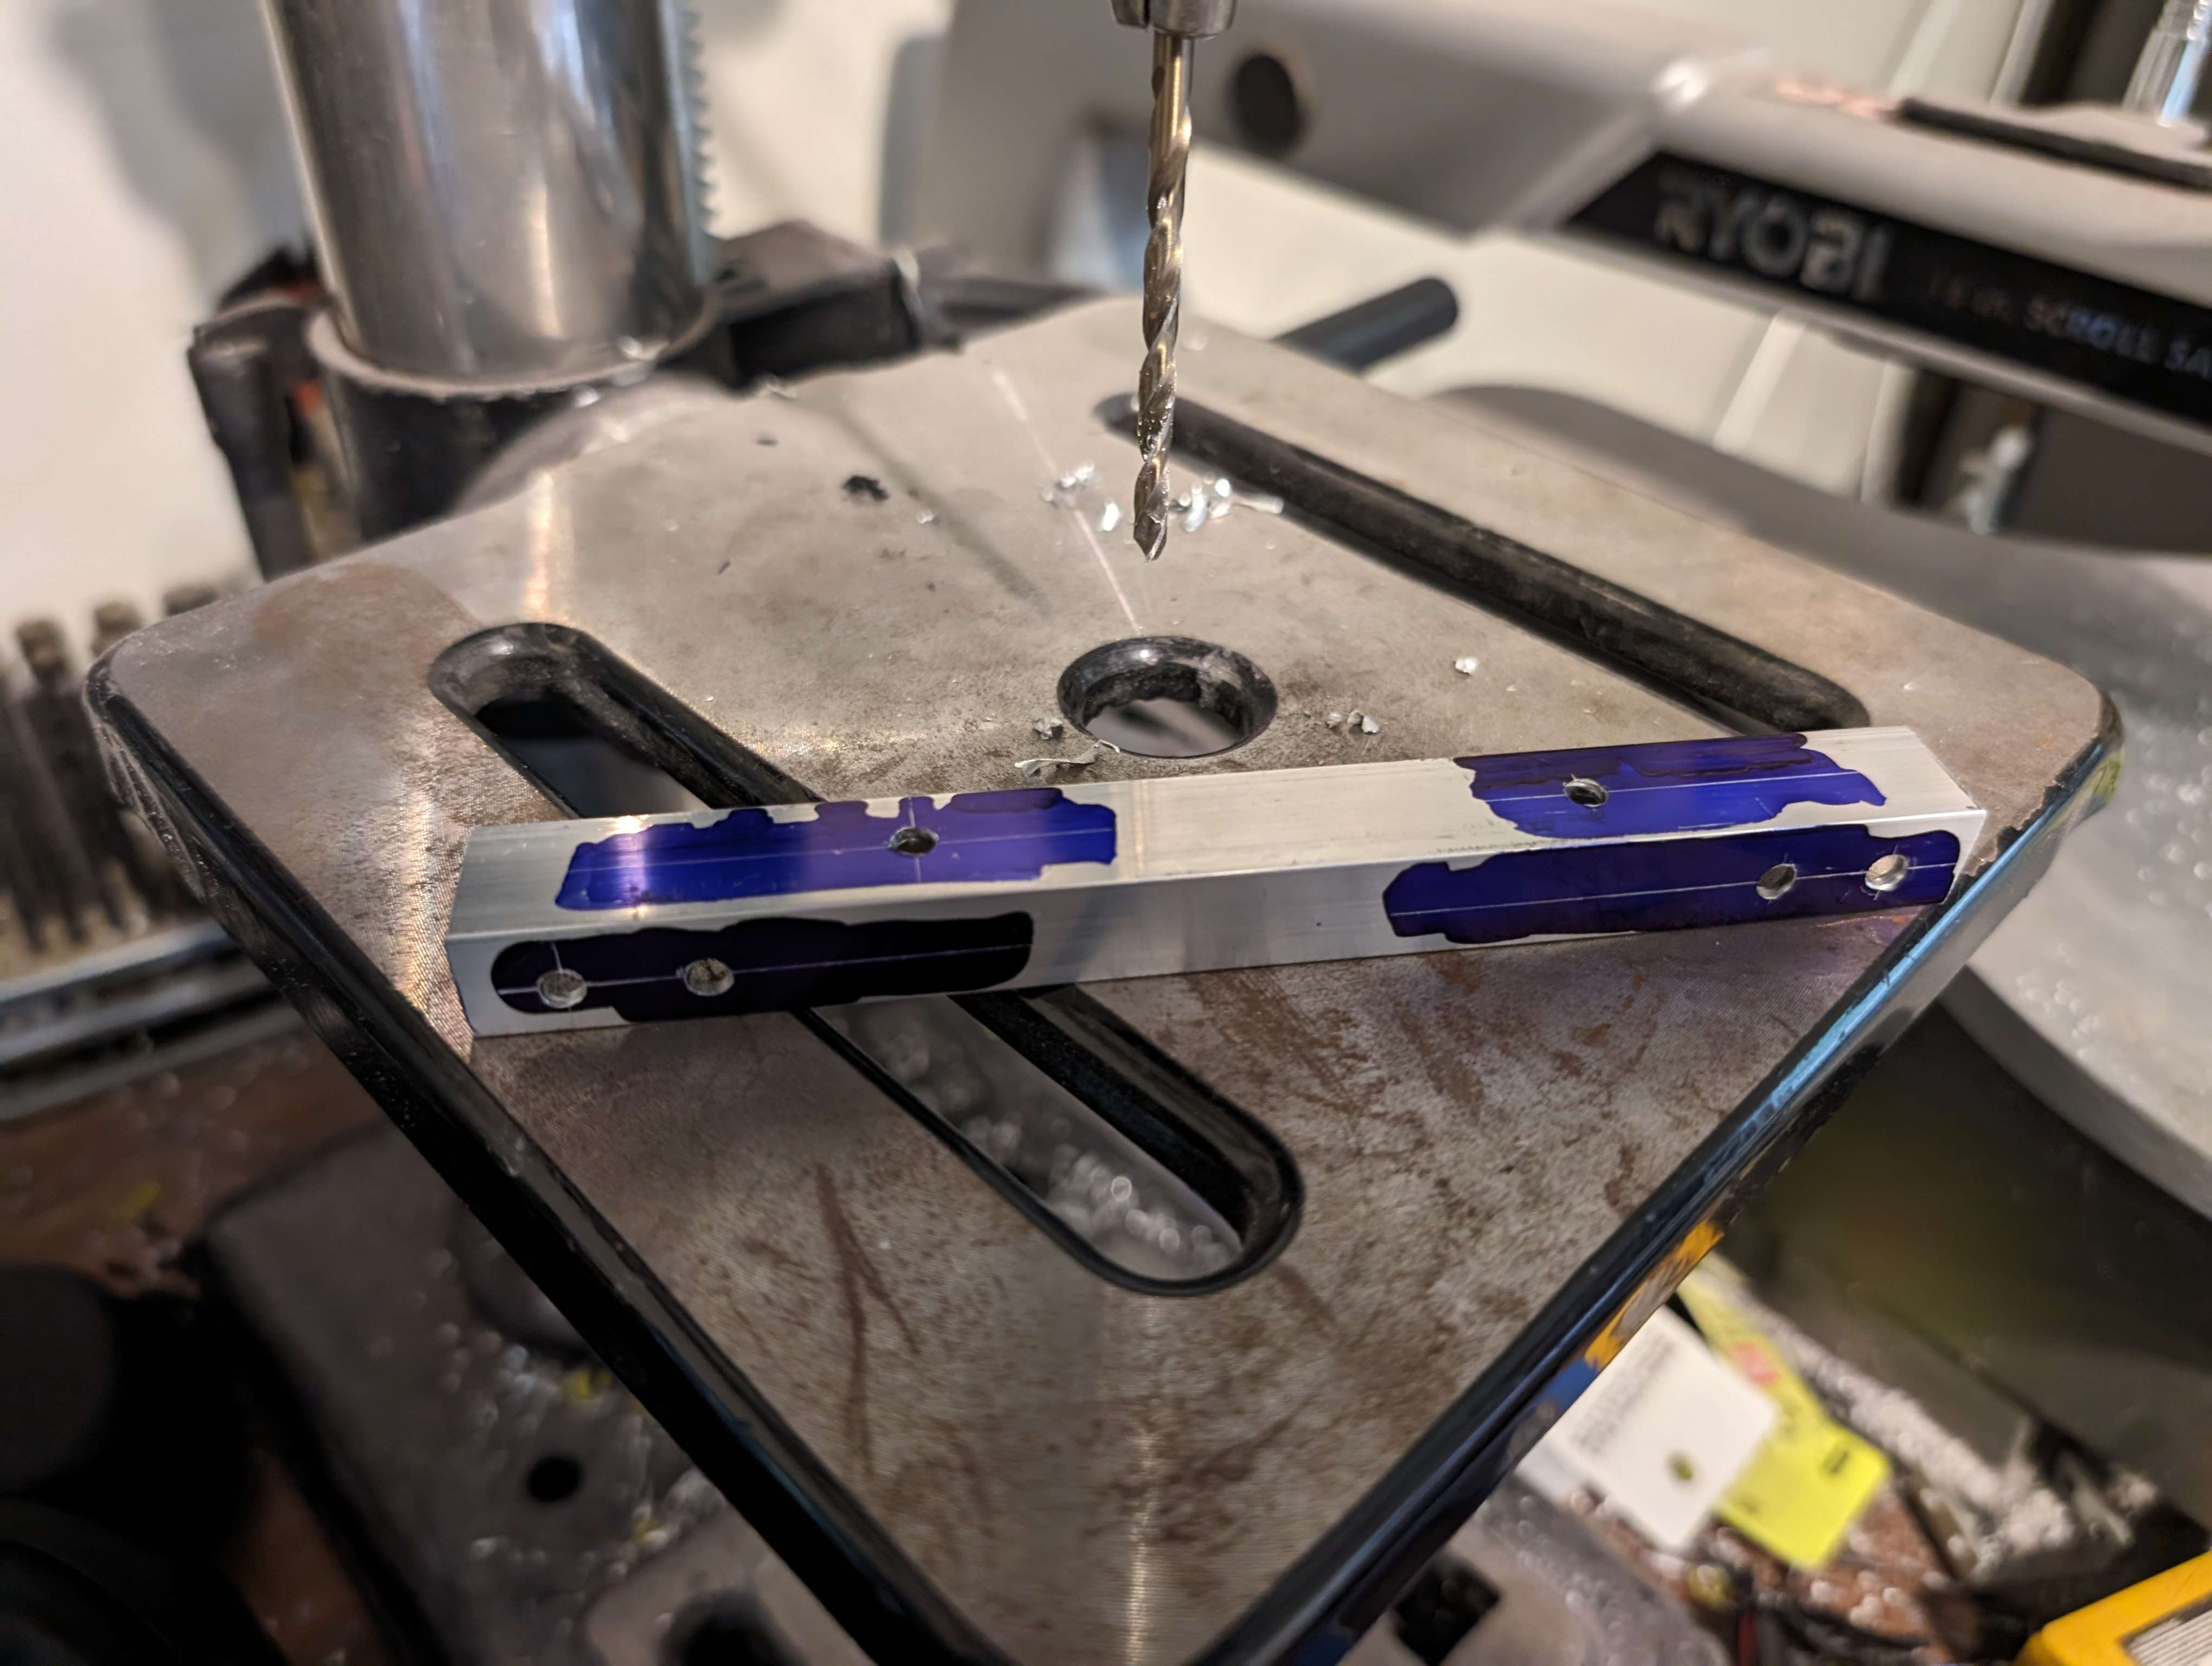
I cut, scribed, and drilled out all of the holes on the aluminum. This is Dykem Blue, and to mark the holes I used a pair of calipers that are only for scribing things.
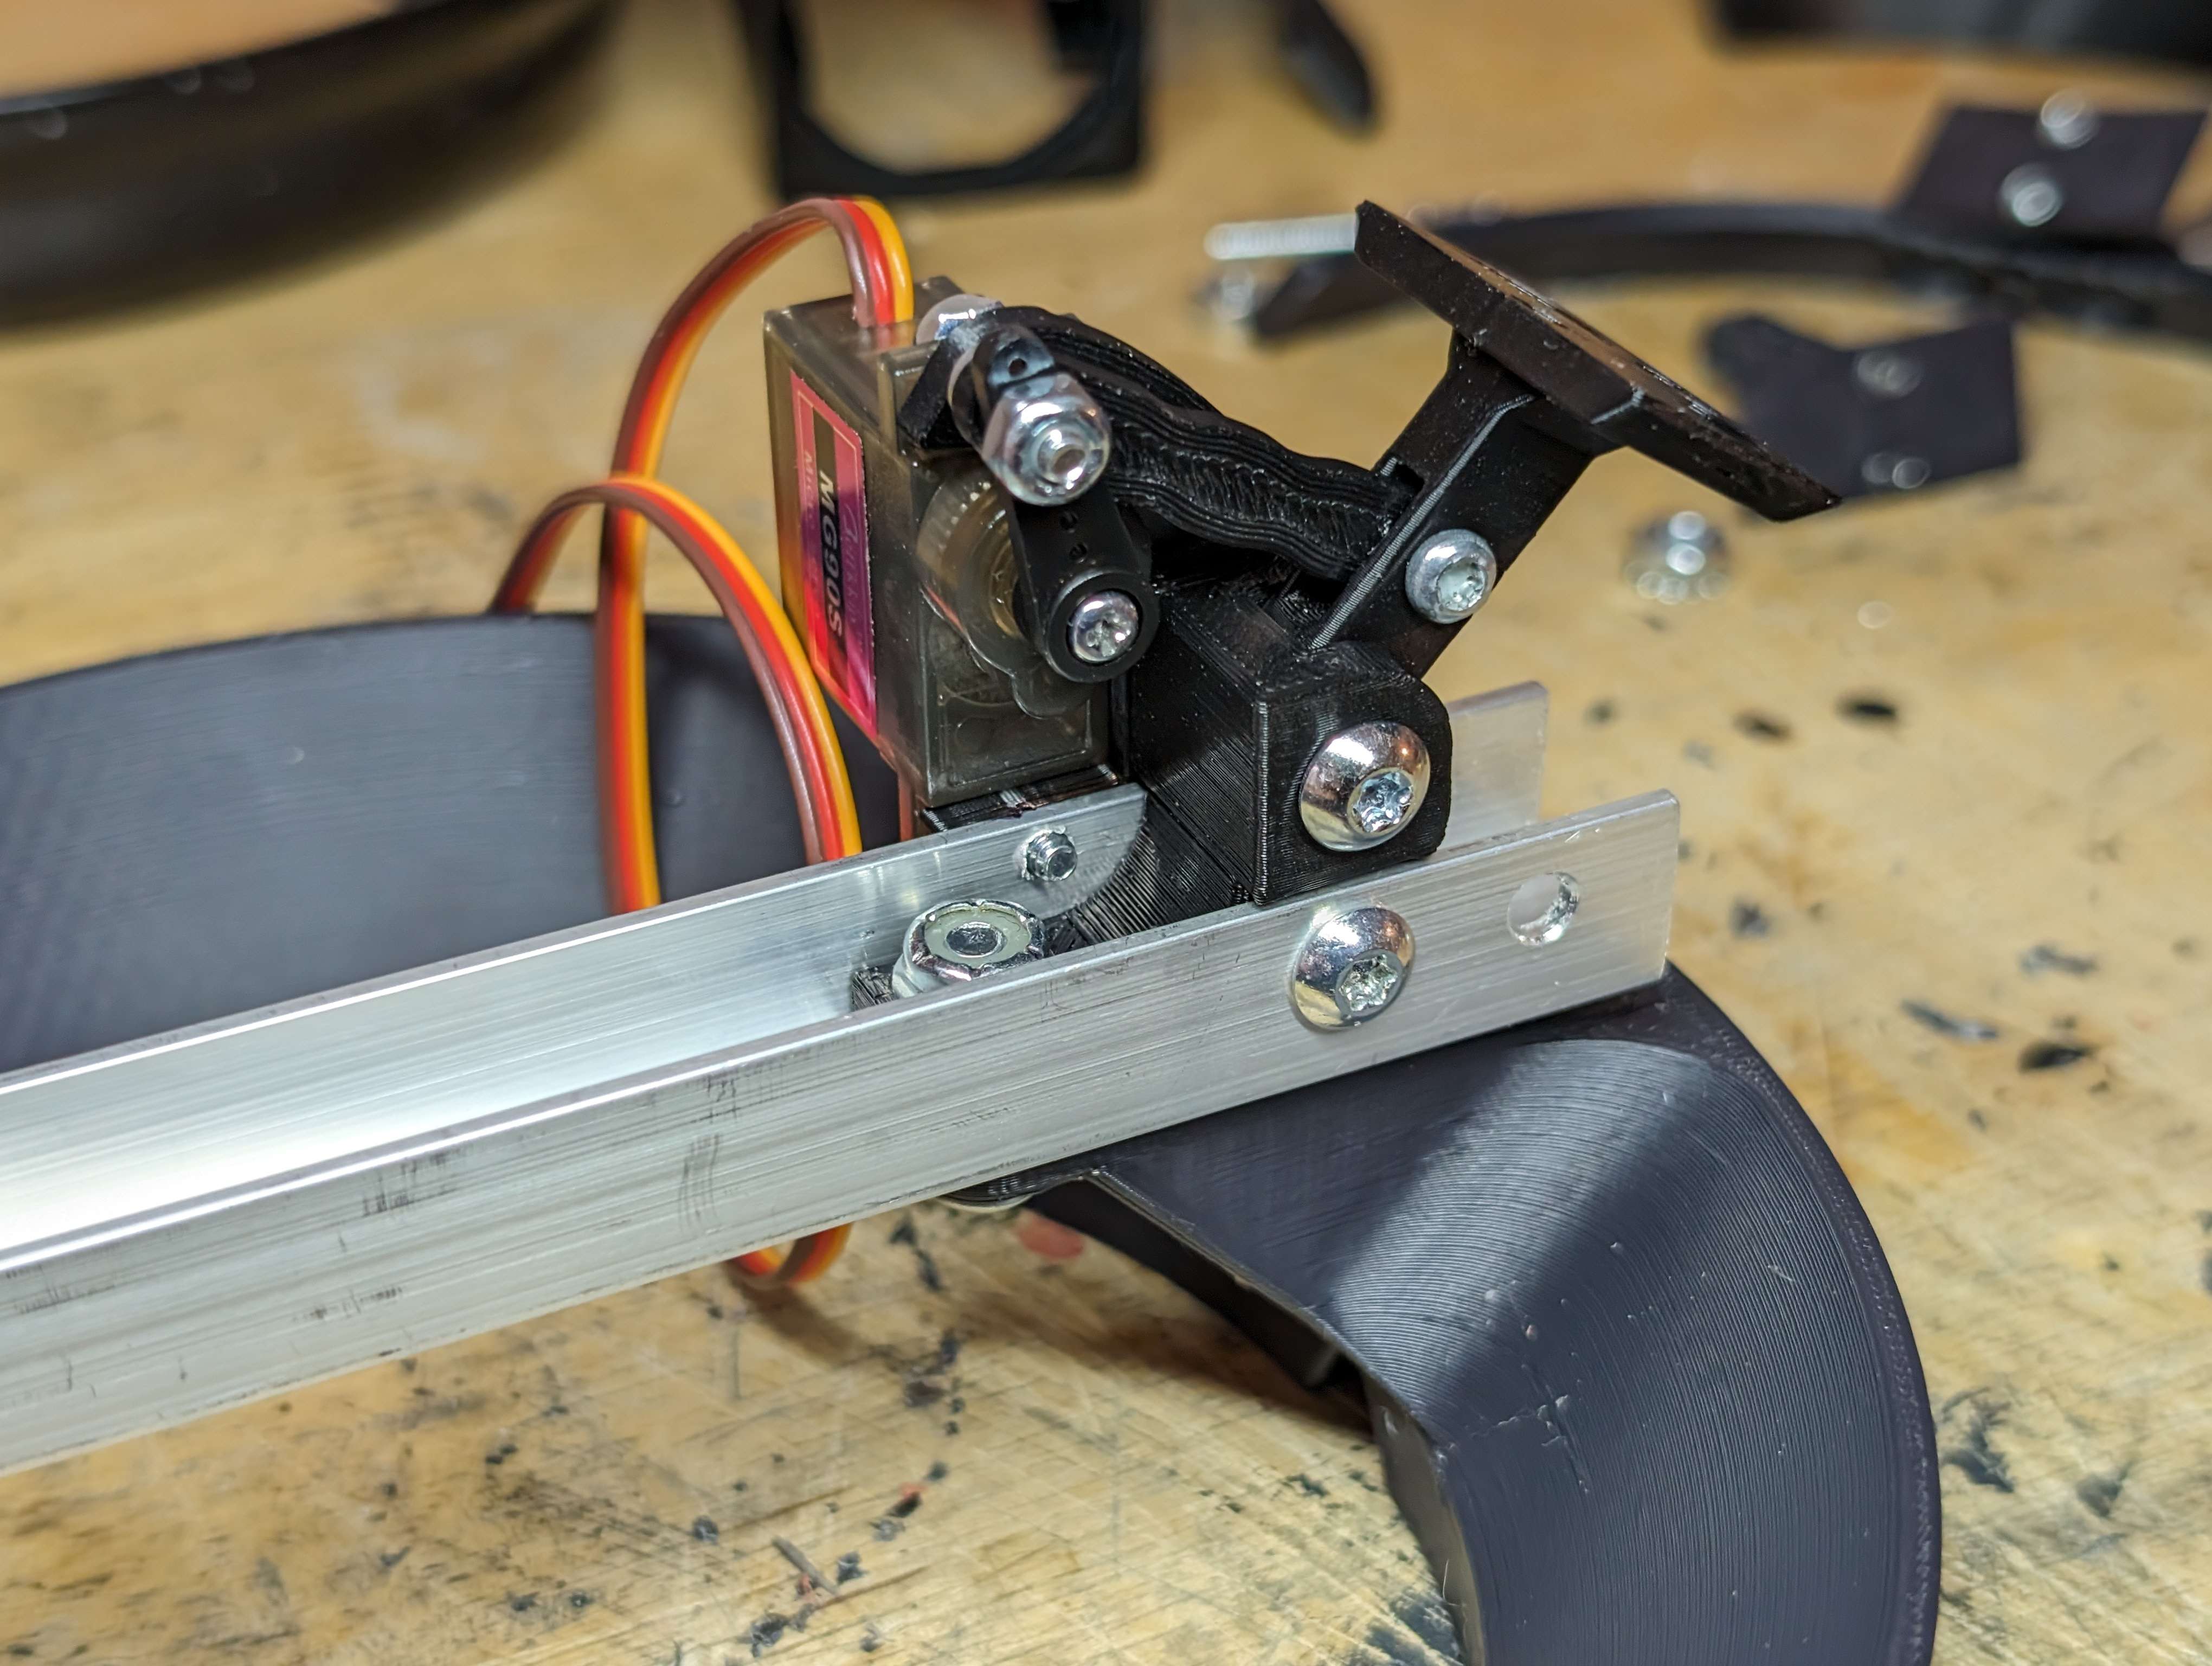
The linkage for the eyebrows all fits together and seems to work.
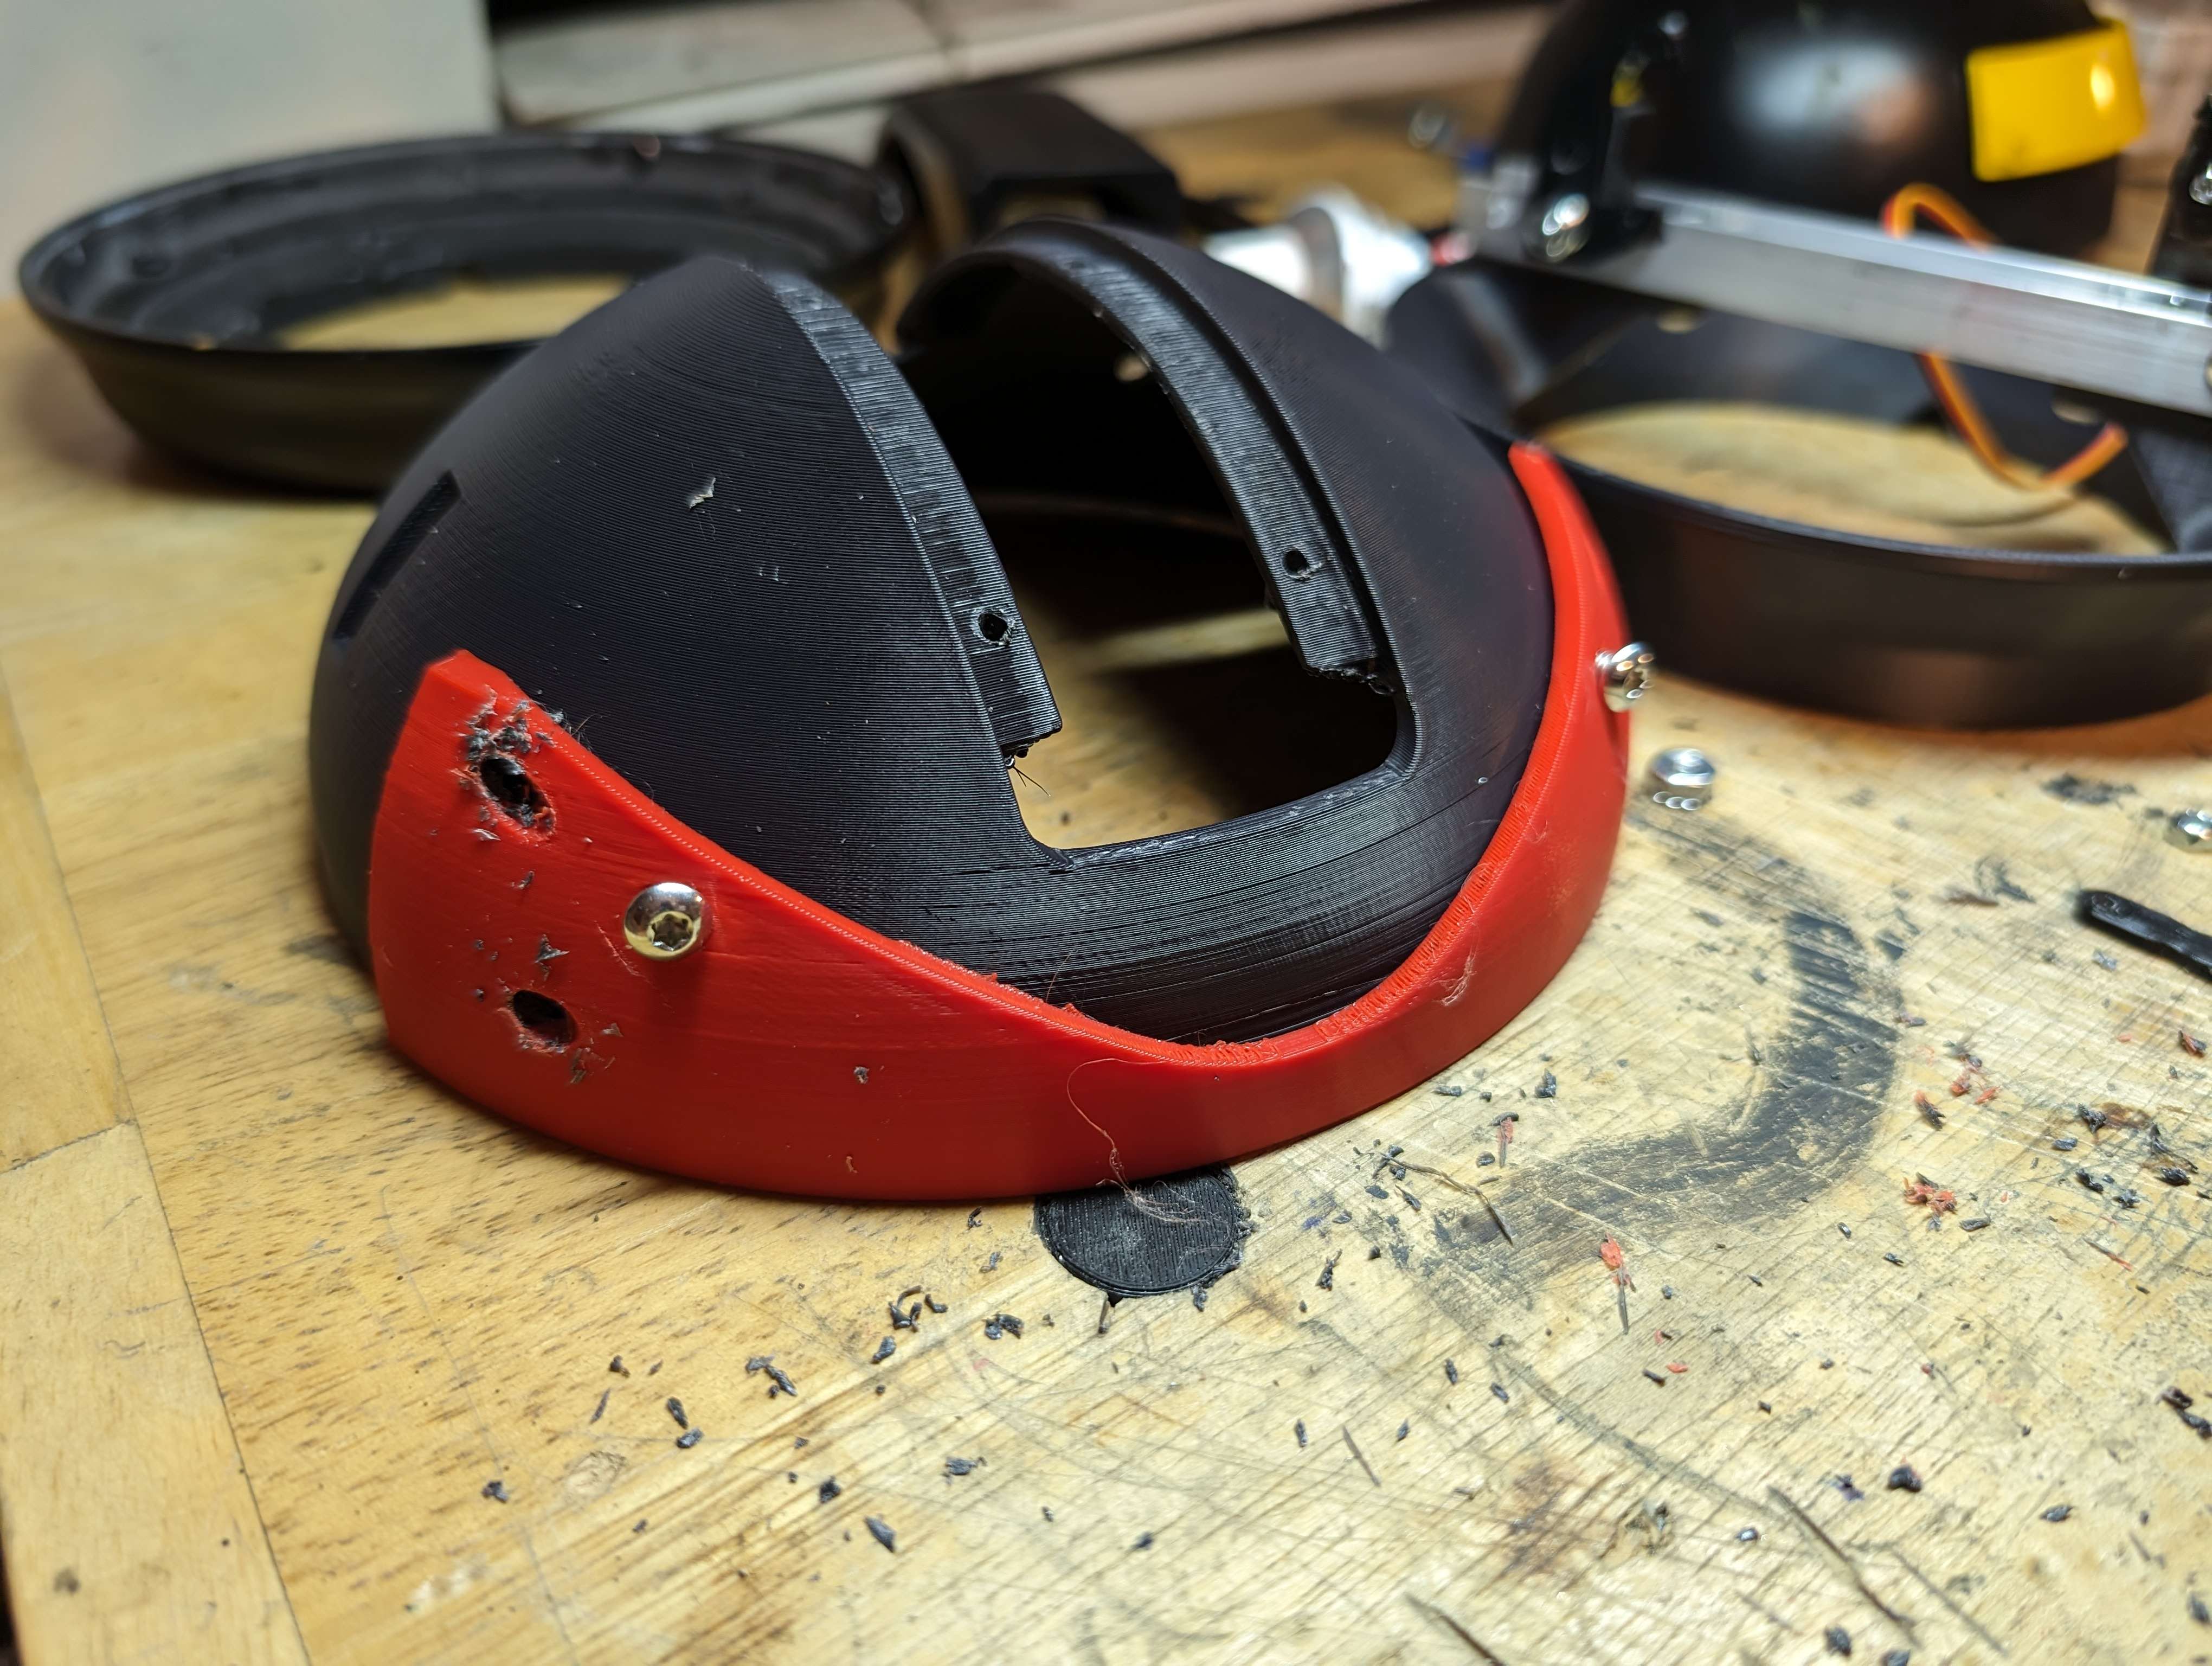
When I went to assemble everything, it was impossible to access some screws.
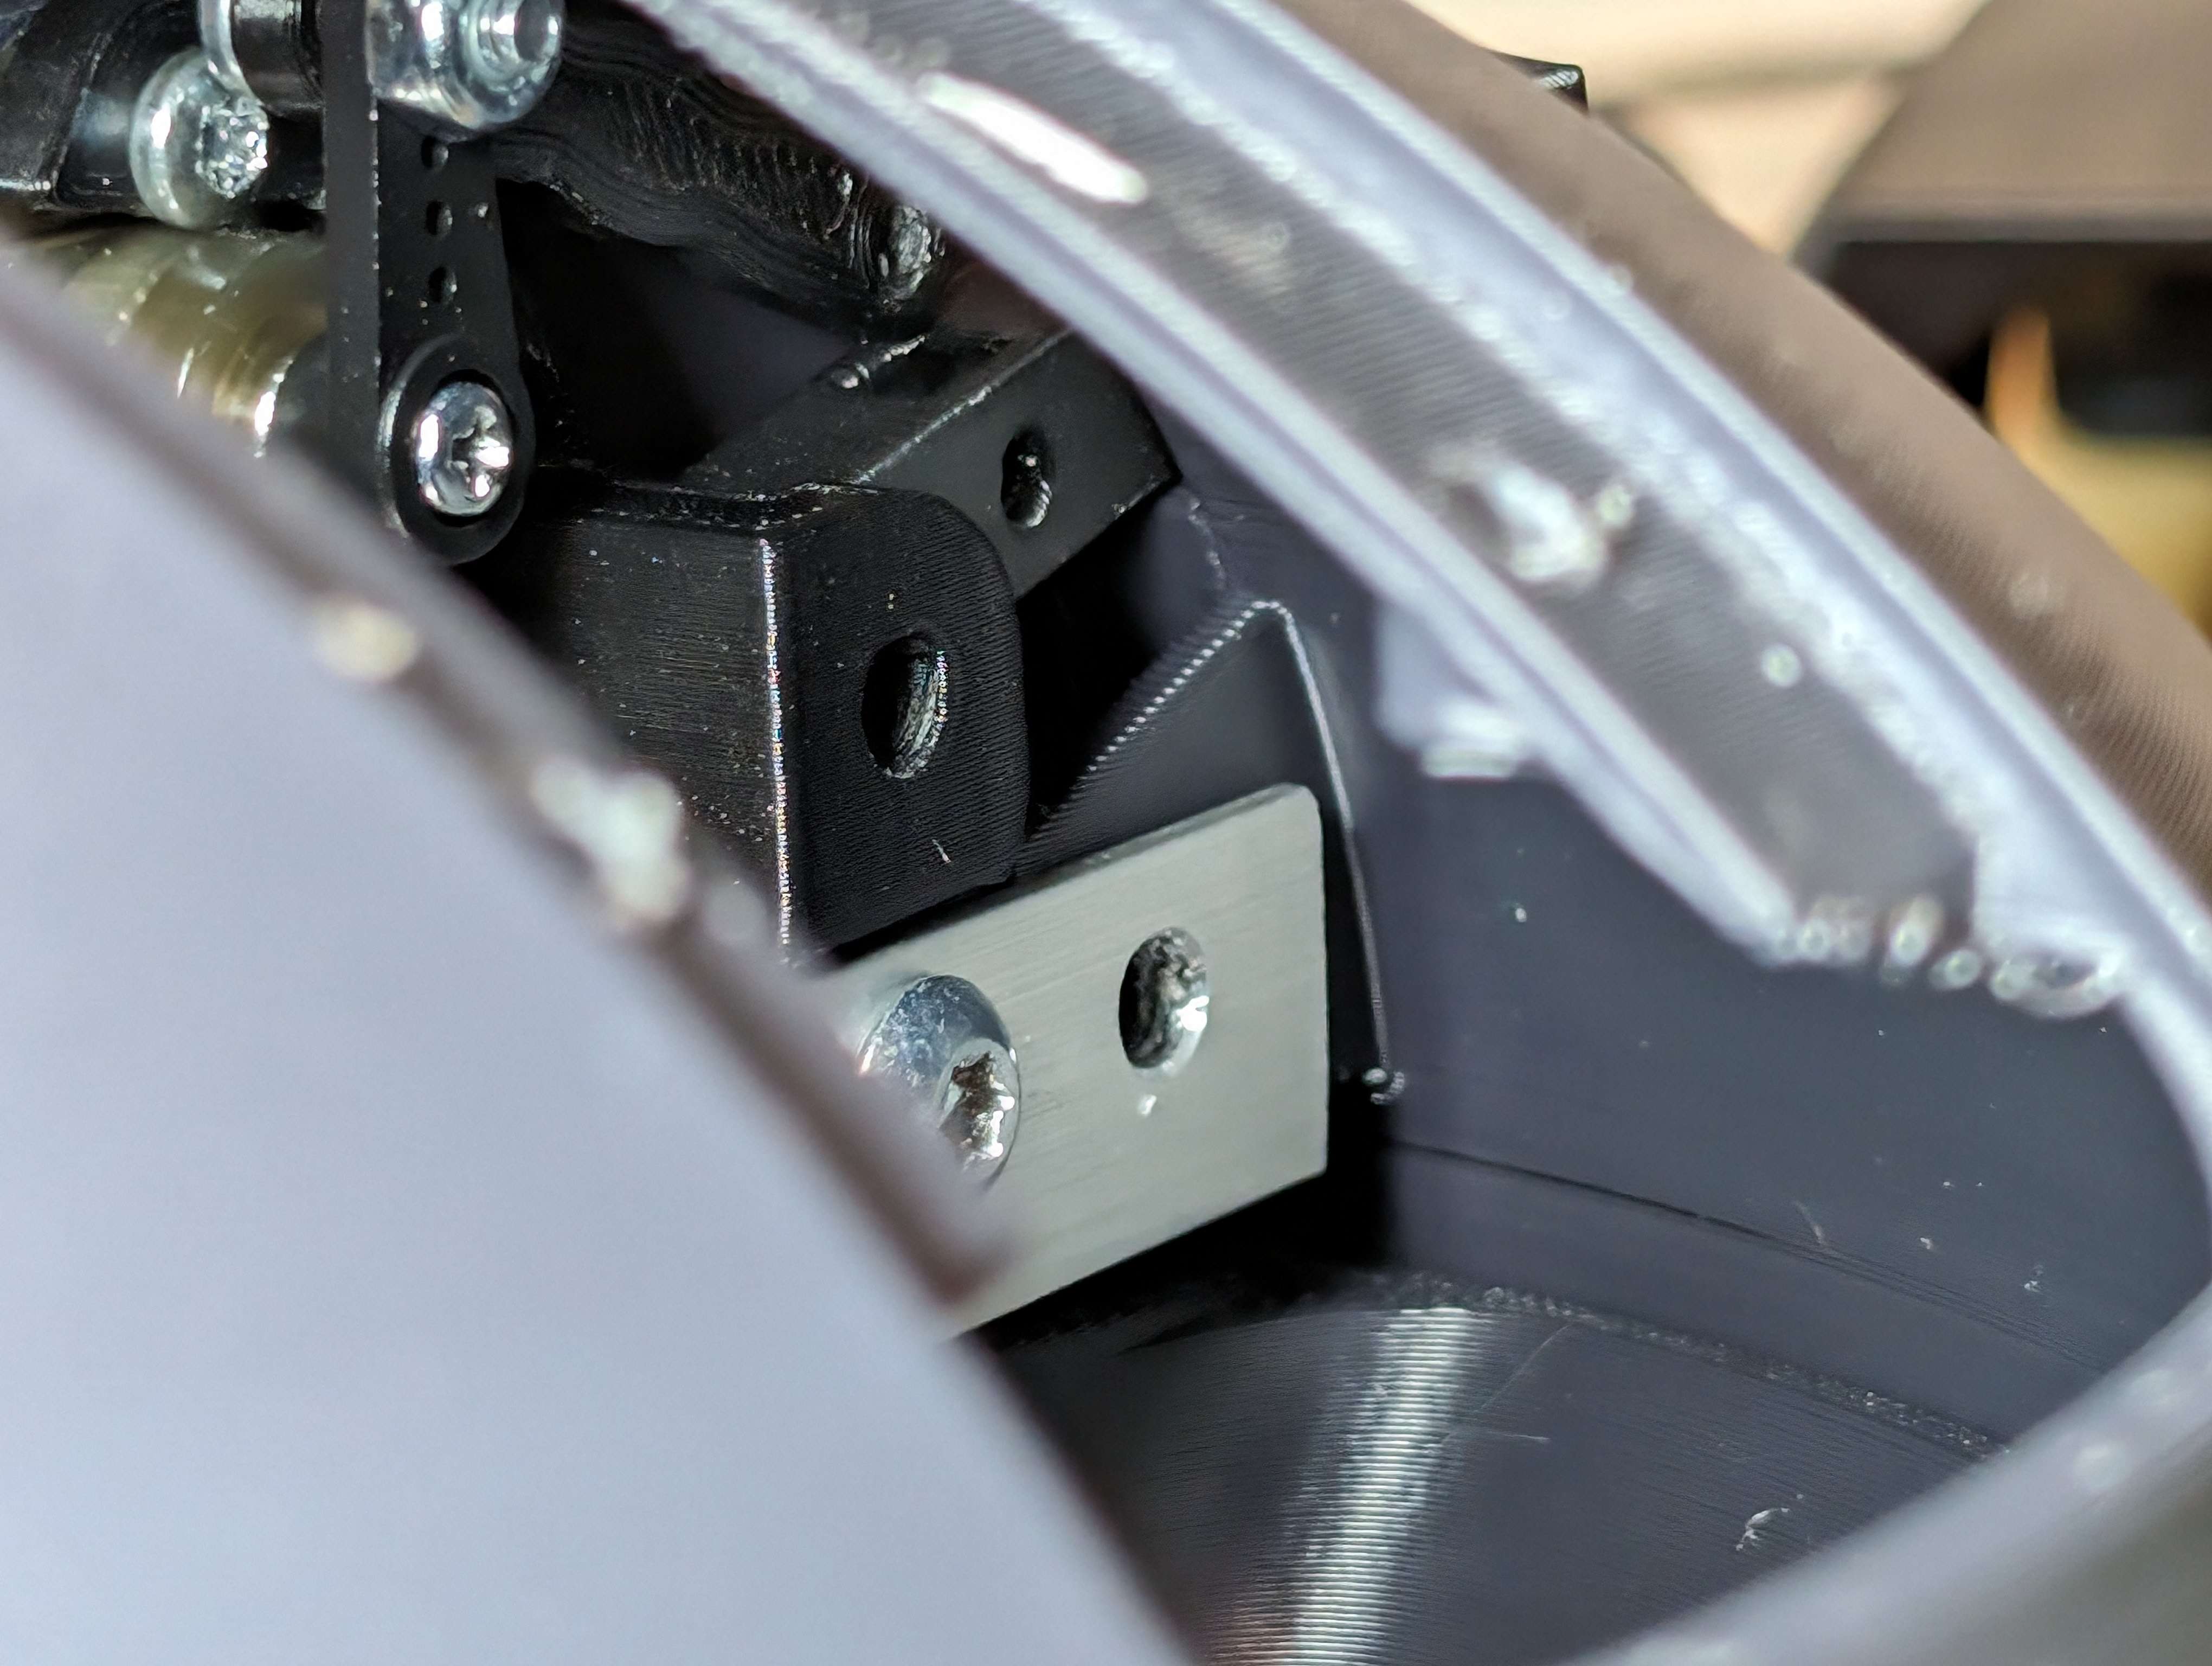
I tried to salvage this dome by drilling more through holes, but even after this, I found it was impossible to fit in the screw between the floating linkage and the eyebrow mount.
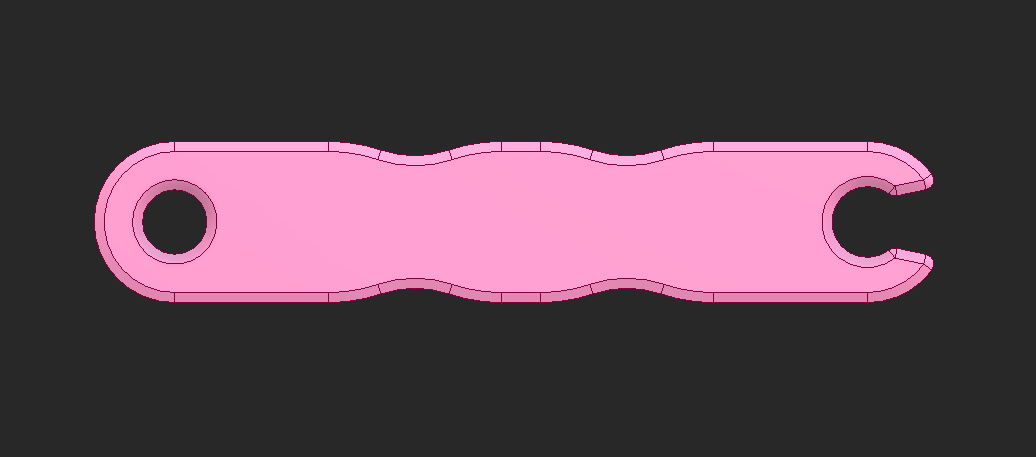
I modified the floating linkage to snap onto the eyebrow linkage.
The CAD I got for the servo had some discrepancies to what I have because the floating linkage does not sit centered.
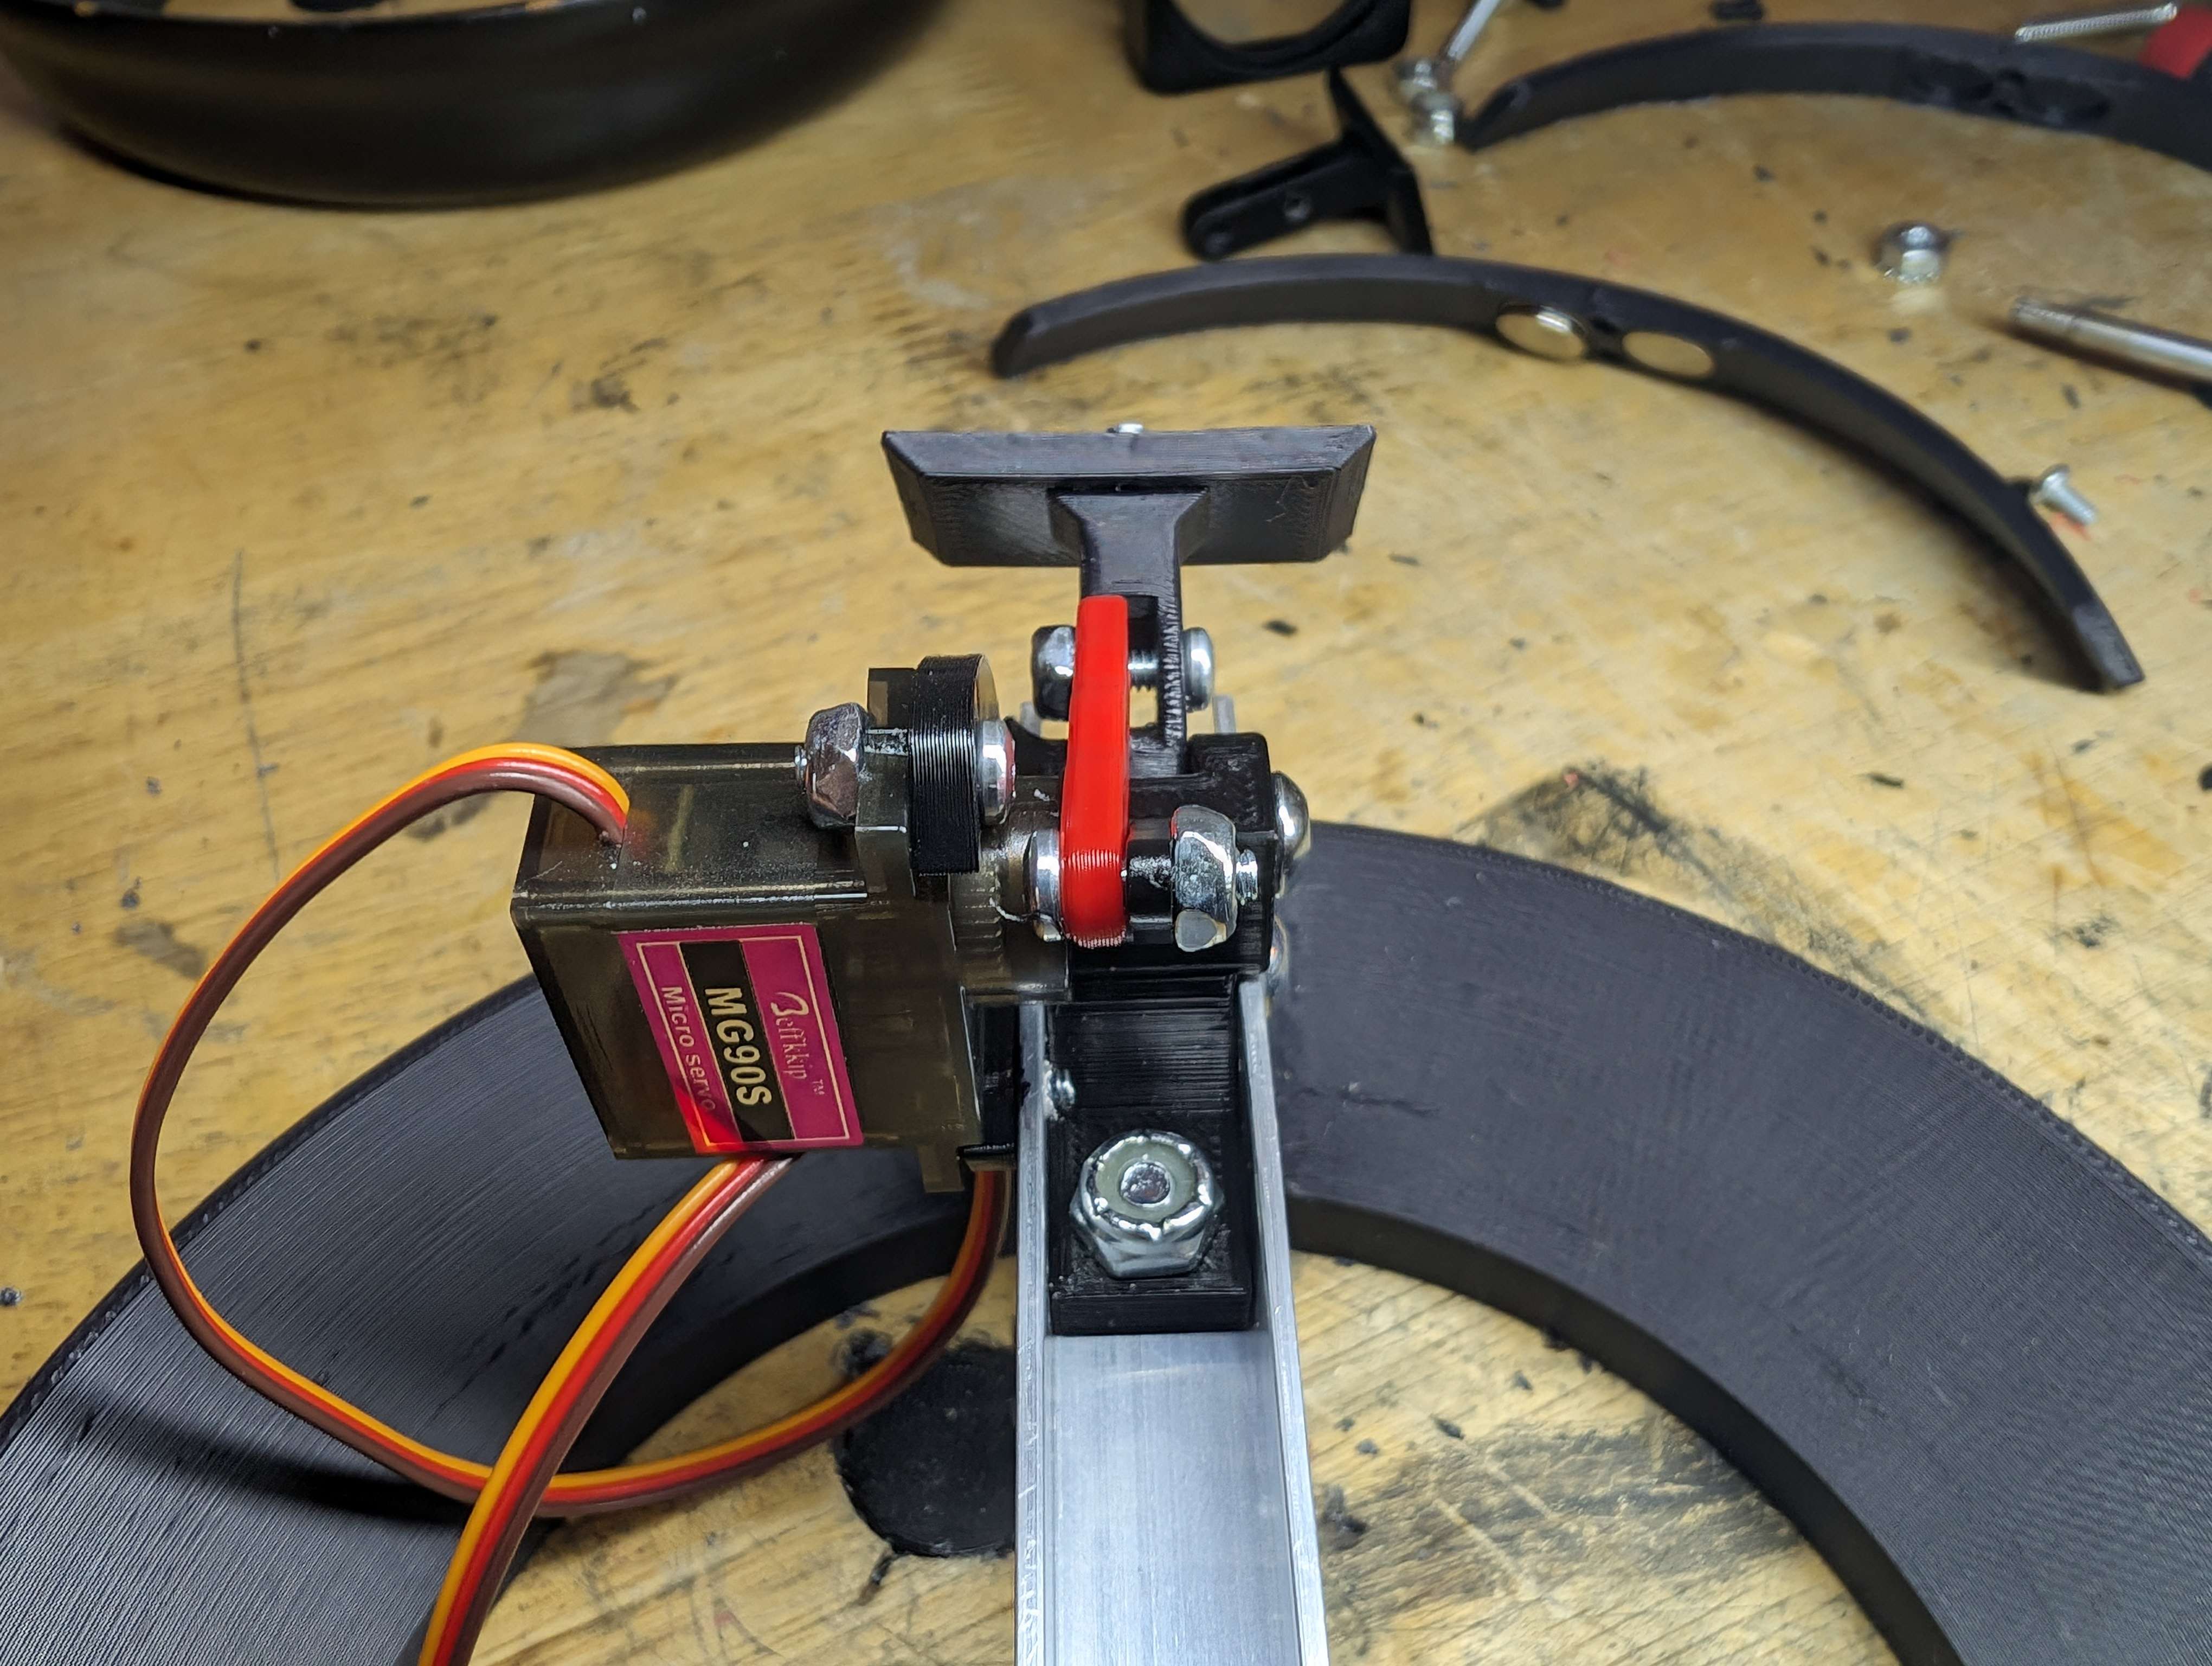
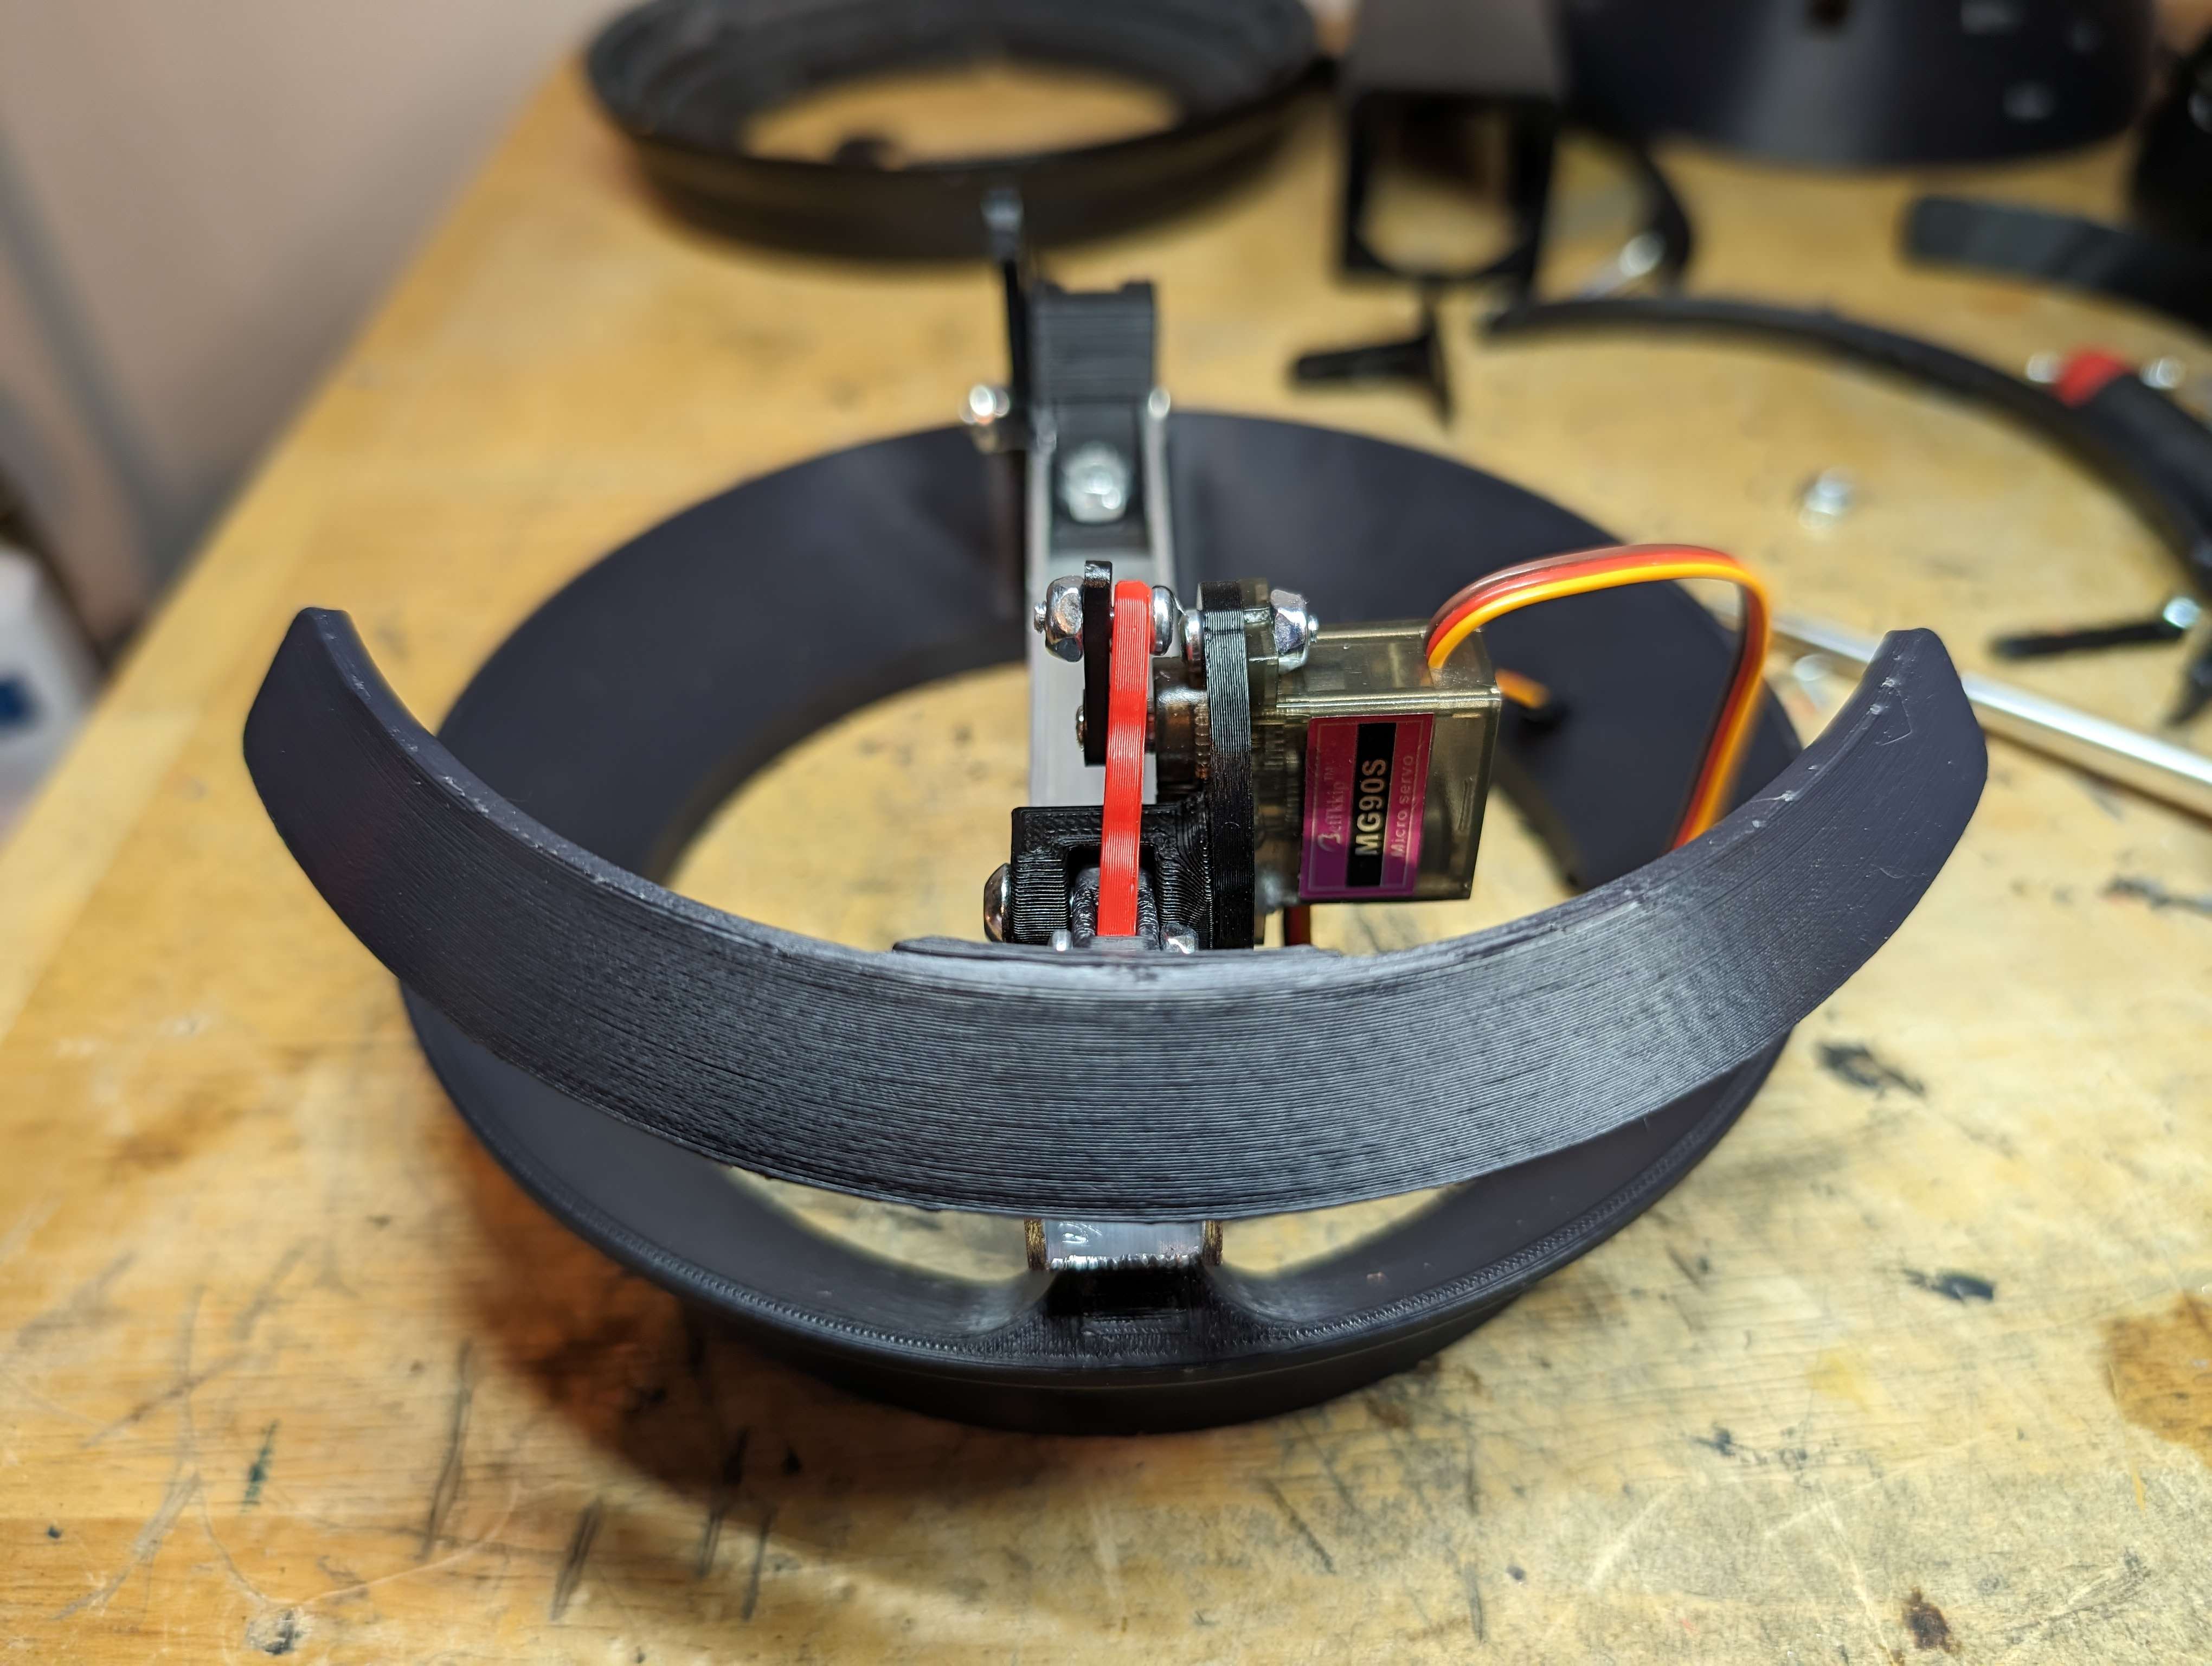
This is easily fixable by making the servo mounting plate thinner. I also reprinted the floating linkages in black so they aren't obviously there.
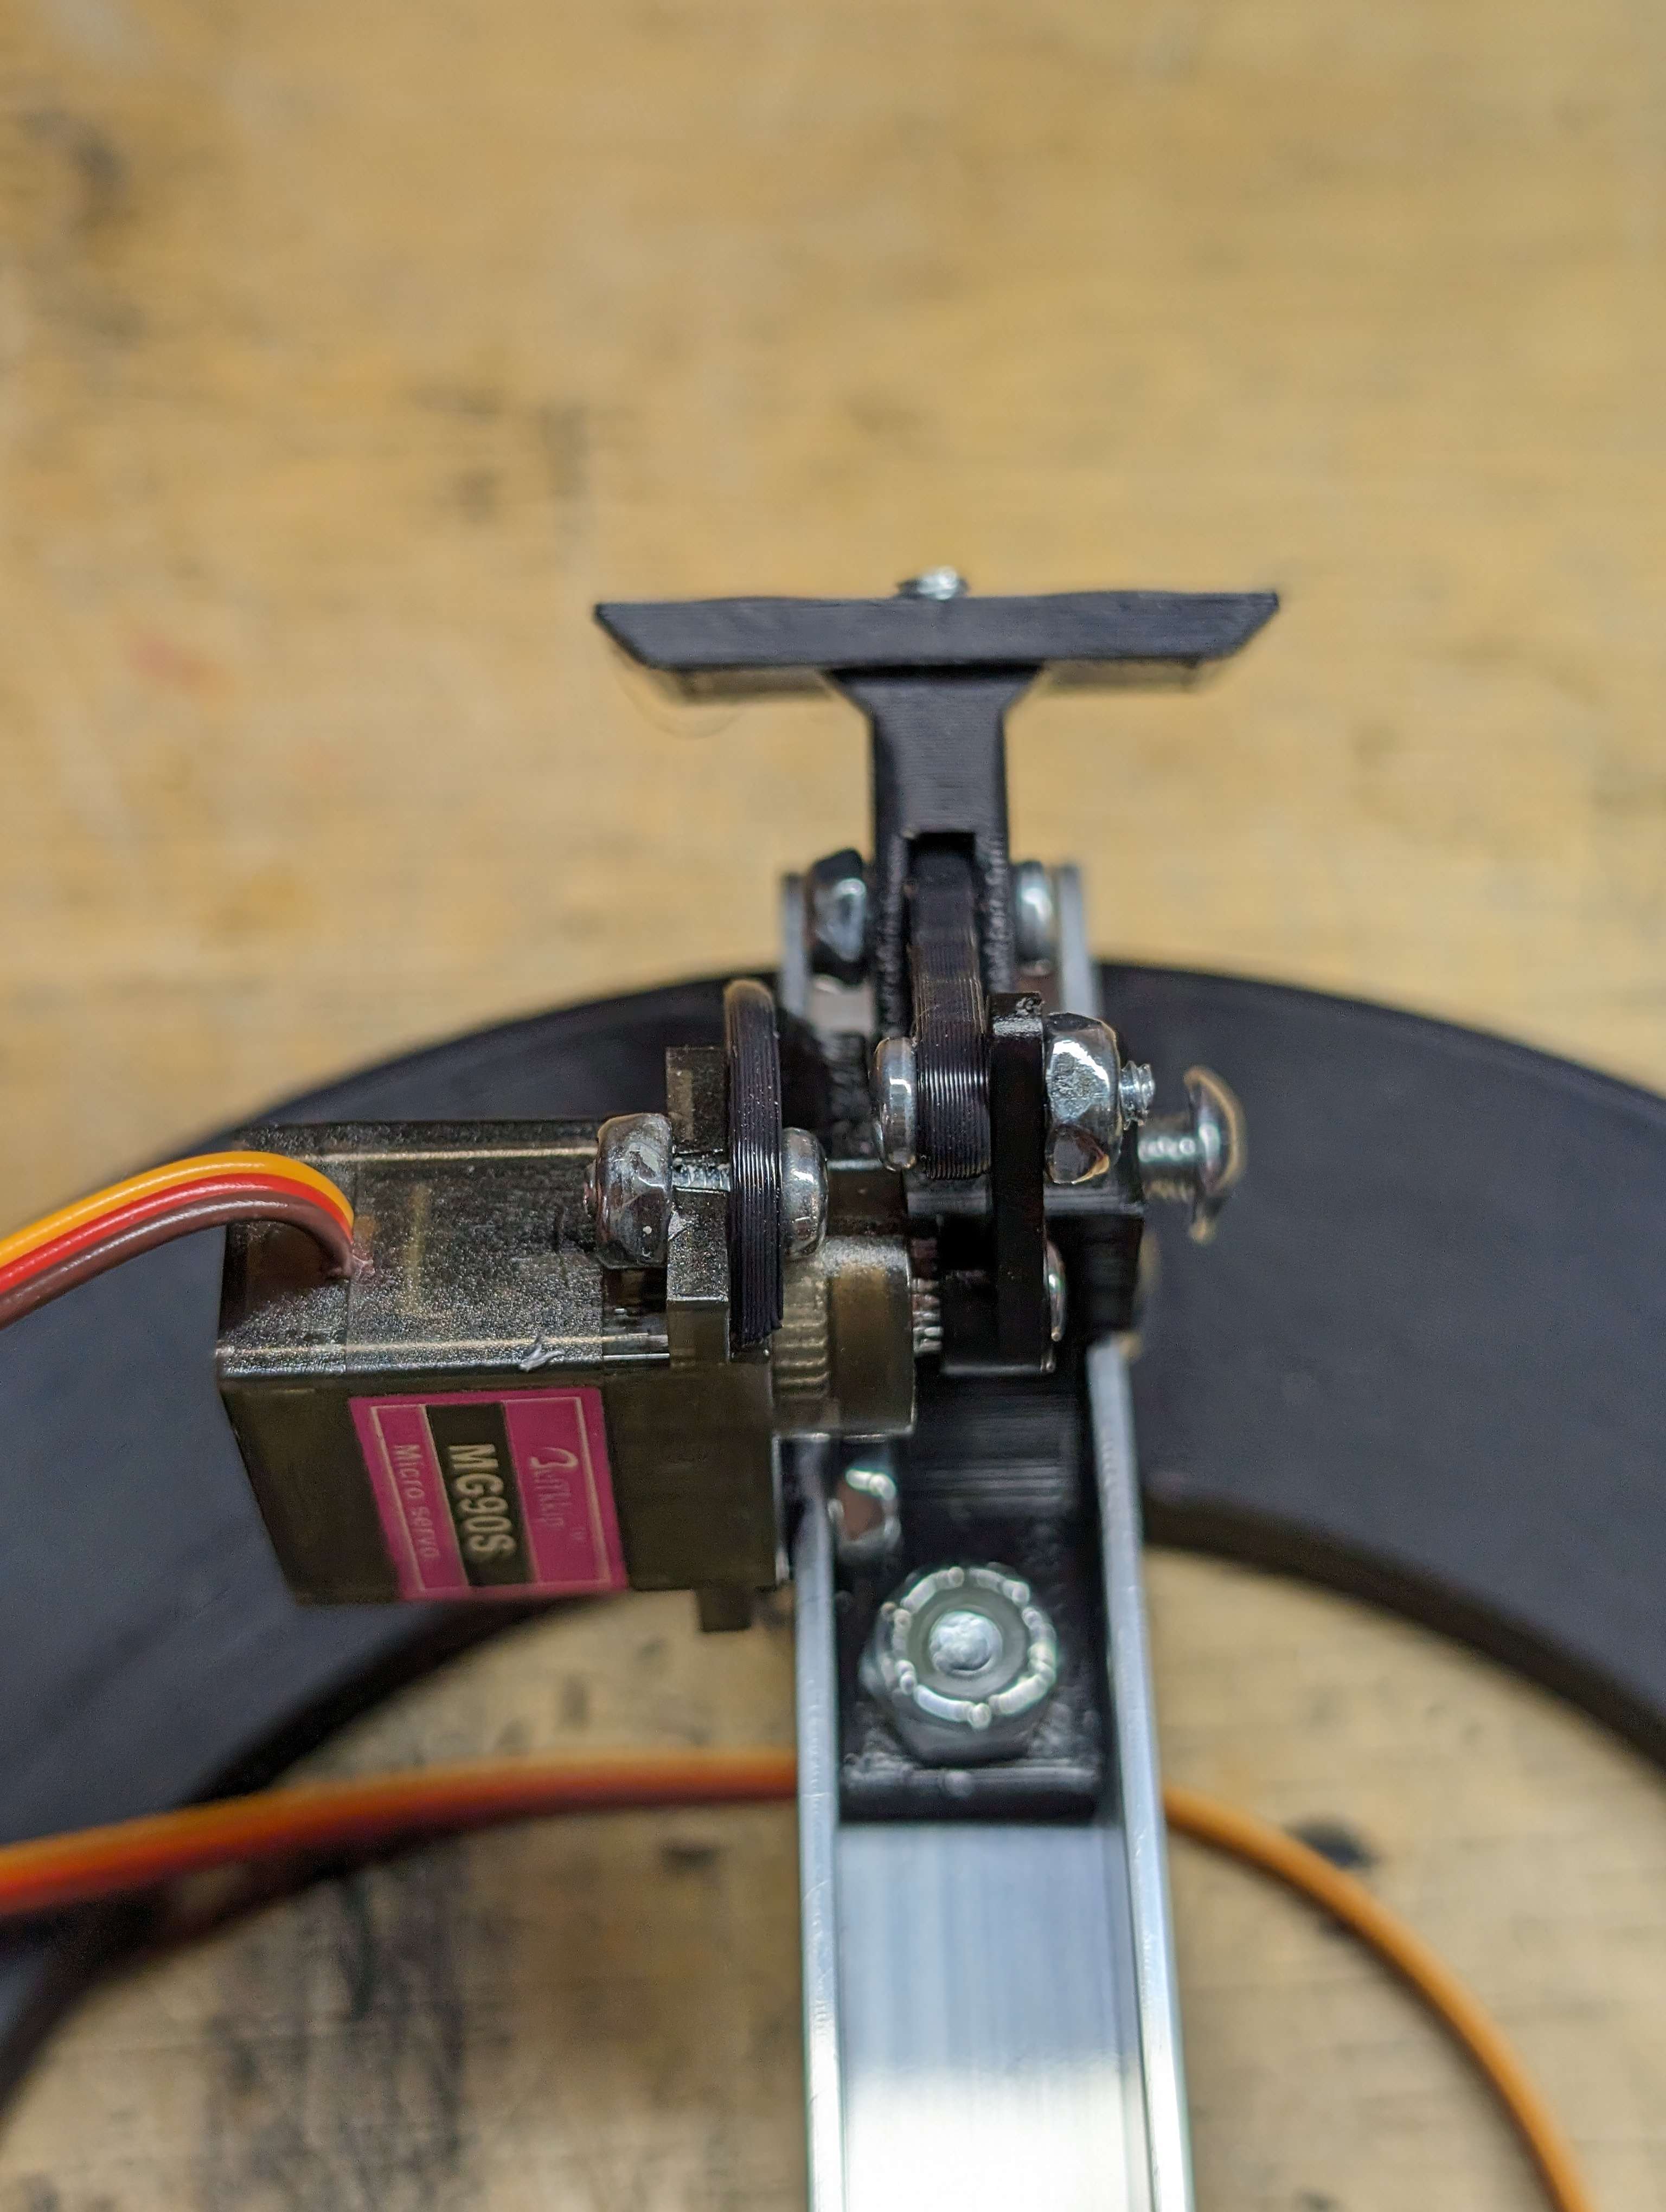
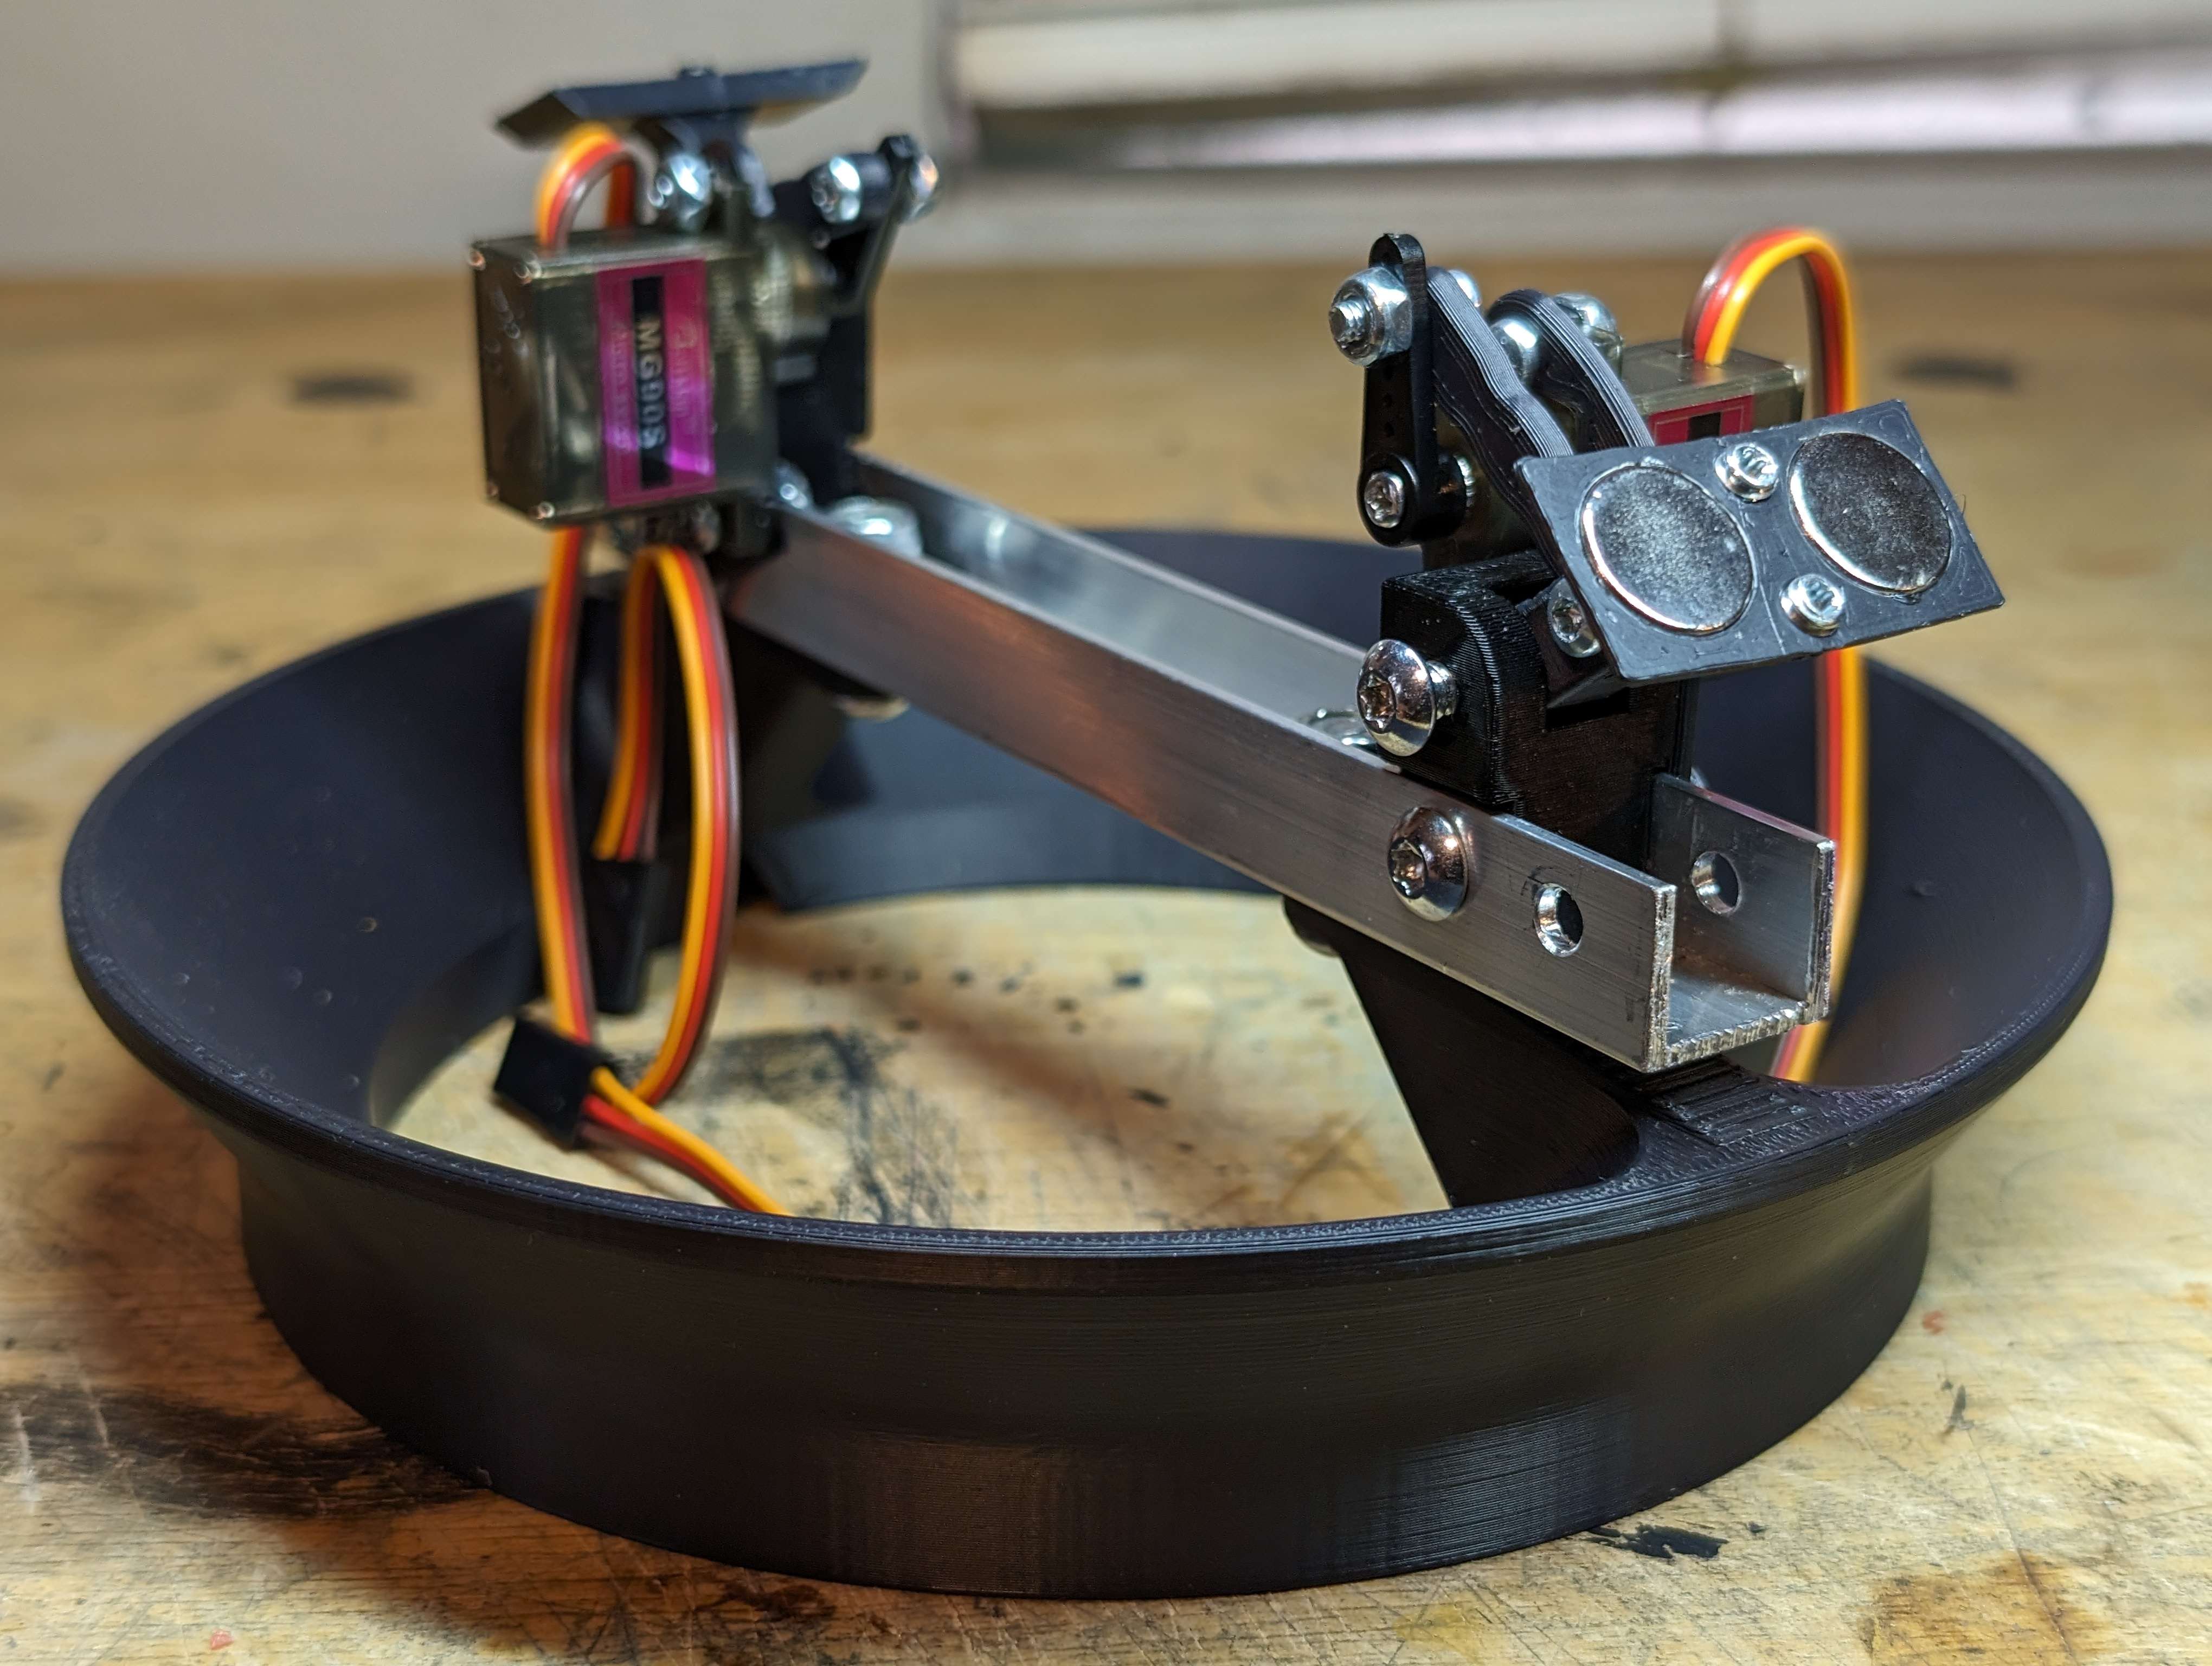
Both sides assembled!
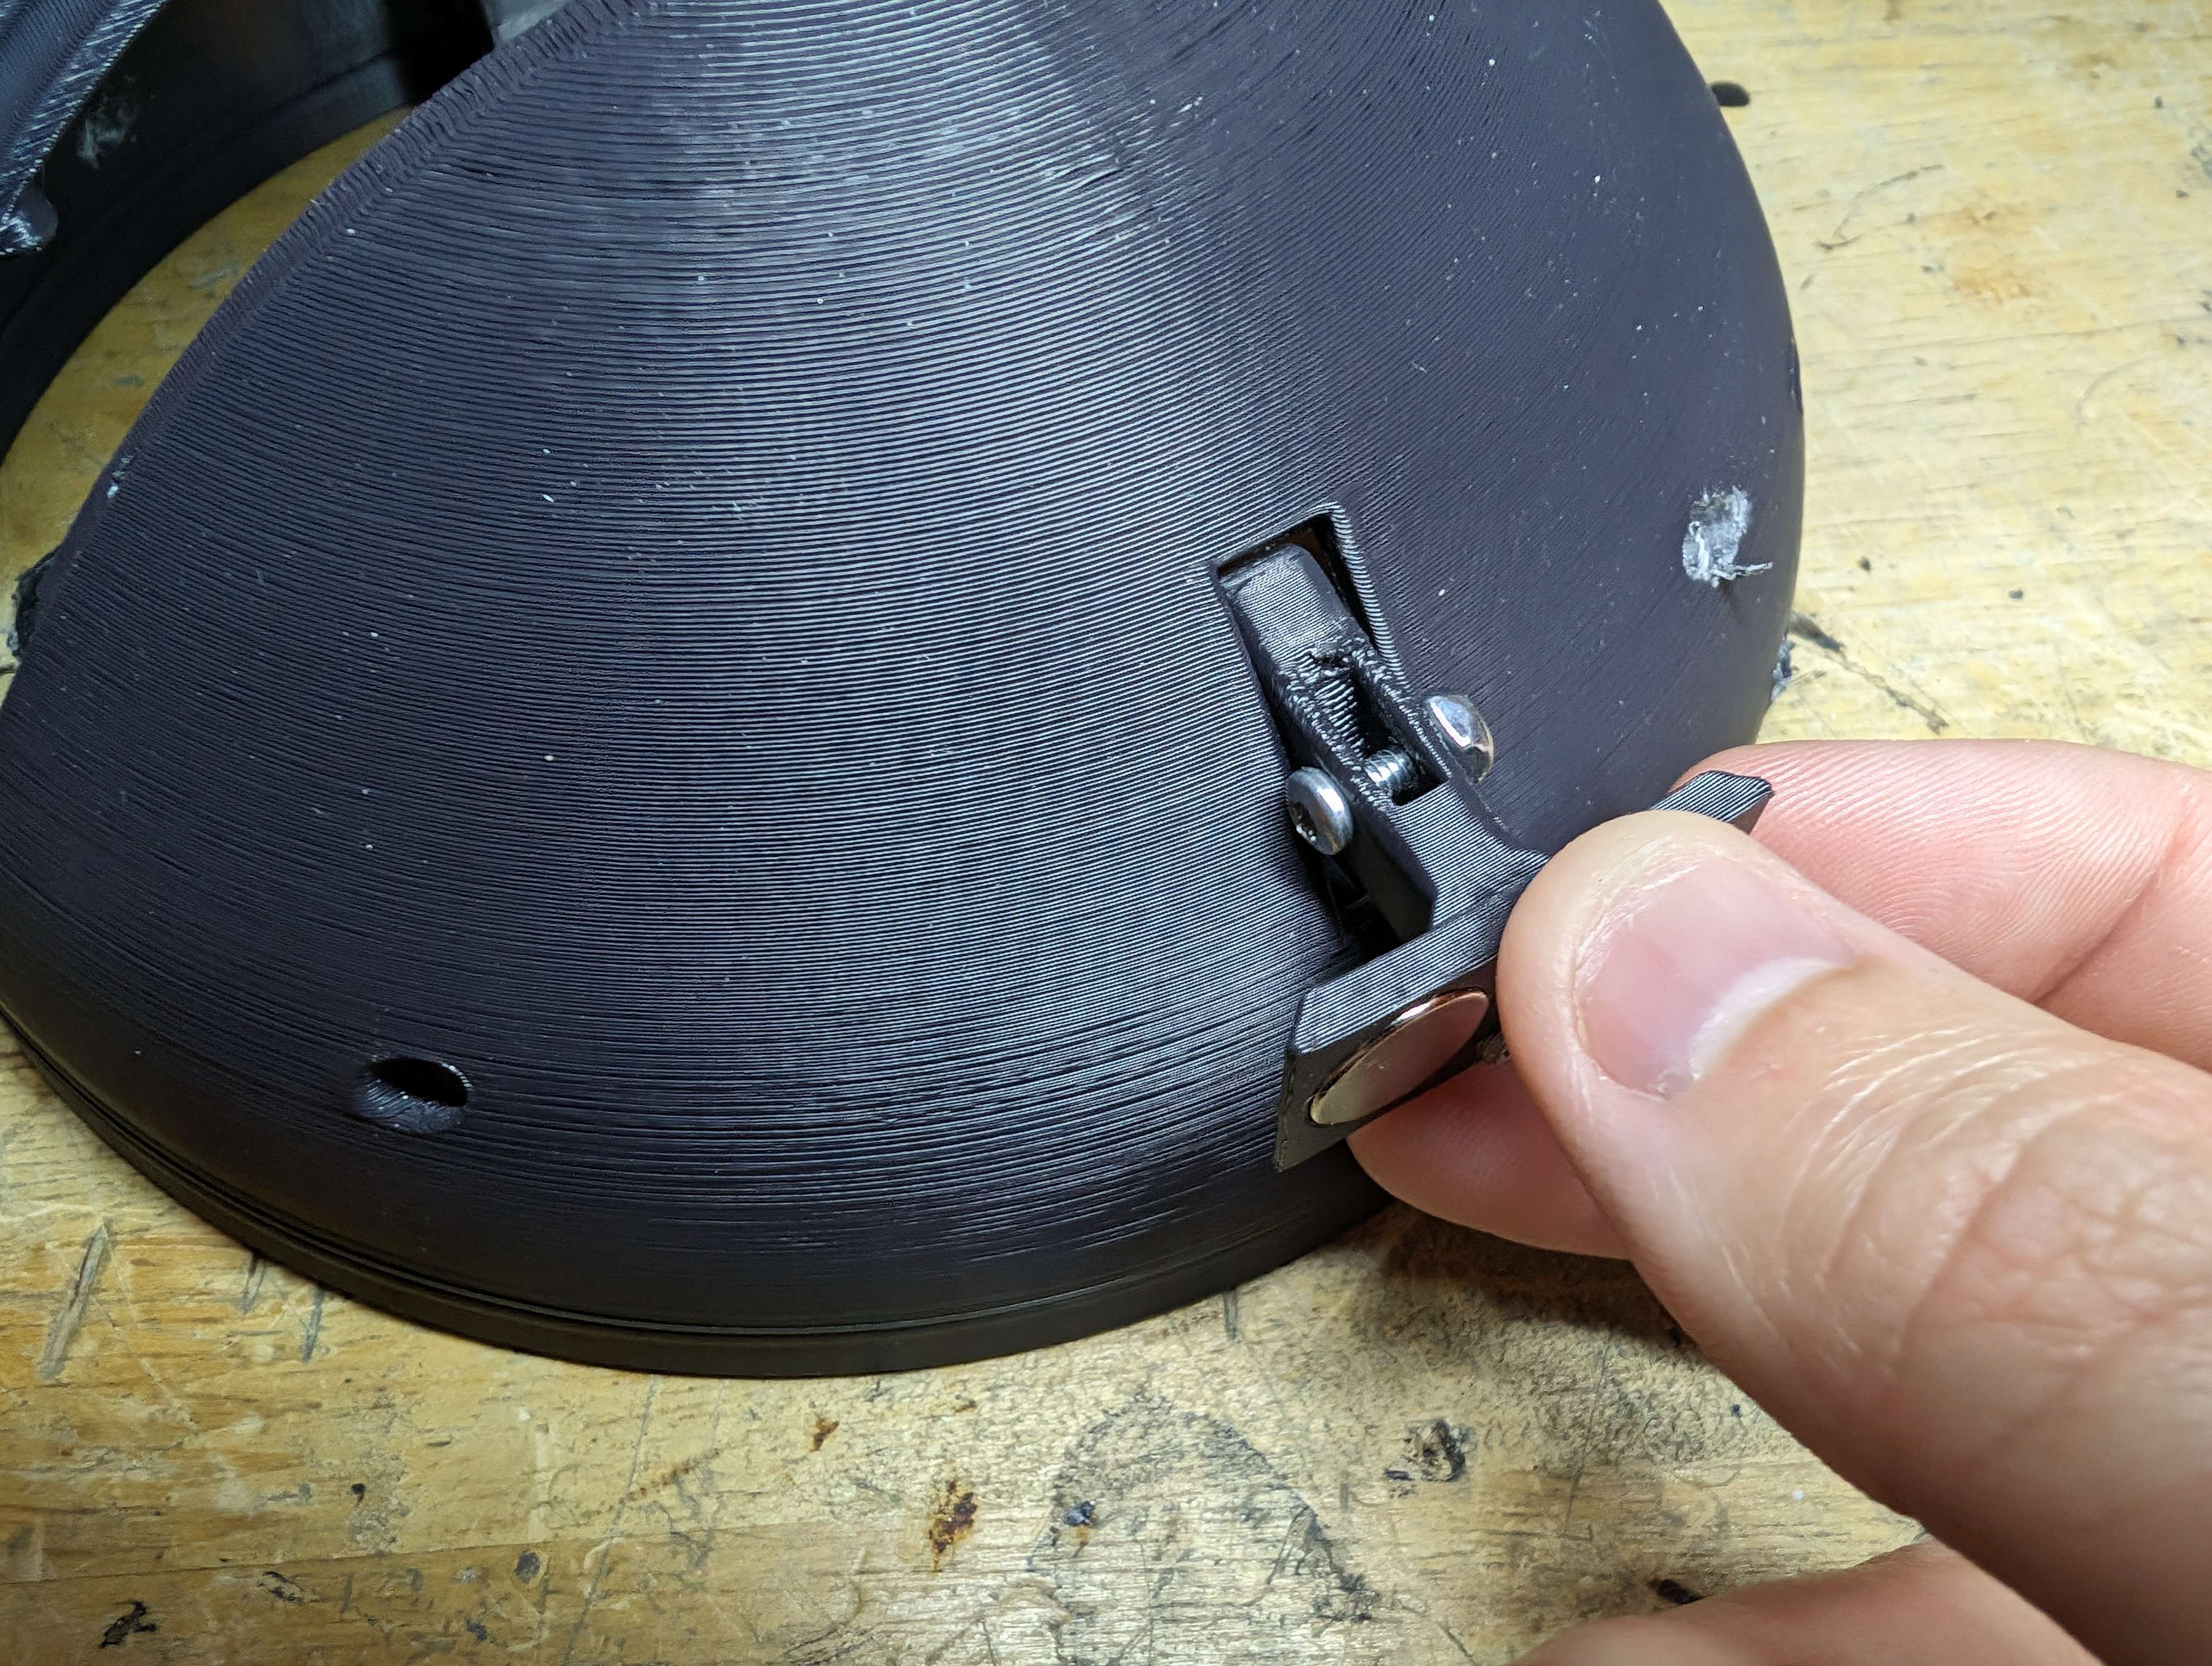
But now, with the new snap-on joint, the eyebrow linkage doesn't fit inside the slit in the head...
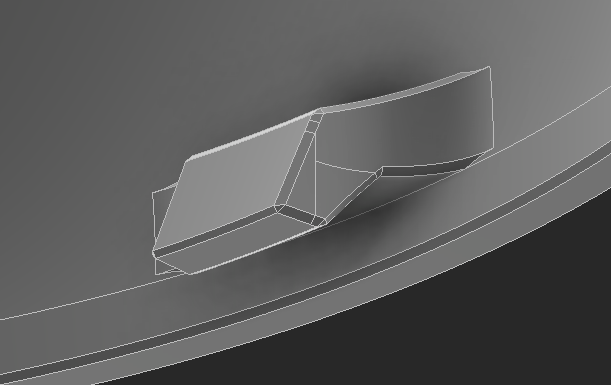
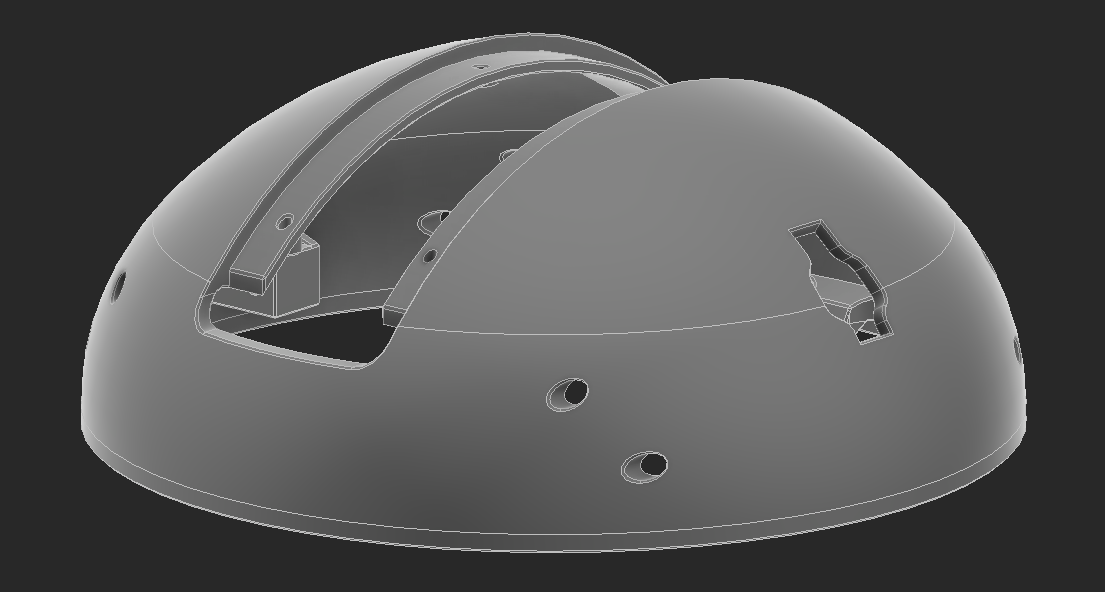
Now that I need to reprint the dome anyway, I'm going to add an improvement to it while fixing the problem above. To add a little more support between the two pieces that make up the head, I added these flanges to stop the head from being able to flex back and forward.
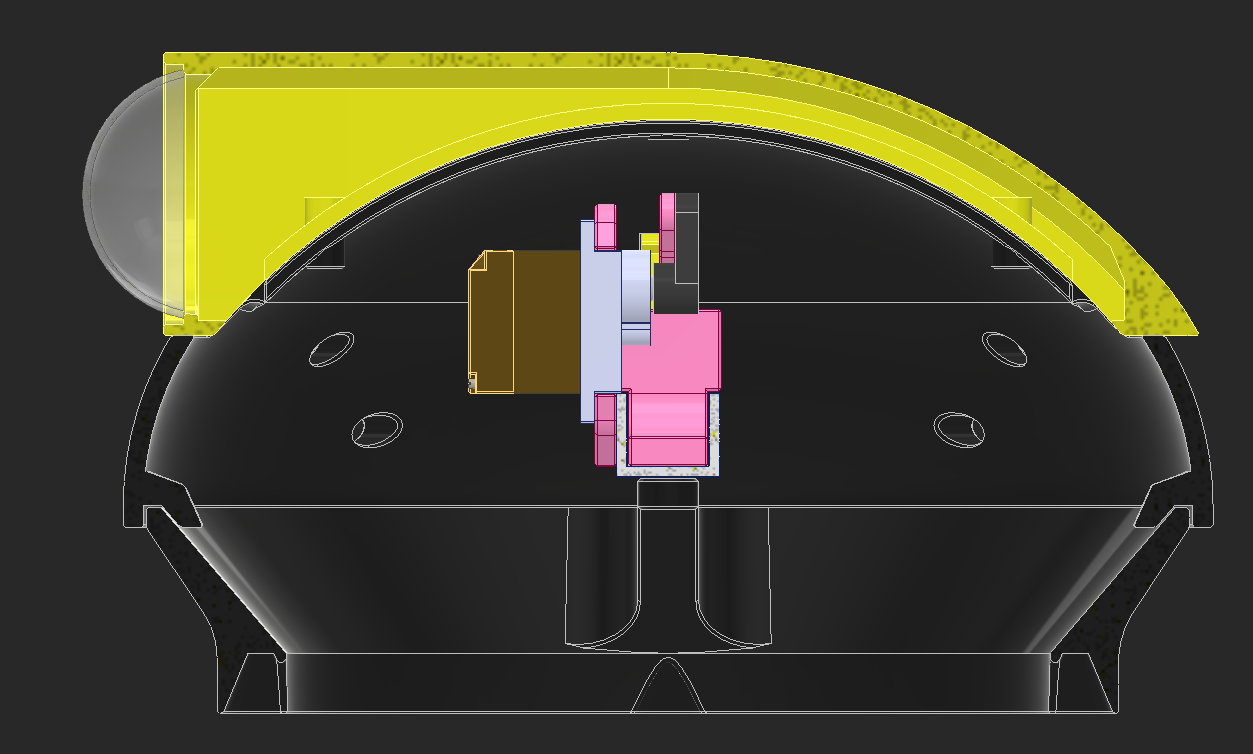
More through holes were added to make this possible to assemble, and the slits for the eyebrows were made larger. Now to print again!
Delta Linkage Design
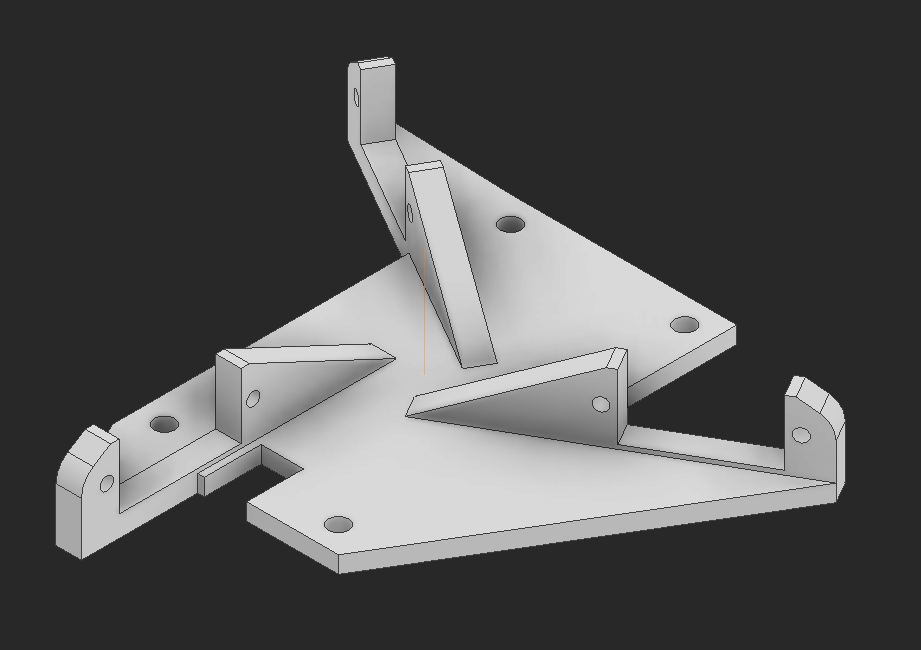
As a refresher, the goal of this is to replace the head tilt with the linkage in this video. This needs 3 servos all mounted at 60 degrees to each other, but each servo needs to be offset from the centerline of the robot by some amount, the same amount that the servos for the eyebrows are shifted by. To make this part more clear to me I started with this (gross) rough draft of the part. The way I made this part didn't let me easily change parameters but I know how to go into remaking it.
I remade the part and I can now adjust every dimension of the motor mount relative to the center of the robot (and the center of this part).
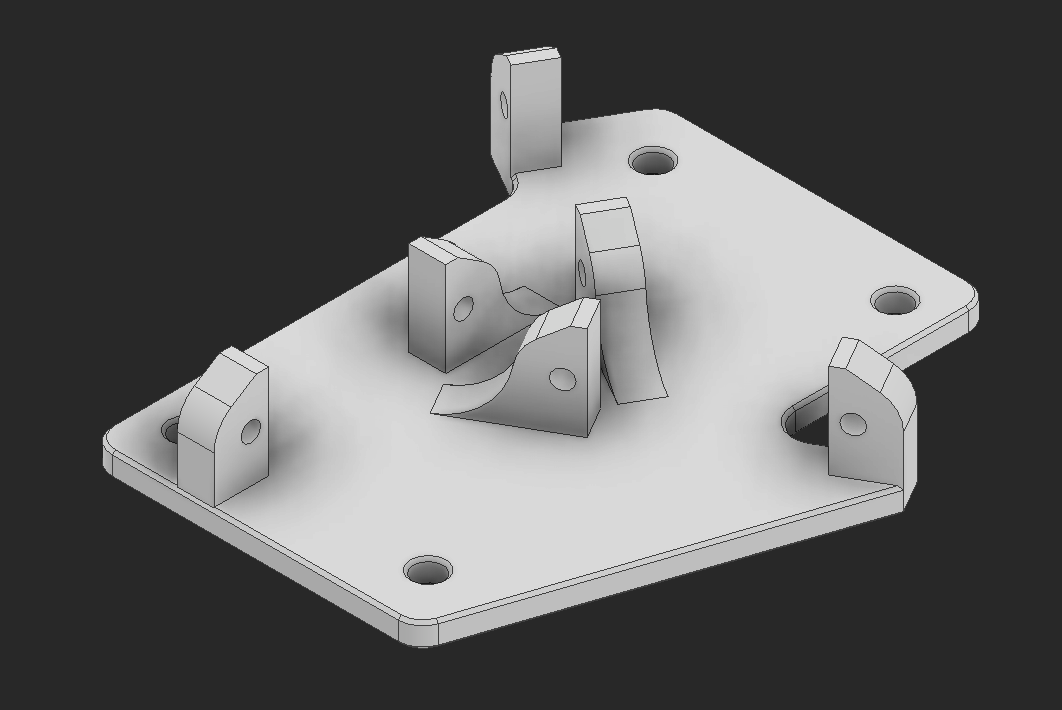
This servo mount will screw into the top of the "T" structure in the droid.
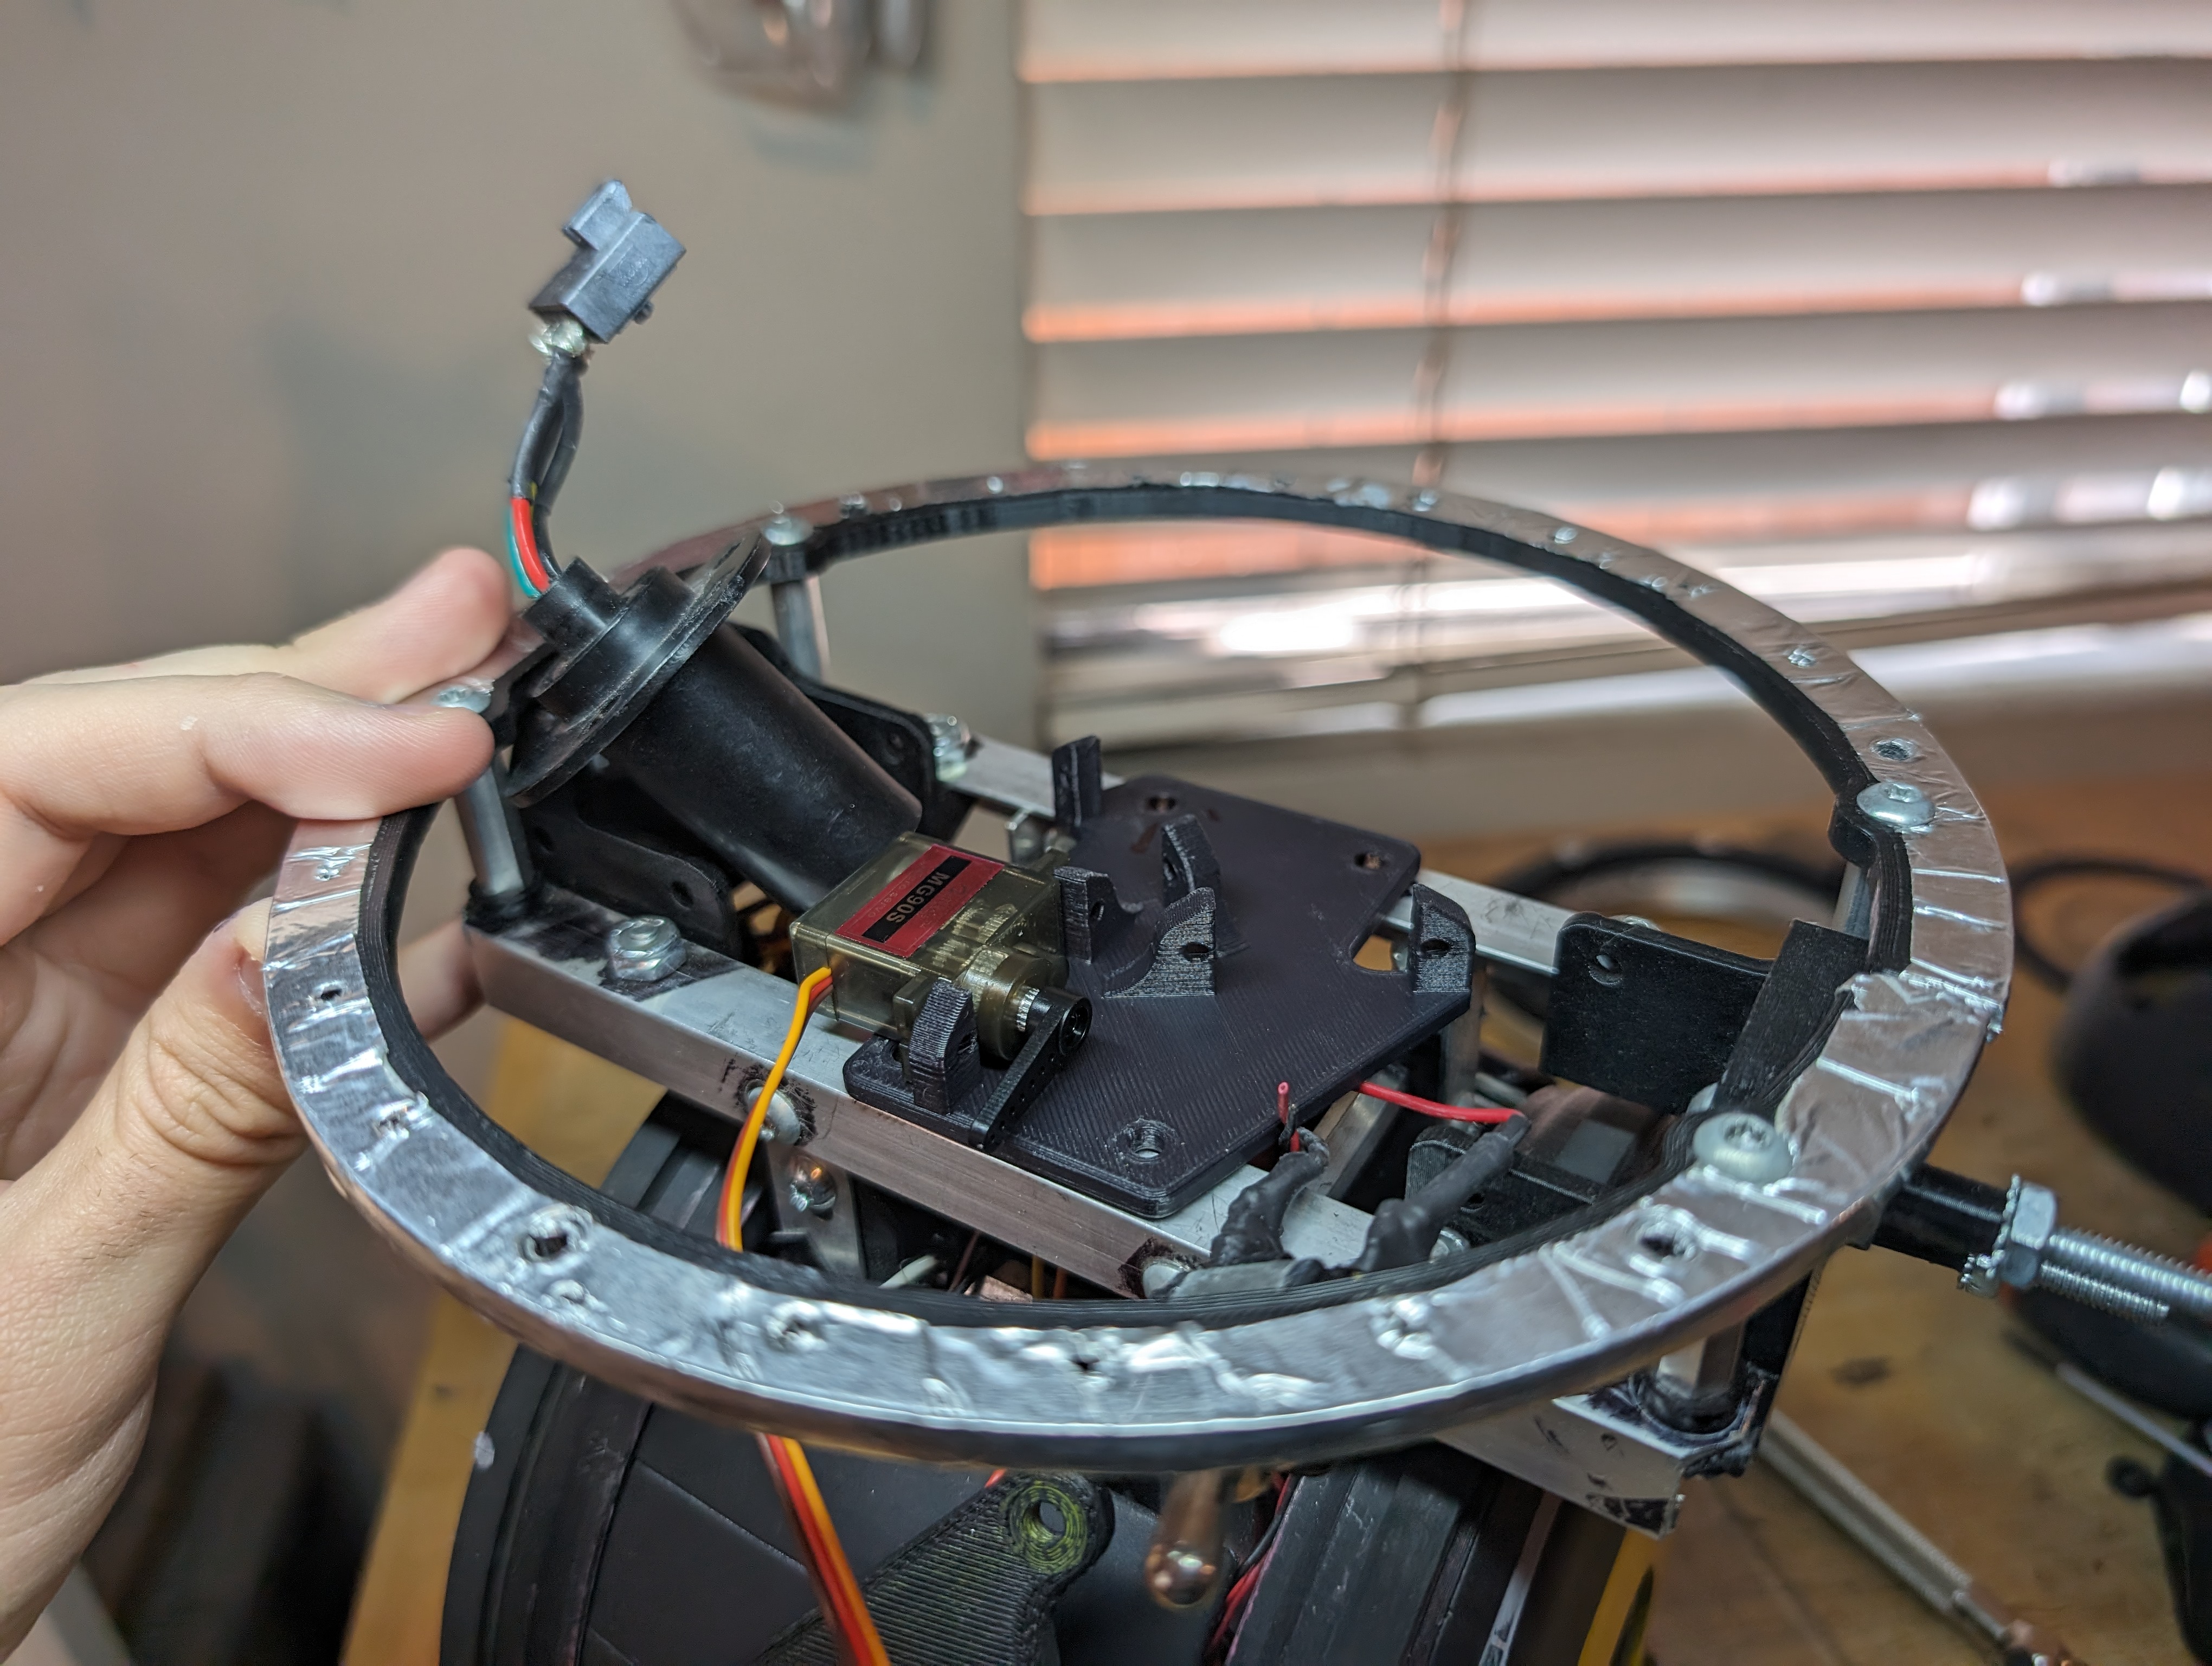
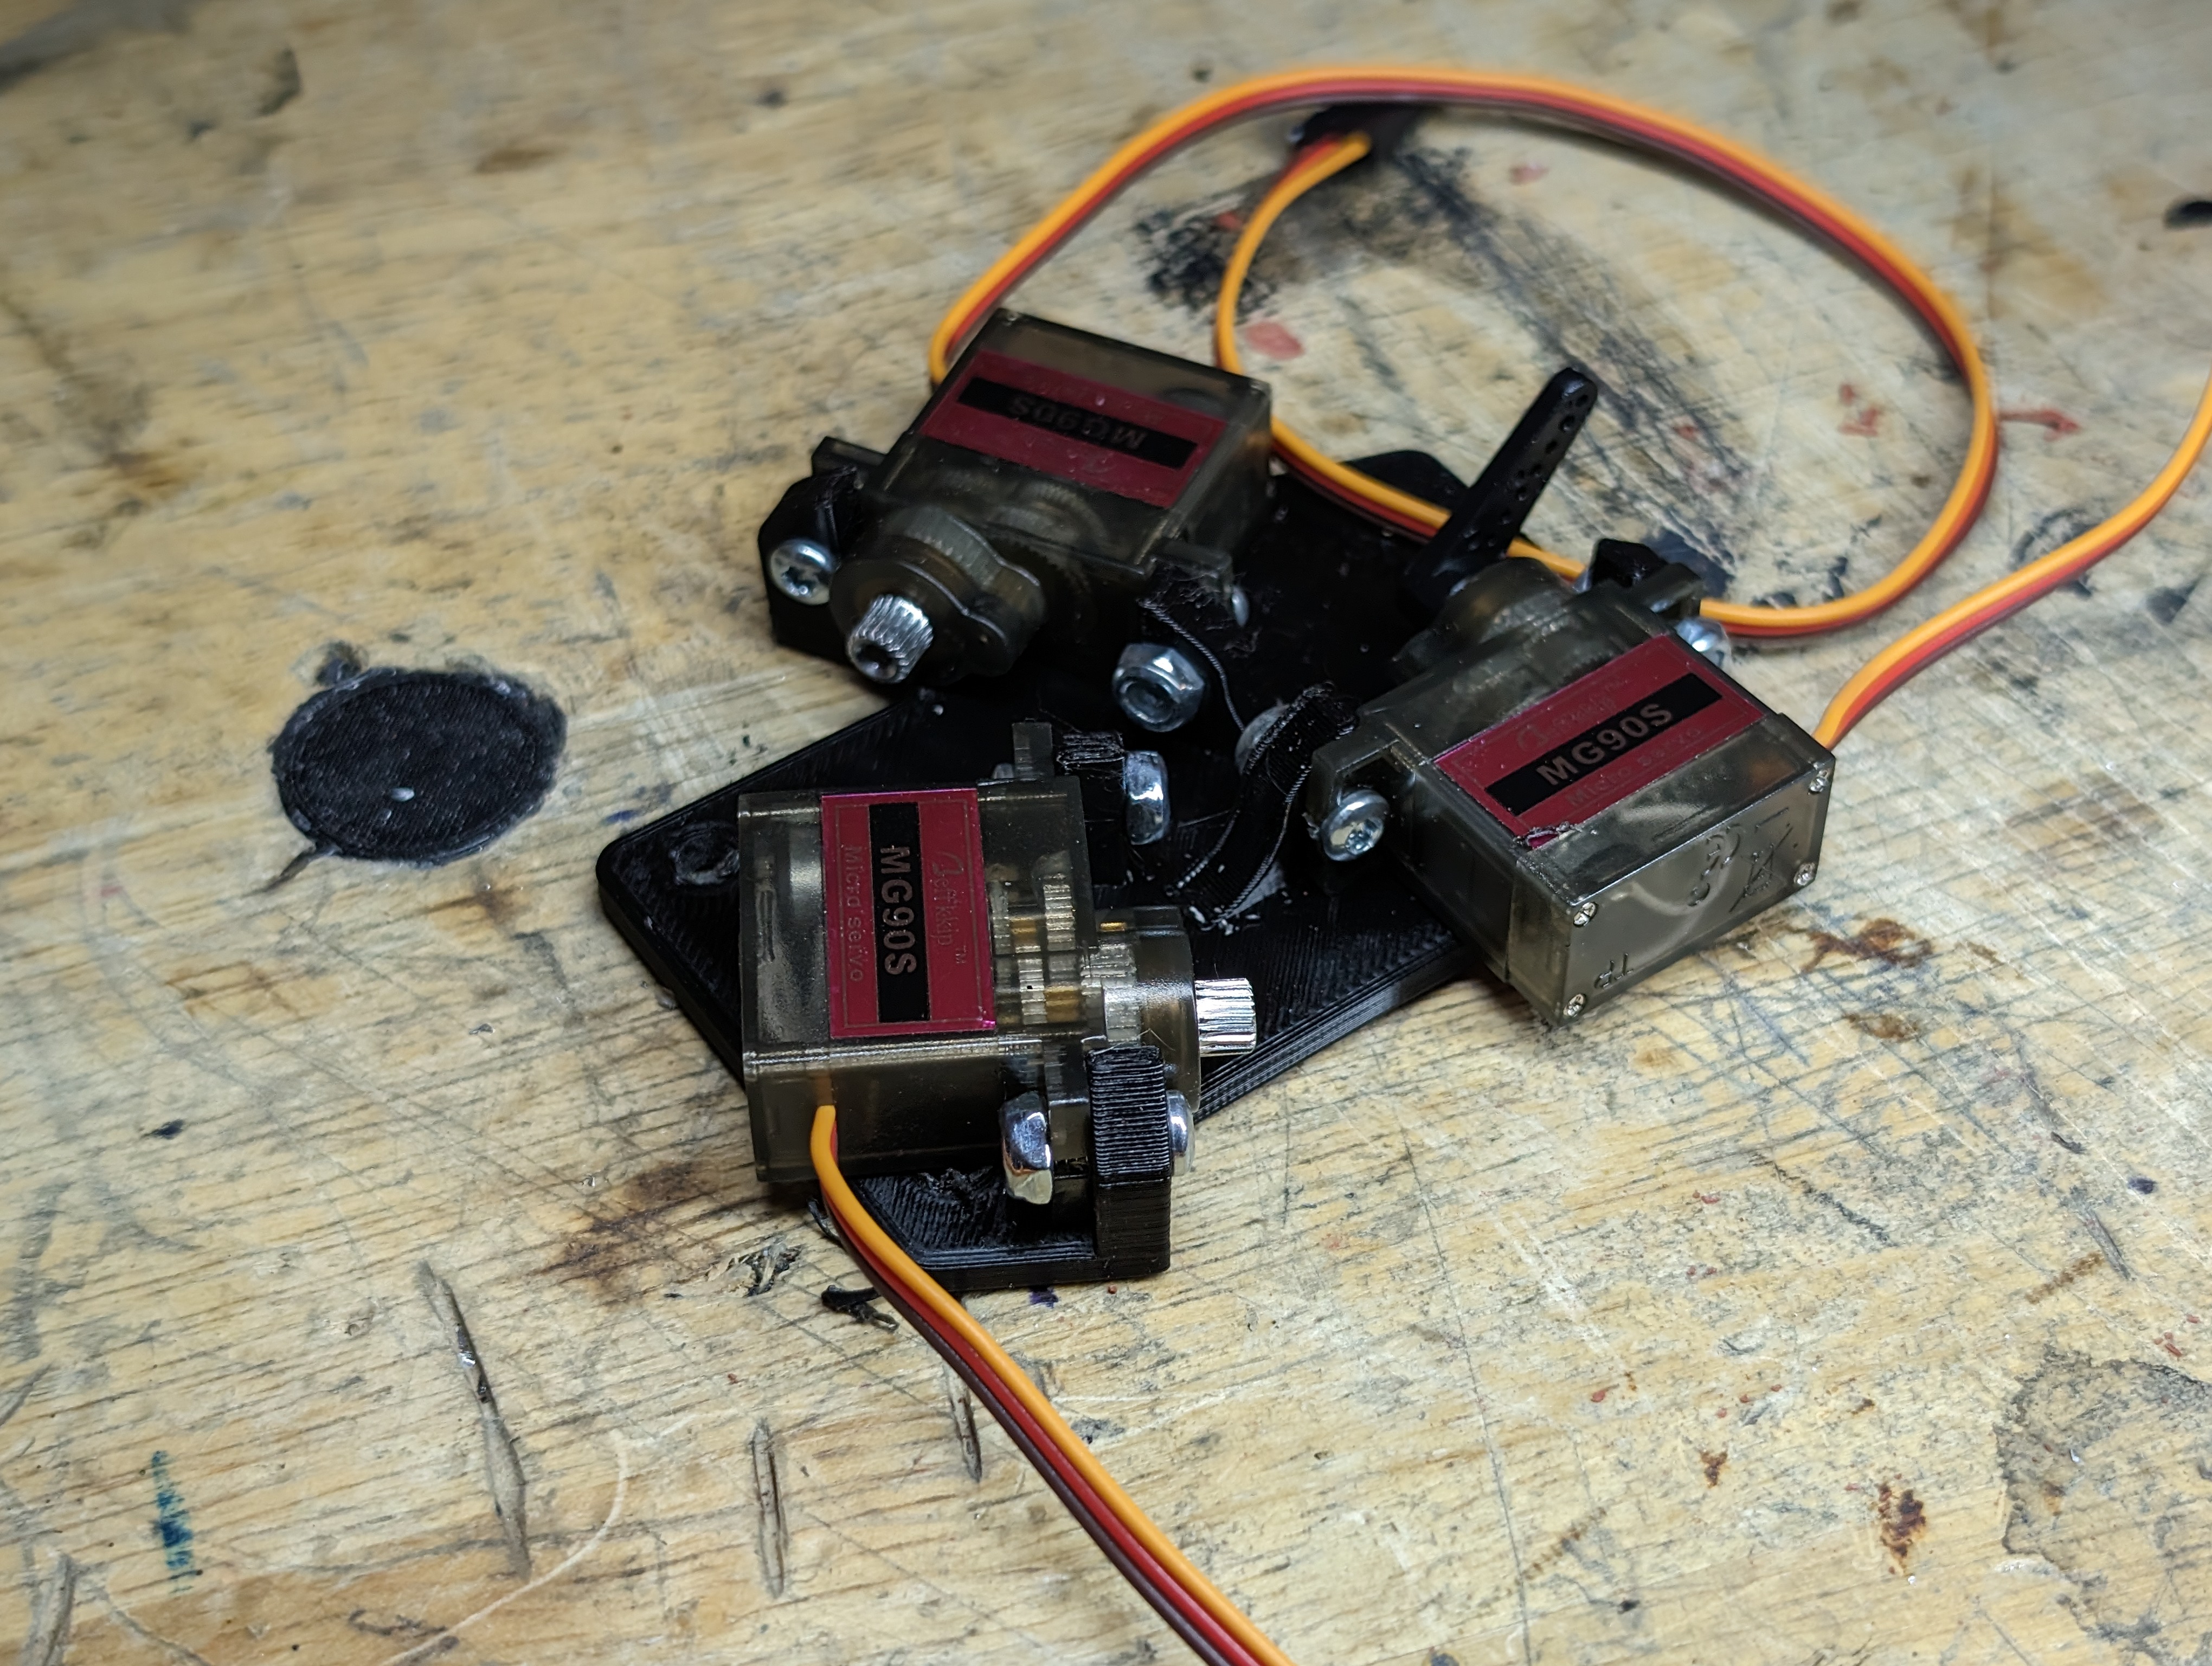
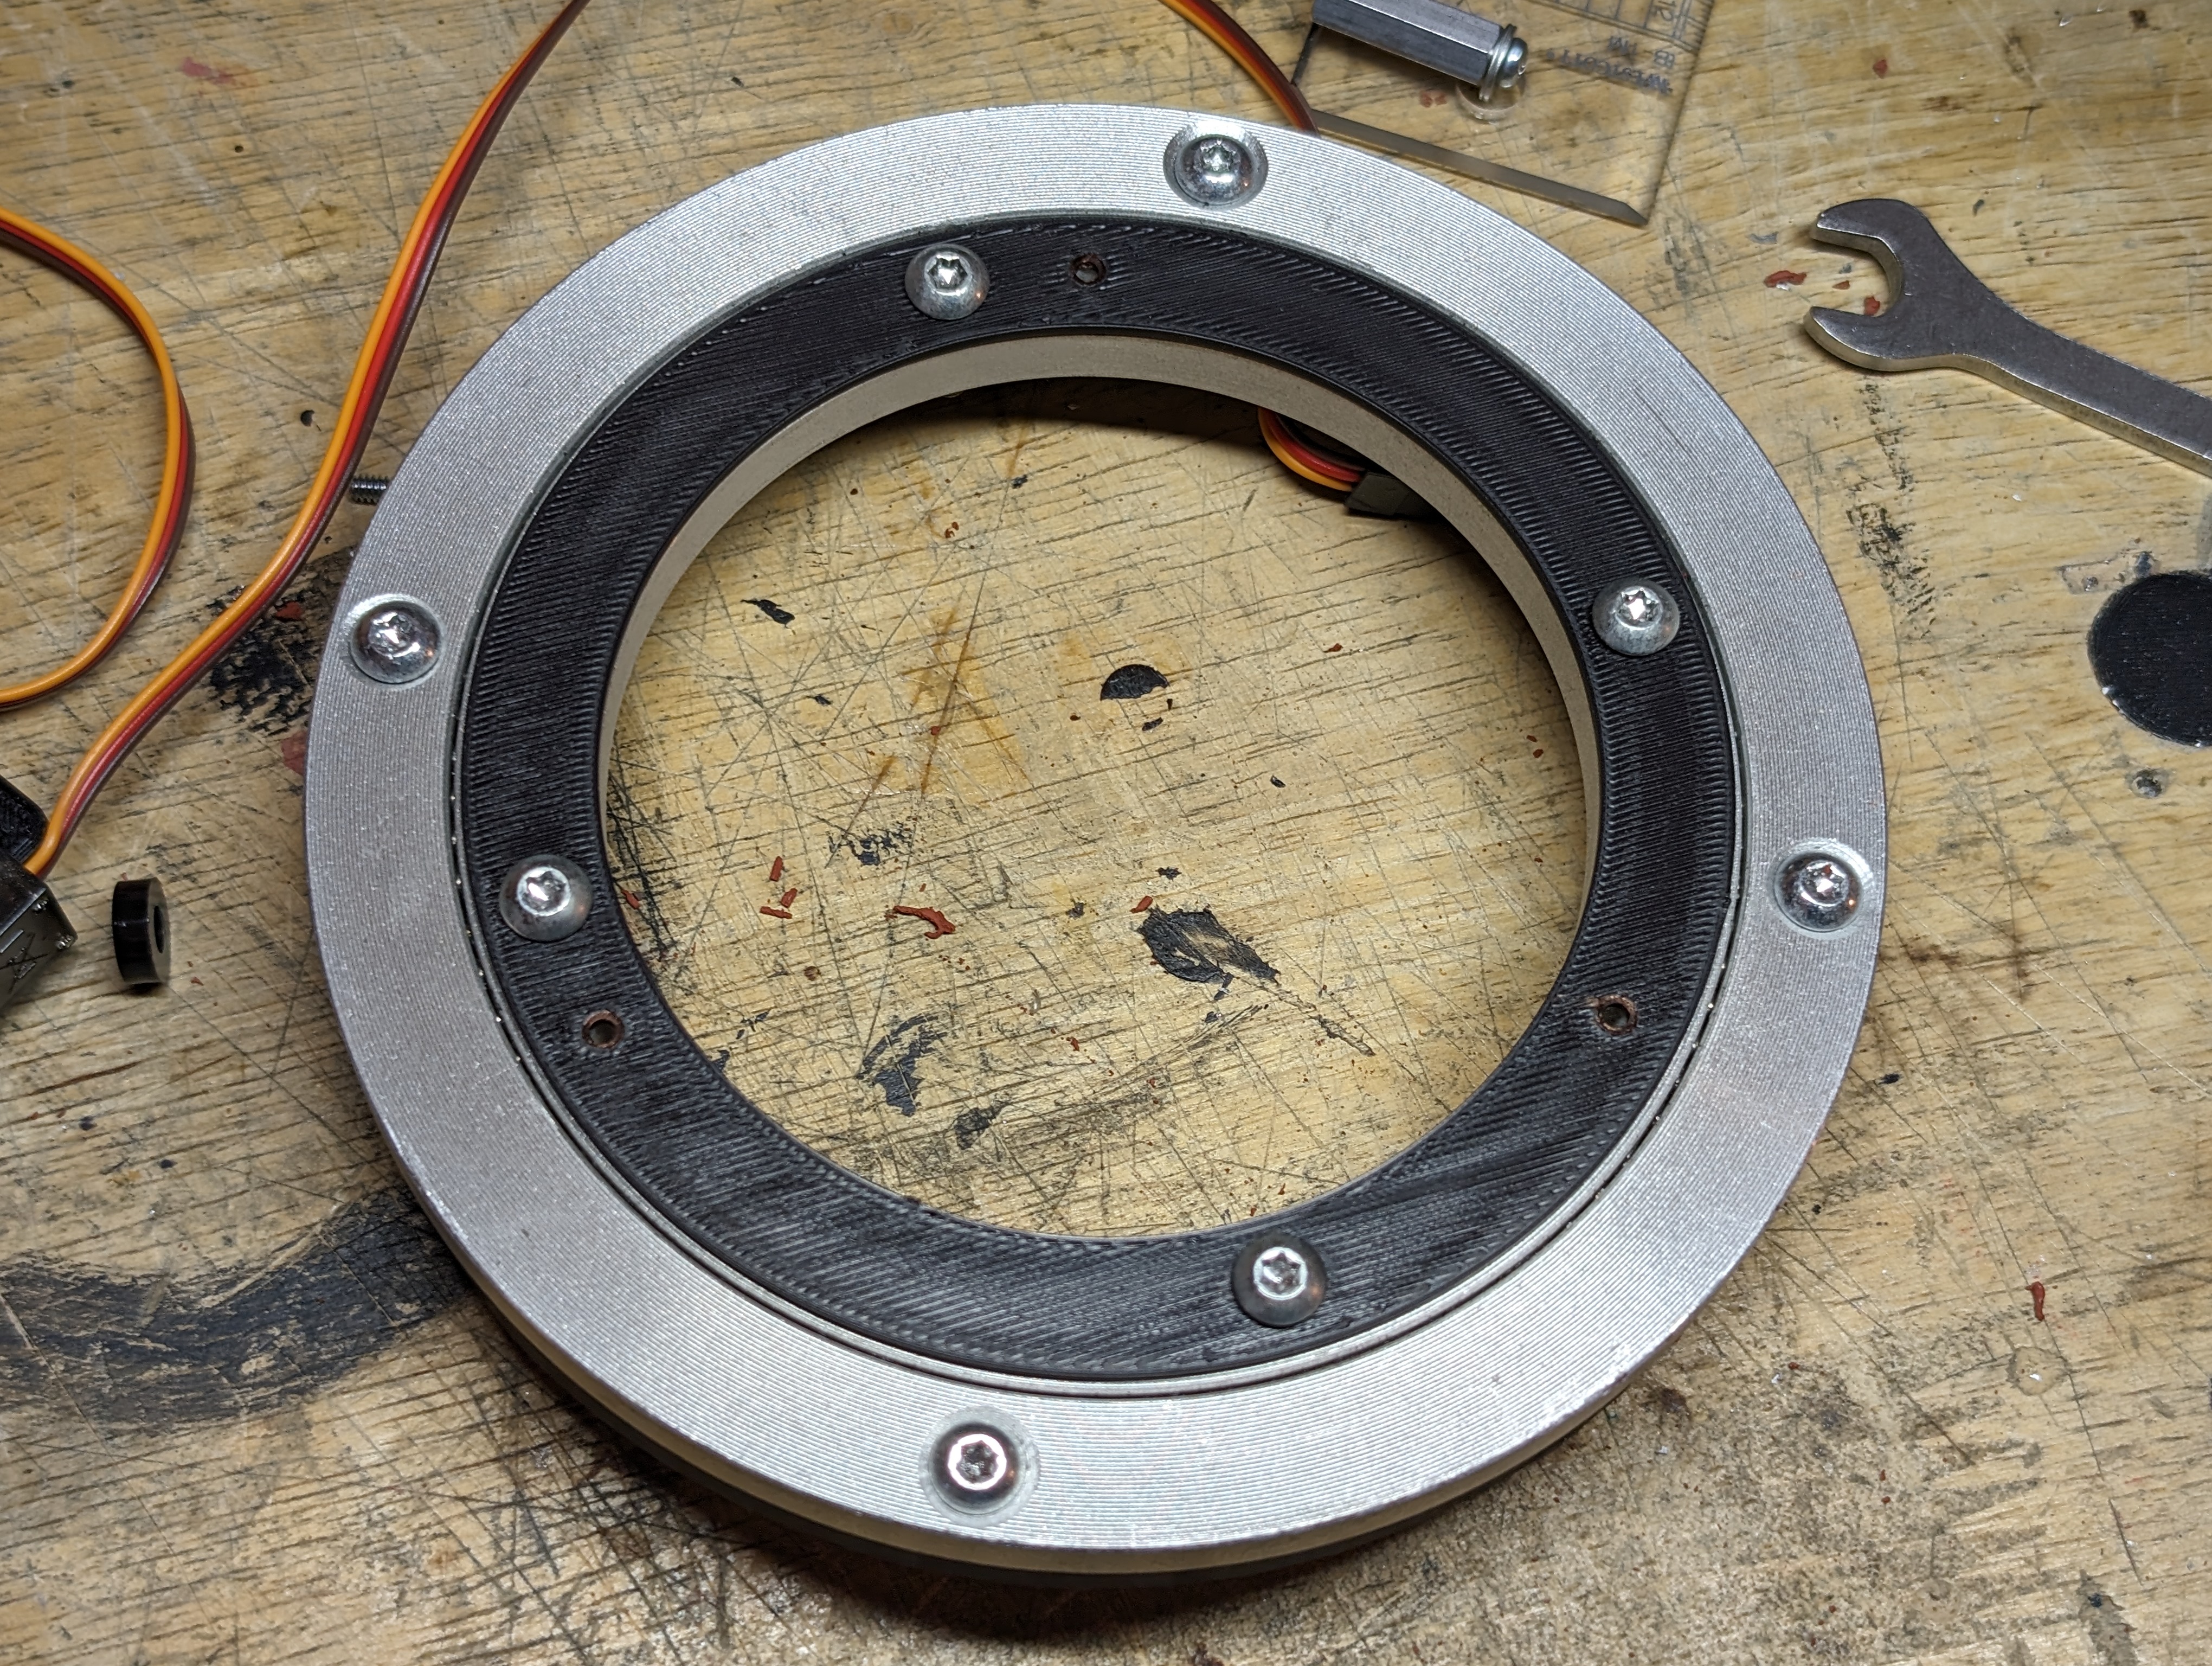
The lazy susan now needs matching holes at 60-degree angles to each other, I printed this jig to screw into existing holes before center punching and drilling the new holes out.
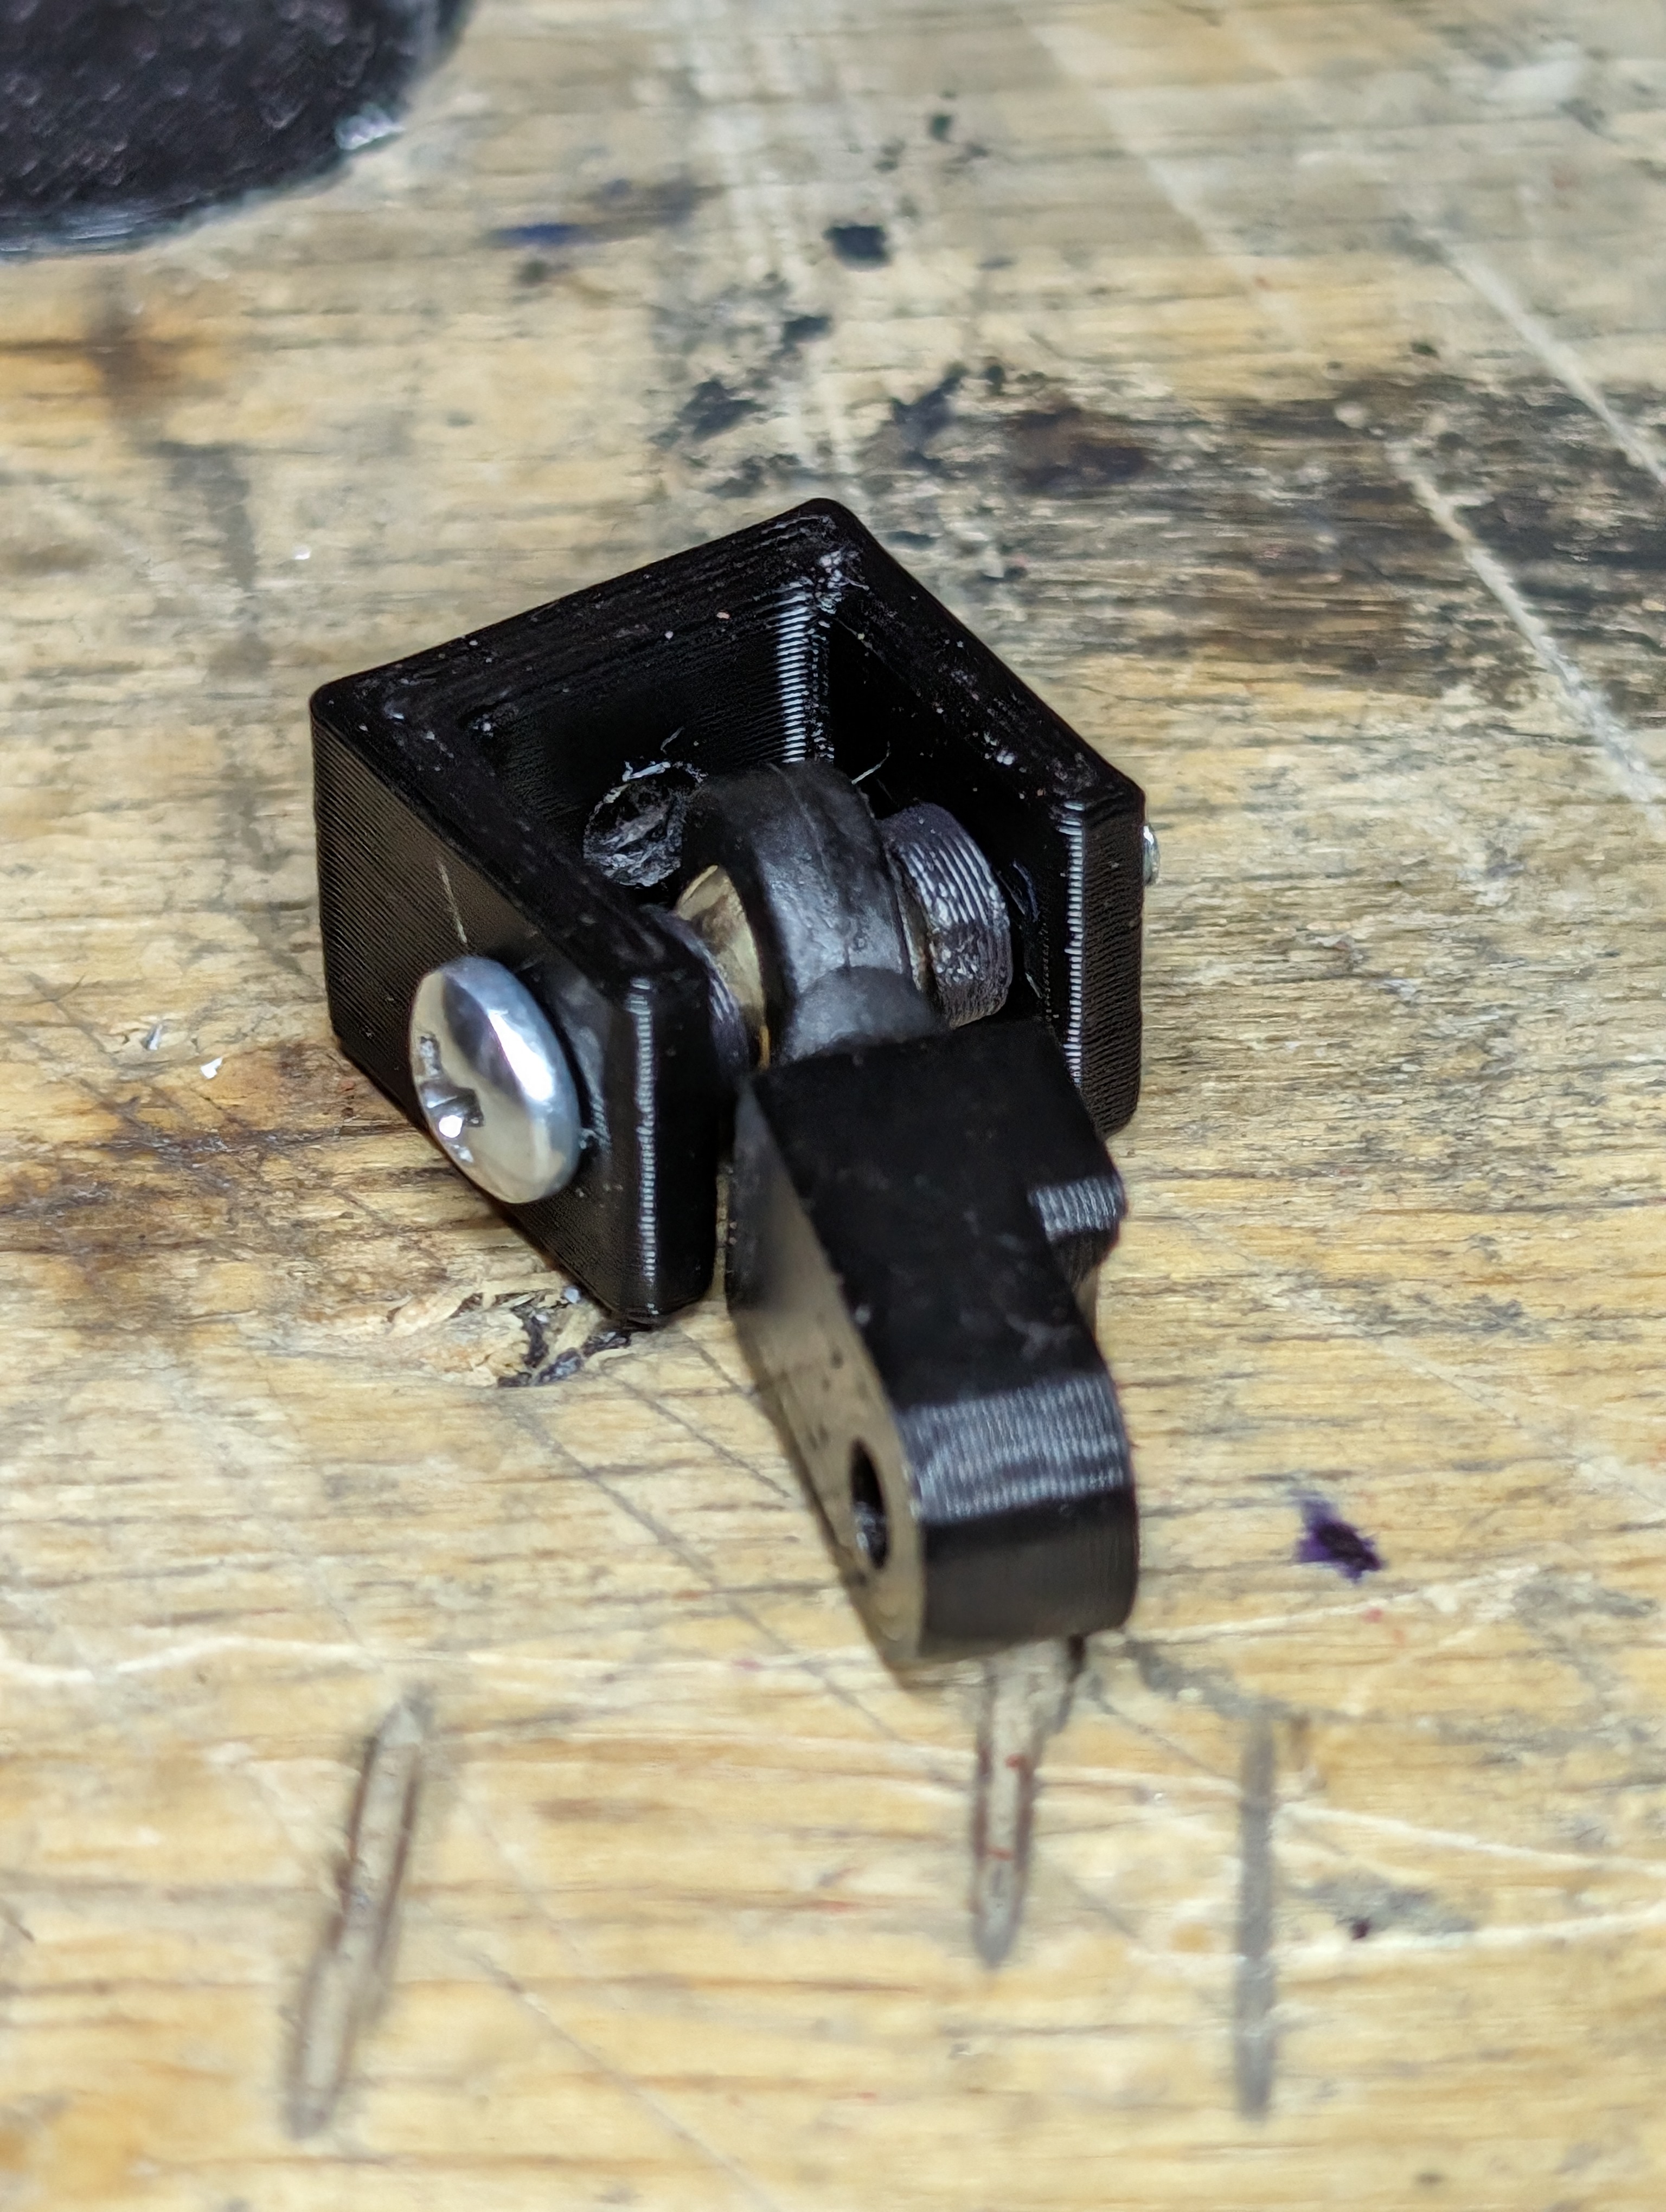
For the ball joints, I'll be using RC tie rods, and these are the little mounts I designed that will go on the lazy susan.
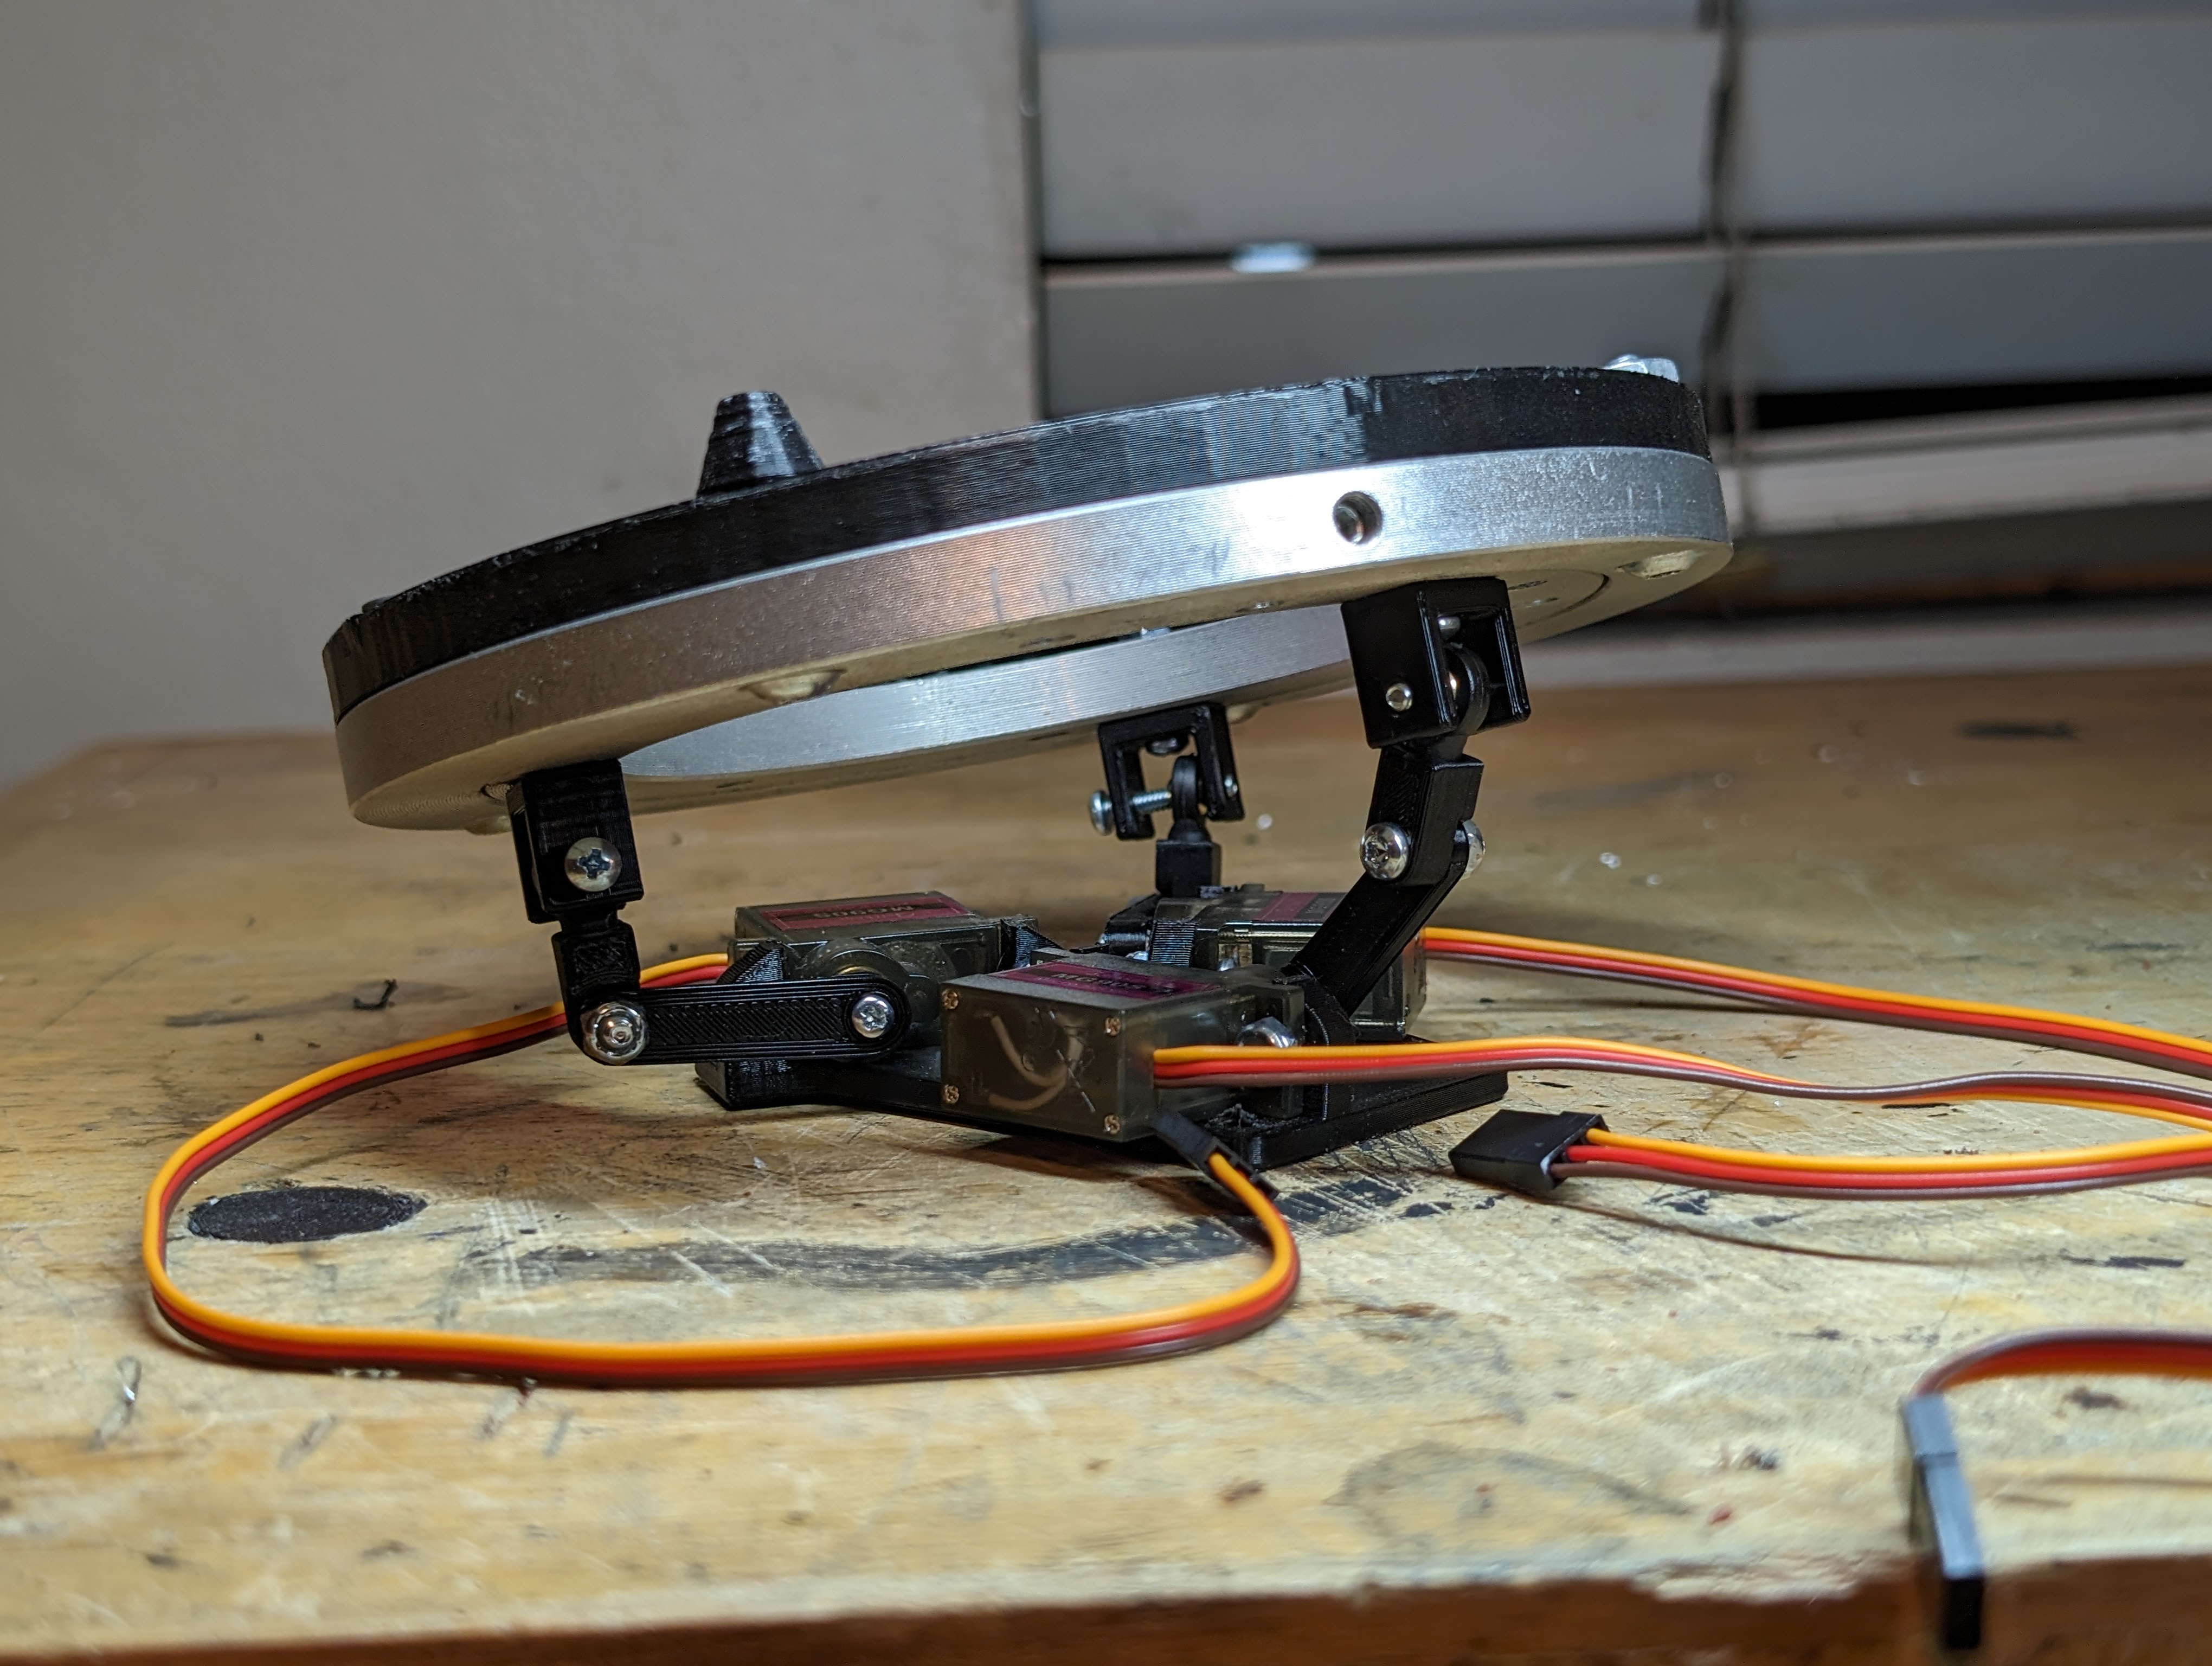
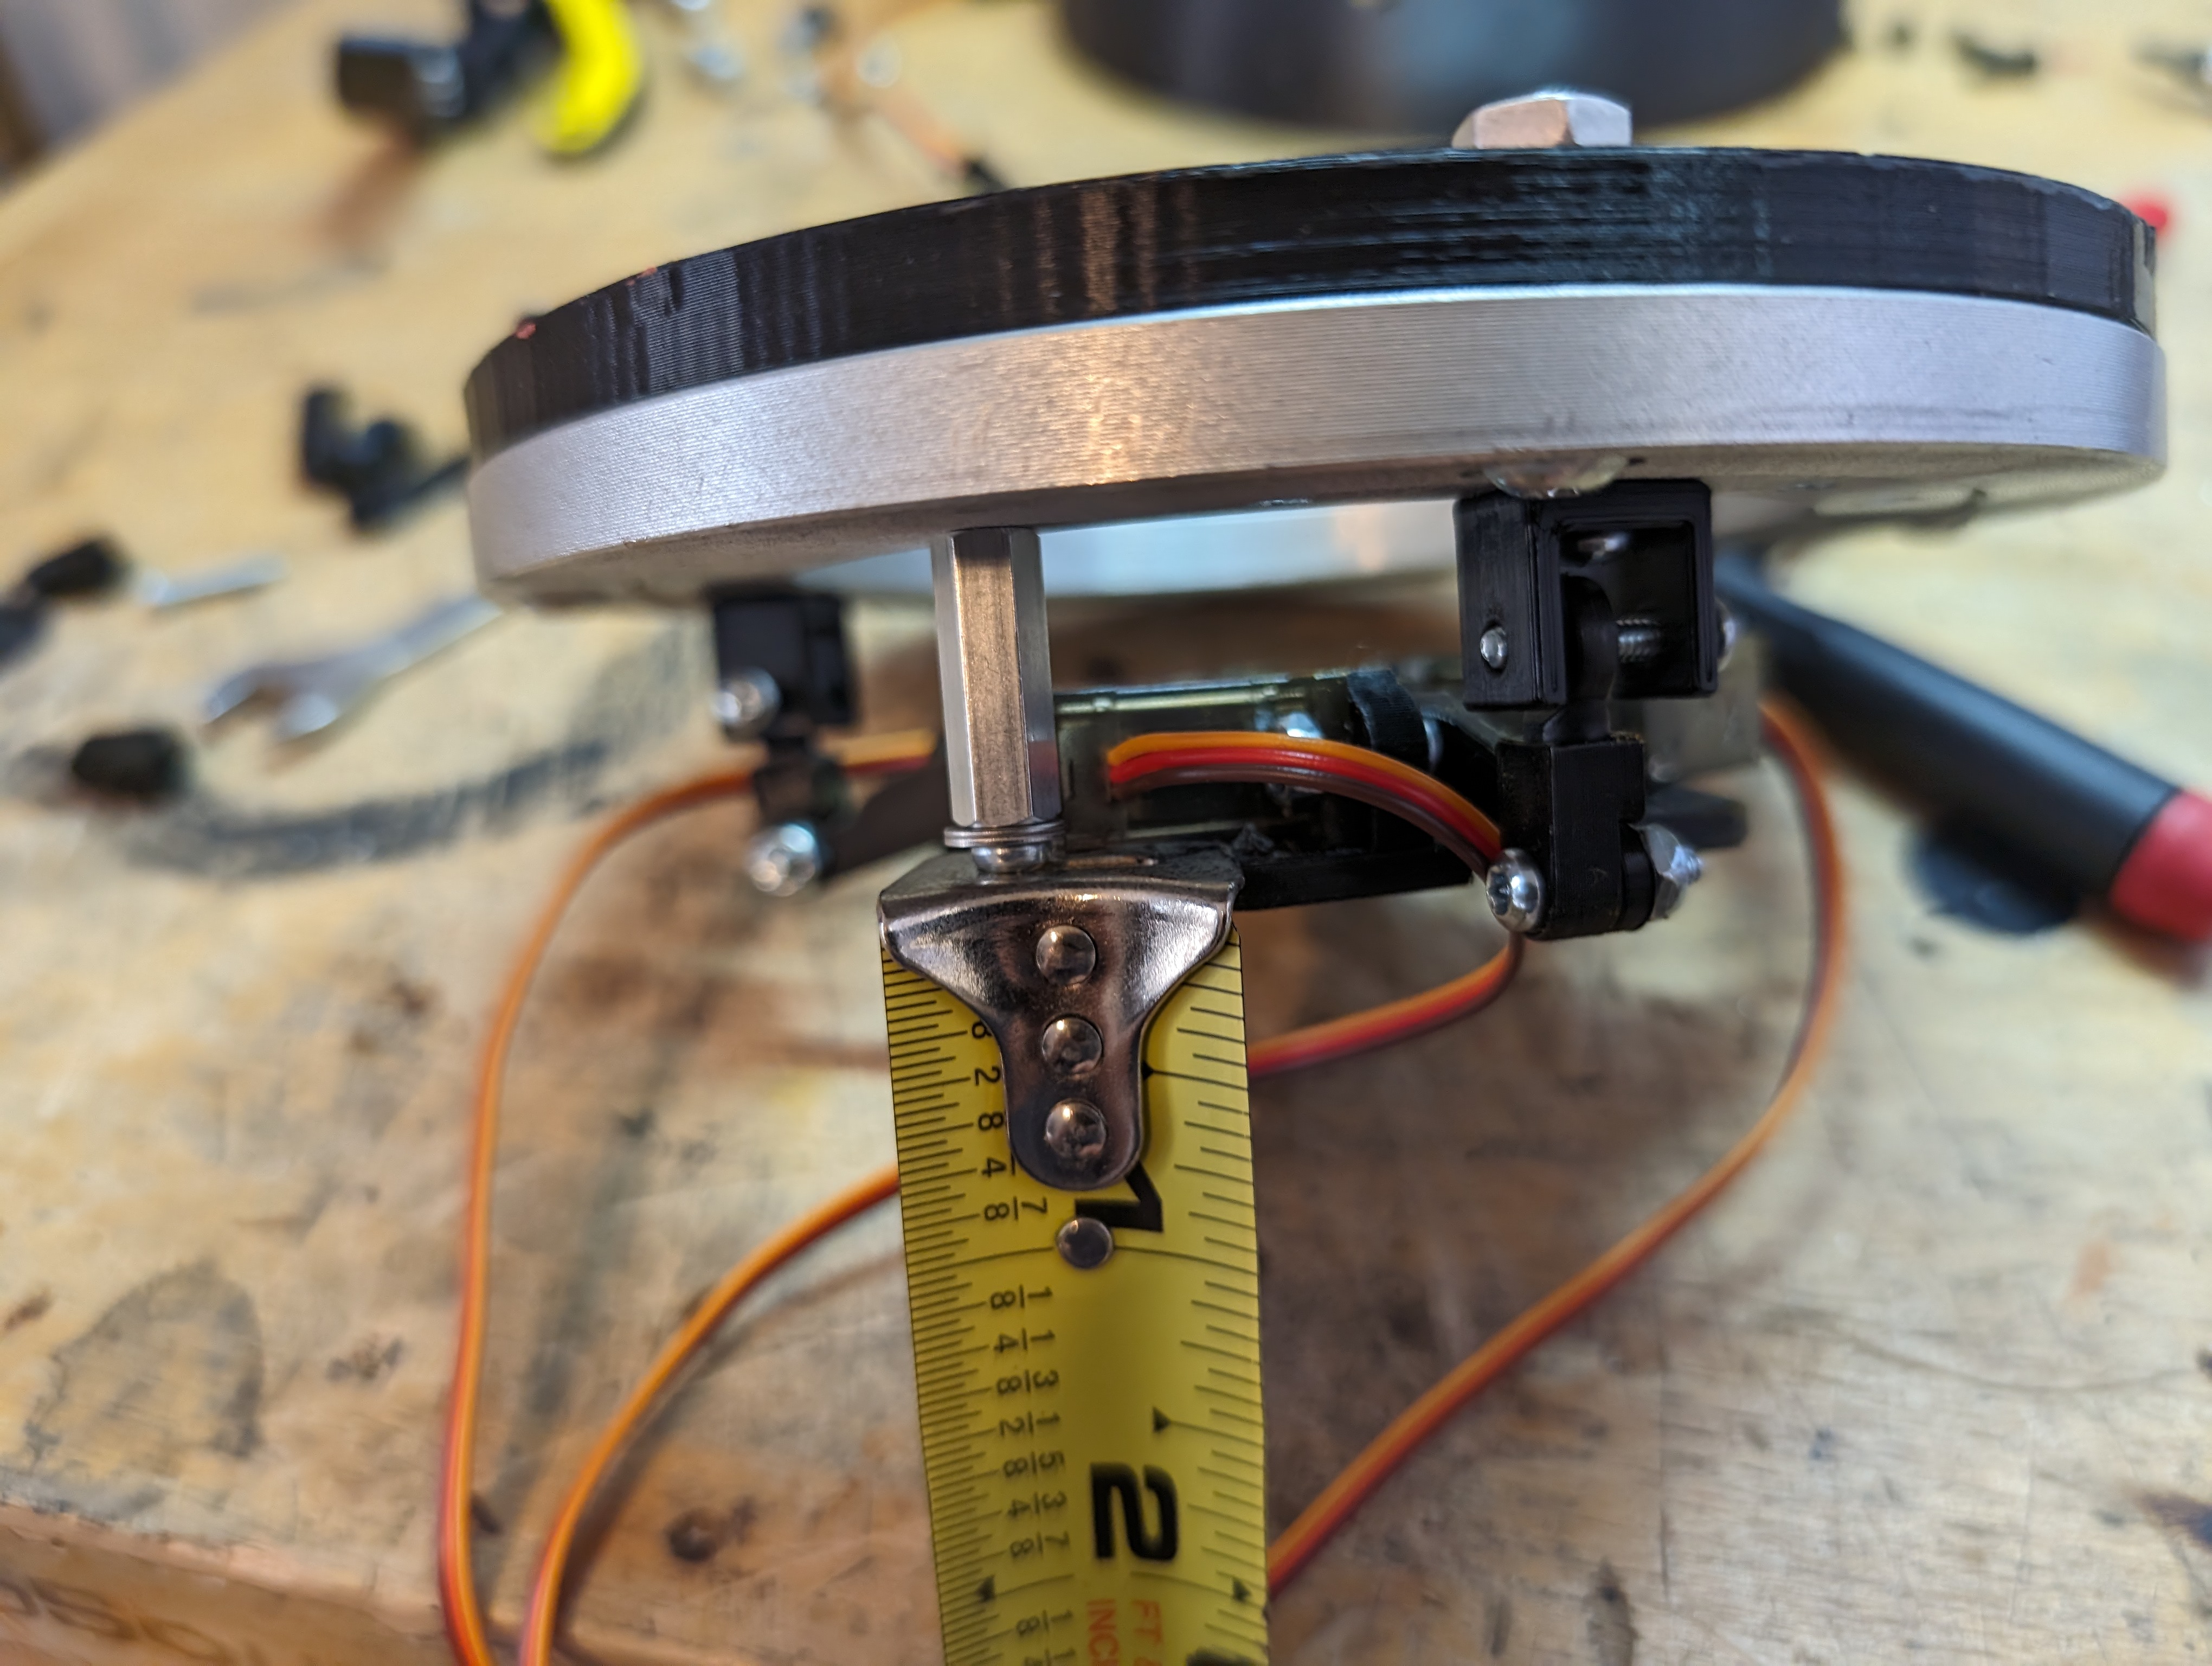
The geometry all looks good and it moves as I expect it to, sadly this doesn't come down far enough due to interference between the crankshaft and the bottom of the motor plate, there is only 0.875" of travel. But what I think is worse then that, is the lower the head goes the more obvious it'll be that it's moving away from the body. I'd like to get that 1/2" down a bit.
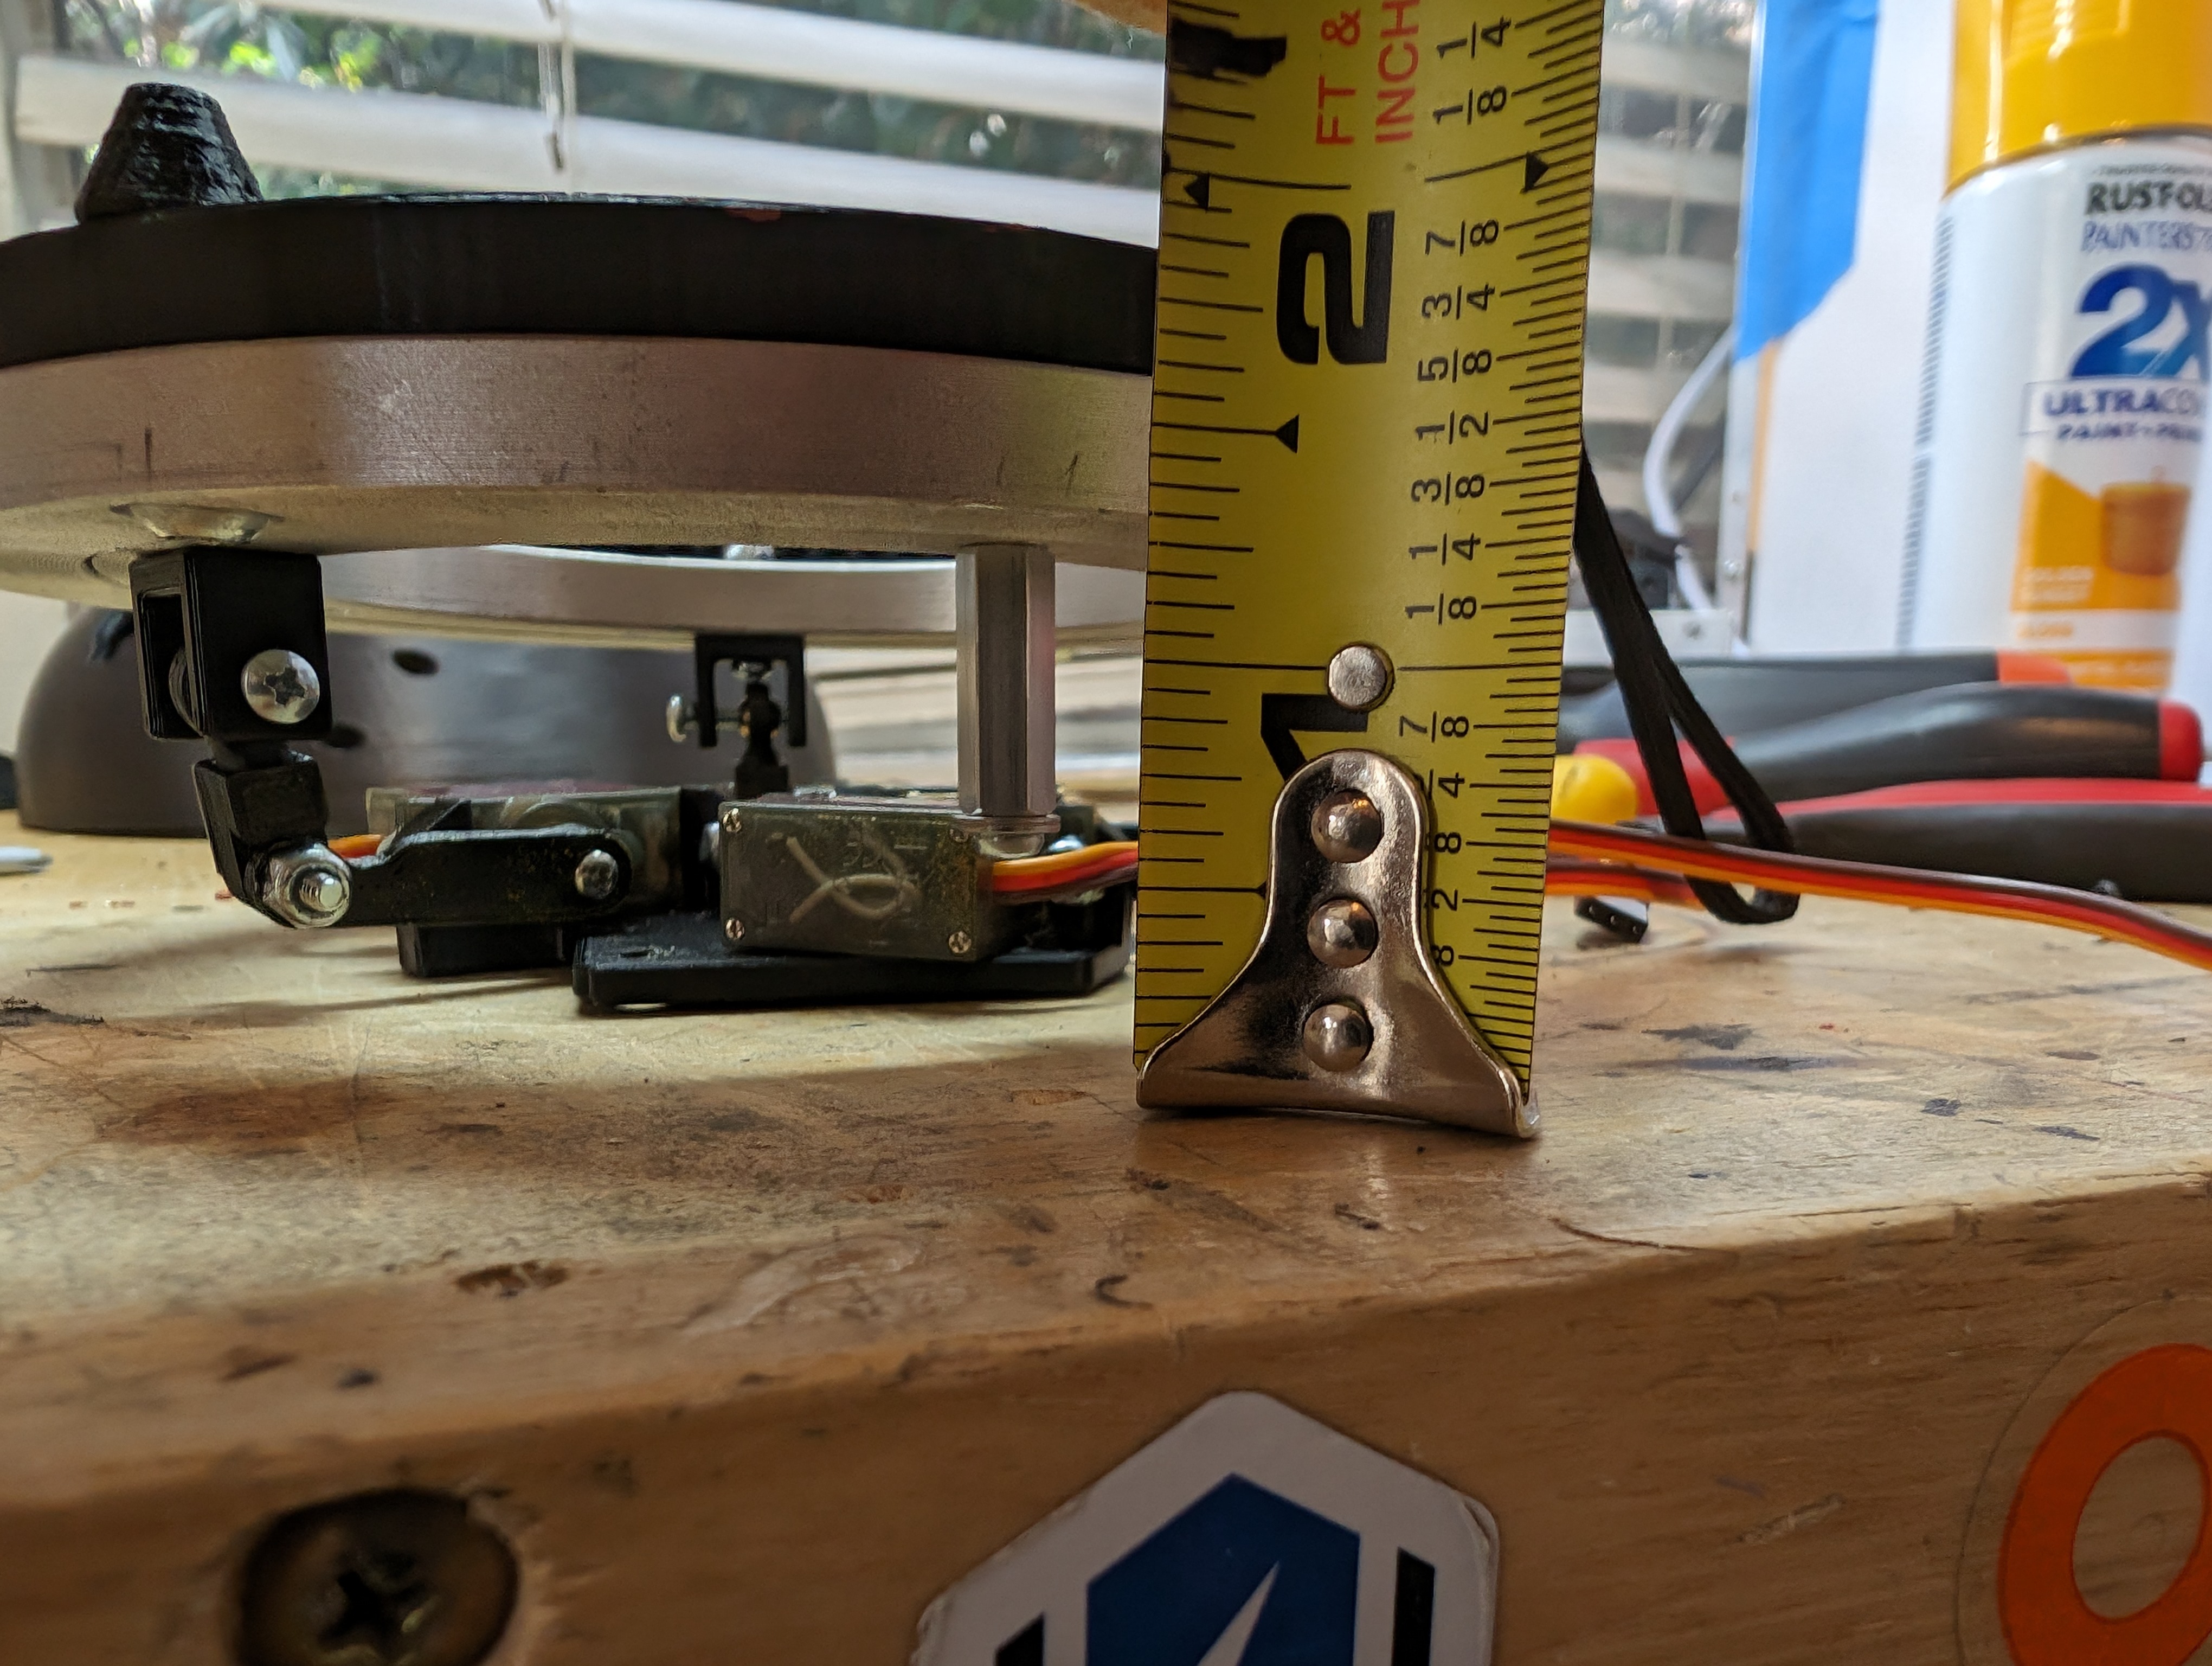
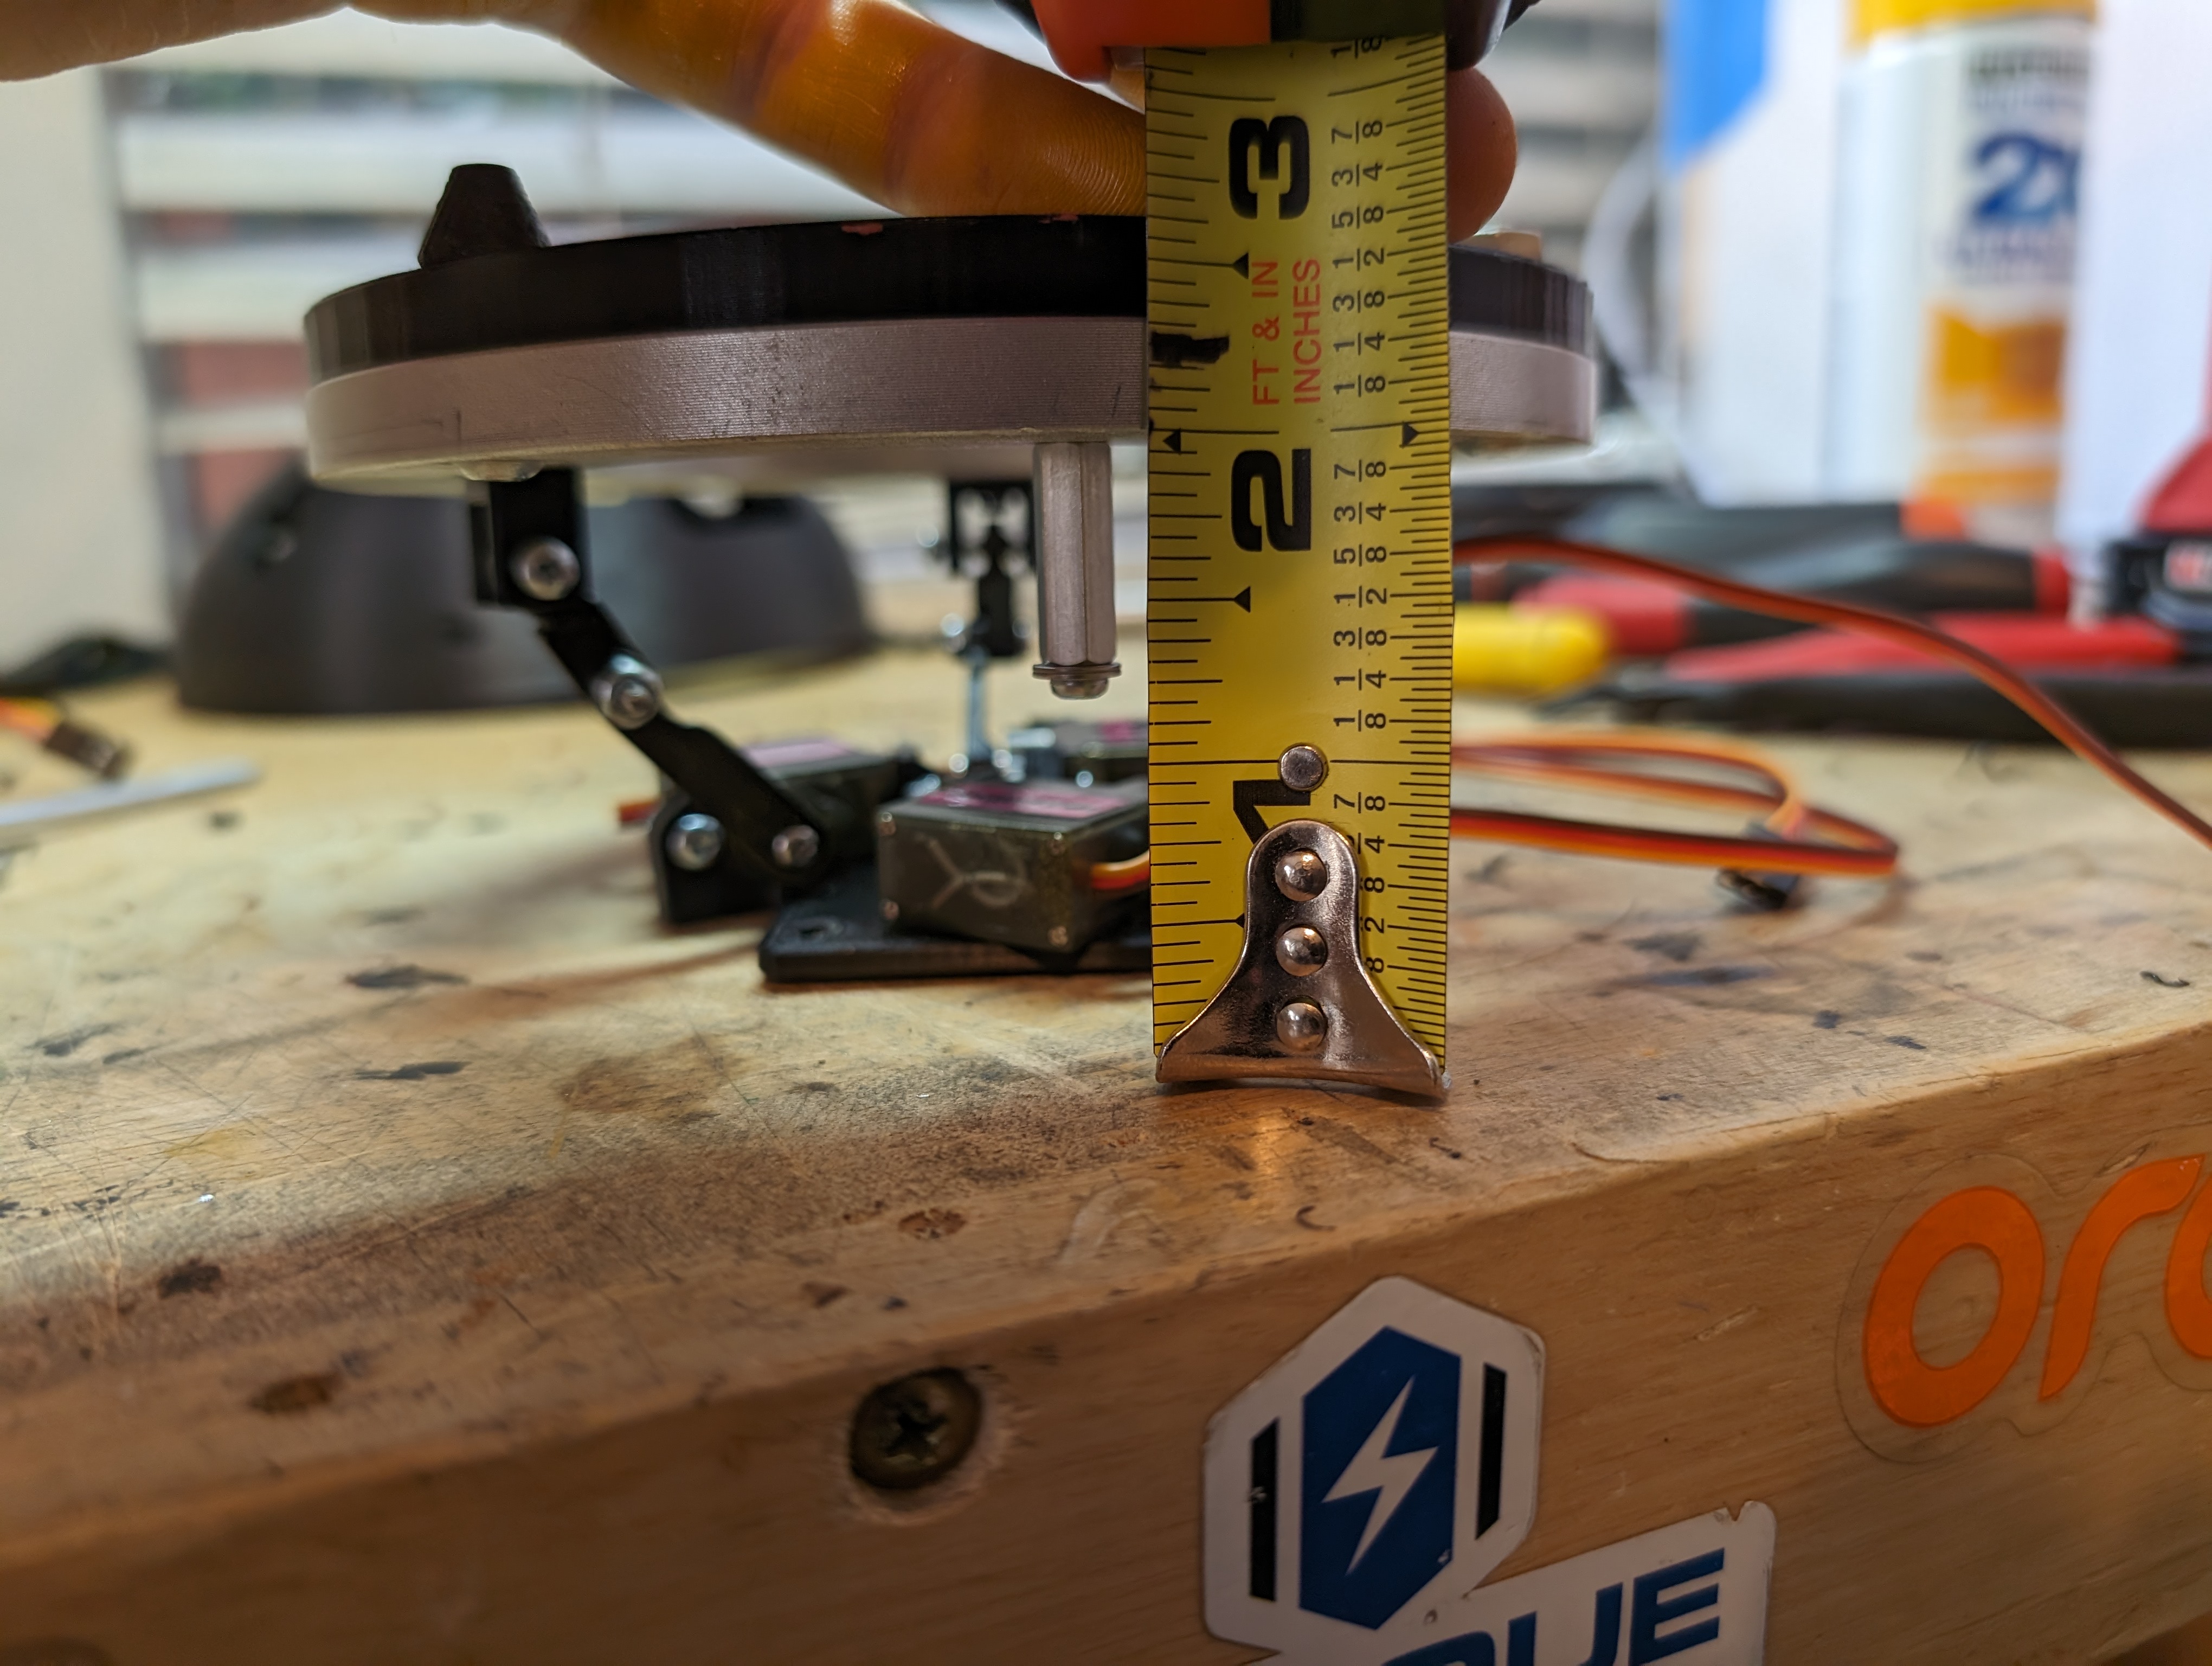
I marked off and cut out some of the motor plate on the scroll saw.
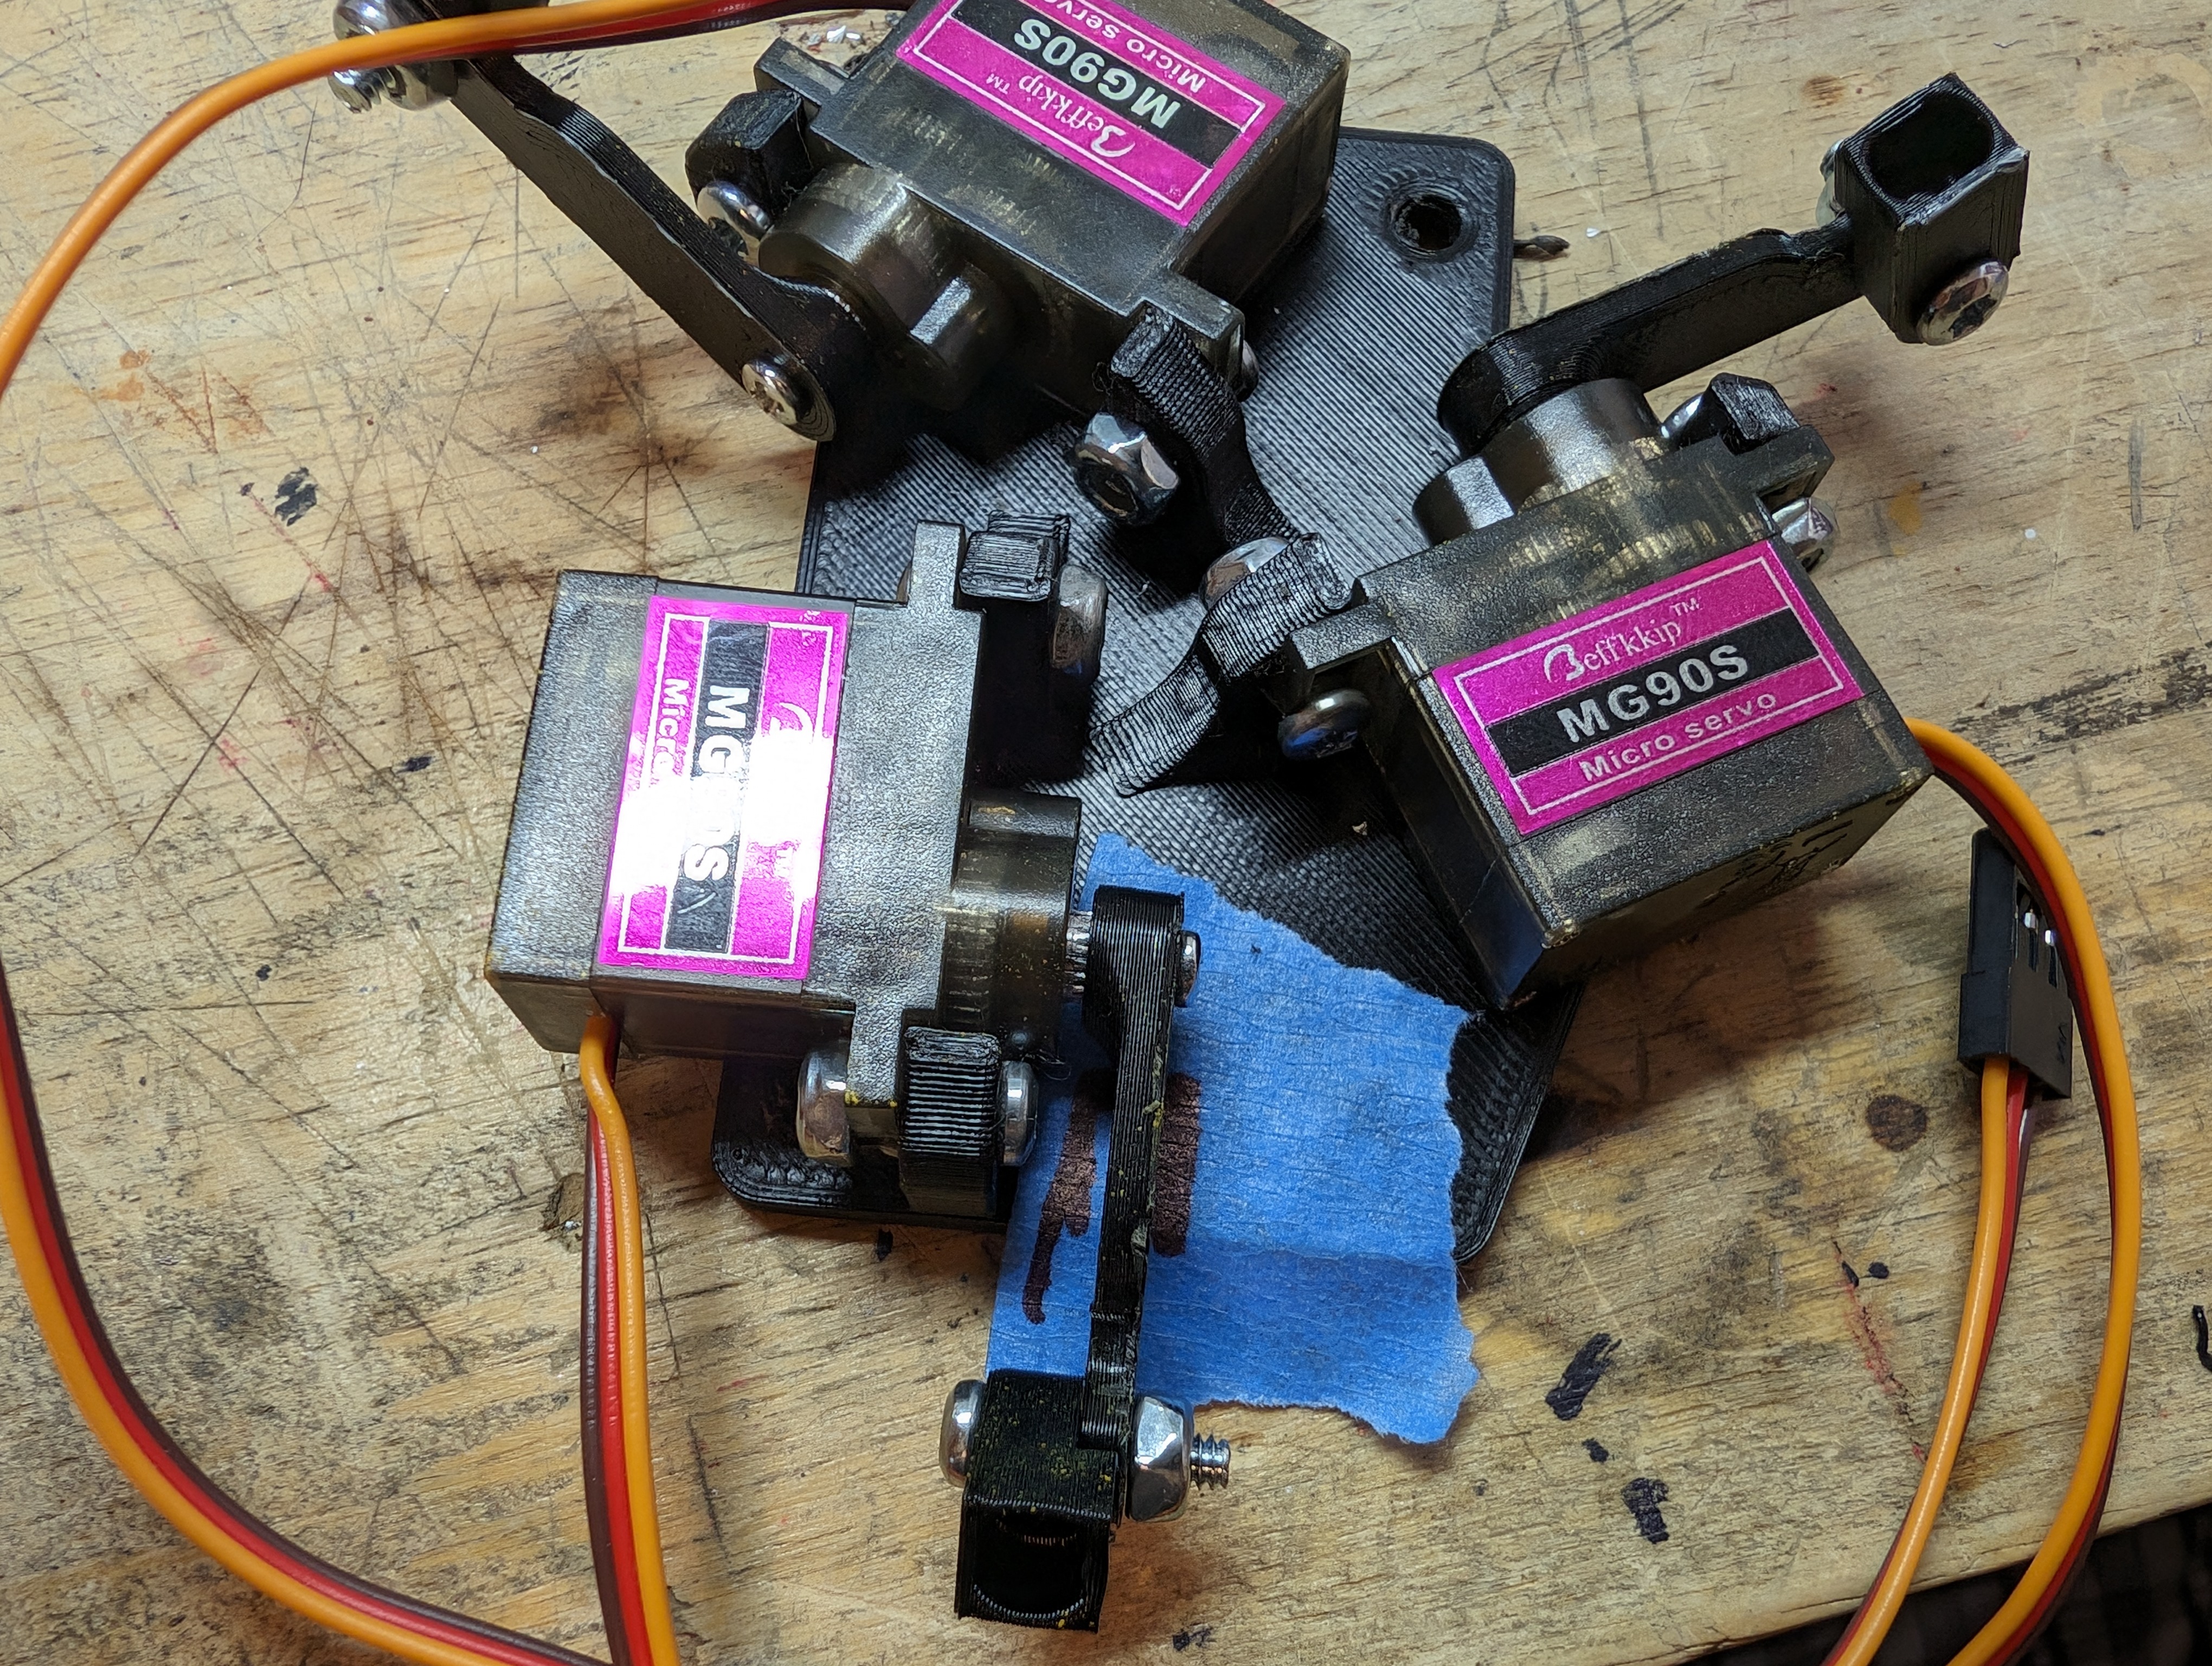
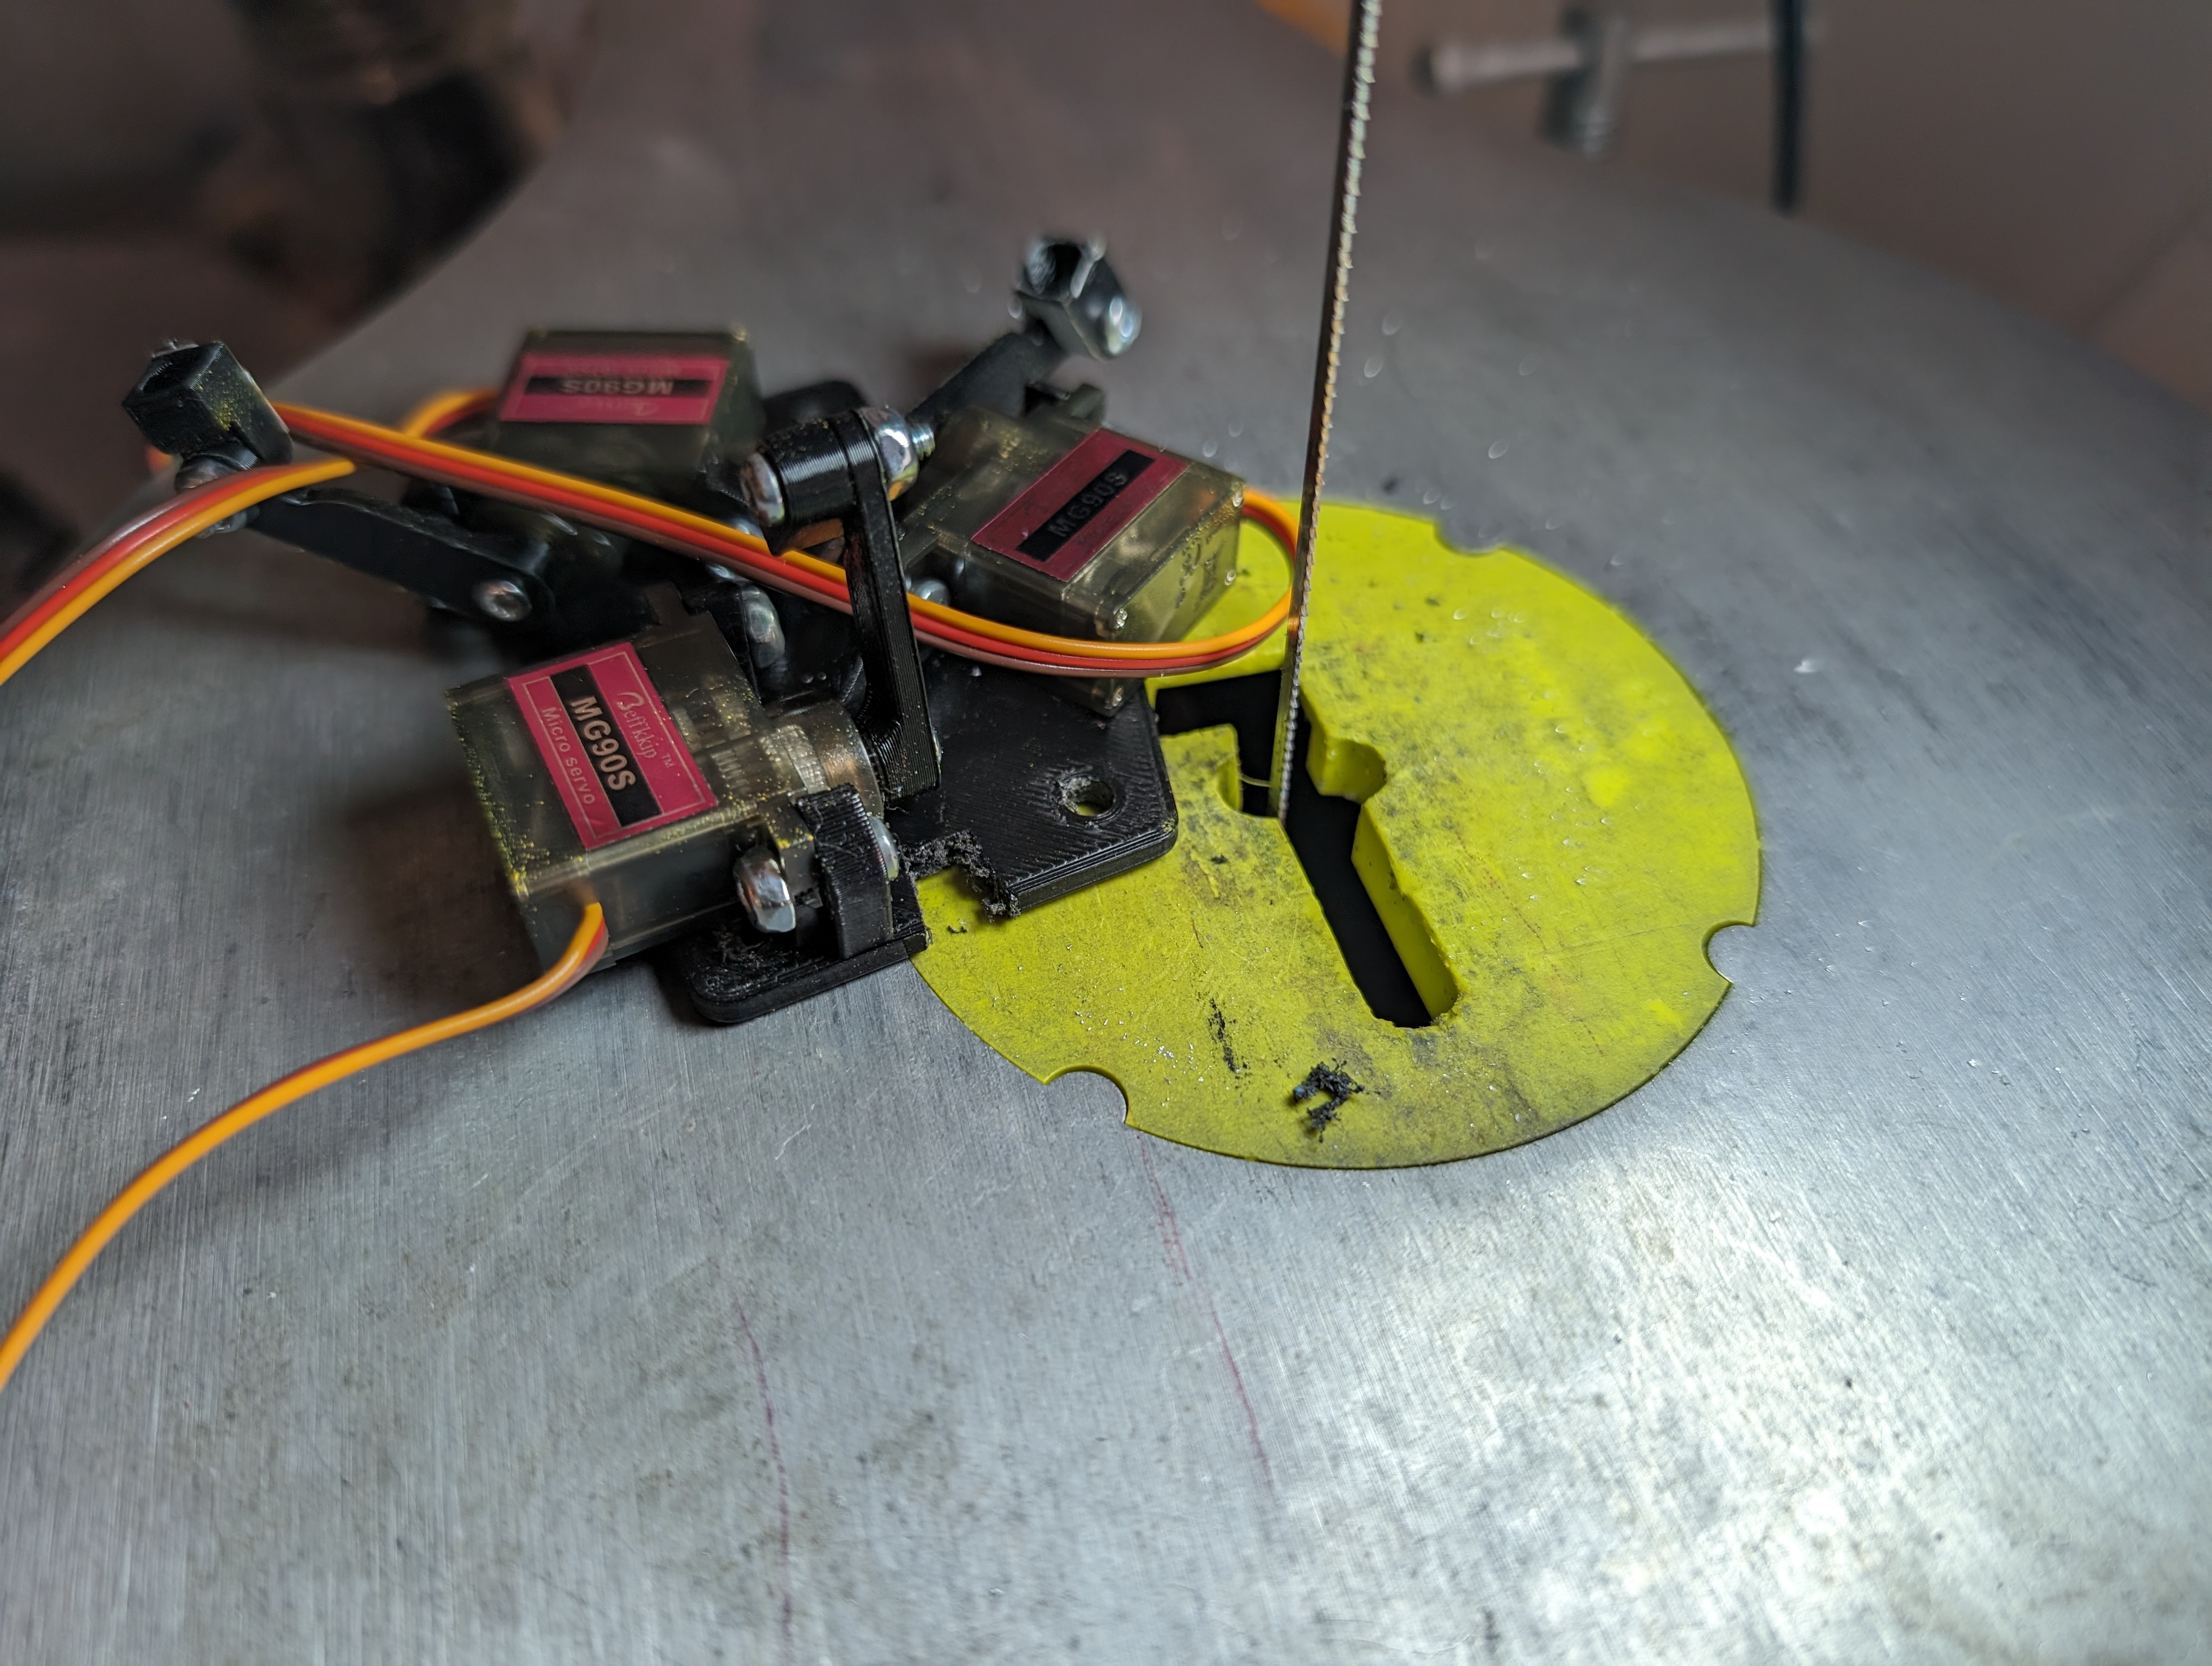
Hard to capture this image because now the crankshafts go below the motor mount, but there is ~1/4" of space now between the head and the body. I'll leave it at that for now and I can find places to squeeze out some more distance if I feel it's needed later.
New Motor Spin Mount
This ended up being much simpler then I anticipated. I was able to take the existing motor mount and shift the motor closer to the metal. Below is the old motor mount vs the new motor mount, where the new motor mount shifts the motor closer to the lazy susan.
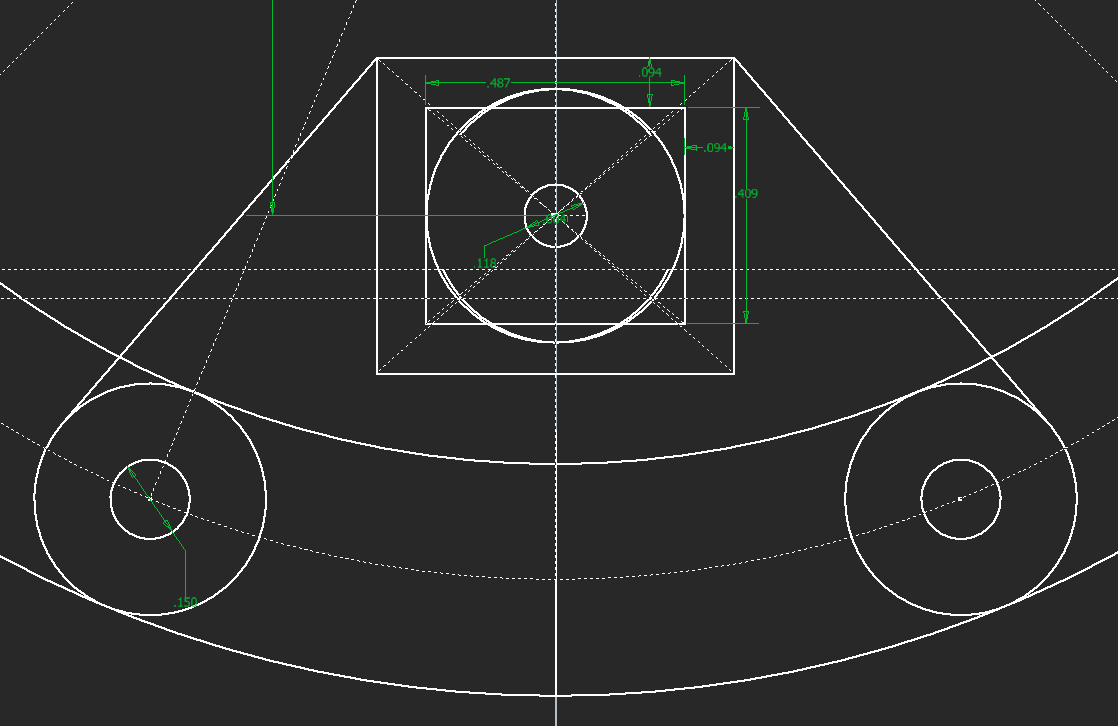
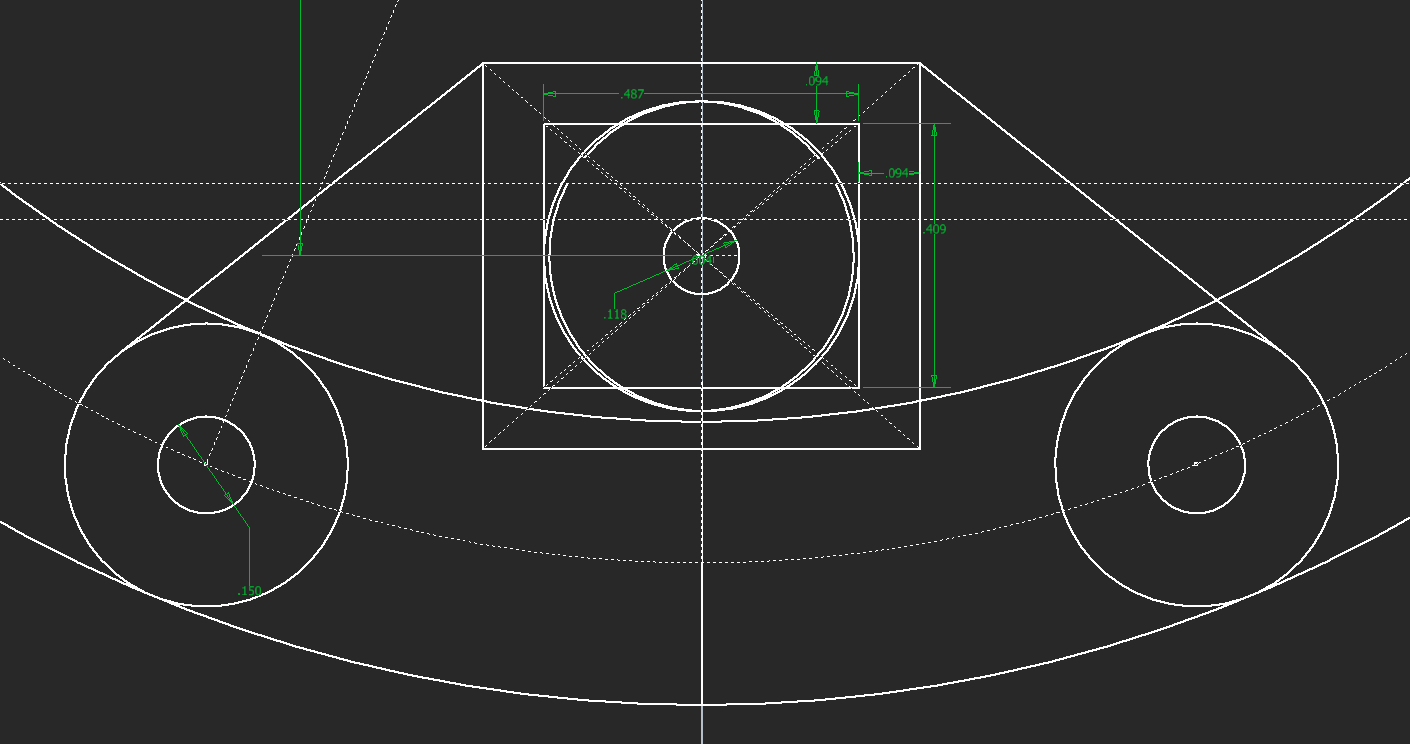
Now I needed a new gear for this, I ended up replacing the 29t gear with a 23t gear. This brings my ratio from 0.40 to 0.32, but the motor has increased from 100rpm to 200rpm. The head will now spin at 64rpm instead of 40rpm.
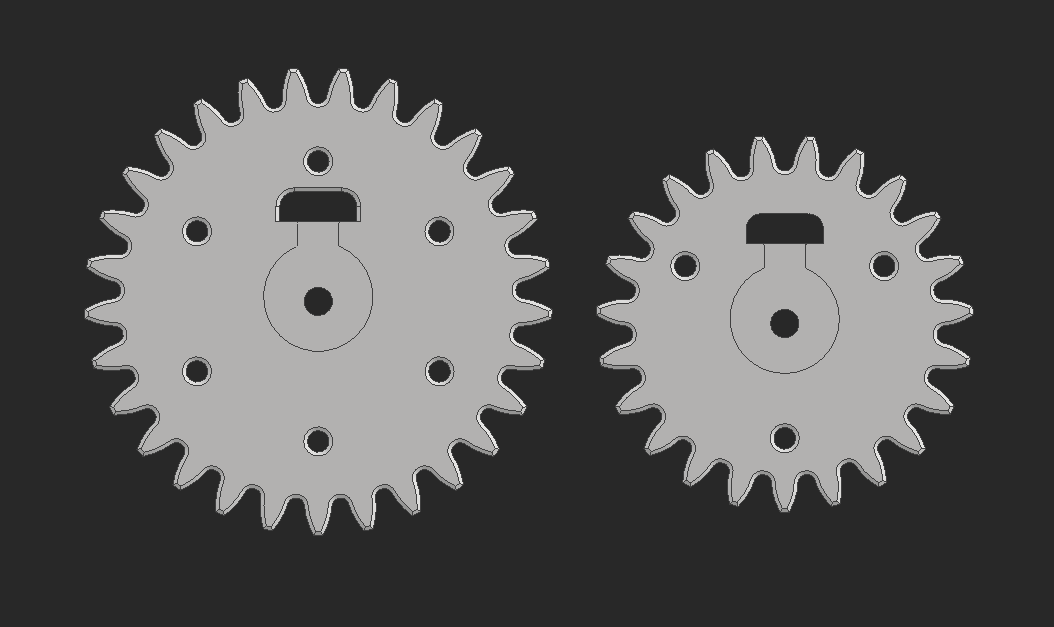
With everything being smaller it doesn't seem like I have to mount the motor on a pivot. As soon as this shows any sign of failing I'll be modifying the motor mount to pivot, which I might be able to do just by cutting into the existing part and having it hit one of the mounting screws.
Adding a Potentiometer
To mount a potentiometer, the sensor will need to be in the center of the lazy susan. An arm will mount from the moving part of the lazy susan to the potentiometer, and then as the head spins the potentiometer will spin too.
There aren't many mounting points on the moving part of the lazy susan. I can attach it by 1 screw but then it needs a way to index so it doesn't pivot. I did this by extruding teeth into this arm so it indexes with the gears.
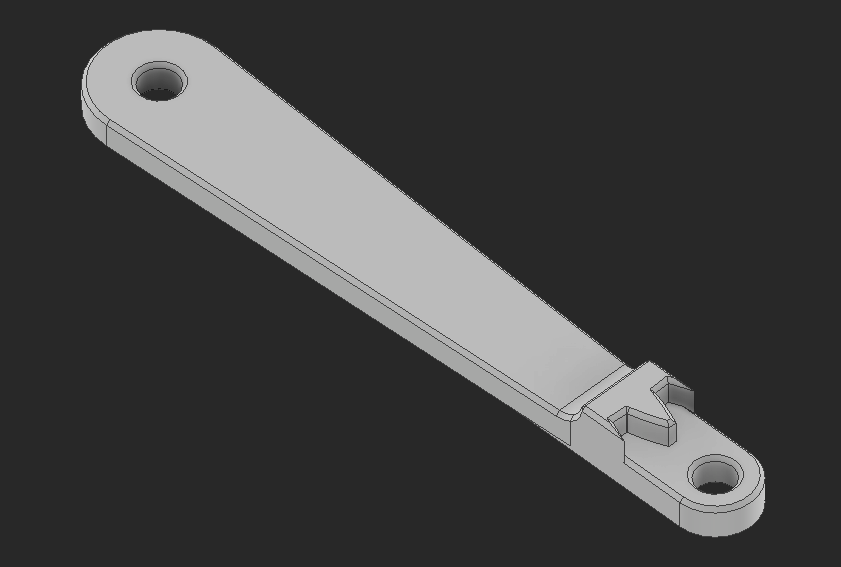
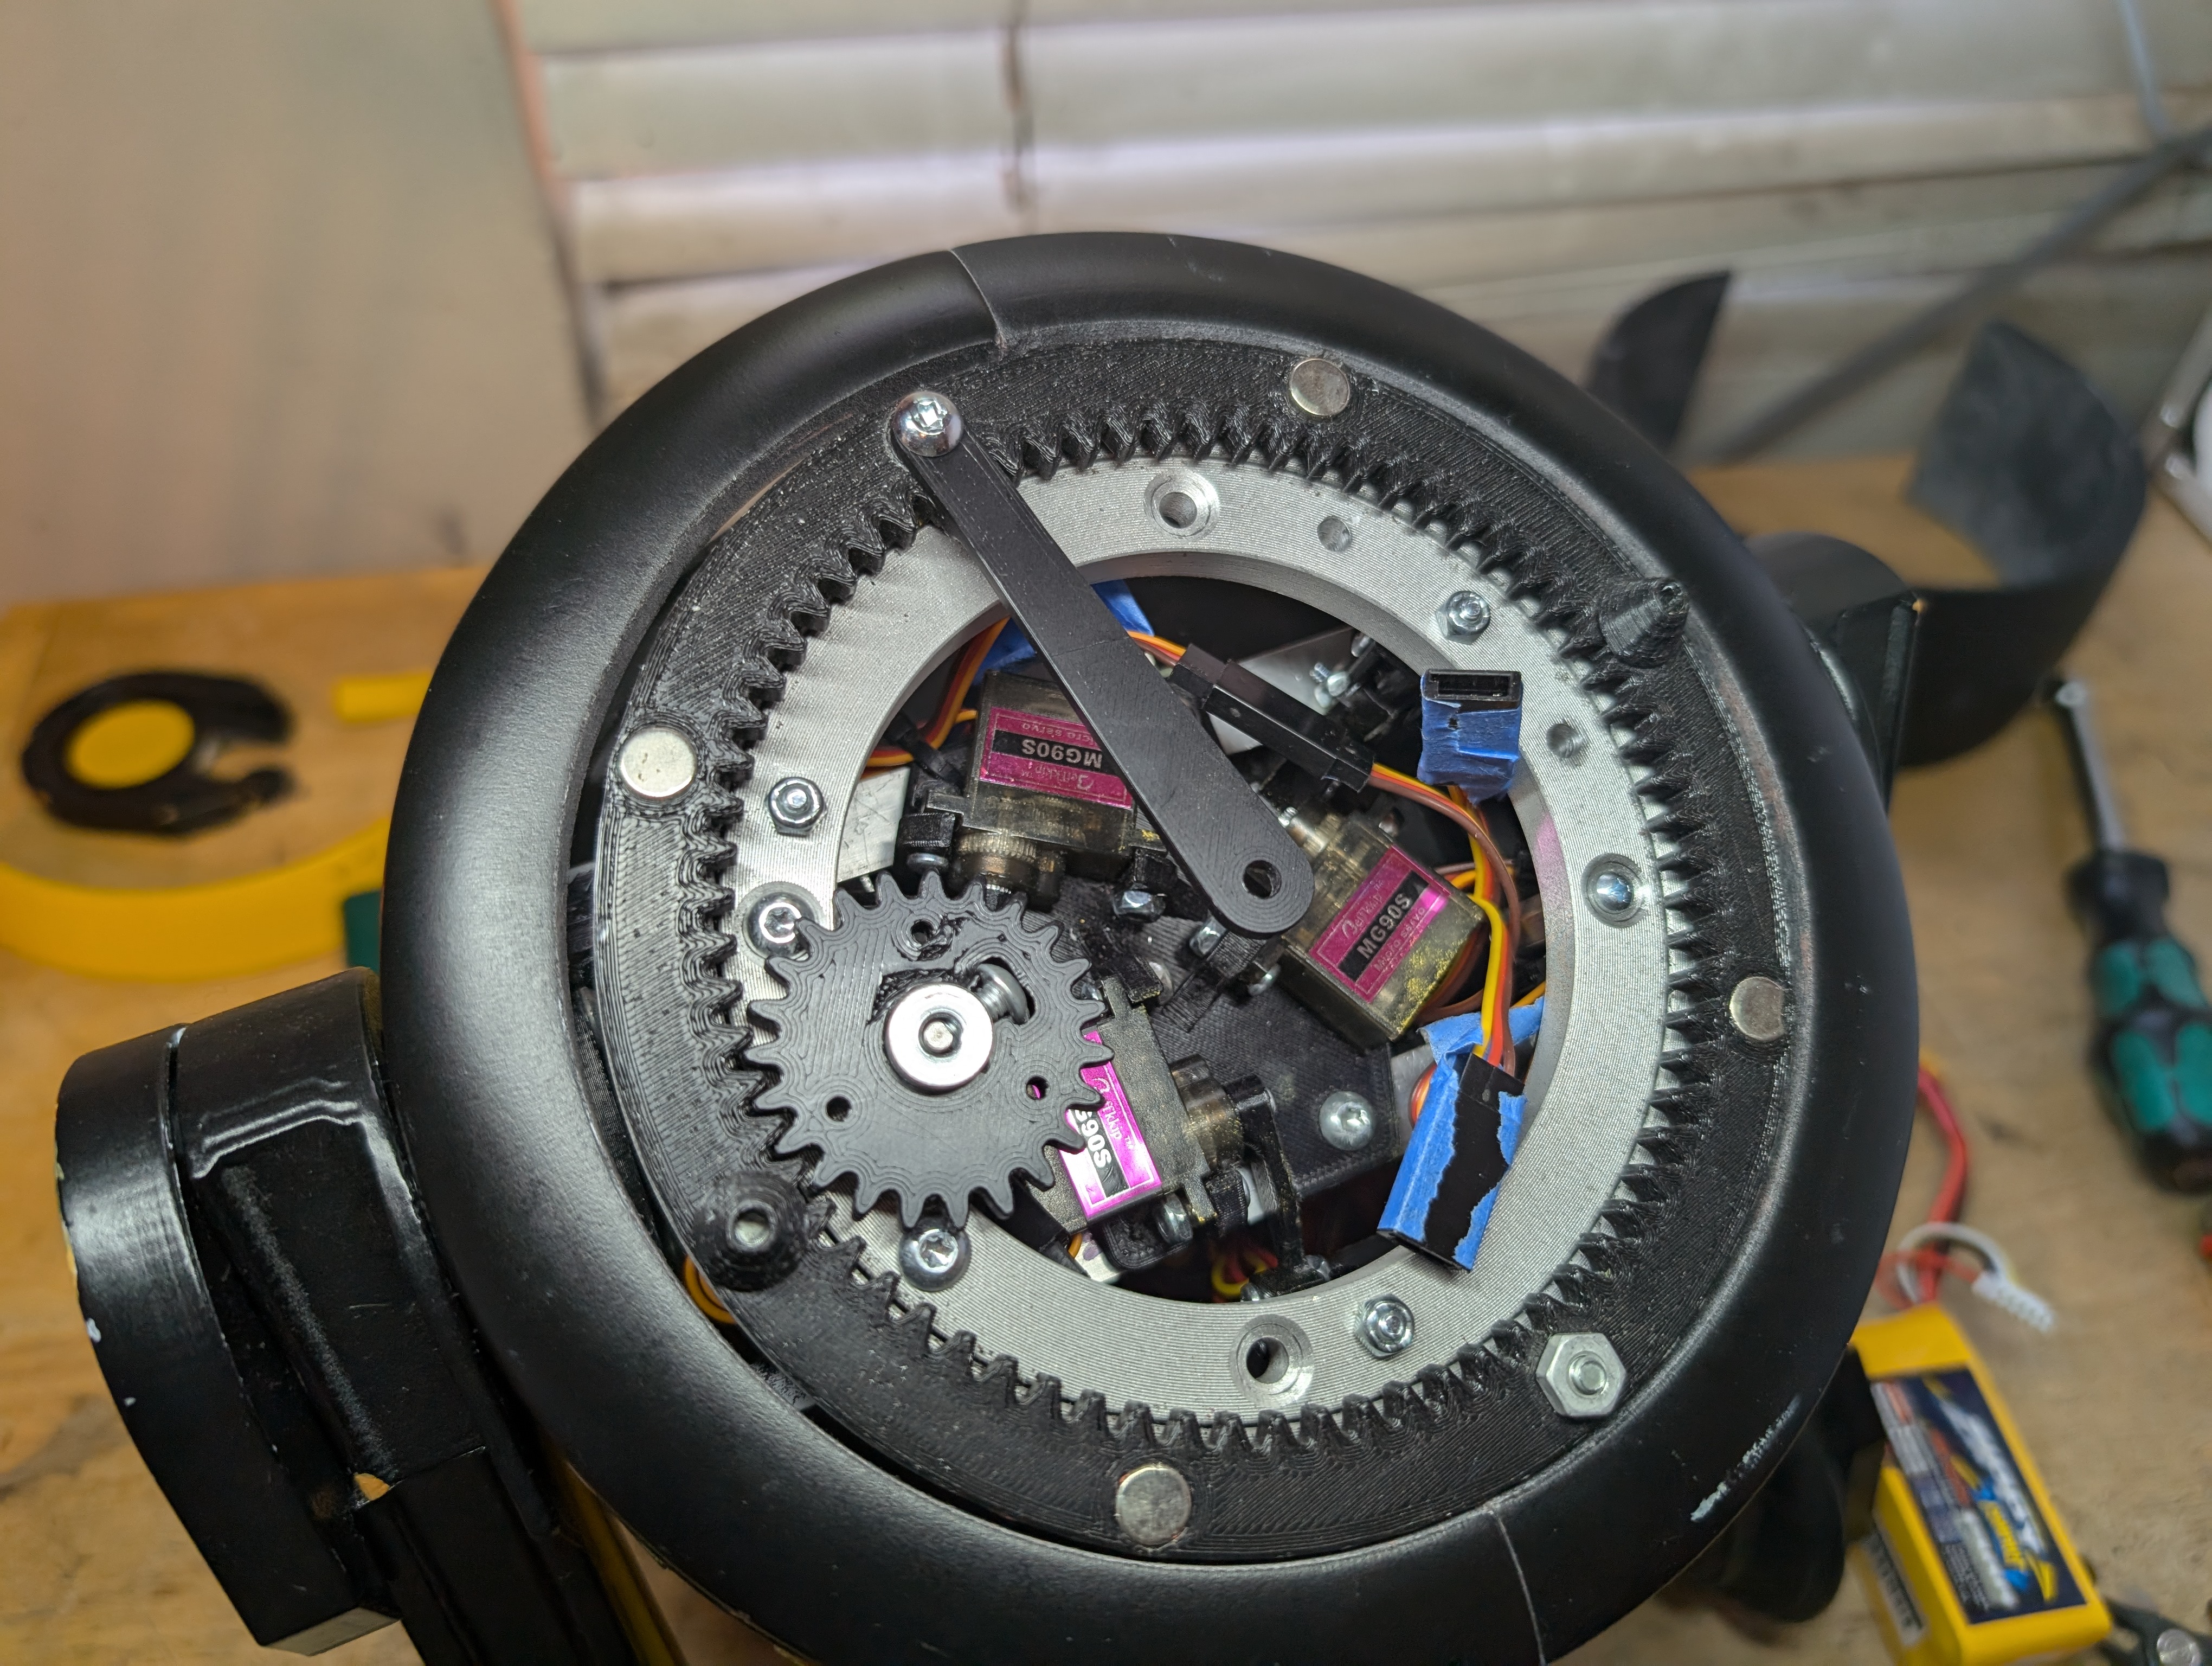
Mounting the potentiometer was super simple. A bar goes across the fixed part of the lazy susan and the potentiometer gets screwed to that. I was slightly worried about flexing in this piece, so I added some "flanges" to help counteract this.
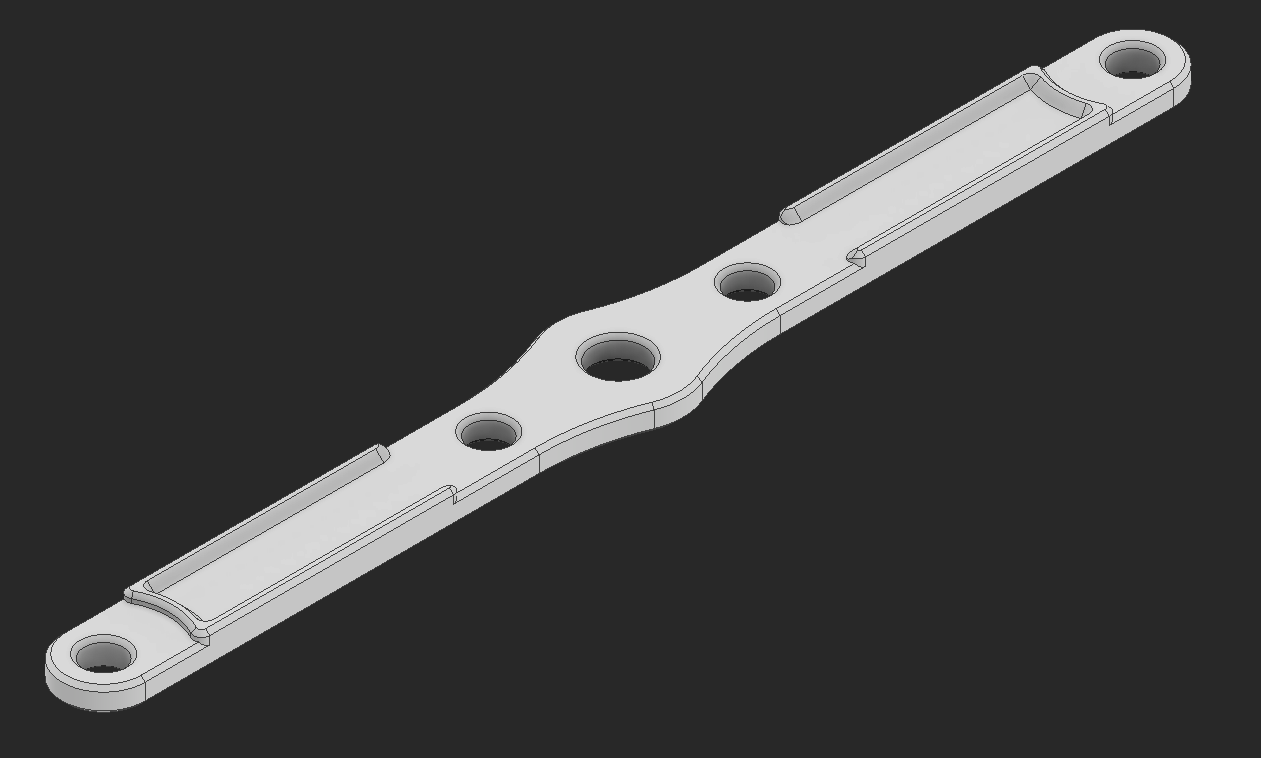
To connect the two of these parts, I used a low strength VEX shaft that I cut 8-32 threads onto. This lets me mount the shaft securely while still allowing it to enter into and spin the potentiometer easily.
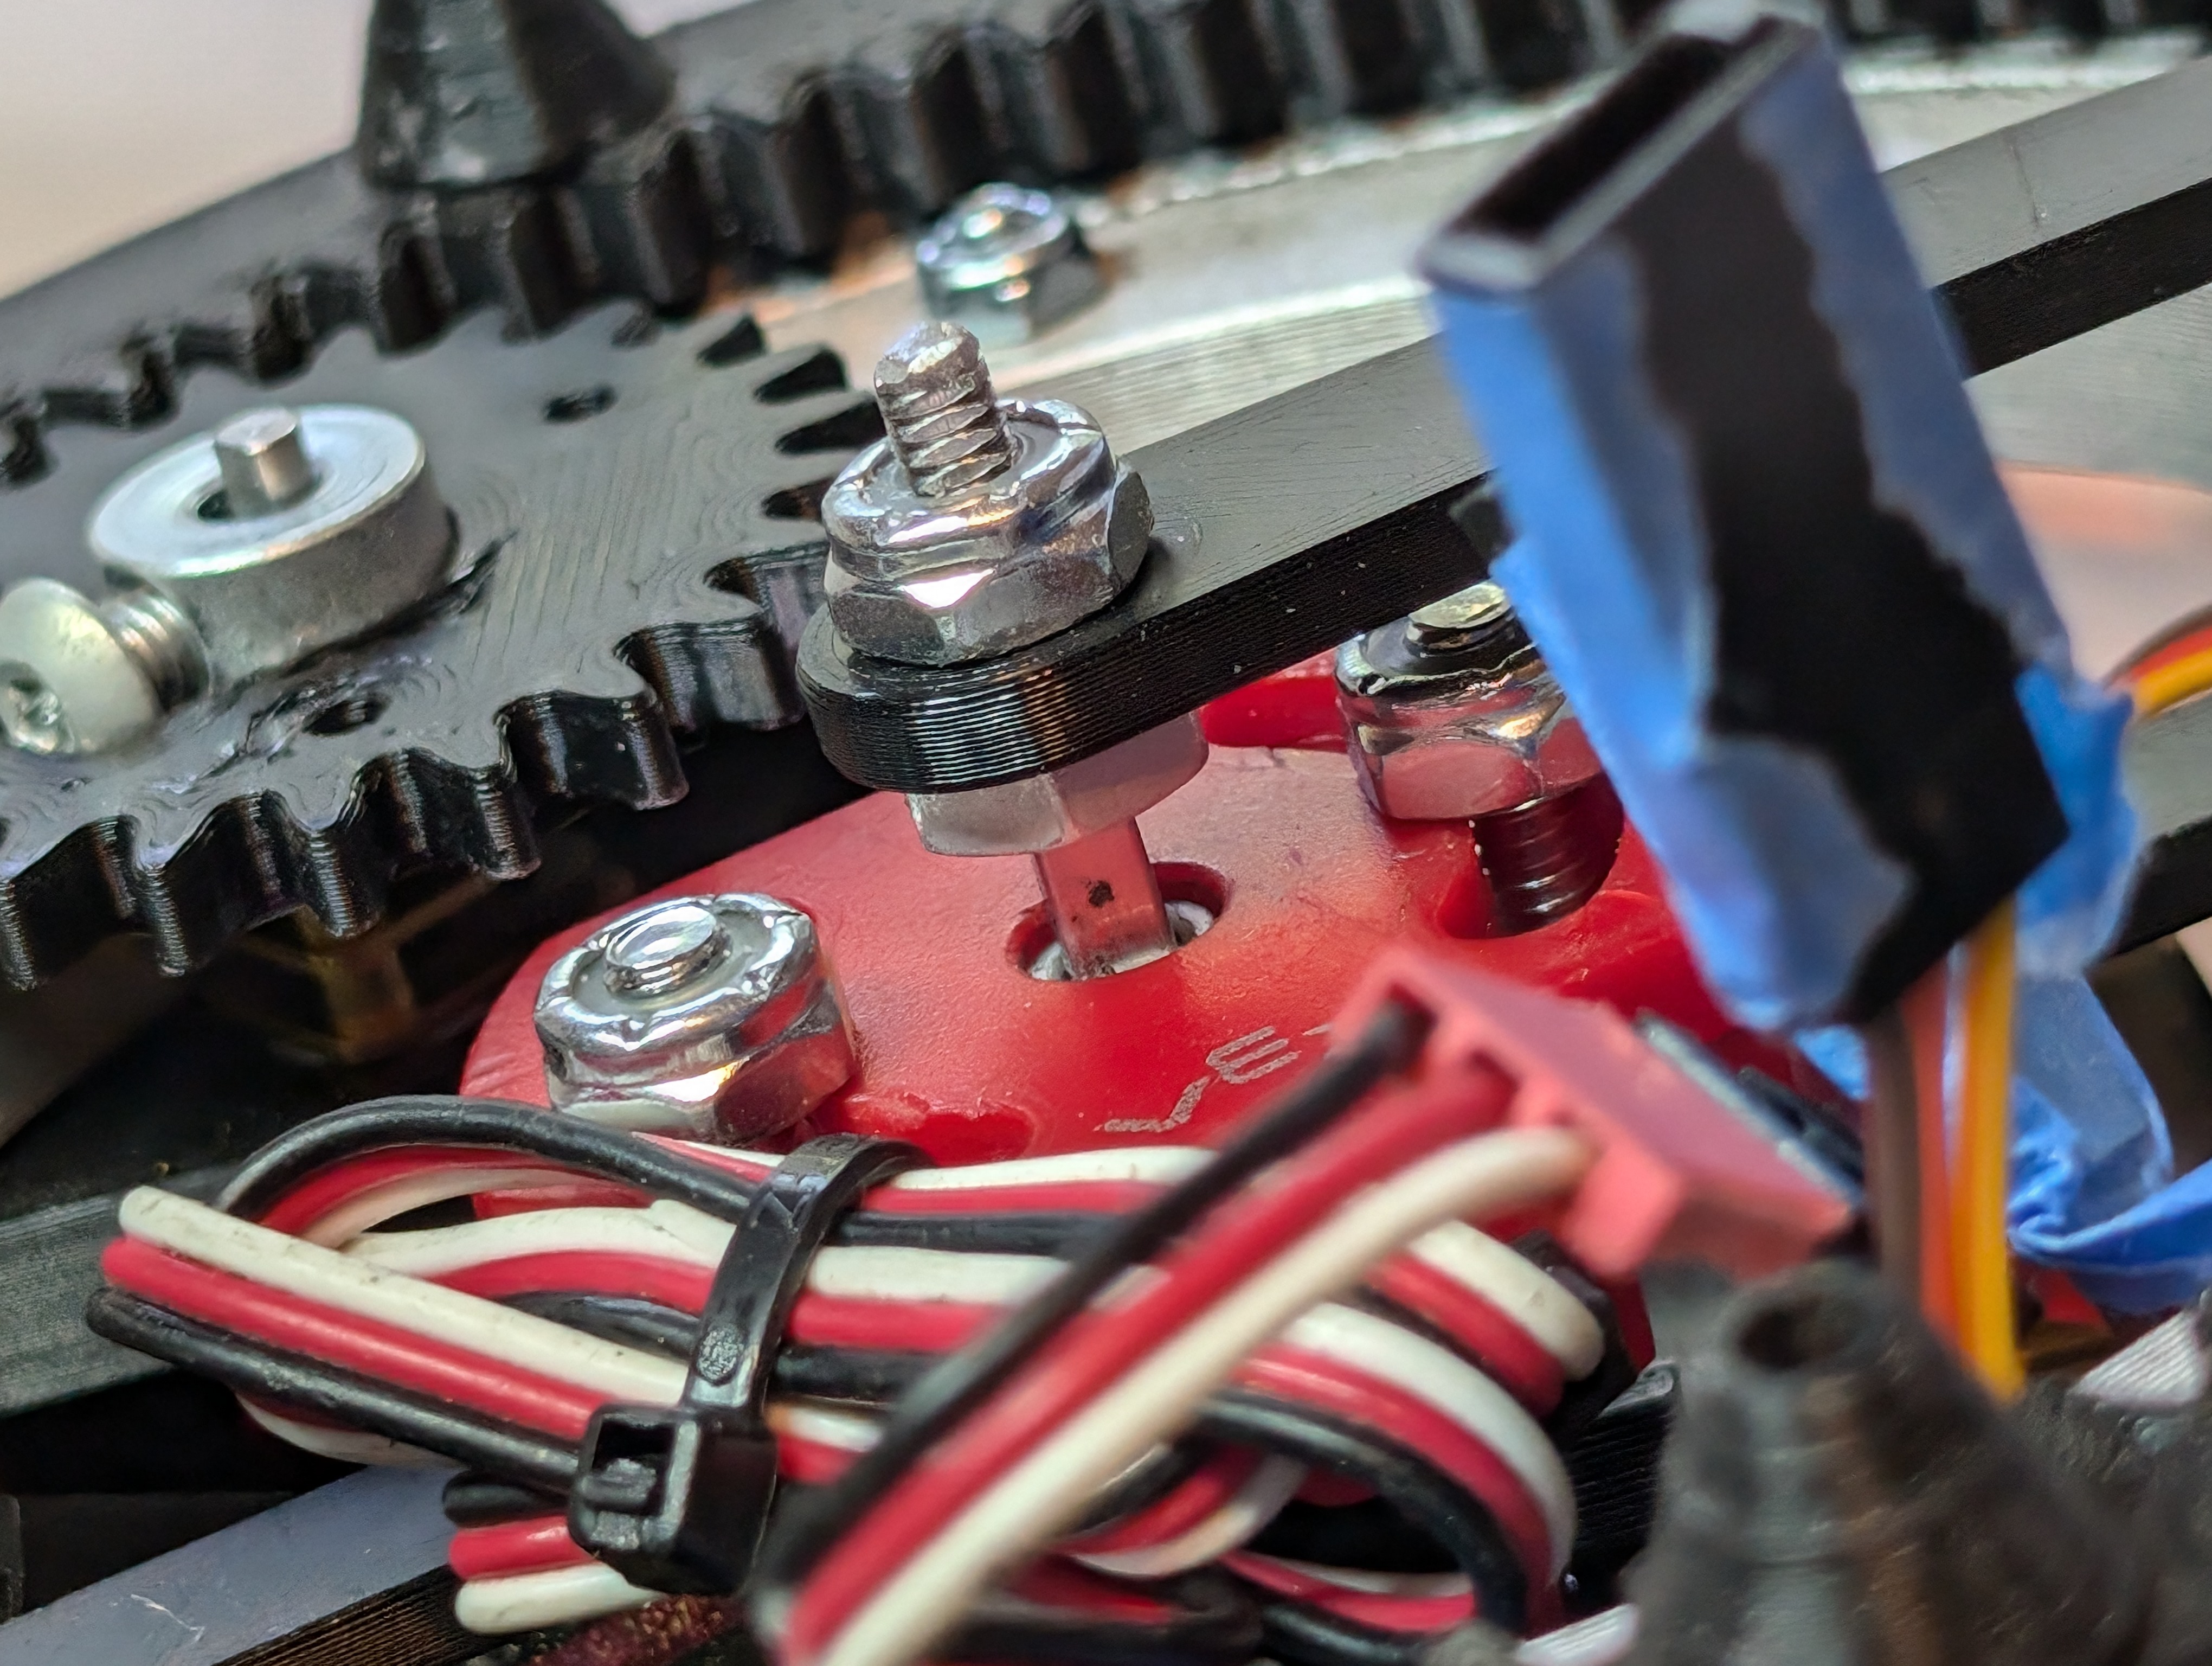
Sanding and Painting
I'm trying out ASA for most of the parts on the head. I've used it before briefly and I remember it melts in acetone. I asked in the Droid Builders Discord server if anyone had tried acetone smoothing ASA, and someone told me how they smoothed their ABS prints:
- sand the part
- do not wipe the abs dust off
- wipe the part in an acetone soaked paper towel This causes the particles to fill in gaps and smooth out the print further.
My first attempt on this, I instinctively wiped the particles off before hitting it with the acetone paper towel. The results were not great.
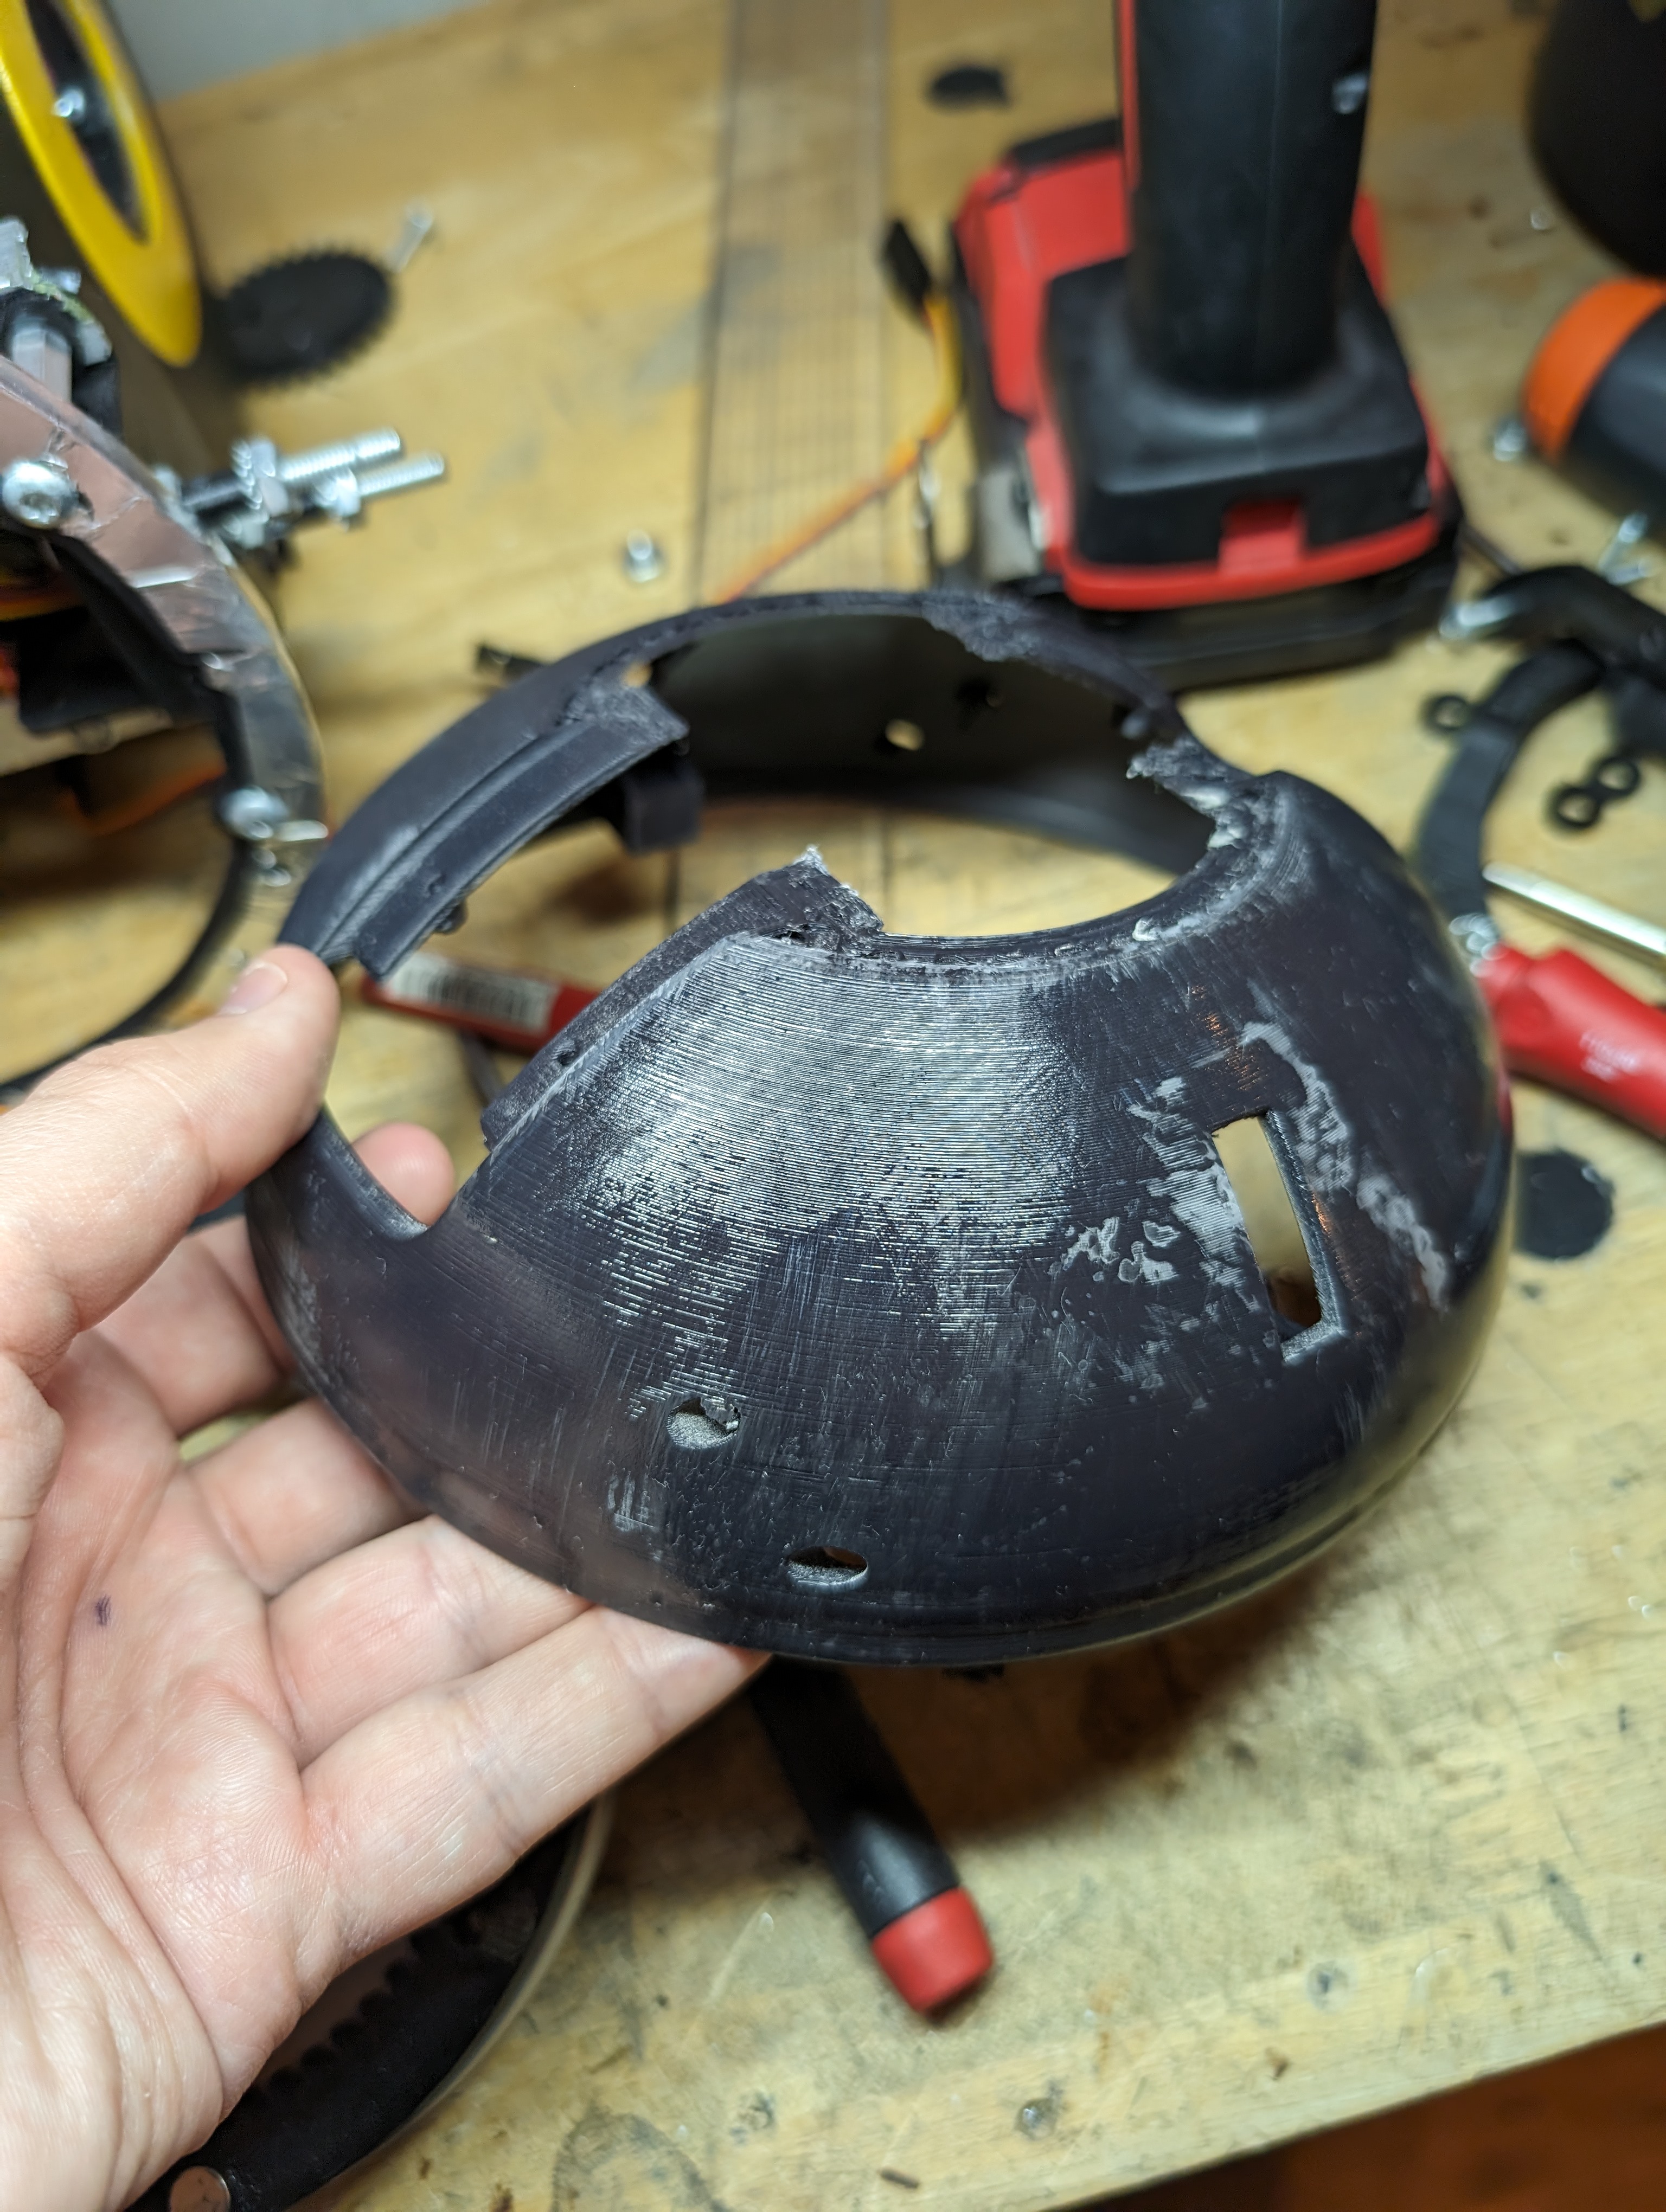
I tried again on another section of this part and leaving the particles on gave much better results.
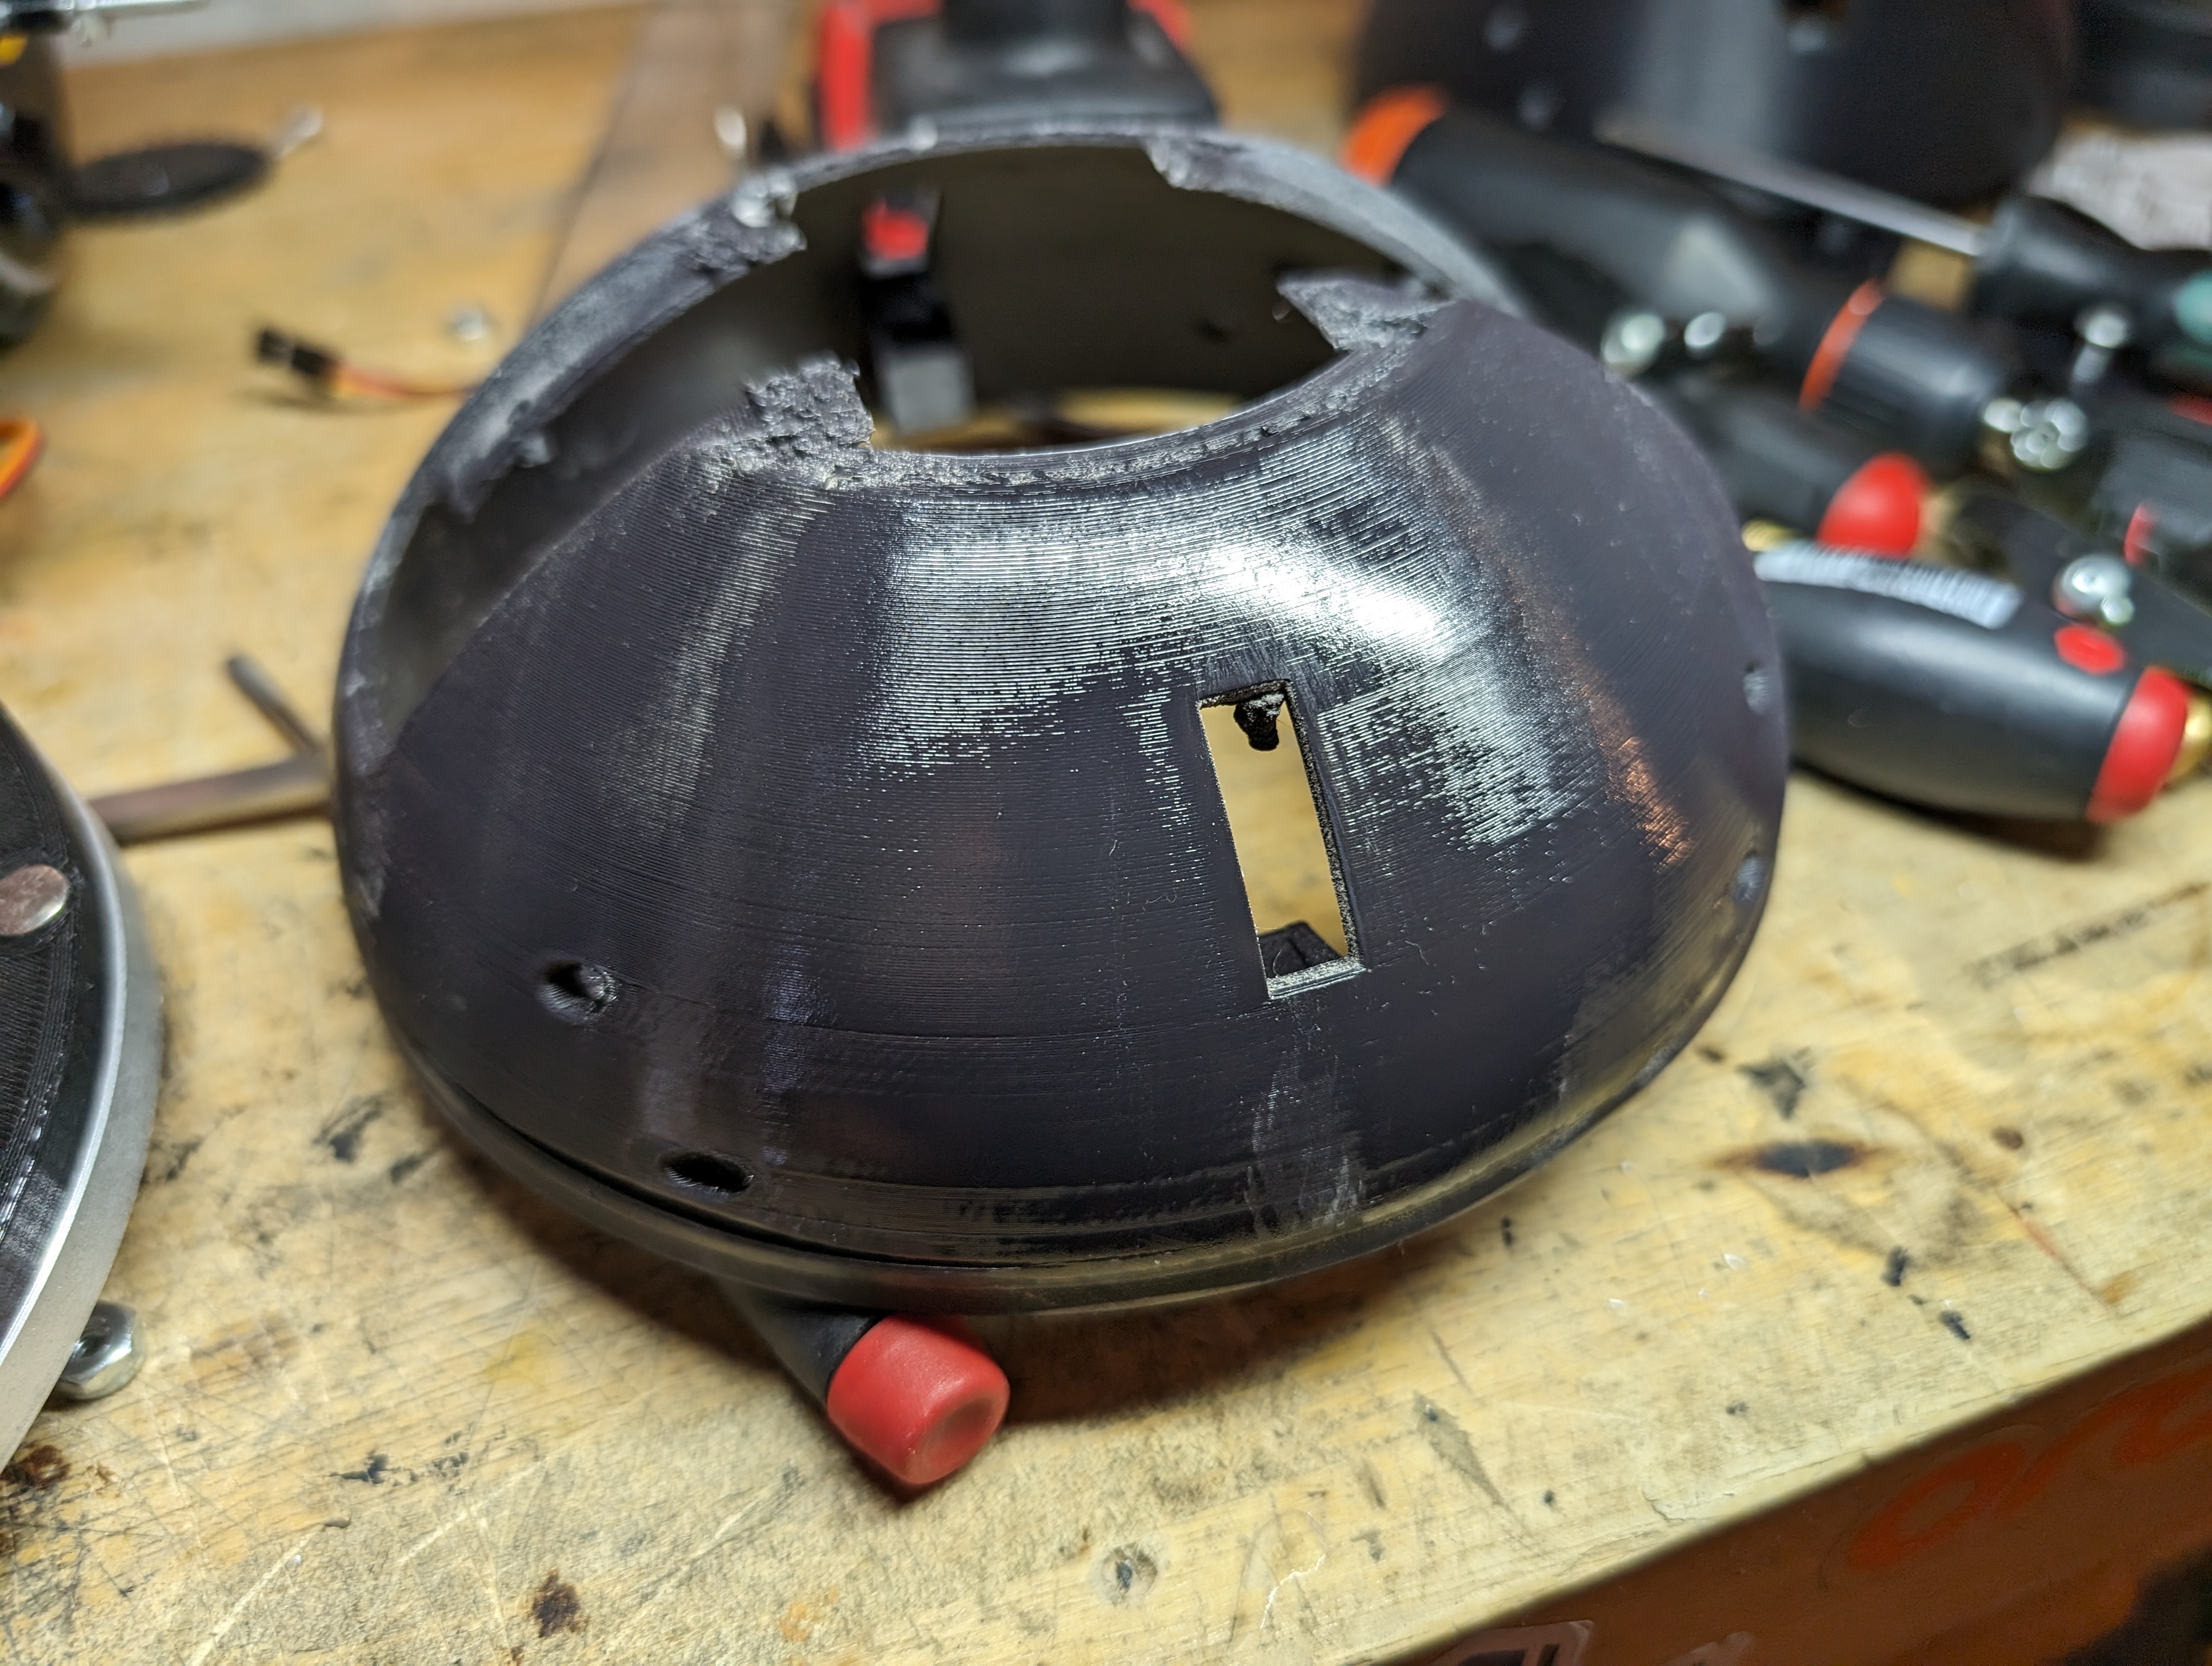
I also tried a random orbital sander and the results of that are very easy to get and took very little effort from me. This is the path I'll be taking for all of the parts on the head.
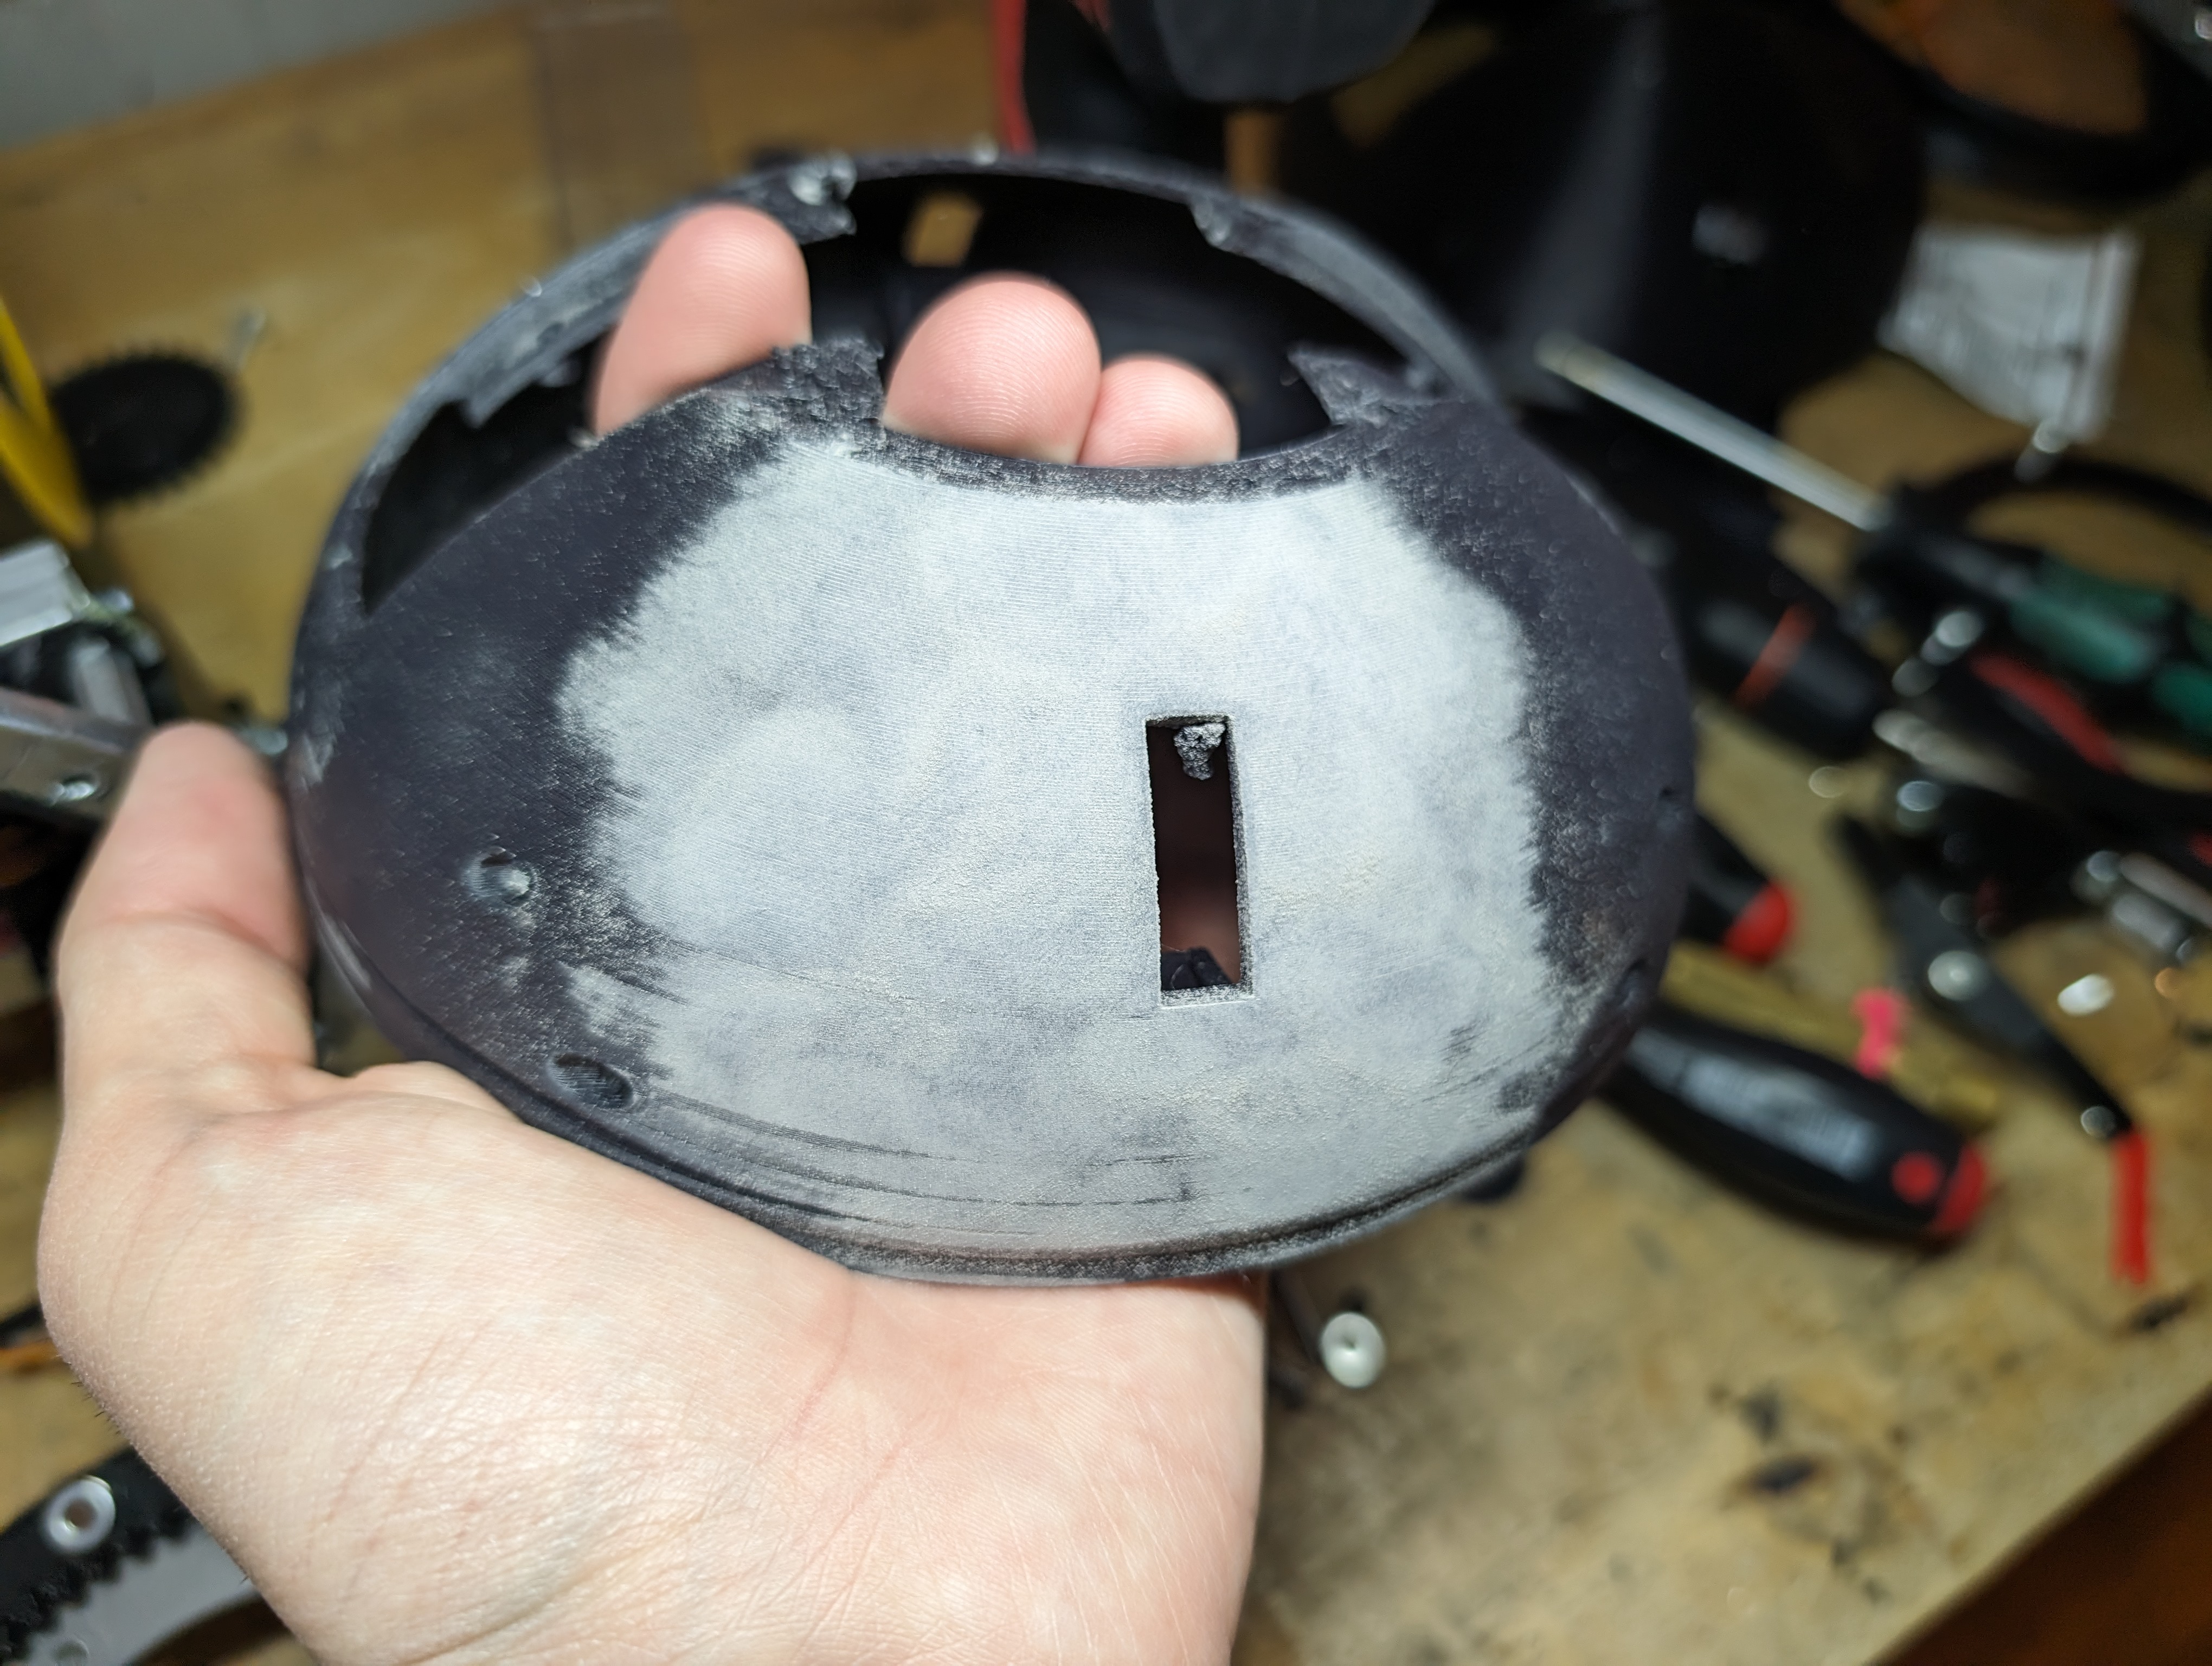
I went on to fully sand the ASA.
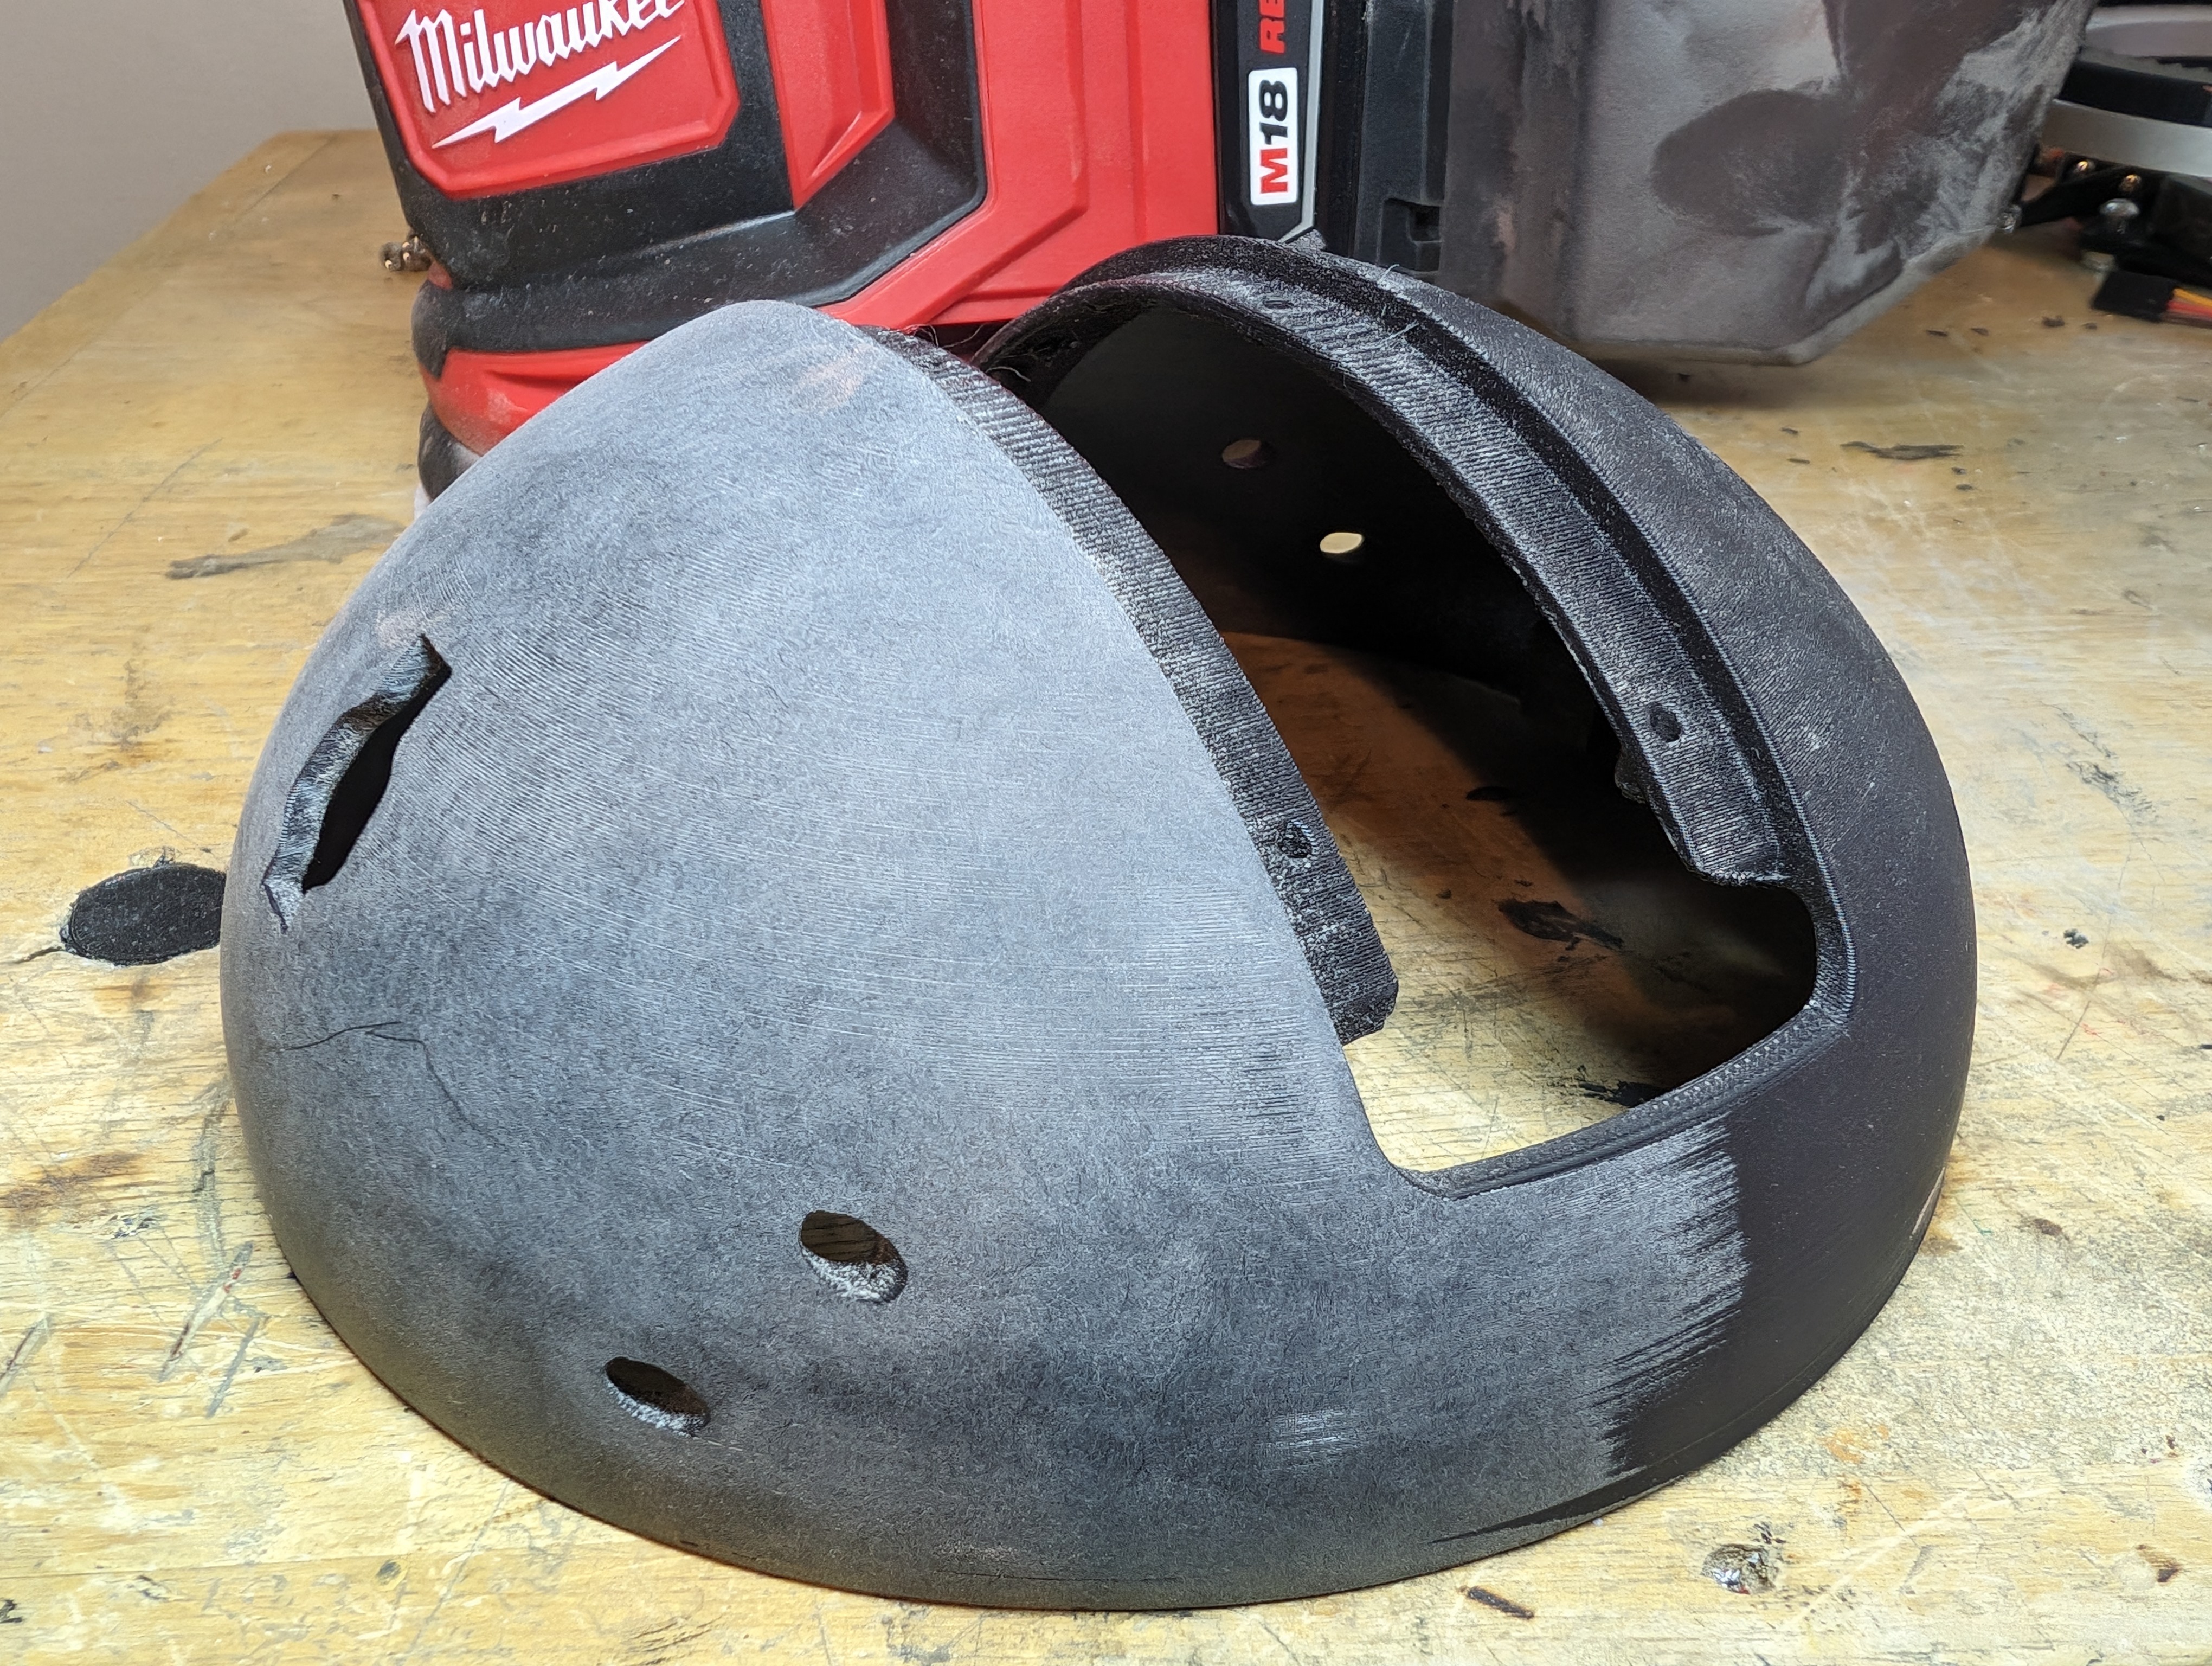
After sanding I wiped the particles off and put a very thin layer of Bondo spot putty over the entire head. This filled in all the gaps sanding missed and makes everything smooth.
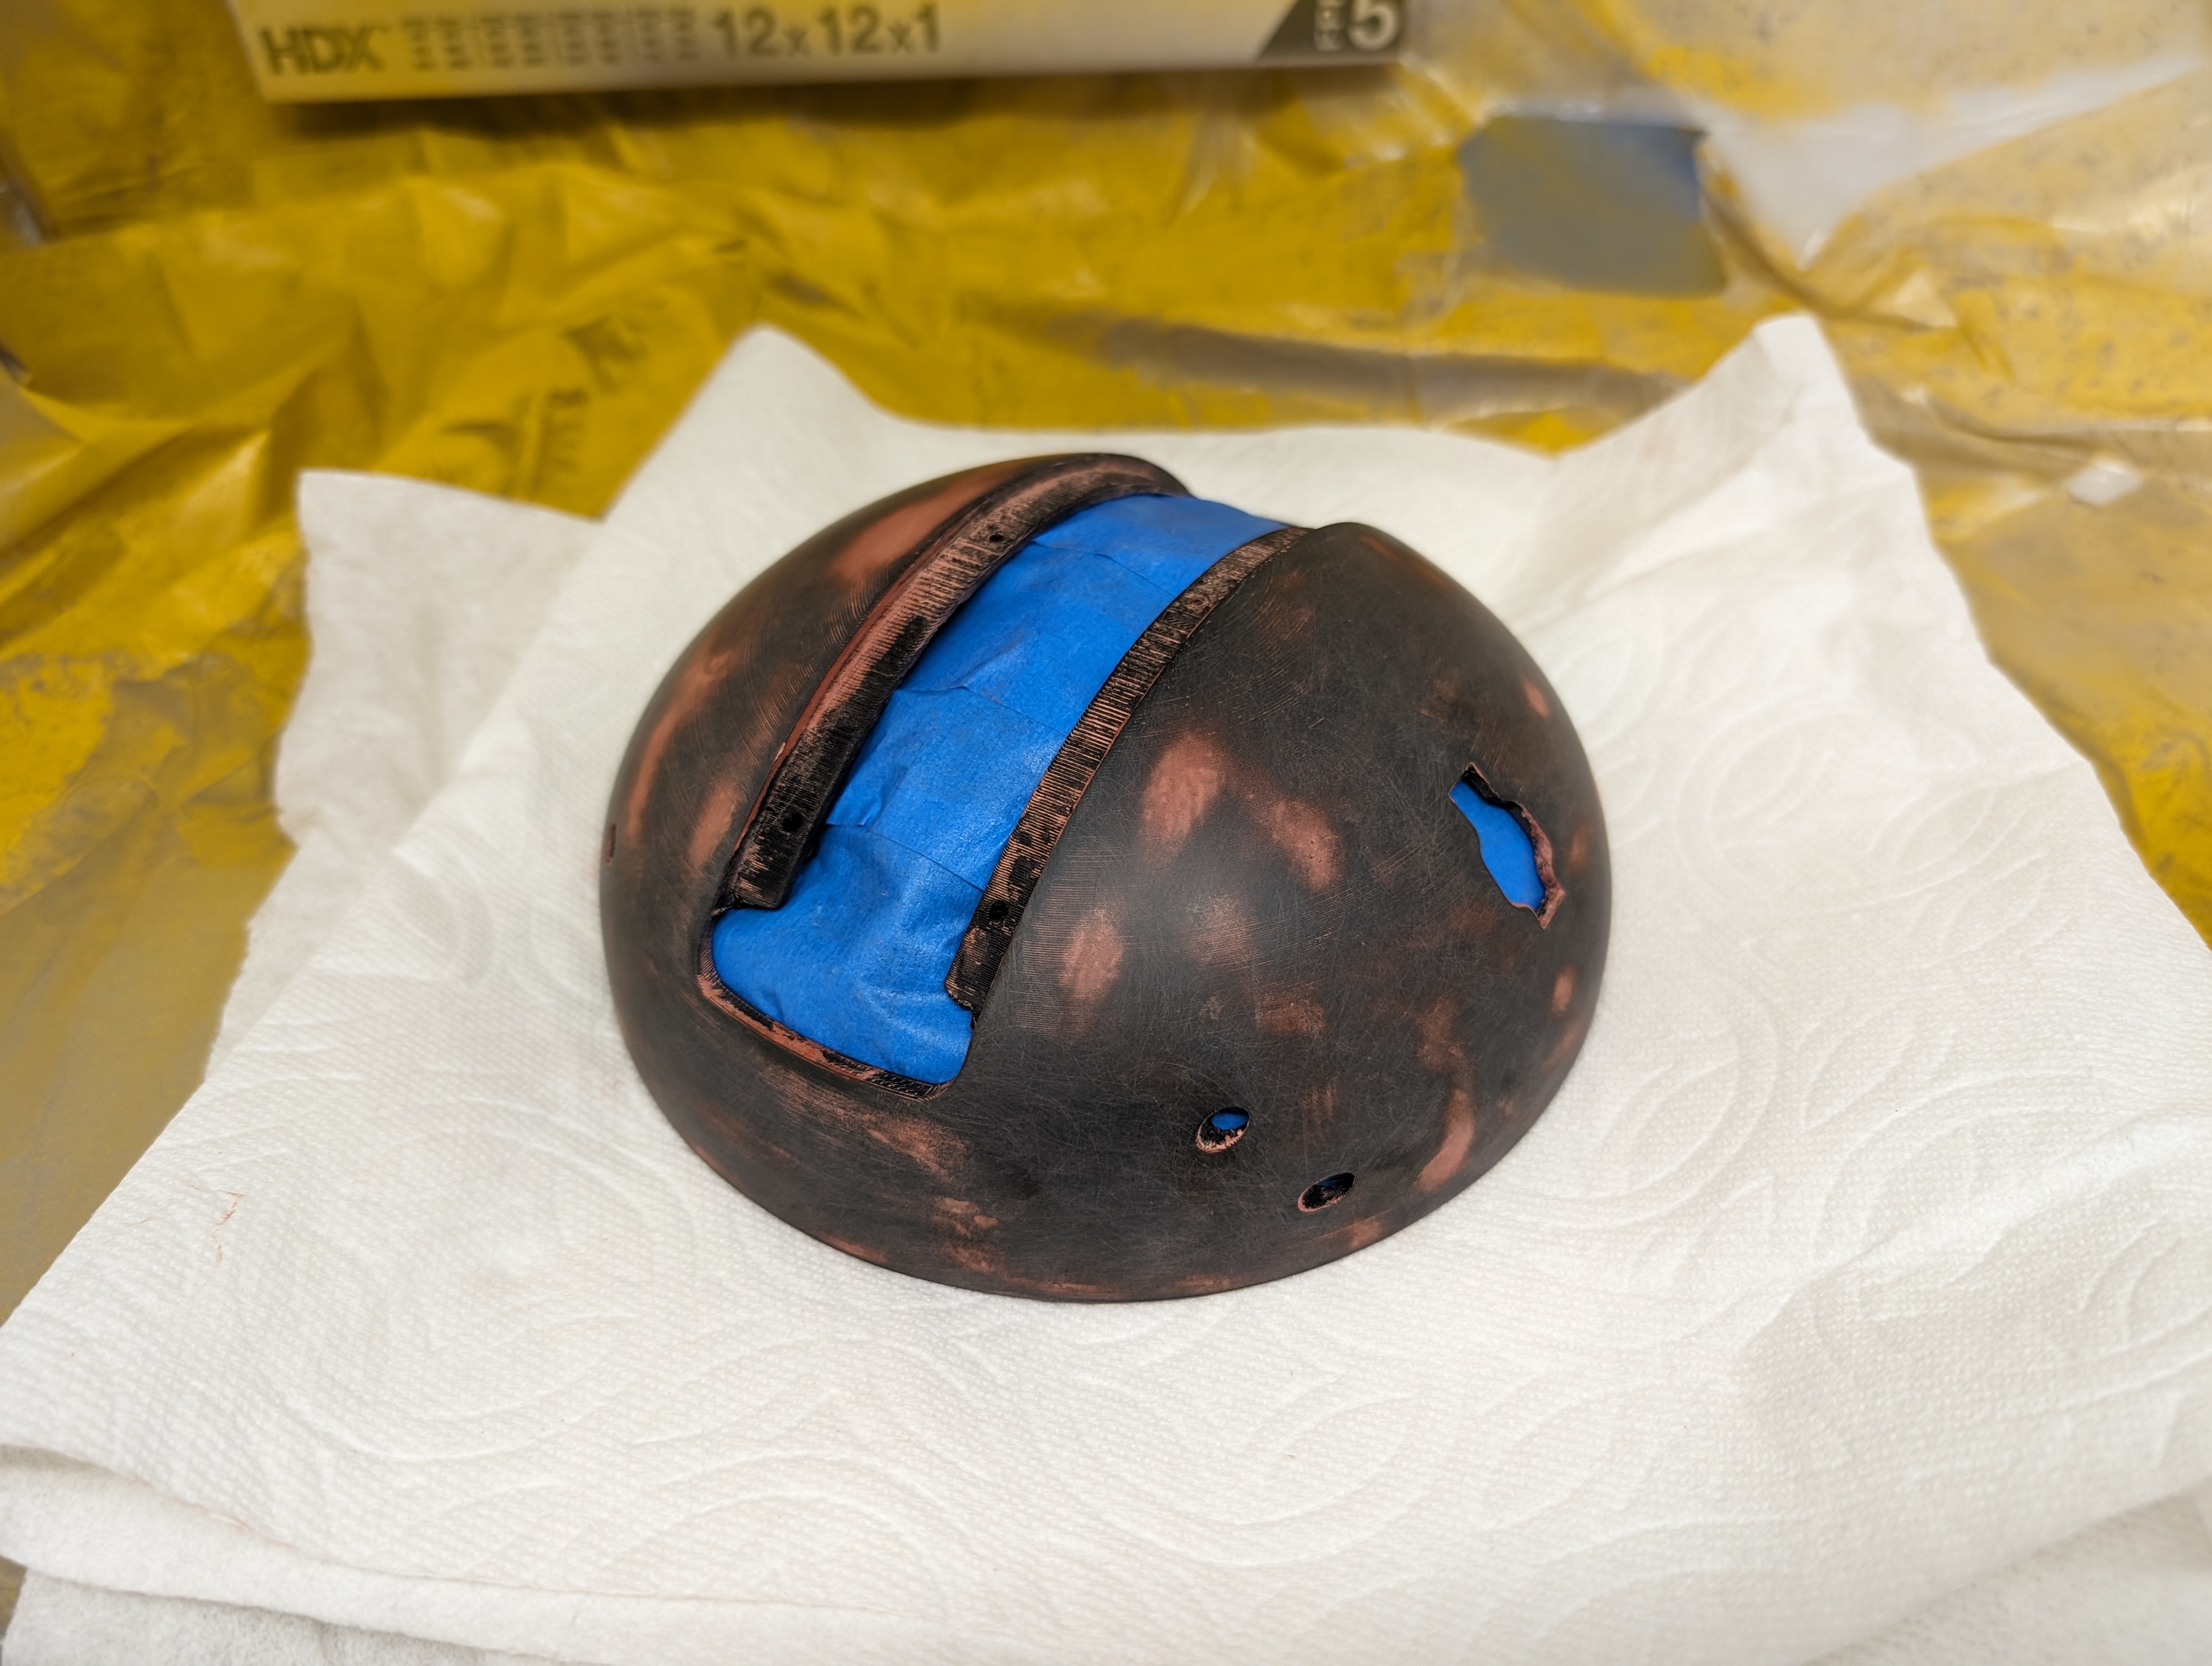
After bondo is applied and sanded, a layer of filler primer gets sprayed on. This fills gaps even further and gives a smooth surface to put color on.
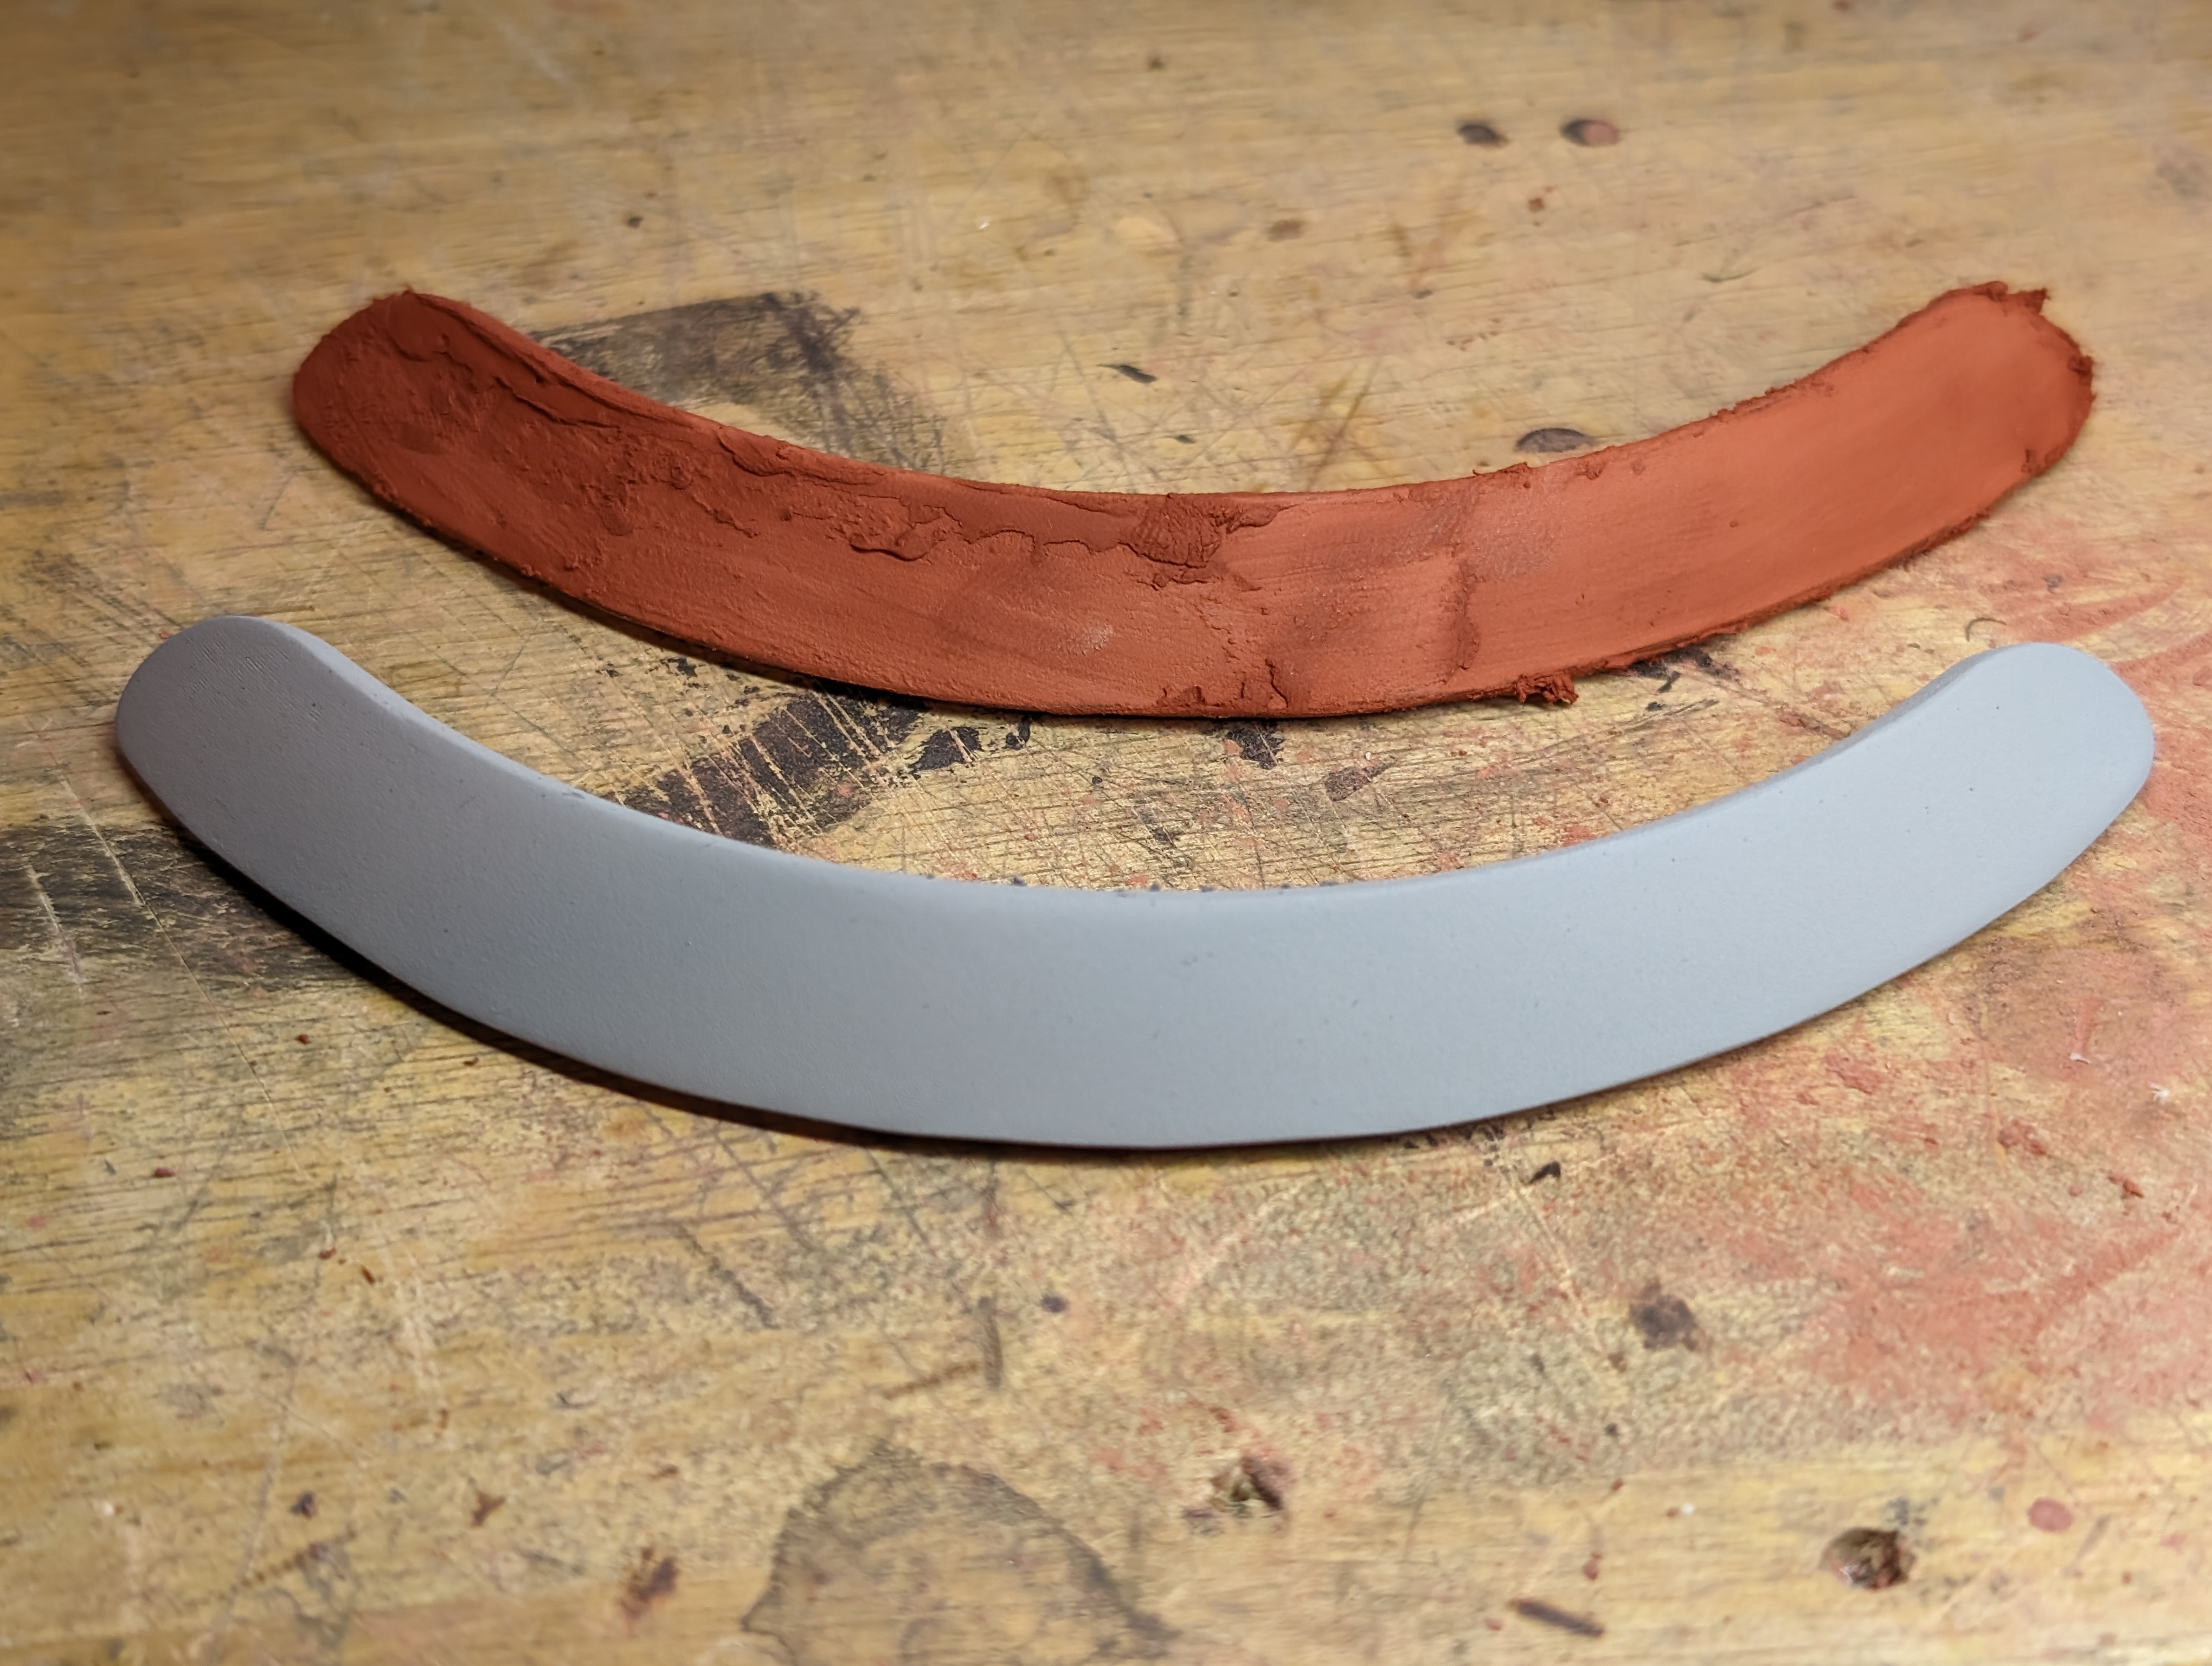
But, it was suggested to me to try hitting the filler primer with scotchbrite before putting color on. I tried and the results were better and very easy to achieve. This is primer without smoothing.
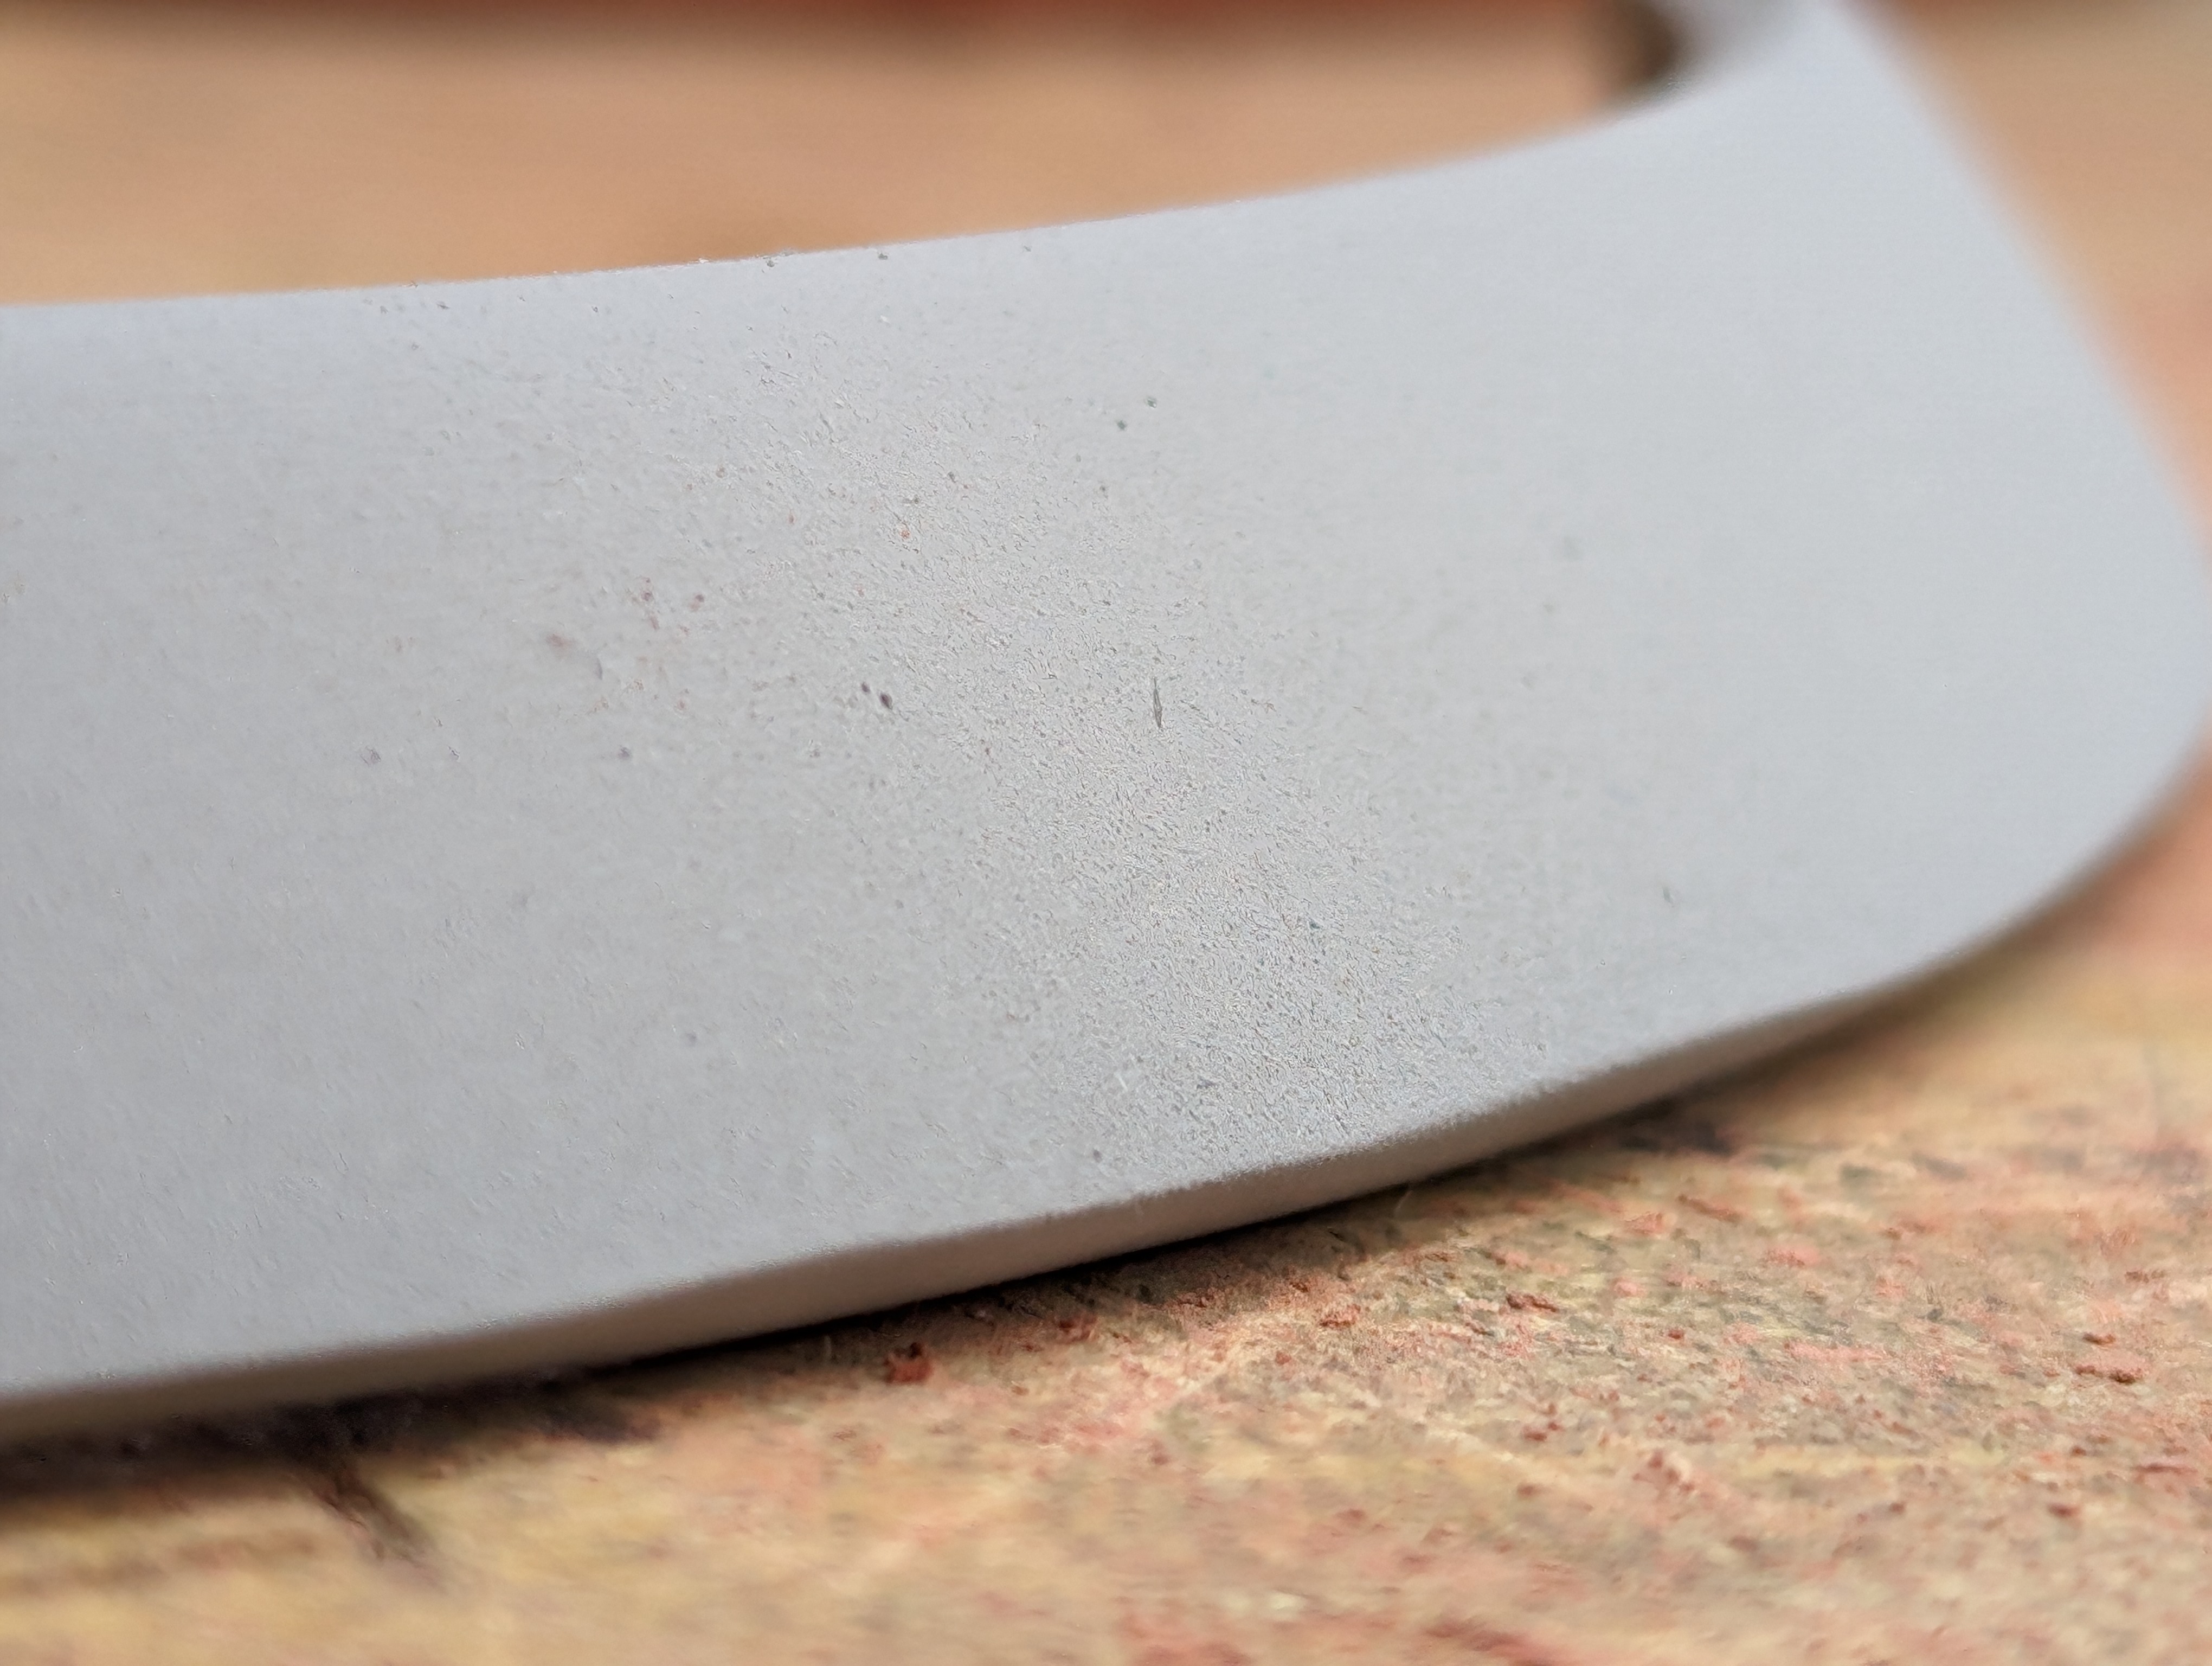
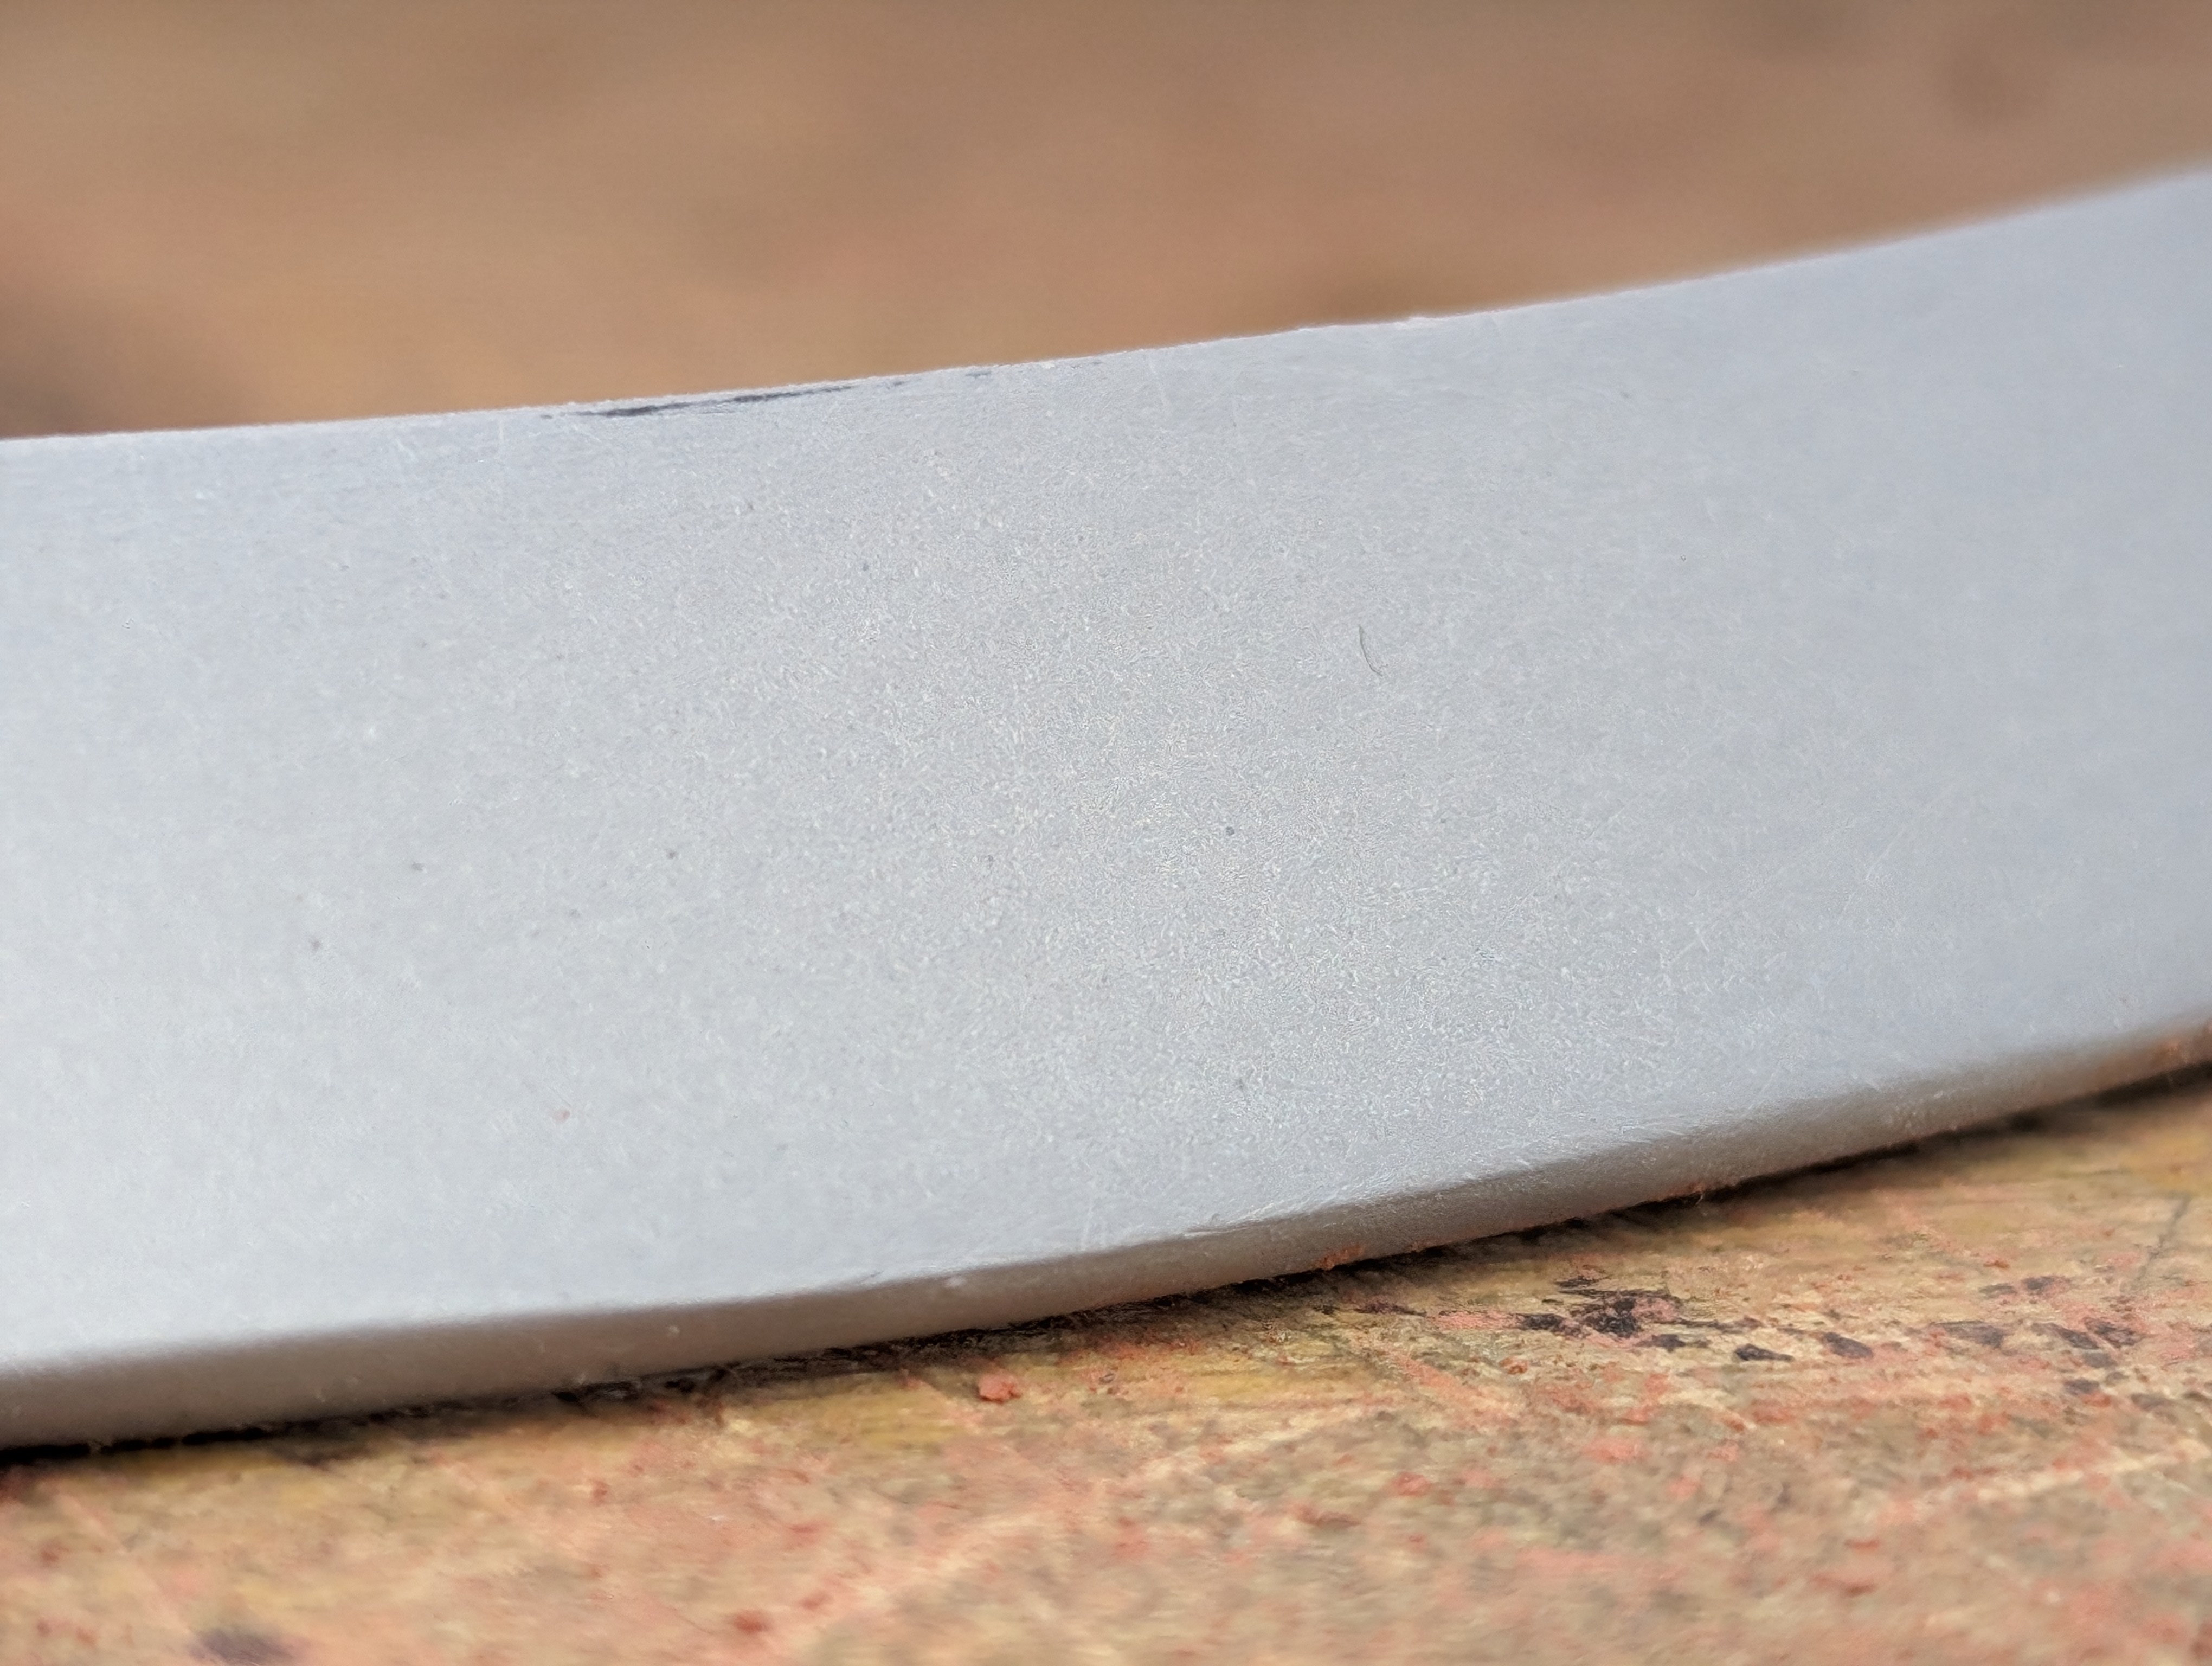
This is primer with smoothing. Minimal difference, very obvious when feeling them back to back, and very easy to achieve. I'll be doing this for everything going forward!
Software
Controlling the triple servo setup seems a little daunting to me, but I started to think about it servo by servo and the solutions became a lot more clear to me.
I have 2 problems to solve. There are 3 servos, one is inline with forward/backward, and the other two are symmetrically 120 degrees off of the center one. The code for the left and right servo will be very similar.
I want 3 inputs: height, forward tilt, sideways tilt. Height is the simple one, I'll have some value that gets set to all of the servos. Forward and sideways tilt will get added/subtracted to the current height. I'll need to normalize whatever this output is so the servos can interpret it, and motions will change when height is at either limit.
I'll be controlling this with a joystick and I don't care what angles the head ends up going to. I don't want the servos to overextend themselves and I want the directions to all mix correctly. With that, I ended up with this code for testing.
double height = joystick_channel(RIGHT_SLIDER) - 127.0;  // This joystick channel outputs 0-255, so this brings it to -127 to 127
double forward = joystick_channel(RIGHT_Y);
double tilt = joystick_channel(RIGHT_X);

double servo_center = height + forward;
double servo_right = height - (0.666 * tilt) - (0.333 * forward);
double servo_left = height + (0.666 * tilt) - (0.333 * forward);
I have wrappers for my servos to take inputs of -127 to 127, so I'll need to take my servo values and normalize them to this. Using this, I ran this code to see what all of the new outputs were, and the center servo was being heavily modified based on what the left and right servos were doing. I ran this code on the servos to see what it was actually doing (because the numbers all looked safe), and found that I accidentally fixed a bug I didn't realize I had! When height is maxed, tilting sideways can be assisted by the center servo coming down. This code handles this for me.
double largest_servo = fmax(fabs(servo_left), fabs(servo_right));
largest_servo = fmax(largest_servo, fabs(servo_center));
if (largest_servo > 127.0) {
  float scale = 127.0 / largest_servo;
  servo_center = servo_center * scale;
  servo_right = servo_right * scale;
  servo_left = servo_left * scale;
}
Here's a video of this code in action. I have control over height, sideways tilt, and forward tilt.
I want to control the head spin as if it were a servo, but it's a motor and a potentiometer. I'll use PID to control this like a servo. PID is something I'm very comfortable with from working on EZ-Template and other VEX related projects, so I just took the PID I already wrote for EZ-Template and implemented it here. I can toggle if i resets when the sign of error flips, and I use a different way of solving derivative to fix a "derivative kick" problem t hat occurs when target gets changed. I tuned this a bit and found the constants that worked well was a kp of 1, ki of 0, and kd of 2.
double prev_current = 0, pid_target = 0, integral = 0, prev_error = 0, output = 0, derivative = 0, SPIN_VELOCITY = 0, HEAD_POSITION = 0;
bool reset_i_sgn = true;
double kp = 1;
double ki = 0;
double kd = 2;
double start_i = 0;
double iterate_pid(double current) {
  double error = pid_target - current;

  // calculate derivative on measurement instead of error to avoid "derivative kick"
  // https://www.isa.org/intech-home/2023/june-2023/features/fundamentals-pid-control
  derivative = current - prev_current;

  if (ki != 0) {
    // Only compute i when within a threshold of target
    if (fabs(error) < start_i)
      integral += error;

    // Reset i when the sign of error flips
    if (sgn(error) != sgn(prev_current) && reset_i_sgn)
      integral = 0;
  }

  output = (error * kp) + (integral * ki) - (derivative * kd);

  prev_current = current;
  prev_error = error;

  return output;
}
Now to use this I just update the PID target and have this constantly iterate.
void head_spin_runtime() {
  set_pid_target(joystick_channel(RIGHT_SLIDER) - 127.0);
  head_spin_set(iterate_pid(get_pot()));
}
Using the potentiometer in the head, I can translate controller inputs based on where the head is facing. Tilting the head left should always tilt it left relative to where the head is facing. I figured out the equations for this by writing out what I wanted and splitting the problem up into chunks.
When the head is facing directly forwards, HEAD_POSITION will be equal to 0. When HEAD_POSITION is equal to 127 or -127, it will be looking directly left or right respectively. Which means I need to figure out an equation that outputs this:
HEAD_POSIITON = 0;
forward = forward;
tilt = 0;
If I divide HEAD_POSITION by 127.0, this would output 0. I can't multipy this by forward otherwise the head won't tilt forwards when facing forwards. So I need to subtract this ratio number from 1. That makes my translated forward look like (1 - (HEAD_POSITION / 127.0)) * forward. After testing this I found that for head nodding, I don't care about the sign of HEAD_POSITION. So for everything nod related, I'll be using the fabs() of HEAD_POSITION.
forward = (1 - ratio) * forward;
Then for translating the forward to tilt, when HEAD_POSITION is 127.0, I want it to tilt instead. I can do this by multiplying HEAD_POSITION / 127.0 by forward. That leaves me with this code.
float ratio = fabs(HEAD_POSITION) / 127.0;
tilt = (HEAD_POSITION / 127.0) * forward;
forward = (1 - ratio) * forward;
Tilting is exactly the same but everything gets mirrored.
float ratio = fabs(HEAD_POSITION) / 127.0;
tilt = ((1 - ratio) * tilt);
forward = ((HEAD_POSITION / -127.0) * tilt);
Which makes this the final translation code.
float forward = joystick_channel(RIGHT_Y);
float tilt = joystick_channel(RIGHT_X);

float ratio = fabs(HEAD_POSITION) / 127.0;
tilt = ((1 - ratio) * tilt) + ((HEAD_POSITION / 127.0) * forward);
forward = ((HEAD_POSITION / -127.0) * tilt) + ((1 - ratio) * forward);
With all of this I can add some more animation to the head. I want the head to lean into spins. If the head is going quickly it should lean a lot, and it shouldn't lean at all when the head is as low as it goes. This was incredibly simple to implement. I multiply the velocity of the head by the height of the head, and the height of the head is multiplied by a scaler so I can tune how much it leans into motions.
tilt = SPIN_VELOCITY * (0.3125 * (height / 256));
forward = -fabs(SPIN_VELOCITY) * (0.25 * (height / 256));
I tested SPIN_VELOCITY being the true velocity of the head, and I tested it being the error of PID. Being the velocity looked strange because it took time for the head to accelerate, then it took time for the head to tilt into position. This combination of delays made it look very unnatural. Using the error in PID gave much cleaner looking motions.
Now there's two ways to control tilt and forward, with my joysticks and automatically. DD-3 will pick the larger of the two, making this the final code.
void head_tilt_runtime() {
  // height, forward, tilt values from the controller
  float height = joystick_channel(LEFT_SLIDER);
  float controller_forward = joystick_channel(RIGHT_Y);
  float controller_tilt = joystick_channel(RIGHT_X);

  // tilt and forward values computed off of head spin velocity
  float spin_tilt = SPIN_VELOCITY * (0.3125 * (height / 256));
  float spin_forward = -fabs(SPIN_VELOCITY) * (0.25 * (height / 256));

  // use the larger of the 2 computed values
  float computed_tilt = fabs(spin_tilt) > fabs(controller_tilt) ? spin_tilt : controller_tilt;
  float computed_forward = fabs(spin_forward) > fabs(controller_forward) ? spin_forward : controller_forward;

  // scale everything to be relative to where the head is facing
  float ratio = fabs(HEAD_POSITION) / 127.0;
  float tilt = ((1 - ratio) * computed_tilt) + ((HEAD_POSITION / 127.0) * computed_forward);
  float forward = ((HEAD_POSITION / -127.0) * computed_tilt) + ((1 - ratio) * computed_forward);

  // bring this back down to -127 to 127 instead of 0 to 256
  height -= 127;

  // make the head move
  head_tilt_set((int)height, (int)forward, (int)tilt);
}
As for the eyebrows, I ran into some electrical problems where my servo board wasn't allowing me to move both of these servos at the same time. This will require some more debugging, but with the amount of life I've brought to DD-3 with all of these changes I think this is ok.
At R2LA 2024
